
Removing and Painting VW badges
This is a bit of a change to my normal posts but hopefully it’ll be just as informative (or at least interesting!)
The net is full of instructions to remove and paint (or vinyl) your VW badges but I found a couple key points were brushed over every time, namely the removal of the front badge where instructions were simply “just turn it a bit” or “turn it about x amount”. It seemed there was quite a polarisation between people that could “just” pop it off and those that had all kinds of trouble to the point of having to remove their grille first, most falling into the latter in the hope to spare doing damage to the badge or grille.
So just like a onesie party or writing a novel about a futuristic amusement park where dinosaurs are brought to life through advanced cloning techniques and calling it “Billy and the Cloneasaurus”, he’s my version of events…
This is specifically for a current model MK6 VW Jetta but I believe it will also apply to Golfs and several previous generations.
Removing the front badge
The badge is attached to a deep mounting bracket which is held on by 3 clips in a triangle shape. The one at the top can be access from behind near the bonnet latch with a long thin flat head screwdriver.
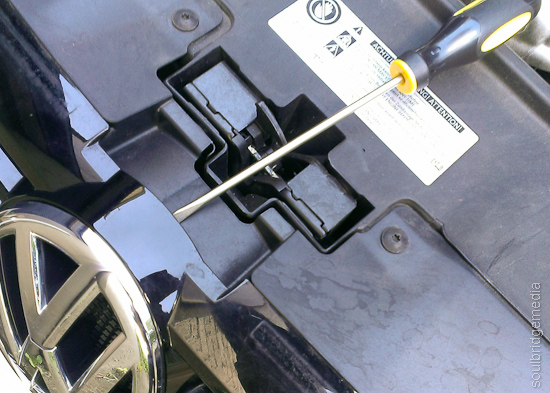
Come in from behind… errr..
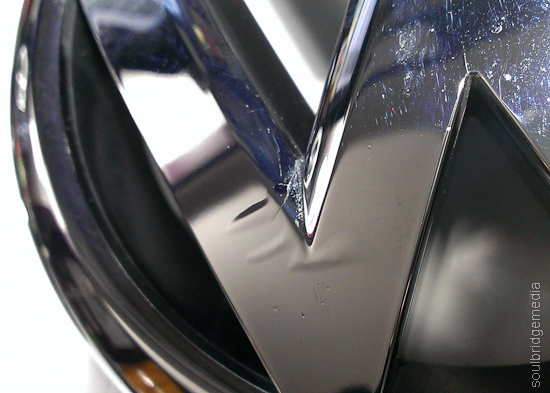
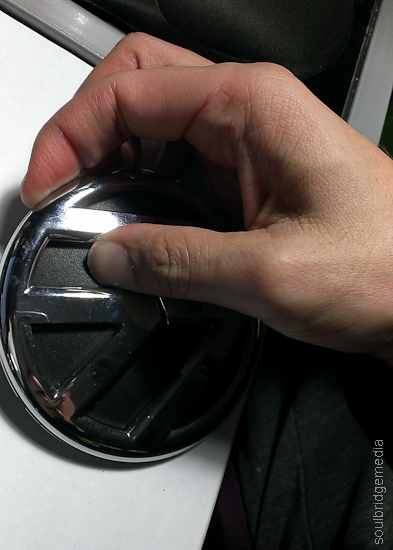
First “just” try turning it to the left, you never know, you could be one of the lucky ones, if you are, you only need to turn it till the right side of the V on the badge is vertical. It is quite likely that you will over shoot the mark if you put a bit of force behind it so just dial it back to that position then pull the badge forward and off.
If you’ve put two hands on it and given it a “carn you bas-tard!” heave-ho and it hasn’t budged, itll need the extra persuasion. First check the emblem itself to see if there’s any damage or imperfections on it. If there is, you might want to go a bit gentle on it. As seen in the photos, my badge has a slight bubbling in the chrome and a small crack, both acerbated after a few big cranks to get it free.
Next, lightly (or not so lightly) jiggle the housing left and right and back and forth. Grab that screwdriver and press the tabs towards the center while continuing to turn and twist. There might be a couple creaks of protest but after a little bit you will notice the housing will feel slightly looser in places.
Take the screwdriver and line it up with the right hand side of the top tab and push while turning the housing with your other hand. You may need a bit of force so watch you don’t skin your knuckles or puncture part of the car or yourself with a wayward screwdriver.
As above, you may over shoot the “open” notch, if so, just dial it back and pull it out.
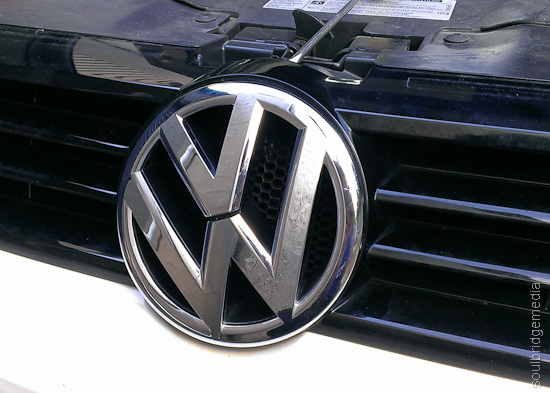
Right side of the V is in the 12 oclock position

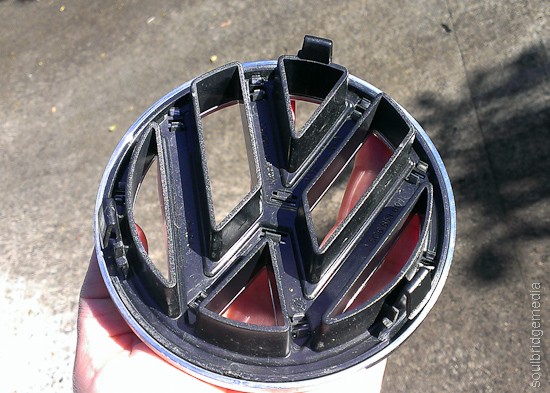
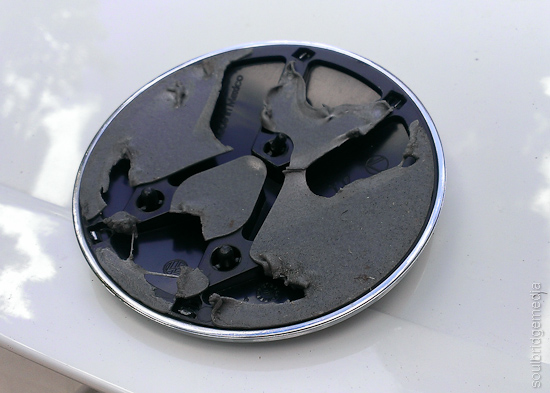
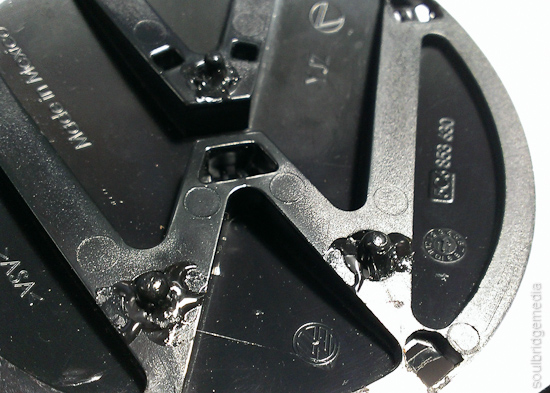
The housing, note the 3 slots for the clips
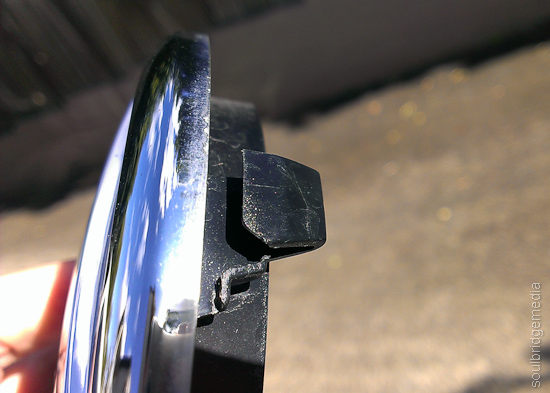
The bane of your existence, note the notch which locks it into place.
Prep and Painting
(I didnt bother taking any photos of the badges sitting on the bench covered in paint, there’s plenty of those online)
Like painting anything, if your base surface isn’t prepped right then you’re not going to have a good time. Any blemishes have to be smoothed out otherwise they’ll be just as visible after painting. I used 400 grit to smooth down the bumps, crack and a couple little dibbits then scuffed up the whole thing (housing and emblem) with 800 grit. I’m painting it black so I didn’t bother removing the emblem from the housing (see rear badge removal for tips below on separating the emblem).
Warts n all
Hit it with a primer, then your chosen colour. Remember with painting anything, don’t get impatient, follow the instructions on the can and give it plenty of time to dry. Sand the first coat as well if you have to.
(Also don’t use old paint (I’m talking close to 10 years), it’ll give a nice marbling effect which you’ll have to sand back and redo… just saying :-\ )
Throw on a couple coats of clear for extra protection, especially since its going to be on the front of the car. If you want a matte finish, use a matte clear. If you don’t have matte you could use a gloss with a 2000 grit sanding over the top to take the sheen off but only if you have a black belt in sanding.
Refitting the badge is as simple as a flick of the wrist and it should just click into place. You may notice the locking notches are a little rounded after removal, this makes it heaps easier to remove for future changes of mind but also for grubby little mitts so a dab of hot glue or some strategically placed two sided tape.

Front – After
Removing the rear badge
This, by the general consensus is a million times easier, and it was. The recommended old credit card seems to do the trick no problems too. The double sided tape holding it on is rubbery and sticky so you could probably even fashion a jagged “blade” from a juice bottle to give more cutting power, otherwise the card will work fine.
Find a spot around the edge that isn’t sitting as flush, you may need to get your fingernails under it to kick it off. If no where really works, try dead center up the top, there’s a small notch in the housing on the underside that might be just enough for the card to slide in. You could also try some dental floss if you get really stuck.
Work your way around to the soft spots, gently lifting the badge as you go. Take care not to scuff your paint or bend the badge up too far, let the card do the work of separating the badge from the car.

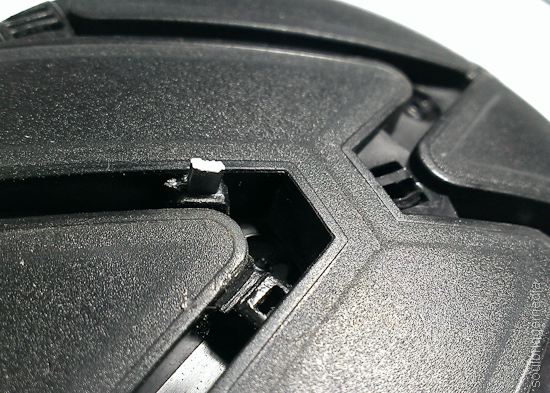
When you’re about half way you’ll notice there’s 3 little stems sticking out, these are used to align the badge for mounting. The problem is they’re built on to a very weak frame so in the course of removing, painting and refitting you will no doubt, bend or break at least one of them off. Not the end of the world but do your best to preserve these, it’ll be a godsend when it comes to refitting.
Super sticky goo
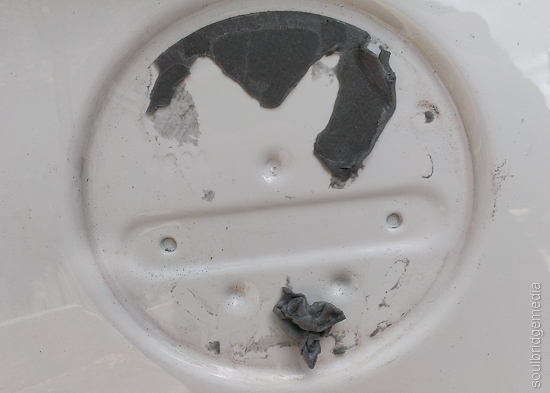
3 dibbits for mounting
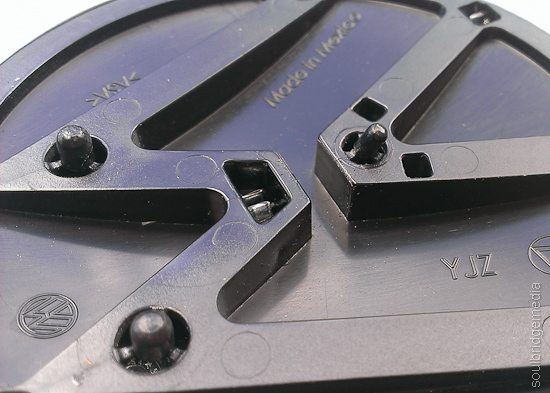
Bom-bom. Look how thin those supports are!
I gave them a bit of strength straight away with a couple dabs of glue.
Looks messy but the glue I used shrinks as it dries
Separating the emblem from the housing
Most sites suggest using a screwdriver or other tool to push the tabs through from the back, I found this is pretty much impossible to do without damaging the tabs or slots in some way. The chrome plating is strong but brittle so it tends to crumble or dent with only the smallest amount of pressure so I figured the best way is to not touch them at all, instead just pushing it out with my fingers.
Put your thumb on the front of the housing (black part) and your fingers on the very edge of the underside of the emblem (chrome part). Push with your thumb and pull/peel with your fingers, kind of like opening a can of tuna or baked beans with a pull tab. Work your way around the outside, these are the easier ones. For the center ones you may need to change your grip using more of a 3 finger pinching motion, pulling with your finger tips and pushing with your nails on the same fingers. Pulling from the outside while the center is still attached may bend or crack the emblem where the letters meet the circle so be careful. A bit of wiggling and changing of angles should pop it off eventually.
Use two hands and go slow…
One problem I came across is one of the tabs was glued/melted to the housing, possibly for extra security to stop it from falling off. Thanks to the brittleness and thinness of the tab, you can keep going with the “pincher” and it will eventually snap, if you don’t think its going to give, leave it to last so there’s enough room to get a blade in to cut it. Cut the broken tab off to save it from getting in the way when you’re refitting.
Which one is the anchor on yours? Its a gamble!
Removing emblem from the front housing would be very similar. Even though I didn’t try it, I think you should be able to use a similar method to removing it from the front badge, prying from the front instead of pushing from the back. The problem here is there’s nothing to push on from the front so you might have to try a couple spots around the edge first with the ol credit card, then once you have a big enough gap use something like a disposable chopstick to get in between the two layers and pop the tabs out.
Prep and painting is the same as describe above, but if you are matching the housing to the colour of your car take note that there is some texturing to it so you’ll need some extra sanding and a few extra coats of paint to give it a smooth panel finish. I found the paint still wasn’t very glossy after this (fine in the grooves where the emblem sat tho!) so I topped it off with some clear gloss to better match the car’s body.
Fitting rear badge
Standard double sided tape (the foam stuff might be a bit too thick and may make it easier for thieving hands) from an automotive store should do the trick ($5 for a small roll from Autobarn). Take a hobby knife to the edges to give it a good fit. Before peeling off the tape, give the area a good wipe down to make sure it is free from dirt and old tape. Also check to make sure the areas you have taped are making contact with the body, you may need to stack the tape to give it more height. If you kept the mounting stems itll be a simple matter of lining them up and pressing firmly.
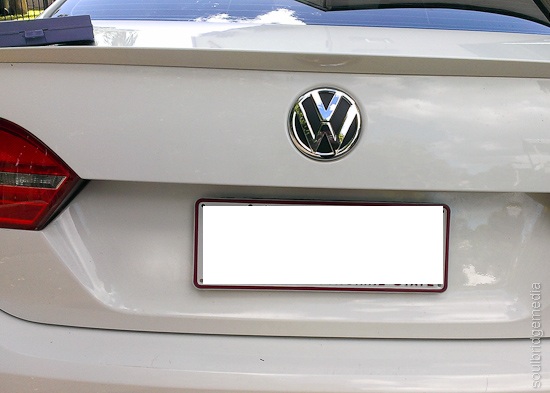
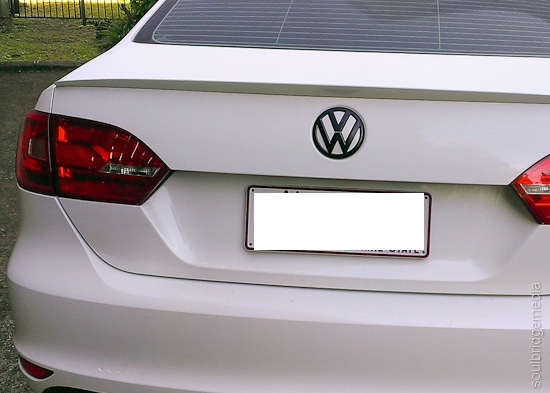
Back – Before
Back – After

Side note: I lazily looked up my paint code online instead of in the manual and found VW’s “candy white” colour code LB9A. Giving this code to the paint man he could only find this colour going up to 2004 but nothing under the model search for a current gen white (weird, I know) so I figured it was the right one. It wasn’t till I got back to the car and threw the stuff I bought into the passenger side that I noticed it was printed on a label on the door sill (derrp) but this was listed as B4B4. I did a quick search but couldn’t find anything about the difference but found plenty of places selling the one “candy white” with both codes. After painting the backing I walked around the car with it and couldn’t really tell the difference on most parts of the car (in fading sunlight). If anything, the small discrepancies would be of a slight fade on the original paint. After fitting it seems to have blended pretty well so I would have to say the codes, to my eye, are interchangeable but please correct me if I’m wrong!
Hope this post helps to clear things up for some people and give a bit of confidence to those who weren’t sure before hand. Happy DIY customising!
ps. I’ll get some proper photos when its clean… and I find some time!
Customising your own Kid Burner
Ok so you want to build an army of custom minions to do your bidding or perhaps the Rsvp’s to your tea parties look a little thin? Then its time to get your Martha Stewart on.
If you’re thinking “Ay? What’s this all about?” then you need to have a quick read of this. For those up to speed, continue reading.
These are the steps to create a simple decoupage’d custom
-
Step 1.
You’ll need a few supplies

Ask for help if you need to, just dont ask Ken. He has minimal articulation 😉
1.a) Hey doll! – Nooks knock off toy. These are available from Cardiology. As these are privately run franchises, stocks vary between stores. I have been getting mine from the Garden City store (Mt Gravatt, Brisbane) as the city store doesn’t stock them. Call ahead to save yourself a trip. They’re $10ea. If you’re planning on doing a few of them, ask for the loyalty card, buy 10 get one free. (unfortunately I only found out about it after I had already bought 10!)
b) Choosing your Nook. There’s quite a variety of different shapes and colours (you can get an idea from their site), so choose one to match your mental blueprints. Depending on the colour of paper, you may want to choose one that matches or best compliments the colour you’re working with. If you’re after predominately white or black characters, the mouse and the skeleton respectively are the way to go.
2. Get the – Paper. The sky is the limit for this. You can use anything from newspaper to wrapping paper to butcher’s paper. Have a look round the house or pop down to your craft/discount store. The only thing to remember, it has to be rather absorbent and not too thick so the glue can soak in, which makes it stick better and is a lot easier to work with ie. More pliable around edges and curves. Beware of papers that have a high gloss, super smooth finish or are woven, these can have
a plastic/cellophane content and are really tough to work with. If you’re not sure, you can test your paper by cutting off a small piece adding a drop of water, then seeing if it will mould and stay around the edge of the foot. If it doesn’t stick or hold its shape when you crease or fold it then you might have to choose different paper.
3. Stuck on you – Glue. The cheaper and thinner the better! You’ll need to soak the paper in glue so the thinner it is the more likely it will soak right through. This also gives a light lacquer finish on the final product. I used a simple glue pen. Great for controlled, no mess application and readily available. IGA has them for .92c
4. Ya – Tool. This will be used for applying/spreading glue and selecting, positioning and “working” pieces. I chose a couple good quality round toothpicks. Cheap and plentiful. The point is used to press the paper into creases and joins ie. Around the neck and arms and also to “magnet” pieces so you don’t need to put everything down each time you add a piece. The round edge will help you roll pieces flat, mould them to contours and edges and also to disperse excess glue. You’ll want something that will sit comfortably in your fingers, so find something that suits you, wooden skewers or disposable chopsticks are also options.
5. ob ja dart – Other bits and pieces. The rest are things you should have lying around the house and will just help make your customising a bit easier. Clear working area – little bits of paper + glue = mess in any language. Scissors – for cutting decou bits or for those corners that just don’t crease. Something small to “fence” or contain your decou clippings from exploding everywhere at the first sign of a cough or if you sit down too fast, I use a large roll of sticky tape. Damp cloth – for stray glue bits or if your fingers or tool get sticky. Drying rack – something to sit the little guy on with minimal contact while its drying, I used an up turned flat backed power adapter.
- Step 2
Prepping the toy. If you’re using lighter coloured paper you may need to go over the painted areas of the original toy so they don’t show through. You can give it a quick light coat of ACRYLIC paint in a similar colour or if it’s a predominantly white one, at a pinch you can use “white out” tape.
-
Step 3
Paper prepping. Tear or cut your paper into random shapes and sizes roughly 1-2cm (Note: larger pieces can be harder to work around contours and edges). Torn paper = greater absorption and bonding to other pieces. Works better for random patterns. Cut paper = better for joining/matching up repetitive patterns. To minimise overlaps, joining edges need to be straight. As the space is filled you’ll have to start tailoring the pieces to fit exact spots.
-
Step 4
Decou-ing. I start from the top down. Apply a liberal blob of glue round the top, front and back of the head. Make sure its nice and thick, not too the point its dribbling but enough to wet and soften the paper. Any excess can be wiped or “squeegeed” later. Don’t worry about the glue drying on one side while youre working on another, it takes quite some time to dry by itself (~15-30min). Start with the larger pieces to cover more of the easy areas first. Place a piece on the gluey area then lightly dab it round the edges with your toolpick. When it starts sticking, roll from the center out, just like if you were rolling out a pizza base with a rolling pin. This kneads the paper and helps it absorb the glue and also squeegees the excess glue out. If some parts pop up or don’t make flush contact, add a couple dabs of glue on top of the paper, this will soften the paper
and make it more pliable. Some of the acute angles like on the feet or hands, you may need to soak the piece in glue and let it sit or even add a drop of water to the piece before sticking it to the body.
Stick torn pieces with a little overlap and cut pieces edge on edge to help make a smoother finish. Too much overlap it may end up lumpy, too little and youll have thin/clear spots that you will have to go over with pin head sized pieces.
Once you finish the head and body, you’ll find less dry spaces to hold, so it’s a good idea to do it in parts, allowing the sections to dry in between. I used an upturned power adapter as a cradle to sit its head in so there would be minimal contact and less chance of it falling over while drying. Those of you in countries that only have 2 prong adapters may need to find an alternative. Once dried, go over the completed areas and make sure there are no air bubbles or stray/rough edges. Some can be pressed down with your finger nail while others may need going over again with an extra dollop of glue.
For finer details around the around the neck and arms, you can choose to lock it in a London guard position by decou-ing over the joints or if you want movement you can use a scalpel afterwards.
Take extra care to roll the feet flat, the dolls are nose heavy and topple easily. When its almost dry, find a flat surface and press down hard to make sure they can stand their ground.
-
Step 5
Finishing. Once you’ve finished gluing, give it overnight to dry then check for any gaps or thinner areas in the paper. Touch up accordingly, allow to dry then add your final touches, paint, pen or glue on other features or accessories and you’re done!
Here’s one that i whipped up using the dragon analogue

Been busy? Hit us up in the comments with your own custom vinyls!
 … then you get the rest of the family!
Kidrobot has a reunion for Munny with a family they never knew they had! Now under the aptly titled Munny world, Munny gets 4 new buddies Trikky, Rooz, Buband Raffy in the DIY range. All figures sit around the 4″ mark in size, are only available in white and retail for the same $9.95US as the Munnys. The possibilities are endless!
We’ll definitely be grabbing a couple soon enough 😀 If you can’t wait for them to hit the Aussie shelves and are willing to foot the postage costs, you can grab them from the site here
Get customising!
