Nuked Nooks
 A few months ago we stumbled across what can only be described as blatant ripoffs of Kidrobot Munnys. They’re called Nooks. The basic body mould and arms are pretty close (except they’re made from a cheap soft pvc blend. The arms are even softer along the lines of a dog’s chew toy, but more on that later) to that of the Munnys while the heads are an oblong sphere skewed towards the front. The main difference lies in the different styles of characters. Each one is a different “thing”, ranging from standard animals: mouse, cow, kangaroo to mythical creatures like a dragon or a Cyclops guy with a bolt through its head or people like nurses and kings. So each character has a different add on to the basic mould be it wings, tails, horns or ears along with a terrible attempt at personalising with a name, favourite game, “friend” and a rego number to take to the seizure inducing Teletubby designed website. What it is for, I can’t tell you, but as soon as I get a hold of a 5yo, I’ll let you know.
Despising aside, I thought, these could actually come in handy. Instead of spending $20-30AU to purchase a 4″ DIY Munny locally that I could potentially ruin, I can pay half that and practice on the cheapy instead. So in doing that I’ve created a little how to for those wanting to get their art on and letting a bit of creativity run wild.
The first thing I tried was a simple coat of paint to get rid of the ugly faces and colours. As mentioned theyre made from a soft pvc type plastic which causes some problems with adhesion and drying. If you apply very light coats (I used a cheap enamel spray paint) allowing drying time between each coat, the body and head seems to dry ok, however if you get it even slightly thicker in places, it will have a tacky texture. As for the arms, forget about it. They stay just as wet as the day you sprayed them. So you will need a pvc specific type paint (I’m still trying to track down the best type for the job) for it to dry and adhere properly. Not having this handy at the time I instead decoupaged it in plain paper and then repainted it.
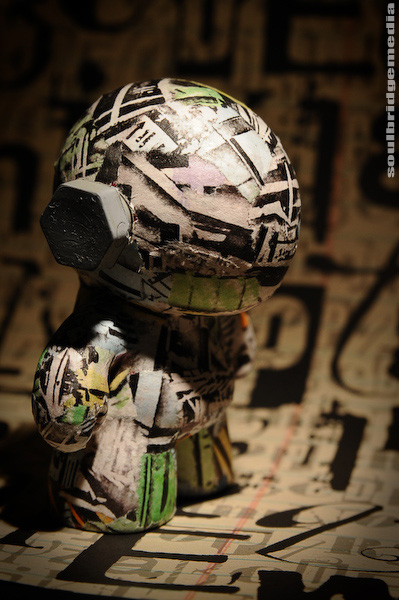
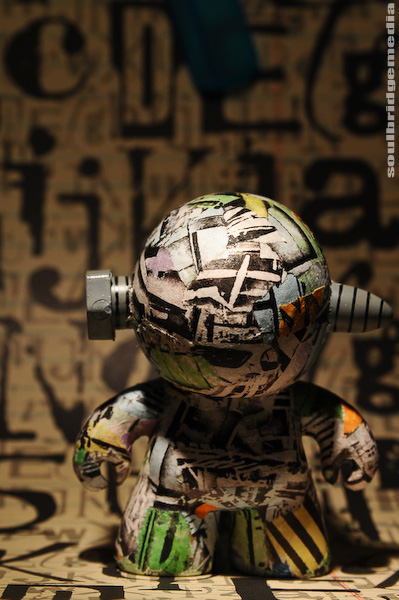
The other option of course is decoupage from the start, basically covering the whole thing in small bits of paper with glue, paper Mache style, and this is what we’ve done. I will detail the process I used in a future post.
Till then, a sneak peak of one I whipped up. In tribute to the Kid Robot knock offs I’m aptly naming them Kid Burners (:


Customising your own Kid Burner : News @ soulbridgemedia on 12.23.2009
[…] thinking “Ay? What’s this all about?” then you need to have a quick read of this. For those up to speed, continue […]