
Pearl Harbour
One of the biggest tourist attractions in Hawaii after beaches and luaus is a more sombre affair and the site of a battle that led to one of the most devastating retaliations in world history.
Not being anything close to history buffs (I haven’t even watched the whole movie in one sitting) we didn’t really know what to expect but like most historic places in America, it has been converted to cater for the masses similar to an amusement park, the main difference being you aren’t allowed to take in anything that can carry things. Any kind of bag (shopping/grocery included), backpack or case (including lenses cases) has to be checked in to the cloak room at a hefty $3 per item (small building off to the right of the main entry gates). Bottles or cans of liquid are also out, so where possible, best to just leave it in the car/hotel.
Once inside, its quickly noticeable that it is far from a joyous place, I don’t mean the mass of screaming kids running around, I mean bottom line, it’s a memorial, a place where people go to honour family members and comrades. Seeing a solider in uniform huddled around his sobbing family and an old veteran facing the ocean with his head bowed quashed my excitement of “checking out cool war stuff” and made me remember where I was. I don’t know how the photojornos from the likes of Nikon Walkley Press Photo awards can do it – detach themselves from an environment of sadness or suffering. Drunken revellers are easy to ignore but I definitely cant bring myself to vulture over such moments or try to share such a moment that wasn’t mine to share, so out of respect, I holstered the camera around these parts of the grounds.
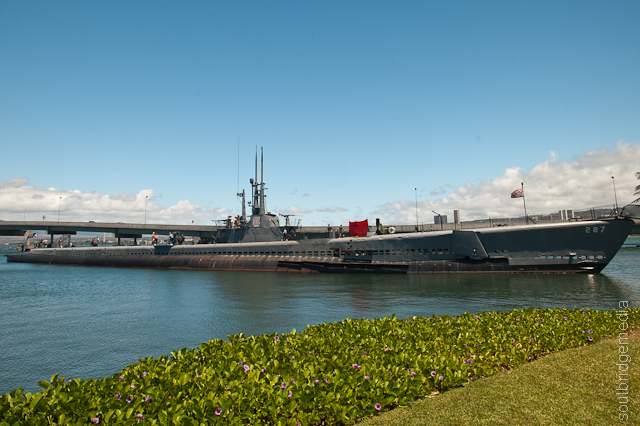
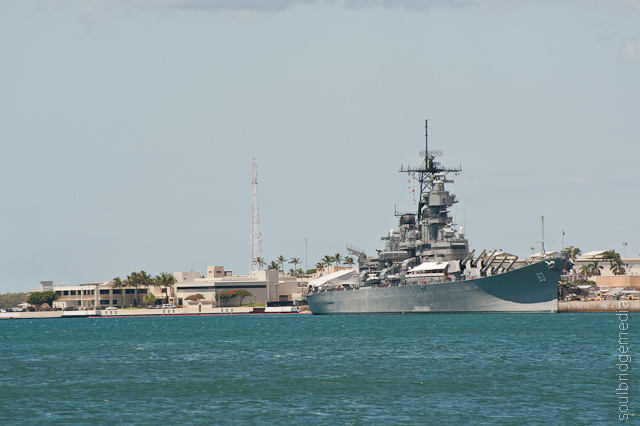
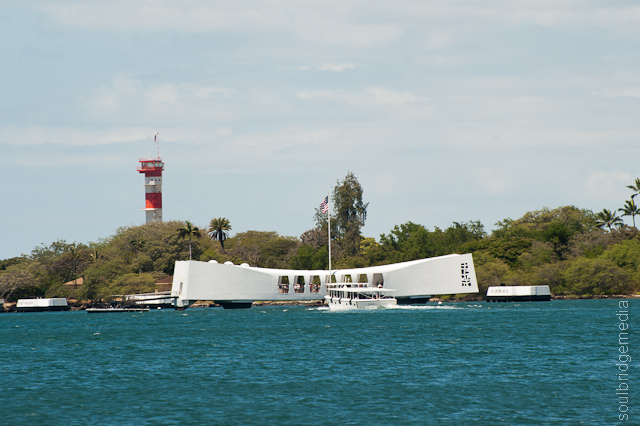
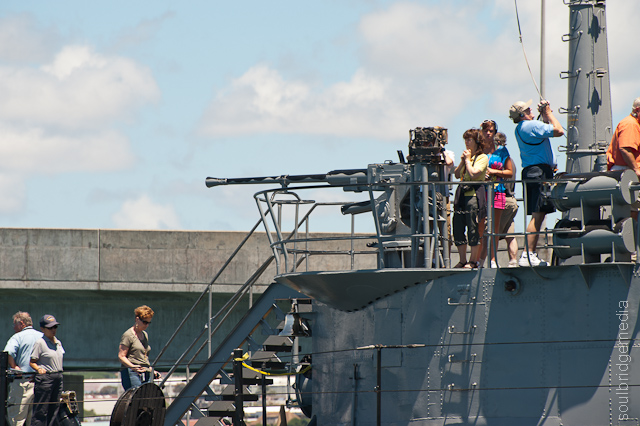
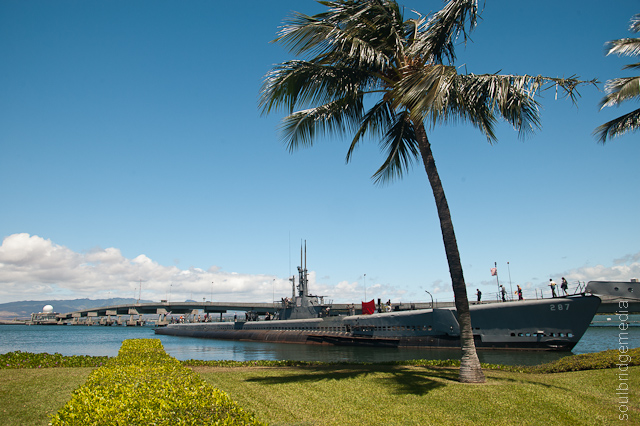
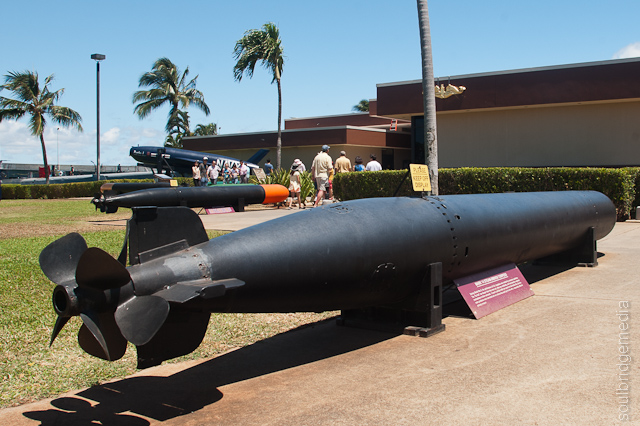
The solemn disposition of this nature aside, the lead attractions – the USS Missouri, the Bowfin submarine and a ferry out to the USS Arizona memorial above the sunken wreck of the battleship of the same name were as expected, very busy, so we decided to forgo the “rides” and just take a semi-peaceful walk around the grounds to view some of the memorials and relics instead.
Travel tip: Tickets for the attractions can be pre booked directly through the National Parks Services
There is a large gift shop with a wide variety of merchandise, from historic photos, medals and models to tacky patriotic fan fare.


Travel tip: Even if you do the “rides”, you only really need to budget a couple hours here. If you’ve got extra time to kill, you can make the trip over to Ford Island via shuttle bus for the Aviation museum and Missouri battleship memorial. Time it on the right day and you’ll be able to bare witness to one of the many air shows hosted there.
The center opens early at 7pm daily which is handy in planning multiple stops for the day, one of which could be a spot of shopping…
Shopping – Aiea
The pearl (*cough* sorry…) for shopping in this area is the Pearlridge center, second only to Ala Moana in size but its fully undercover and has a monorail (yes that’s right my Hindu friend!) that connects its two halves, sure beats walking!


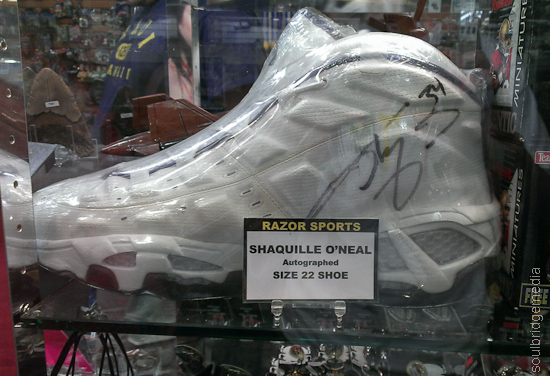
Divided into “uptown” and “downtown” sections our choice amongst the stores were Hot Topic, Champs, Footlocker, Footaction, In Soles, In4mation, Journeys and the Sanrio café, but the store we spent the most time in was Razor Concepts/Razor Sports. A combination of sporting memorabilia and clothing on one side and a wide selection of toy, hobby, games and collectibles on the other. Prices were average to good and sale items were plentiful. Large display cases with “not for sale” items also adorned the stores with vintage collectibles and prestige memorabilia such as an autographed pair of Shaquille O’Neal’s monster size 22 Reeboks!
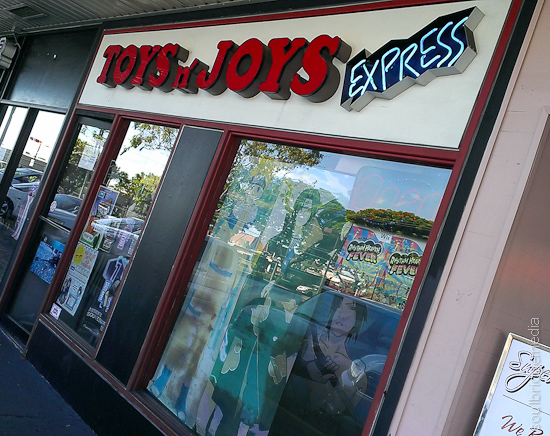
A couple other spots in the area are Toys n Joys (actual domain has been closed and taken over by another company) – this is the smaller of their stores stocking more paintball guns and Airsoft replicas than anything else and The Hobby Company – tucked away amongst rows of industrial and commercial buildings and businesses this place has a good size selection of scale model kits and other hobby related items.
Aiea is also home to the largest 2 flea market/swap meets on the island, which we will be getting to later.
Shopping – Waipahu
If you’re coming from Honolulu it’s a bit of a hike but its only a short drive from Pearl City. The highlight and pretty much the only sight amongst all the residential housing is the Waikele Premium outlets.
We’ve come across Premium outlets a few times in our travels and they rarely disappoint…mainly because there’s a Nike outlet store 😉 but sadly there wasn’t one here. From research there possibly used to be one but not anymore. That left Adidas, Vans and “Factory brand shoes” to pick up the failed attempt at a bargain for us, you however may have better luck with the other stores on hand.
The plus side is they’re open till 9pm every night except for Sunday so heading there after dark will give you a more relaxed experience as the place is pretty quiet then.

Over the road at the Waikele Centre there’s a Kmart, Old Navy and Sports Authority and a bunch of places for a bite to eat. Amongst the regular fast food places there’s our first day friends, Chili’s Bar and Grill and a Korean BBQ but it was Genki Sushi with its angry little logo that drew us like moths to a flame. Slotting us in just before closing time gives them an extra thumbs up!
Next up, we get thrifty and hit up the swapmeets.
If you have any questions about our adventures, feel free to hit us up on facebook.
Hawaii 2012 part #1 – Arrival
Hawaii 2012 part #2 – Waikiki
Hawaii 2012 part #3 – Honolulu shopping – Part A
Hawaii 2012 part #4 – The Big Island – Volcano tour
Hawaii 2012 part #5 – Shopping Honolulu – part B
Hawaii 2012 part #6 – Tattoo Honolulu / Boardshorts: A Perfect Fit art exhibits
Hawaii 2012 part #7 – Pearl City area
Hawaii 2012 part #8 – Swap meets and Made in Hawaii festival
Hawaii 2012 part #9 – Cook offs and Car shows
Hawaii 2012 part #10 – North shore
Hawaii 2012 part #11 – Windward shore and Sealife Park
Hawaii 2012 part #12 – Chief’s Luau at Sealife Park
Hawaii 2012 part #13 – South shore – Diamondhead crater, Hanauma bay
This week we slip into something a little more comfortable with Slip-on Stereo saudering in for our Time Off Magazine – “The Guide” section cover shoot.
Check them out in this week’s issue #1637.
Get it FREE from all the usual street press outlets or read current and back issues online @ Time Off magazine – Brisbane
Removing and Painting VW badges
This is a bit of a change to my normal posts but hopefully it’ll be just as informative (or at least interesting!)
The net is full of instructions to remove and paint (or vinyl) your VW badges but I found a couple key points were brushed over every time, namely the removal of the front badge where instructions were simply “just turn it a bit” or “turn it about x amount”. It seemed there was quite a polarisation between people that could “just” pop it off and those that had all kinds of trouble to the point of having to remove their grille first, most falling into the latter in the hope to spare doing damage to the badge or grille.
So just like a onesie party or writing a novel about a futuristic amusement park where dinosaurs are brought to life through advanced cloning techniques and calling it “Billy and the Cloneasaurus”, he’s my version of events…
This is specifically for a current model MK6 VW Jetta but I believe it will also apply to Golfs and several previous generations.
Removing the front badge
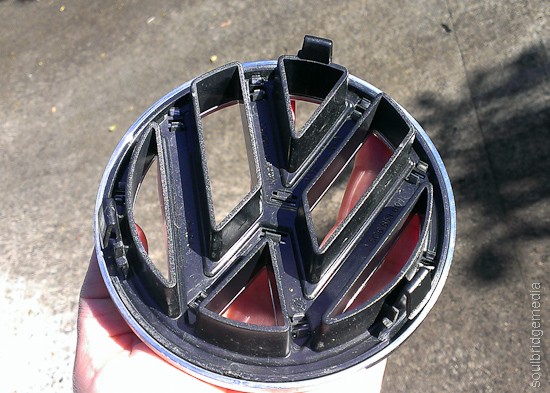
The badge is attached to a deep mounting bracket which is held on by 3 clips in a triangle shape. The one at the top can be access from behind near the bonnet latch with a long thin flat head screwdriver.
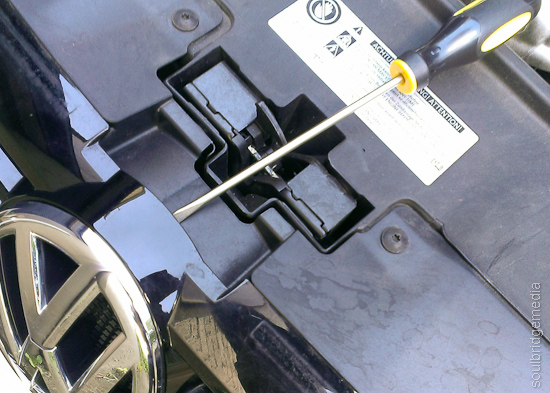
Come in from behind… errr..
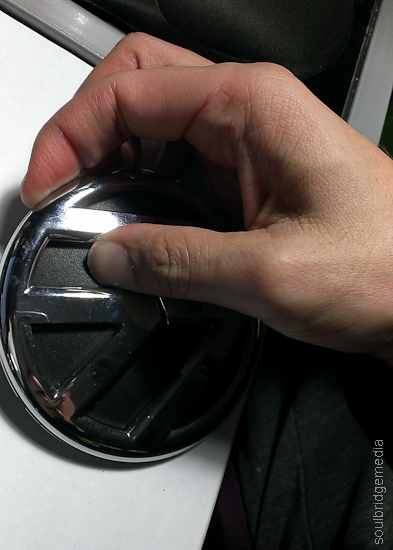
First “just” try turning it to the left, you never know, you could be one of the lucky ones, if you are, you only need to turn it till the right side of the V on the badge is vertical. It is quite likely that you will over shoot the mark if you put a bit of force behind it so just dial it back to that position then pull the badge forward and off.
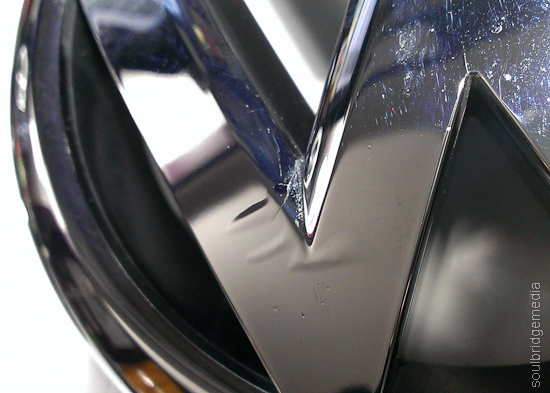
If you’ve put two hands on it and given it a “carn you bas-tard!” heave-ho and it hasn’t budged, itll need the extra persuasion. First check the emblem itself to see if there’s any damage or imperfections on it. If there is, you might want to go a bit gentle on it. As seen in the photos, my badge has a slight bubbling in the chrome and a small crack, both acerbated after a few big cranks to get it free.
Next, lightly (or not so lightly) jiggle the housing left and right and back and forth. Grab that screwdriver and press the tabs towards the center while continuing to turn and twist. There might be a couple creaks of protest but after a little bit you will notice the housing will feel slightly looser in places.
Take the screwdriver and line it up with the right hand side of the top tab and push while turning the housing with your other hand. You may need a bit of force so watch you don’t skin your knuckles or puncture part of the car or yourself with a wayward screwdriver.
As above, you may over shoot the “open” notch, if so, just dial it back and pull it out.
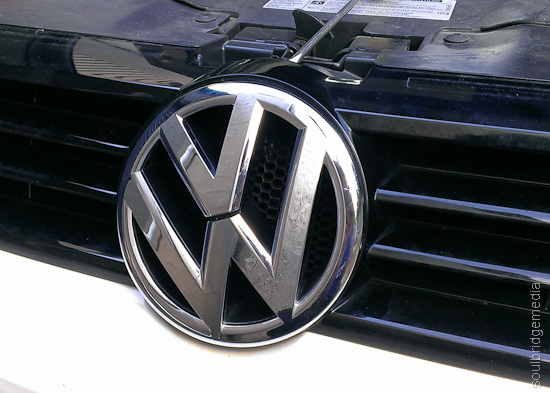
Right side of the V is in the 12 oclock position

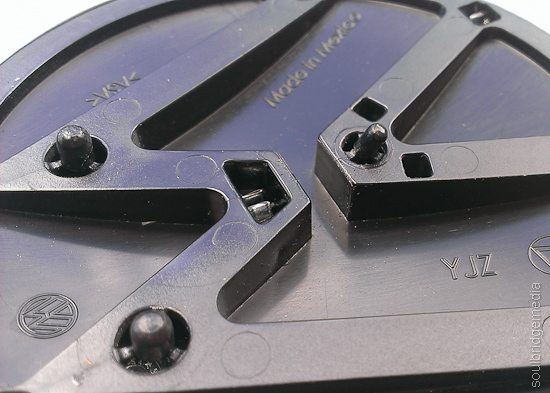
The housing, note the 3 slots for the clips
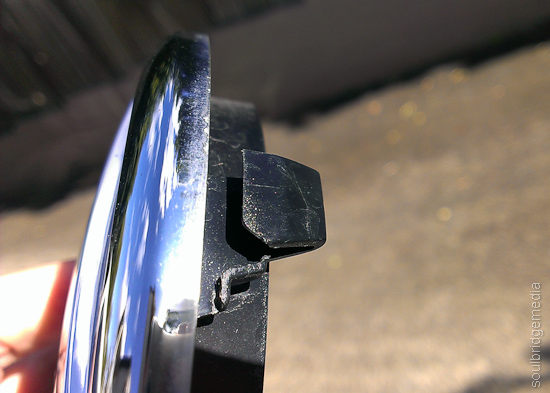
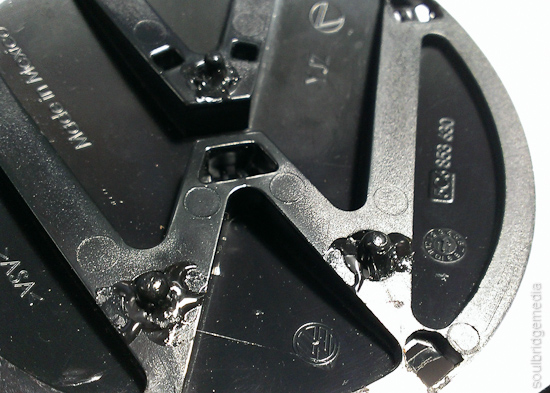
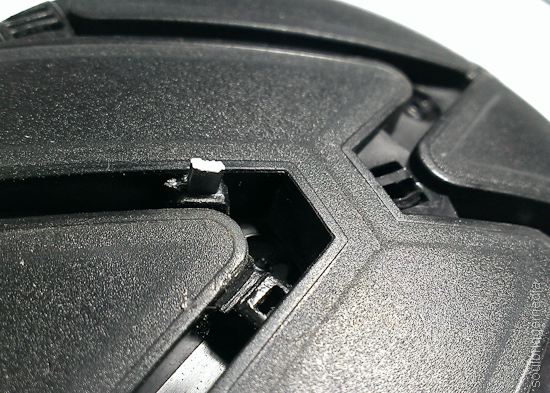
The bane of your existence, note the notch which locks it into place.
Prep and Painting
(I didnt bother taking any photos of the badges sitting on the bench covered in paint, there’s plenty of those online)
Like painting anything, if your base surface isn’t prepped right then you’re not going to have a good time. Any blemishes have to be smoothed out otherwise they’ll be just as visible after painting. I used 400 grit to smooth down the bumps, crack and a couple little dibbits then scuffed up the whole thing (housing and emblem) with 800 grit. I’m painting it black so I didn’t bother removing the emblem from the housing (see rear badge removal for tips below on separating the emblem).
Warts n all
Hit it with a primer, then your chosen colour. Remember with painting anything, don’t get impatient, follow the instructions on the can and give it plenty of time to dry. Sand the first coat as well if you have to.
(Also don’t use old paint (I’m talking close to 10 years), it’ll give a nice marbling effect which you’ll have to sand back and redo… just saying :-\ )
Throw on a couple coats of clear for extra protection, especially since its going to be on the front of the car. If you want a matte finish, use a matte clear. If you don’t have matte you could use a gloss with a 2000 grit sanding over the top to take the sheen off but only if you have a black belt in sanding.
Refitting the badge is as simple as a flick of the wrist and it should just click into place. You may notice the locking notches are a little rounded after removal, this makes it heaps easier to remove for future changes of mind but also for grubby little mitts so a dab of hot glue or some strategically placed two sided tape.

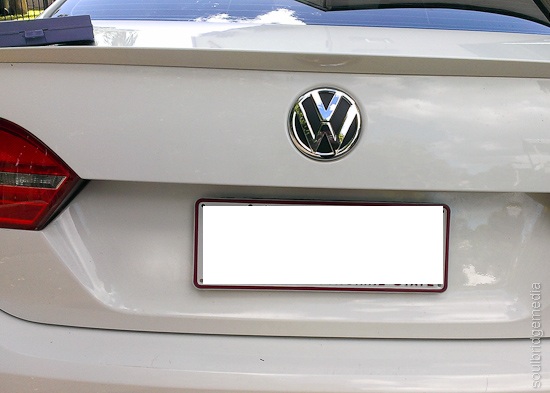
Front – After
Removing the rear badge
This, by the general consensus is a million times easier, and it was. The recommended old credit card seems to do the trick no problems too. The double sided tape holding it on is rubbery and sticky so you could probably even fashion a jagged “blade” from a juice bottle to give more cutting power, otherwise the card will work fine.
Find a spot around the edge that isn’t sitting as flush, you may need to get your fingernails under it to kick it off. If no where really works, try dead center up the top, there’s a small notch in the housing on the underside that might be just enough for the card to slide in. You could also try some dental floss if you get really stuck.
Work your way around to the soft spots, gently lifting the badge as you go. Take care not to scuff your paint or bend the badge up too far, let the card do the work of separating the badge from the car.

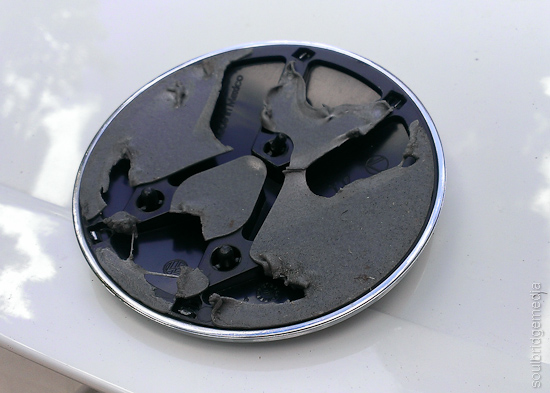
When you’re about half way you’ll notice there’s 3 little stems sticking out, these are used to align the badge for mounting. The problem is they’re built on to a very weak frame so in the course of removing, painting and refitting you will no doubt, bend or break at least one of them off. Not the end of the world but do your best to preserve these, it’ll be a godsend when it comes to refitting.
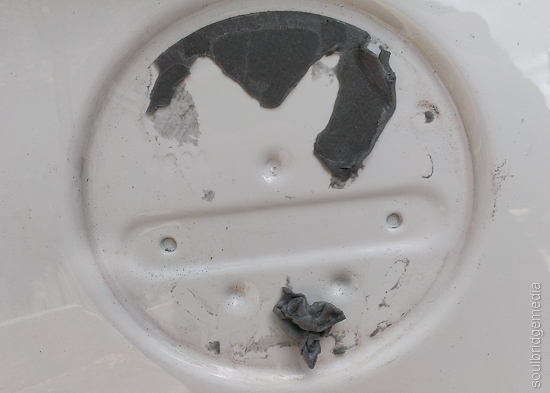
Super sticky goo
3 dibbits for mounting
Bom-bom. Look how thin those supports are!
I gave them a bit of strength straight away with a couple dabs of glue.
Looks messy but the glue I used shrinks as it dries
Separating the emblem from the housing
Most sites suggest using a screwdriver or other tool to push the tabs through from the back, I found this is pretty much impossible to do without damaging the tabs or slots in some way. The chrome plating is strong but brittle so it tends to crumble or dent with only the smallest amount of pressure so I figured the best way is to not touch them at all, instead just pushing it out with my fingers.
Put your thumb on the front of the housing (black part) and your fingers on the very edge of the underside of the emblem (chrome part). Push with your thumb and pull/peel with your fingers, kind of like opening a can of tuna or baked beans with a pull tab. Work your way around the outside, these are the easier ones. For the center ones you may need to change your grip using more of a 3 finger pinching motion, pulling with your finger tips and pushing with your nails on the same fingers. Pulling from the outside while the center is still attached may bend or crack the emblem where the letters meet the circle so be careful. A bit of wiggling and changing of angles should pop it off eventually.
Use two hands and go slow…
One problem I came across is one of the tabs was glued/melted to the housing, possibly for extra security to stop it from falling off. Thanks to the brittleness and thinness of the tab, you can keep going with the “pincher” and it will eventually snap, if you don’t think its going to give, leave it to last so there’s enough room to get a blade in to cut it. Cut the broken tab off to save it from getting in the way when you’re refitting.
Which one is the anchor on yours? Its a gamble!
Removing emblem from the front housing would be very similar. Even though I didn’t try it, I think you should be able to use a similar method to removing it from the front badge, prying from the front instead of pushing from the back. The problem here is there’s nothing to push on from the front so you might have to try a couple spots around the edge first with the ol credit card, then once you have a big enough gap use something like a disposable chopstick to get in between the two layers and pop the tabs out.
Prep and painting is the same as describe above, but if you are matching the housing to the colour of your car take note that there is some texturing to it so you’ll need some extra sanding and a few extra coats of paint to give it a smooth panel finish. I found the paint still wasn’t very glossy after this (fine in the grooves where the emblem sat tho!) so I topped it off with some clear gloss to better match the car’s body.
Fitting rear badge
Standard double sided tape (the foam stuff might be a bit too thick and may make it easier for thieving hands) from an automotive store should do the trick ($5 for a small roll from Autobarn). Take a hobby knife to the edges to give it a good fit. Before peeling off the tape, give the area a good wipe down to make sure it is free from dirt and old tape. Also check to make sure the areas you have taped are making contact with the body, you may need to stack the tape to give it more height. If you kept the mounting stems itll be a simple matter of lining them up and pressing firmly.
Back – Before
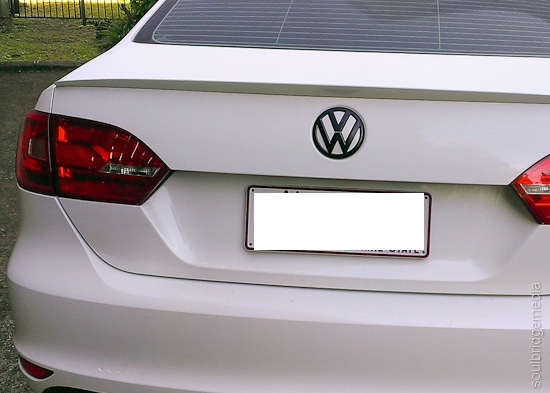
Back – After

Side note: I lazily looked up my paint code online instead of in the manual and found VW’s “candy white” colour code LB9A. Giving this code to the paint man he could only find this colour going up to 2004 but nothing under the model search for a current gen white (weird, I know) so I figured it was the right one. It wasn’t till I got back to the car and threw the stuff I bought into the passenger side that I noticed it was printed on a label on the door sill (derrp) but this was listed as B4B4. I did a quick search but couldn’t find anything about the difference but found plenty of places selling the one “candy white” with both codes. After painting the backing I walked around the car with it and couldn’t really tell the difference on most parts of the car (in fading sunlight). If anything, the small discrepancies would be of a slight fade on the original paint. After fitting it seems to have blended pretty well so I would have to say the codes, to my eye, are interchangeable but please correct me if I’m wrong!
Hope this post helps to clear things up for some people and give a bit of confidence to those who weren’t sure before hand. Happy DIY customising!
ps. I’ll get some proper photos when its clean… and I find some time!
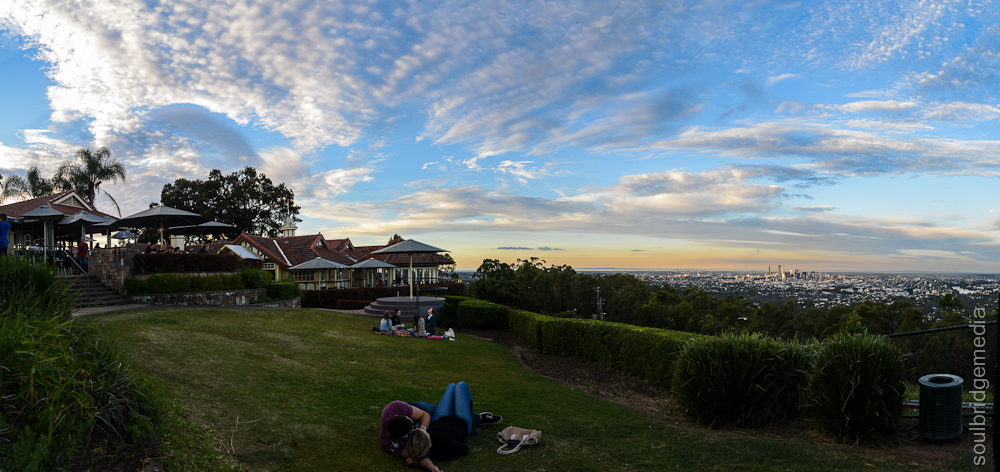
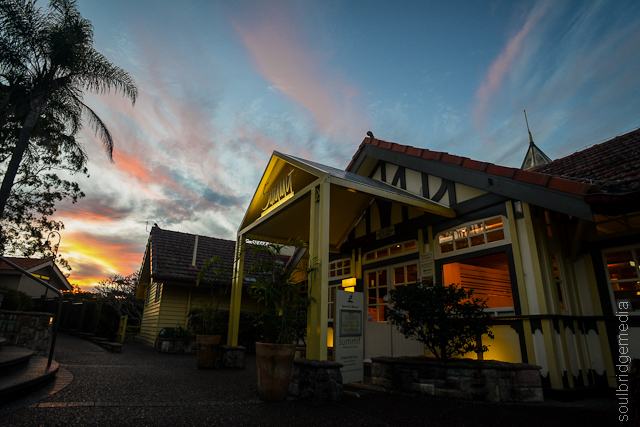
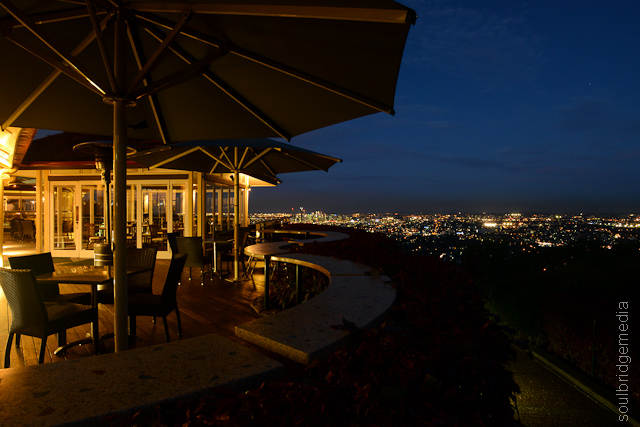
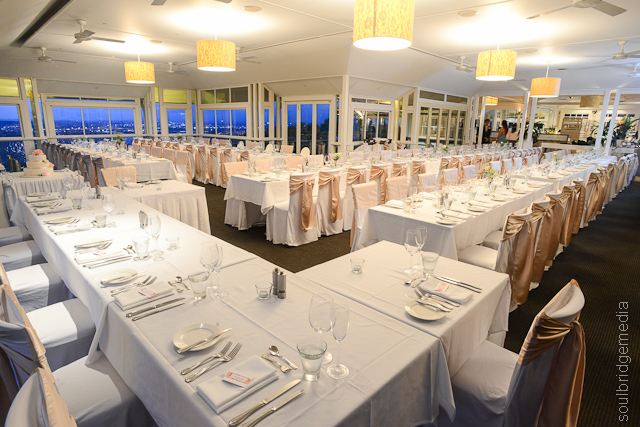
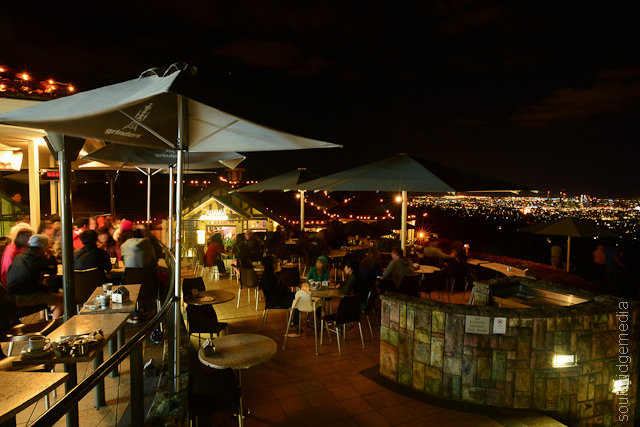
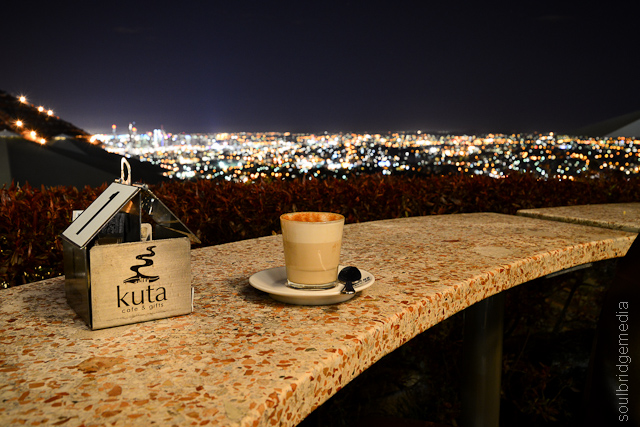
A recent client we have the pleasure with working with is literally THE pinnacle of Brisbane dining, The Summit Restaurant at Mt Coot-tha Lookout. Our work will be featured in future updates to their website and promotional material. Having not visited the site for 10-15 years, I had forgotten just how breathtaking the view is and its been great getting reacquainted with one of Brisbane’s best landmarks.
We still have a few more shoots to go but here’s a sneak preview of what you can expect.
If you can’t remember the last time you were up there, then do yourself a favour and pay it a visit and maybe even duck in to the restaurant or café for a bite or cuppa, they open early and close late 😉
Menus and other details are available from the Brisbane Lookout website.
Local rockers, Electric Horse ride the lightning into our Time Off Magazine – “The Guide” section cover shoot photo this week.
Check them out in this week’s issue #1636.
Get it FREE from all the usual street press outlets or read current and back issues online @ Time Off magazine – Brisbane
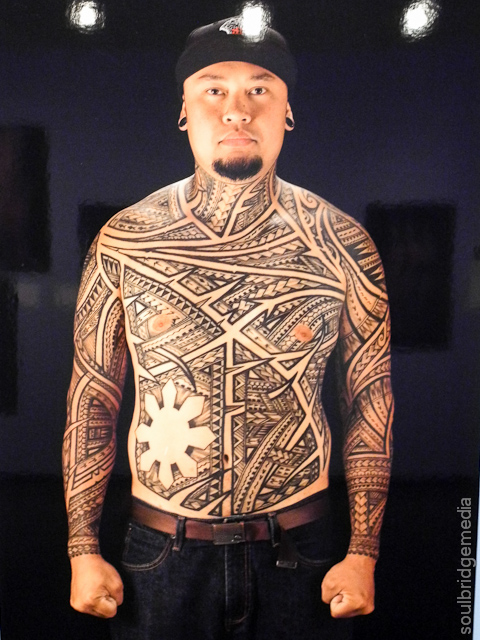
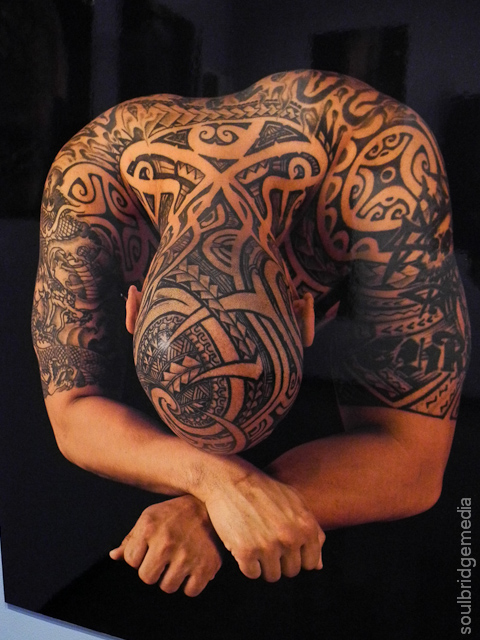
We were very excited to realise our travel dates coincided with this exhibition which incorporated two things that are very Hawaii, tattoos and board shorts!
Getting there
The Honolulu Museum of Arts is roughly between downtown Honolulu and Waikiki on S Beretania St which makes it pretty accessible by car or public transport. If you’re coming by car, watch for all the one way streets and if you go a block too far north you will end up on the freeway!
There are a few choices for parking with the cheapest being $3 for up to 4 hours at the Art school. Metered street parking is also an option for shorter stays, only slightly more expensive.
Full details of directions and parking can be found here.
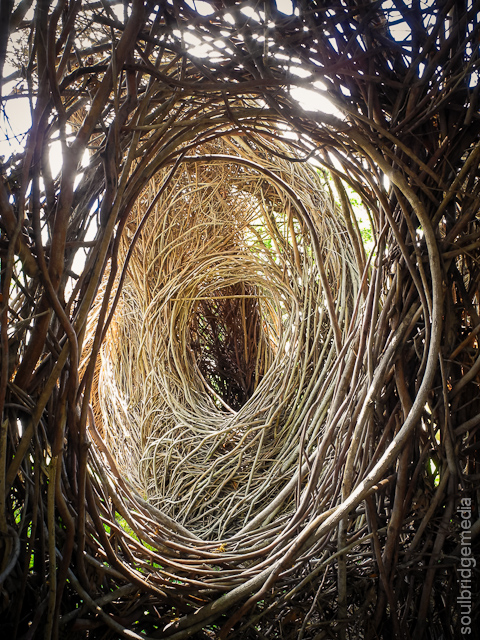
The building itself is rather unassuming but the large cane artworks and swinging metal objet d’art at the front are hard to miss.
Travel tip: Remember this is America and they can “never be too careful” when it comes to tourist spots ie. you will not be allowed to take in bags or liquids. They do however have lockers for hire at the main entrance.
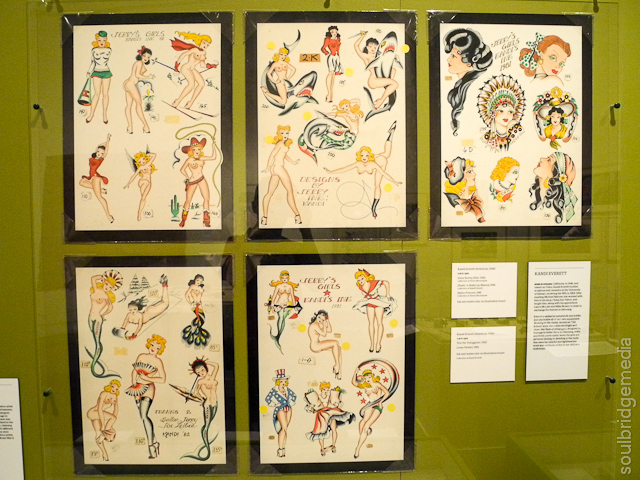
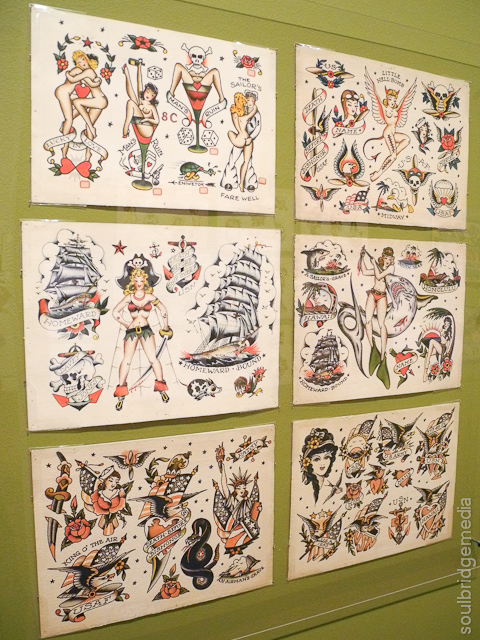
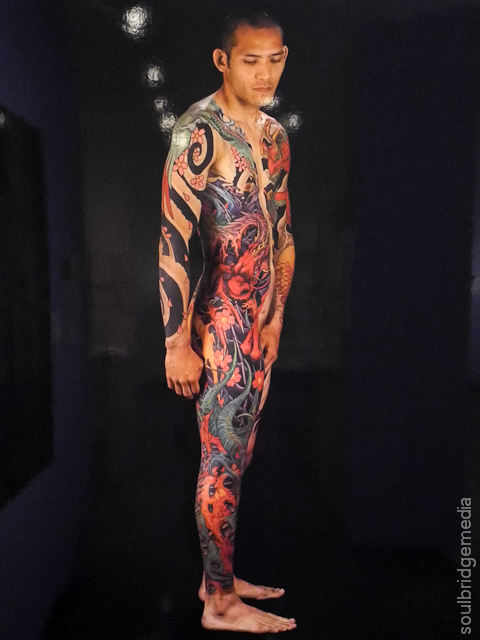
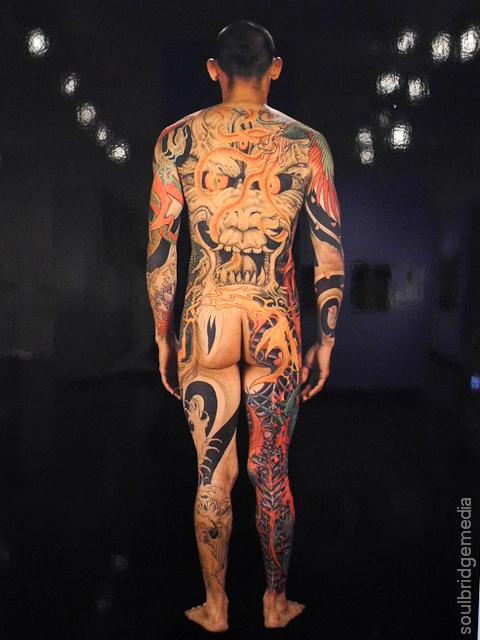
Tattoo Honolulu
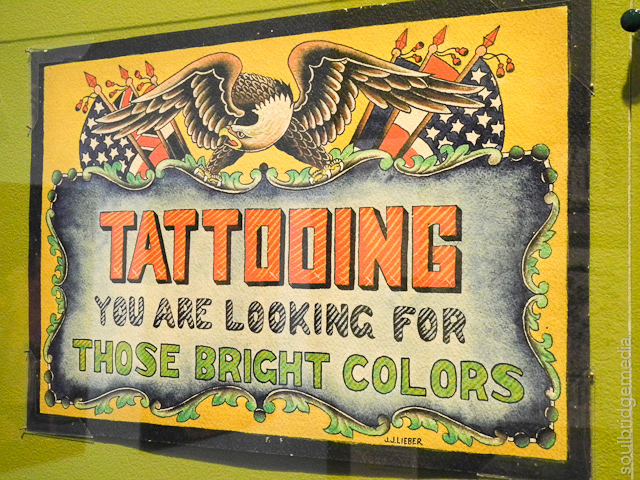
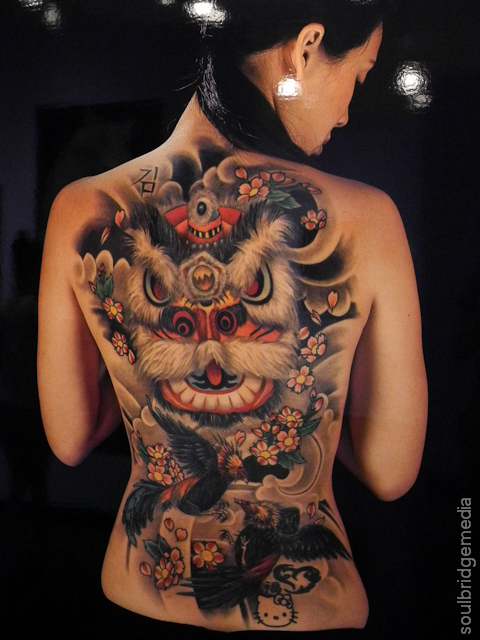
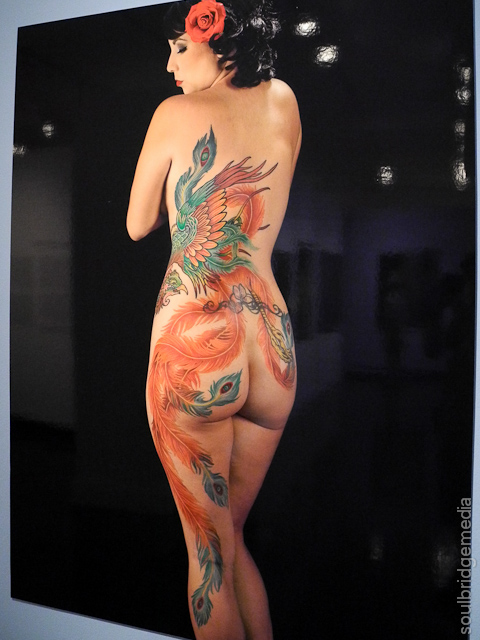
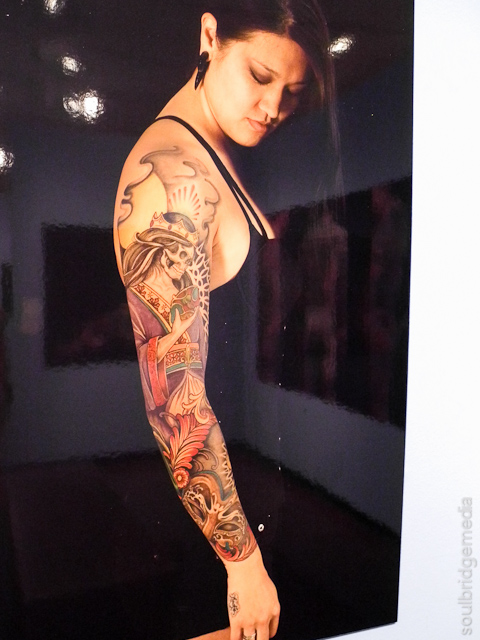
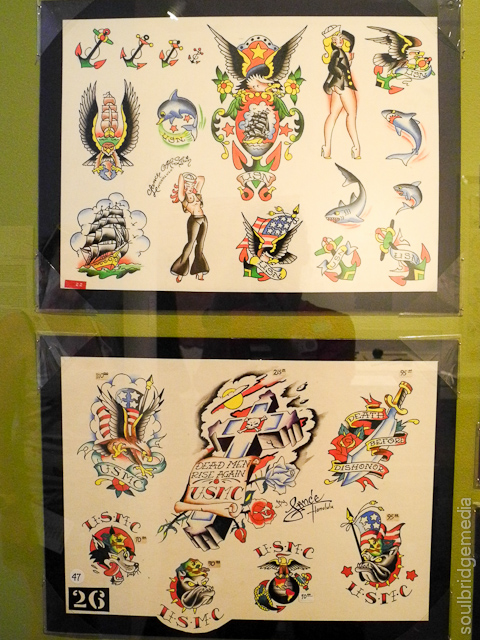
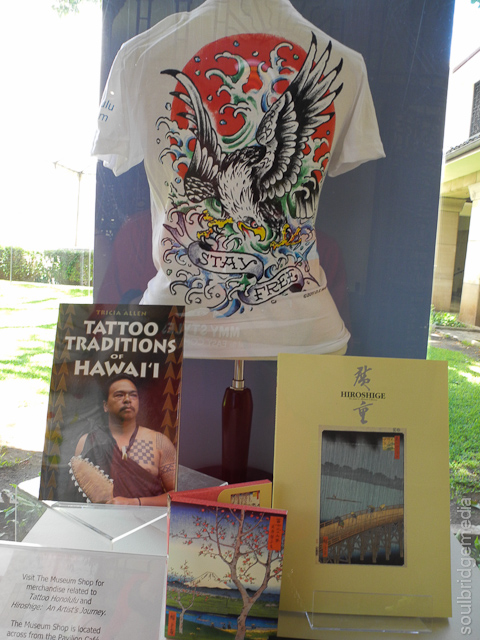
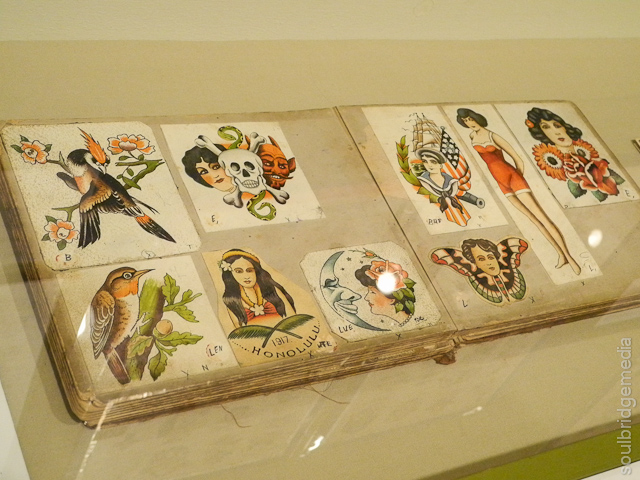
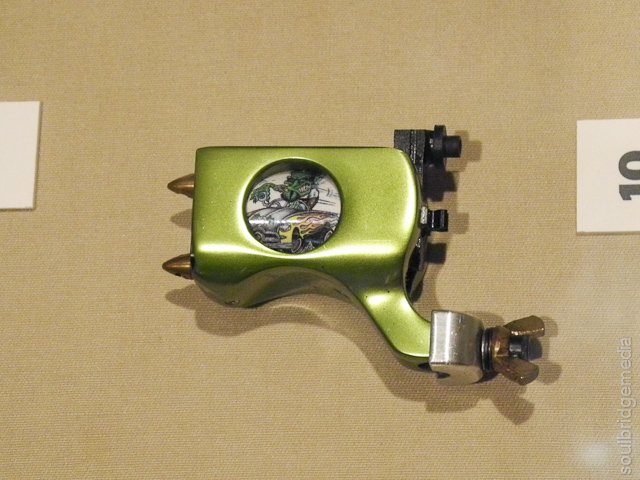
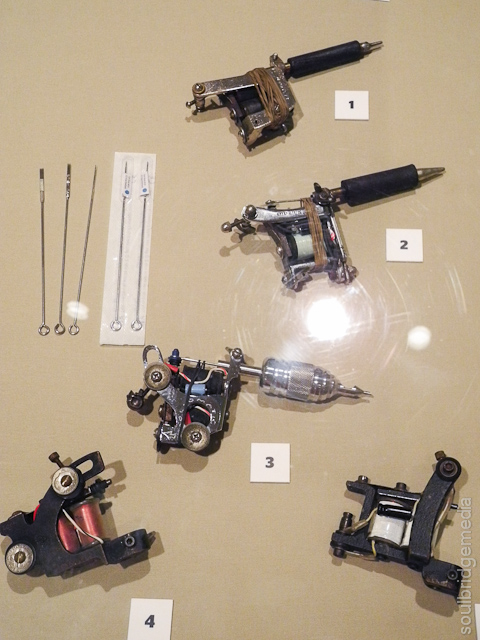
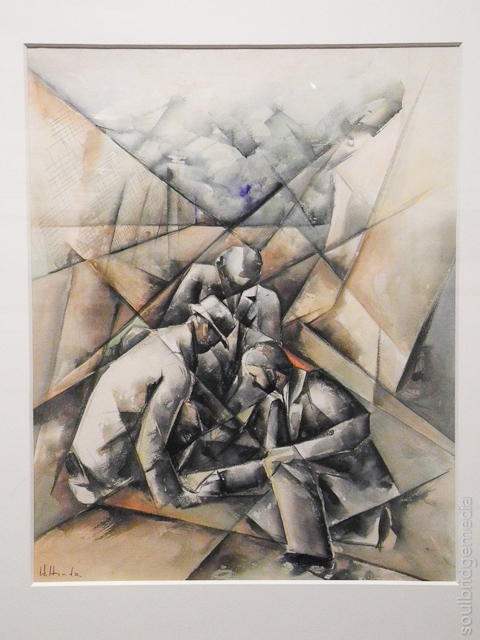
Being the featured exhibit, the displays extended over several buildings covering the history of tattooing from style to application with an abundance of examples and a strong lean towards the locals with traditional tribal, islander and Japanese stylings. There’s also a bunch of traditional artwork, vintage designs and equipment on display.
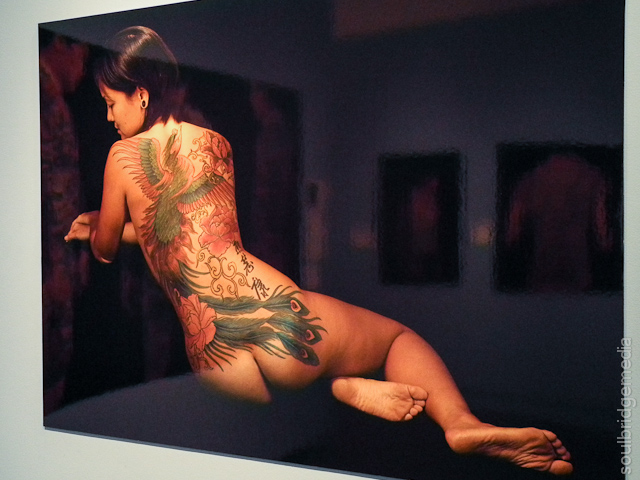
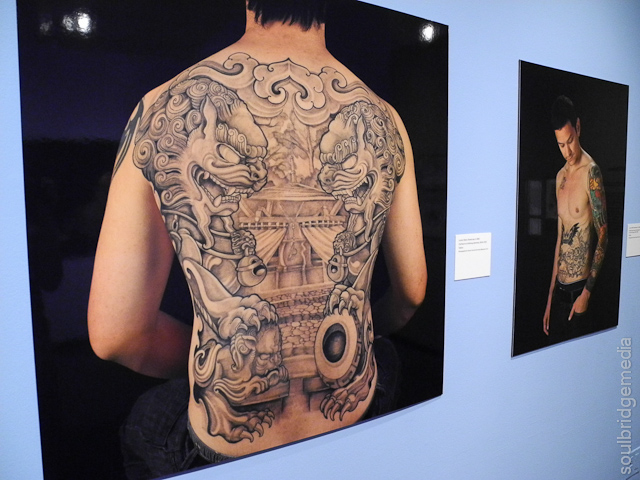
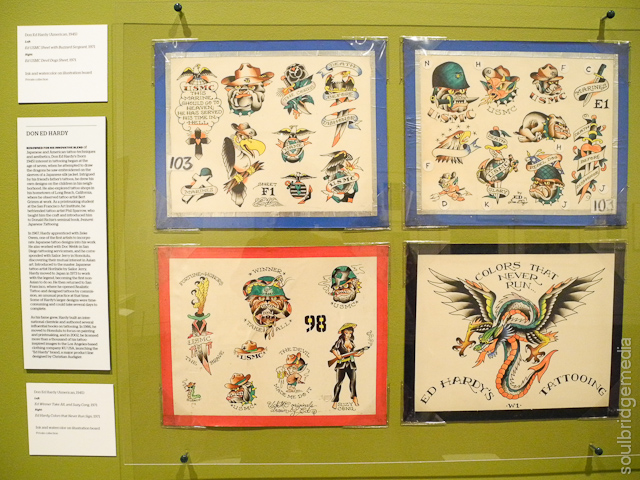
As much as douche bags acros the globe have tainted his name by sporting his gaudish and over the top print designs, Ed Hardy was a pioneer in the tattooing world and has a whole section, along with the official event logo dedicated to him.
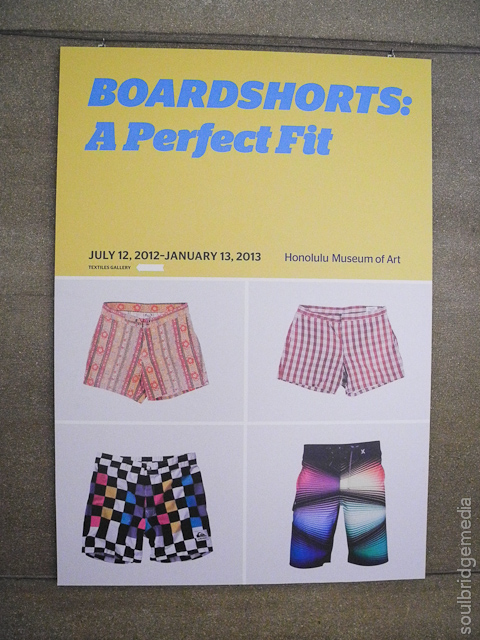
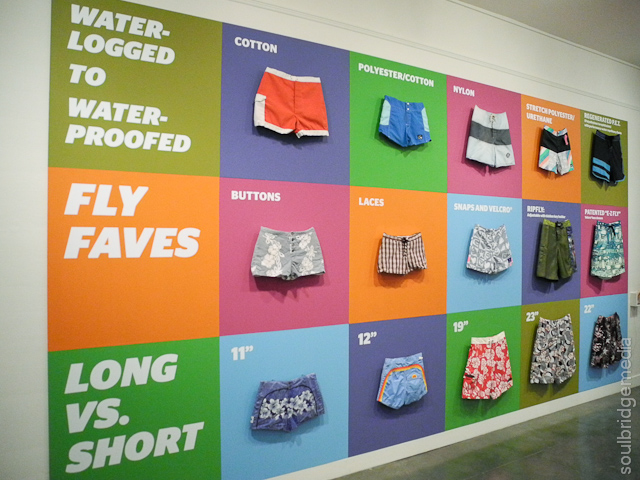
Boardshorts: A Perfect Fit – The history of boardshorts
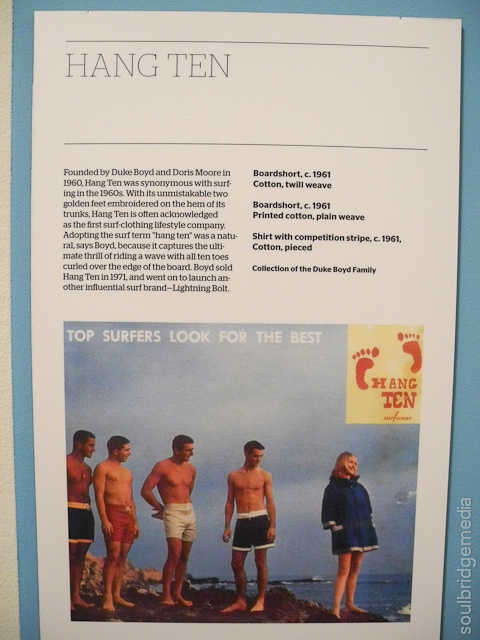
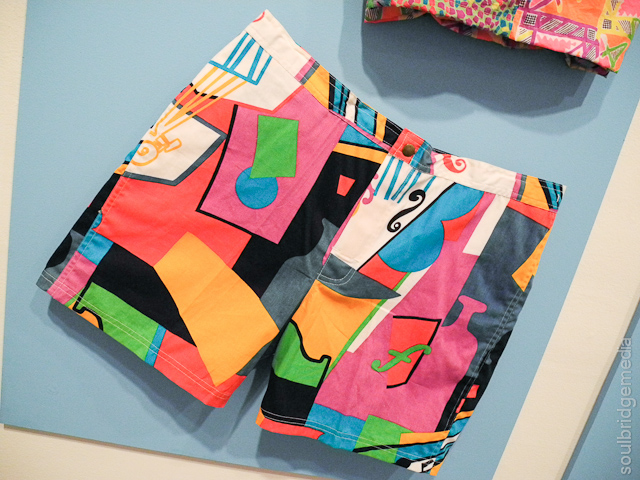
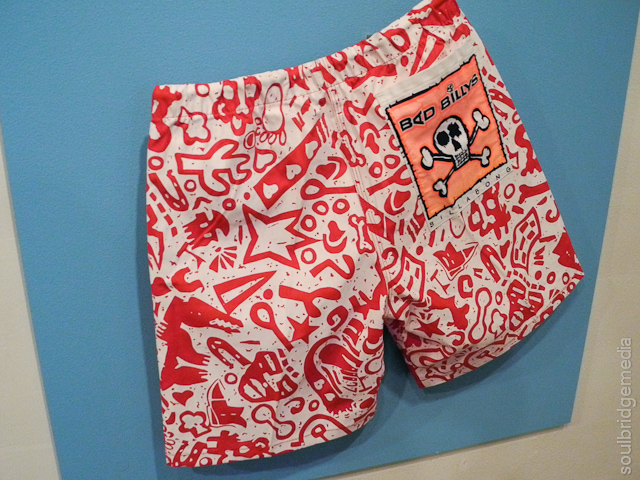
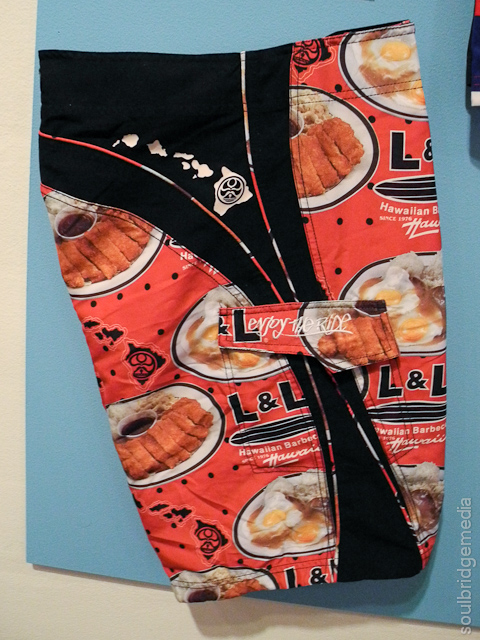
This small novel exhibit in a dedicated room was a little light in content but it did well in focusing on the major style changes and brands of everyone’s favourite non offensive swimming attire from its humble beginnings as short shorts to the quick dry knee length velcro’d numbers that we have today. You might even spot a couple pairs you used to own!
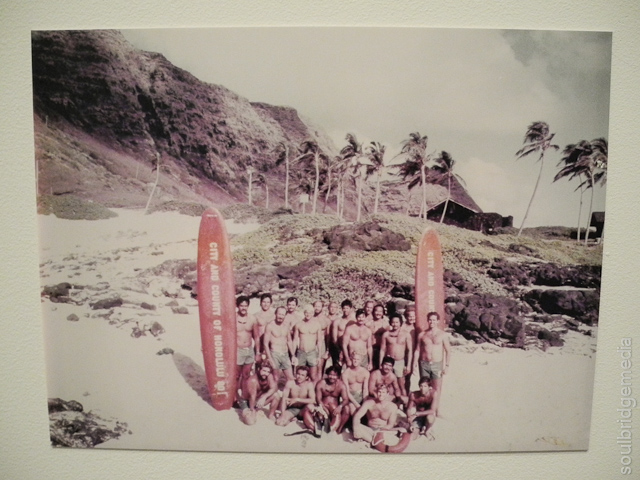
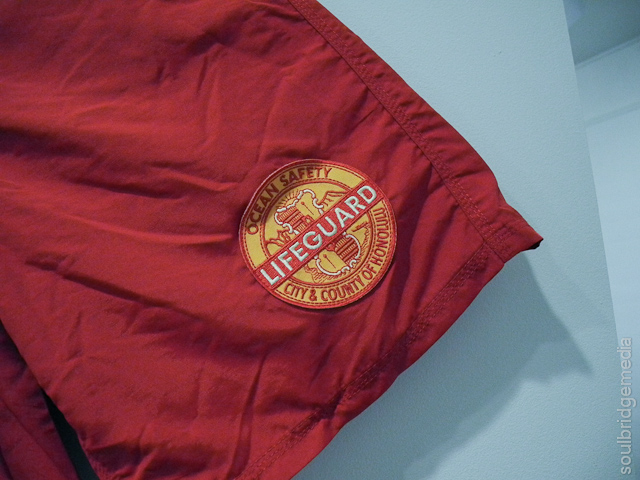
There was also some local history on life saving and the Baywatch styled outfits that came with the job and champion surfers contributions with their boards and their actual boardies on display.


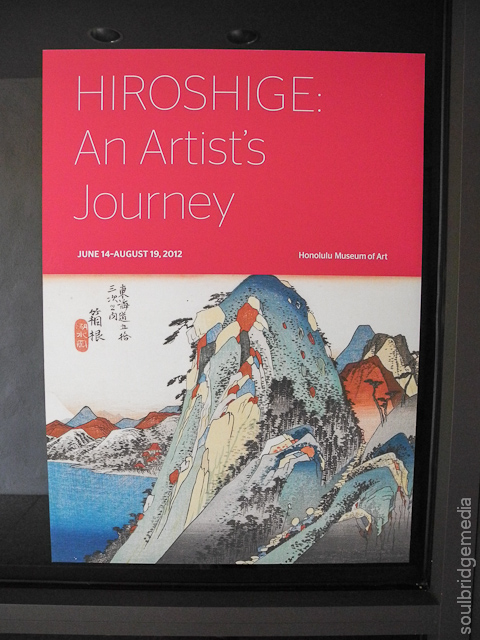
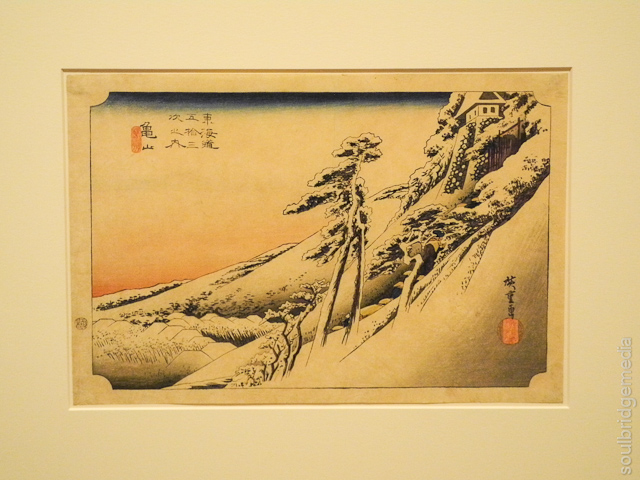
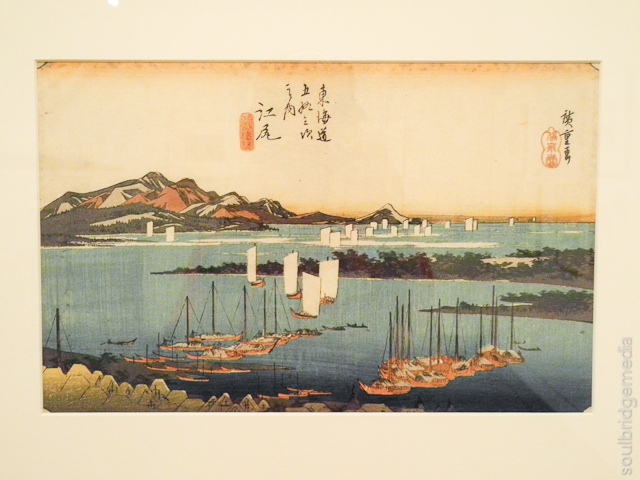
Also during our visit, the museum was featuring a section dedicated to Japanese traditional artist, Hiroshige. The artist responsible for some of Japans most well known images this side of The Great Wave.
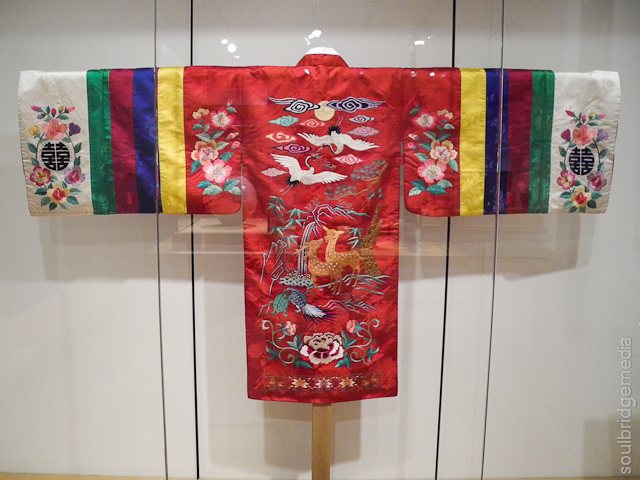
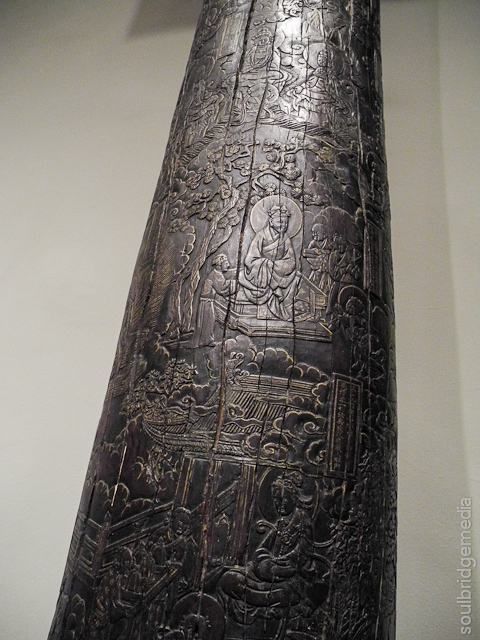
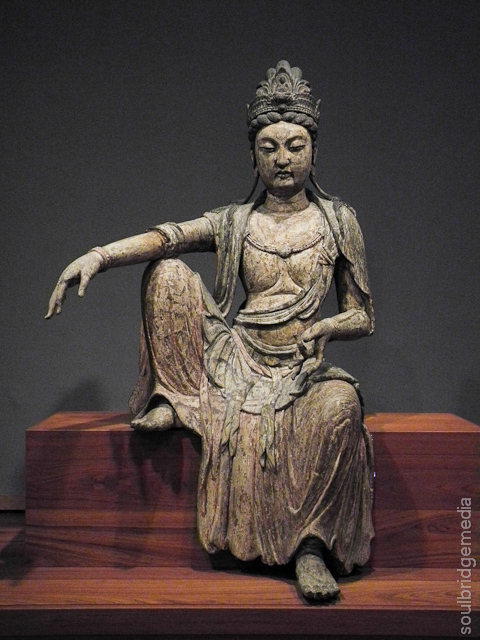
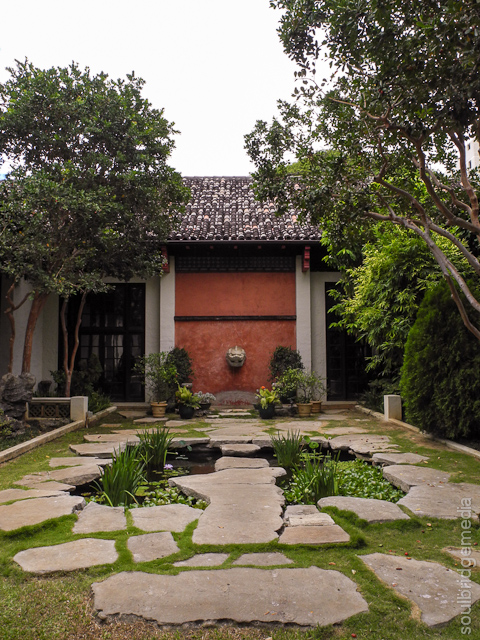
The rest of the museum is divided up with mostly Asian history and artifacts. Some of the carvings and sculptures are extremely detailed. The mind boggles at the time it would have taken to construct such complex pieces with only primitive tools!
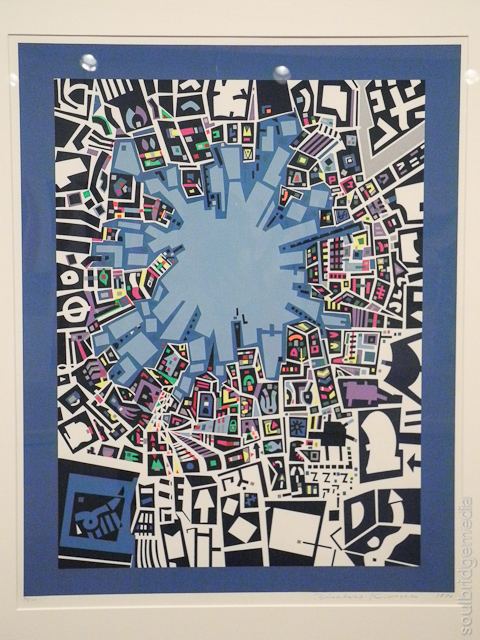
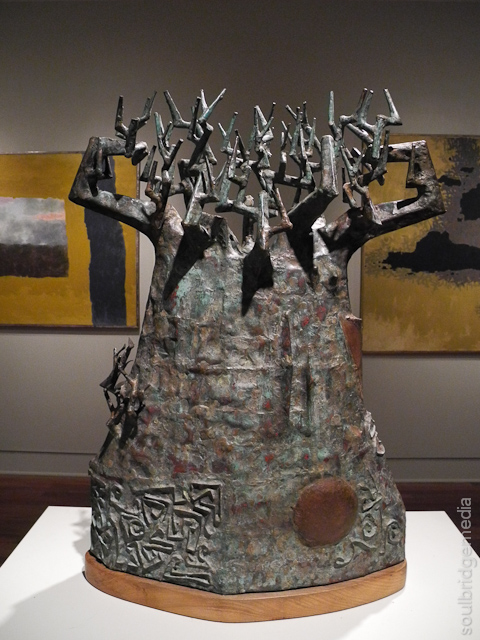
Modern conceptual art also gets its chance to shine along with local paintings of volcanoes, even the courtyards through out the grounds are individually landscaped and decorated to a specific theme.
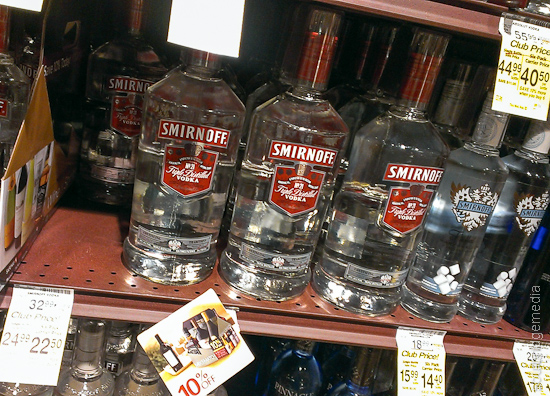
Travel Tip: There’s not much else in this area for sight seeing but there is a Safeway supermarket which is open 24 hours. Definitely the place to stop in if your hotel room has a kitchenette, just remember most portion sizes range from “bulk” to “giant”! Though it does have its perks, a 1.5L bottle of vodka will set you back only $25US! (even less if you’re part of the members shopping).
Check out the full gallery of photos with the links below
Tattoo Honolulu 2013 exhibit
Boardshorts: A Perfect Fit – History of Boardshorts exhibit 2013
Honolulu Museum of Art
Hawaii 2012 part #1 – Arrival
Hawaii 2012 part #2 – Waikiki
Hawaii 2012 part #3 – Honolulu shopping – Part A
Hawaii 2012 part #4 – The Big Island – Volcano tour
Hawaii 2012 part #5 – Shopping Honolulu – part B
Hawaii 2012 part #6 – Tattoo Honolulu / Boardshorts: A Perfect Fit art exhibits
Hawaii 2012 part #7 – Pearl City area
Hawaii 2012 part #8 – Swap meets and Made in Hawaii festival
Hawaii 2012 part #9 – Cook offs and Car shows
Hawaii 2012 part #10 – North shore
Hawaii 2012 part #11 – Windward shore and Sealife Park
Hawaii 2012 part #12 – Chief’s Luau at Sealife Park
Hawaii 2012 part #13 – South shore – Diamondhead crater, Hanauma bay
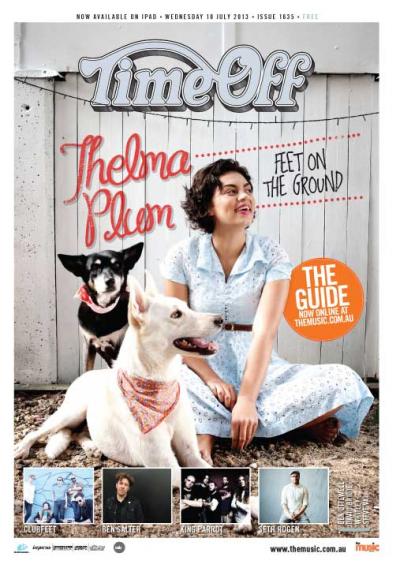
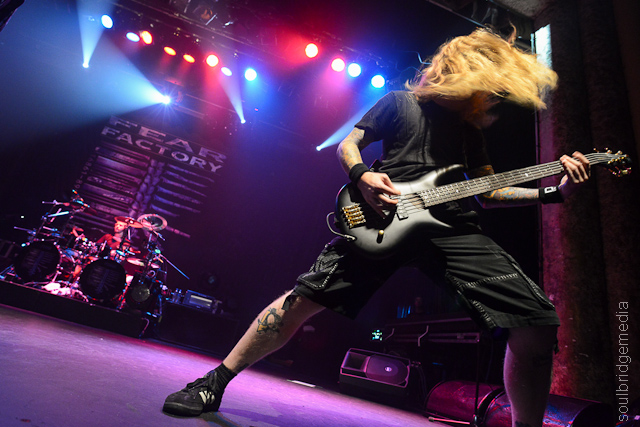
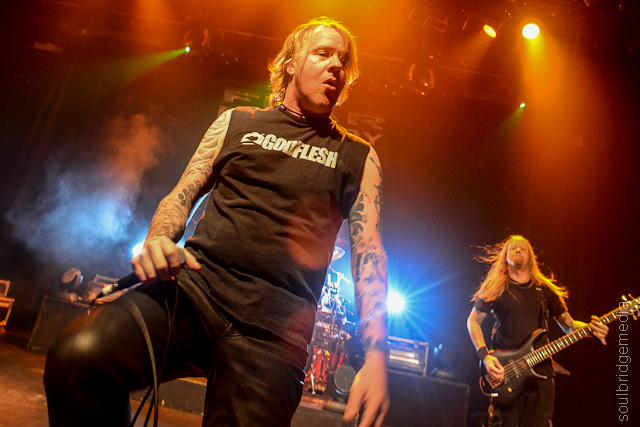
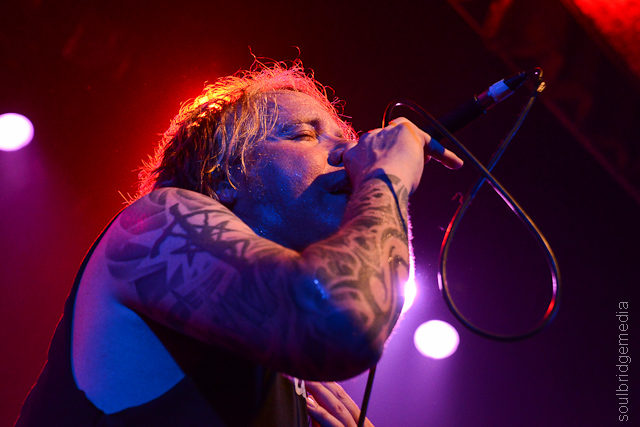
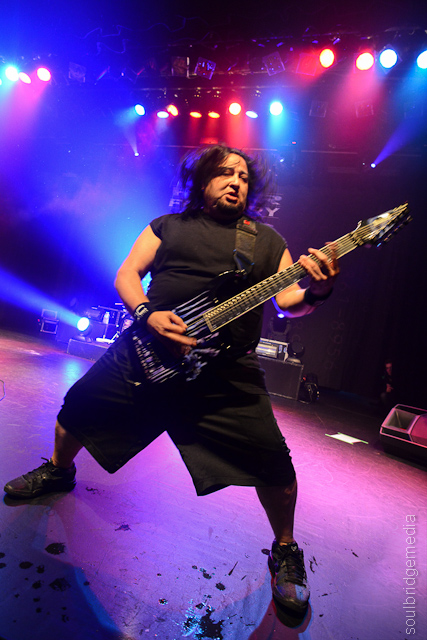
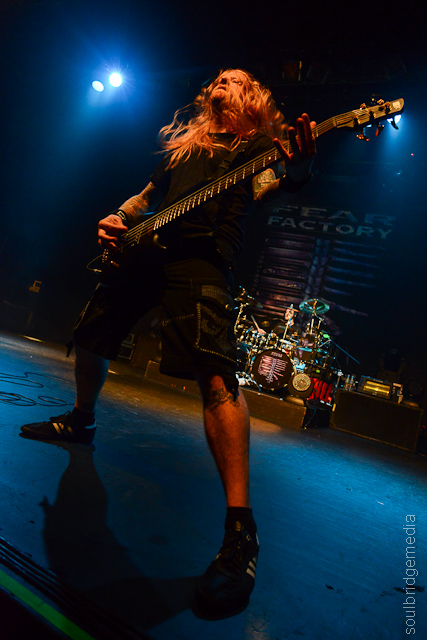
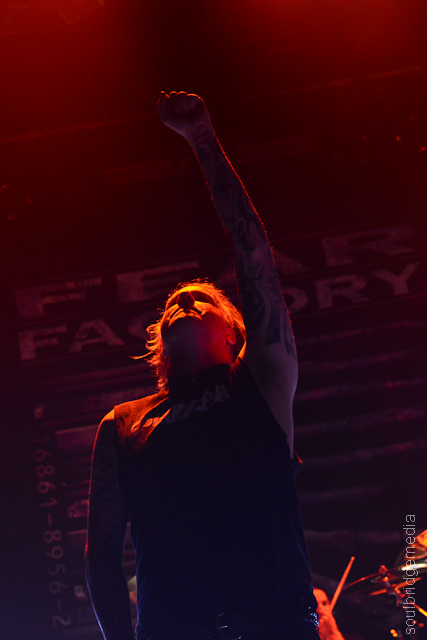
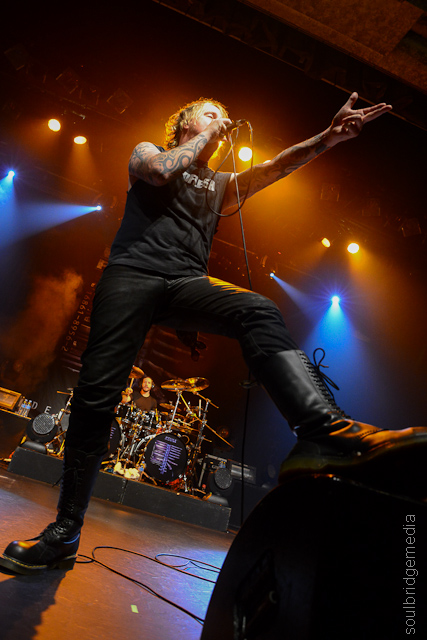
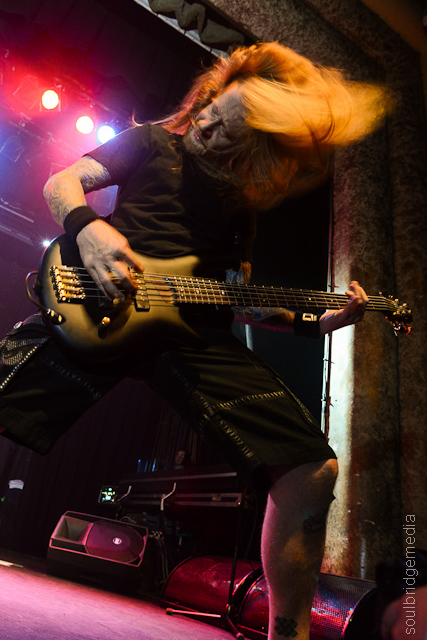
We’ve got a real case of Beauty and the Beasts this week with super songstress Bec Laughton gracing our shoot for Time Off Magazine‘s – “The Guide” section cover and the growling beasts are in the form of some live gig coverage with Fear Factory who performed their Demanufacture album in its chainsawing entirity.
Read about them both in this week’s issue #1635.
Get it FREE from all the usual street press outlets or read current and back issues online @ Time Off magazine – Brisbane
More Fear Factory @ The Tivoli photos below..


Award winning folksters, Miss Elm swander in for our Time Off Magazine – “The Guide” section cover shoot photo this week.
Check them out in this week’s issue #1634.
Get it FREE from all the usual street press outlets or read current and back issues online @ Time Off magazine – Brisbane

Ward Warehouse map
The Ward Warehouse/Center
Well just as I was about to write this blog I realised I don’t actually have any photos of these next couple shopping stops! A picture is worth a thousands words but not wanting to bore you with a novel of compensation, I’ll cut to the chase and keep this one nice and short.
A (big) block away from the Ala Moana Shopping Center along Ala Moana Blvd is The Ward Warehouse/Center. It boasts quite a selection of stores across a large area (more so, a conglomeration of a few smaller shopping centers) with single level open air and covered sections but the whole time I couldn’t help but to think this -was- the place to be before the Ala Moana Shopping Center came along. It just has that poorer cousin/ghost town feel. None the less, if you got the time its worthy of a look through.
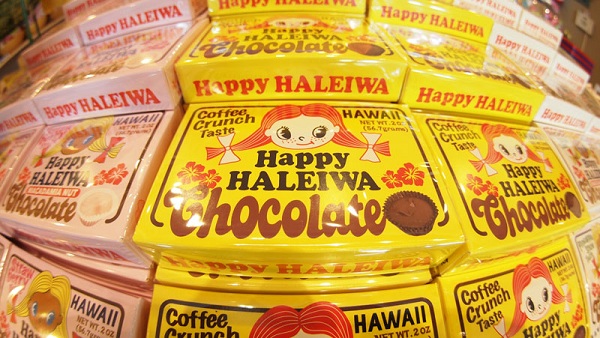
Image courtesy of Happy Haleiwa
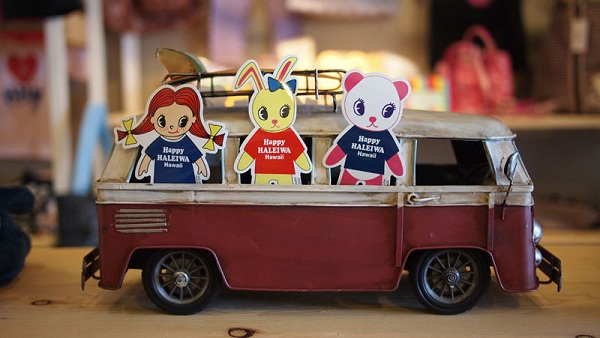
Image courtesy of Happy Haleiwa
Big brand names like Quicksilver, T&C Surf (yep, still alive and kicking over there!), Sports Authority, Famous Footwear and Office Depot are there along with a cinema complex. Happy Haleiwa are there for a selection of kawaii related clothing and gift items. Other collectibles, toys, hobby bits and comics are catered for by Other Realms.
If you managed to get addicted to the Honolulu Cookie Company cookies, breathe a sigh of relief, they have a store here too for that sweet shortbread fix.
Kalihi
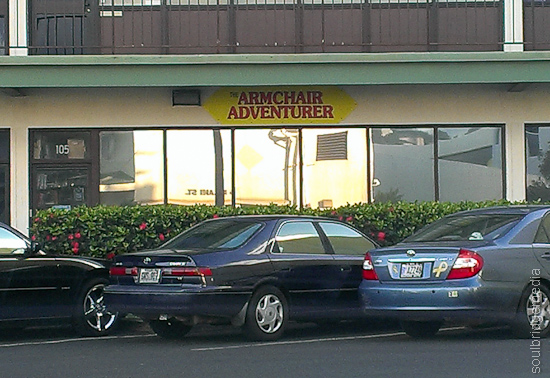
A short drive north on the North Nimitz Hwy is Best Buy, prepare to keel over if you’re looking at a price on an Ethernet cable! Heart attacks aside, the place that sparked our interest here is Armchair Adventurer, sad but fitting name for hobbyists and game players everywhere. Rather unassuming on the outside with its mirrored glass, the store door opens (barely) to pancake rock stack like formations or figures and model kits. Shelves are crammed in a rough order but it seems new stock just ends up piled in front of it. Most of the model kits were military related but there were still a good selection of cars and fictional vehicles/space craft. There’s a corner of plush toys and designer collectibles but the real focus seemed to be on War Hammer and Dungeons and Dragons style games with a whole (clear)area and table set aside for it. (There’s a note on the website saying they are doing a big tidy up and moving some of the towering law suits and expanding into previously unused space)
Speaking of board/card games, if this is your cup of tea, it wouldn’t hurt for you to drop into nearby Toy Lynx in the Dole Cannery Shopping center. Get there at the right time and you’ll be immersed in one of their regular meet ups. They also have a small selection of Kidrobot and similar collectibles.
Lastly, across the road from the Armchair Adventurer is UIC outlet, one of the few places in Hawaii that stocks a decent selection of Dickies gear. It definitely has a thrift store feel, I’m certain I’ve been in the exact same store but it has “Lifeline” on the sign at the front but thanks to their range its worth a look if you’re after pants or a jacket (or scrubs). The prices aren’t too bad, cheaper in the states of course though. There’s also a small range of New Era knock offs and gawdish plastic “bling” if that tickles your fancy…
We also managed to leg it up to the Premium Outlets at Waikele this same day so keep an eye out for that in the Pearl City shopping review.
Next up, we head to the Honolulu Museum of Arts for the “Tattoo Honolulu” and The History of Board Shorts art exhibits.
Hawaii 2012 part #1 – Arrival
Hawaii 2012 part #2 – Waikiki
Hawaii 2012 part #3 – Honolulu shopping – Part A
Hawaii 2012 part #4 – The Big Island – Volcano tour
Hawaii 2012 part #5 – Shopping Honolulu – part B
Hawaii 2012 part #6 – Tattoo Honolulu / Boardshorts: A Perfect Fit art exhibits
Hawaii 2012 part #7 – Pearl City area
Hawaii 2012 part #8 – Swap meets and Made in Hawaii festival
Hawaii 2012 part #9 – Cook offs and Car shows
Hawaii 2012 part #10 – North shore
Hawaii 2012 part #11 – Windward shore and Sealife Park
Hawaii 2012 part #12 – Chief’s Luau at Sealife Park
Hawaii 2012 part #13 – South shore – Diamondhead crater, Hanauma bay
