
G-Shock cleaning basics
Not so long ago we did a write up for the G-Street gang with a run down of basic cleaning, like any publication they did their own edit so in case you missed it, here’s the “directors cut” in its entirety.
G Shock Cleaning part 1 – Basic cleaning
There are 3 basic schools of thought when it comes to how G’s are treated. 1. Keep ‘em clean 2. Treat ‘em mean 3. Stay fly and multiply.
For team number 2, G’s are bought and worn for their intended life purpose, to be beaten like a rented mule. Dirt, grime and battle scars are worn proudly like the ears of their slain on a necklace, Universal Solider style… much to the dismay of others who have to handle the watch with tongs if its left on a bench.
Those in the number 3 camp, and lets face it, its who we are or at least are aspiring to, have enough G’s in our collections to disperse a week’s worth of dirt over 7 watches (or more) so it can take a lot longer for them to accumulate the same amount of wear, but it will happen eventually. So for the benefit of longevity, comfort of wear and housemates/GF’s/wives everywhere a bit of regular cleaning goes a long way.
>>These tips are by no means the be all and end all, these are what have worked for me over the years, however with the variety of models, textures and finishes, your mileage may vary.
Why clean?
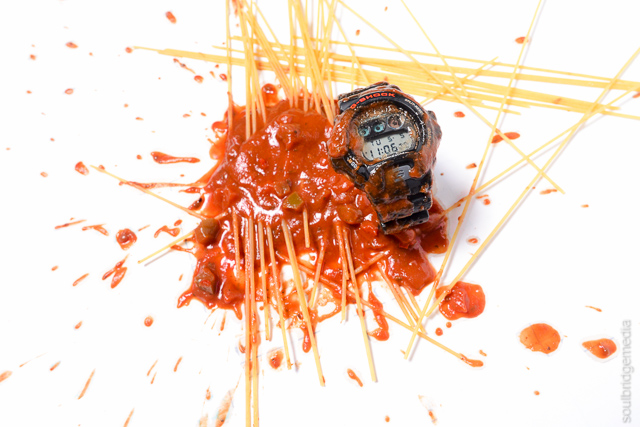
Dirt and grime attracts more dirt and grime and over time the salts and acidity from sweat can deteriorate the resin and affect the finish. Sweat and water can also collect in these areas, which if near small metal parts like screws, pins or pin springs, can rust or seize them. Comfort is the other main reason, coarse particles or other residue can lead to skin irritations. While much rarer, some functionality can also be lost like the ease of pressing buttons or the ability to charge a solar model.
Know thy enemy – Common culprits:
A1. Scuffs and markings – Shows as darker or shinier mark, common when bumped on hard surfaces or grazed during regular wear. Appears mostly on corners and edges of non-glossy resin.
A2. Dirt and grime – usually a combination of dust or dirt with sweat oils and water to get a lovely toe jam paste which forms around pins, casebacks, buckles, raise or embossed sections, where the band meets the case on the underside etc. Grime can also appear as a discoloured coating with an uneven texture. (see fig 1a, 1b)
A3. Salt/sweat/chlorine residue – shows up on darker coloured resin as crusty white marks, a bit like a high tide line, you’ve probably seen the same marks on the brim or front of your regularly worn cap. Just like the high tide line, these marks appear where it -was-, not where it –is- so its not uncommon to see them on the top surface of the band and lug area where the band meets the bezel. Can also collect in embossed areas and buckle holes (see fig 2 and 3)
A4. Paint – paint splatter from work or an out of control custom or taking on a wall or door jamb with the G emerging victorious, taking a souvenir with it.
A5. Welding splatter – ok maybe not so common but a special note for those welders out there frivolously melting resin left and right… just go with stainless steel and spare me the heart ache. Please.
(This one goes out to Ben who’s done himself a right mischief, get well soon buddy!)
Actung Baby – Warning
If your resin still looks new, then don’t go gung ho and try to clean it for no good reason. Use passive methods only, running water, light sponging etc. anything abrasive can and will mark the resin, this includes tissues and cotton tips if the right kind of pressure is applied, it may be very light and only visible on certain angles but spare the elbow grease for your beaters. Persist with the least abrasive methods ie. Soap, sponge, warm water, where ever possible.
Clean up your act (for matte resin)
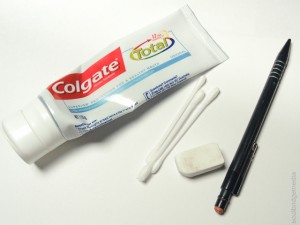
1. Rub one out – Erasers (for A1 above) – This, at best, is a temporary fix with only a medium success rate depending on the scuff but its always worth a try since its simple and non-damaging. Take a regular pencil eraser and rub it on the smoothed or marked spots. Far from a new to old restoration but it will dull some spots and bring back a bit of that out of the box velvety look. For tight spots use the small eraser on top of a Pacer. (see fig 4)
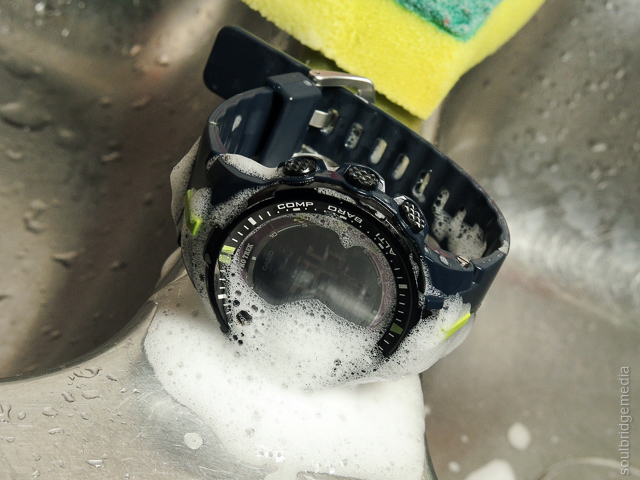
2. At the car wash – Soap, dish detergent (for A2, A3) – This is the quickest and easiest way most will say to keep your G clean. Multitask while in the shower or create a weekly/monthly bath time ritual. Use a soft sponge to lather and lightly scrub stubborn areas. Make sure you rinse and dry it well afterwards, soap/detergent build up isn’t much better than the grime itself. Use a cotton tip to get around edges and into crevices and buckle holes.
3. Mum’s the word (for A2, A3 above) – Mum’s know a thing or two about cleaning so its no surprise some of their go-to’s work as well.
Toothpaste – has a fine abrasive which can help move some stubborn marks with the help of a fine toothbrush also leaves dank straps smelling minty fresh. You can also use it as a polish for restoring shagged crystals (glass on the case). I have not needed to do this yet but there are plenty of folks who champion it.
Vinegar – add a generous splash to a bowl of warm water and wipe/sponge over. Use a cotton tip dipped in it for detailed areas. Rinse thoroughly then give it a soap bath (as above).
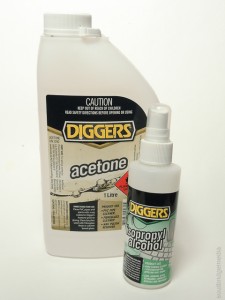
4. Chemical brothers – Isopro and Acetone (for A4 above) – Like taking off your shirt to eat, things are getting serious if you’re breaking out the solvents.
For stubborn salty marks or stains Isopropyl (or Isopro) can help. Its an alcohol based solvent commonly used to clean electronic equipment and whiteboards. You may have come across it in the form of Isocol (green bottle with an alligator). If you had zits at school or got a graze you probably dabbed a bit on it, which burnt like all buggery.
While mostly mild to resin it still has some corrosive properties and can take the finish or many surfaces if you get carried away, so start with a lightly damp (not wet) cotton tip on the underside of the band to test it.
Acetone – basically nail polish remover, will have no problem stripping most oil based paints and clear coats on resin. So take extra care! But if you’re reaching for this its most likely to remove paint, and if you’re painting you’d probably already know how to use it. If not, same as with the Isopro, use very sparingly with a barely damp cotton tip. If it is to remove paint splatter take as much care as possible to very lightly wipe the paint but not the resin. Let the acetone do the work, not the scrubbing action.
For thick dried splatters, try scratching it off with a fingernail or toothpick first, take care not to over to it and have your nail/toothpick skid off and mark the resin. If the paint is still wet, try dabbing it off instead of smearing it.
If however you’re stripping colour or the clear coat for a custom, then go to town with it, just don’t scrub too hard as marks will be left in the resin which will show up after the dye job.
You can also use this method to remove the clear glossy coat from jelly resin to leave a matte finish since the colour is in the resin, not the paint coat.
Some of the cleaning arsenal:
Dem Feels – Glossy and Textured resin
The above is ideally for plain matte resin. Anything with a gloss, satin, textured or printed finish, take extra care and caution. Personally I’d stick with soap and water where ever possible.
If you’re particularly concerned about trying to keep your new resin as pimping as possible, choosing a model with a glossy finish will help repel dirt and grime very well. The trade off however, once the clear coat gets worn down to the base coat it looks rather rubbish and without this protective coating, wear occurs much quicker down to the bare resin. Of course the other trade off is you’ll have to wear glossy resin which could be a tough pill to swallow for some.
Common sense and care
Use it. The above processes are all reasonably straight forward but if you’re in any doubt or get carried away, I nor G-Street can be accountable, but if you think about it, you’ll have a new beater and a reason to buy a new G so that’s not really that bad is it? 😉
Stay tuned for part 2 – Advanced cleaning and resin removal.
—
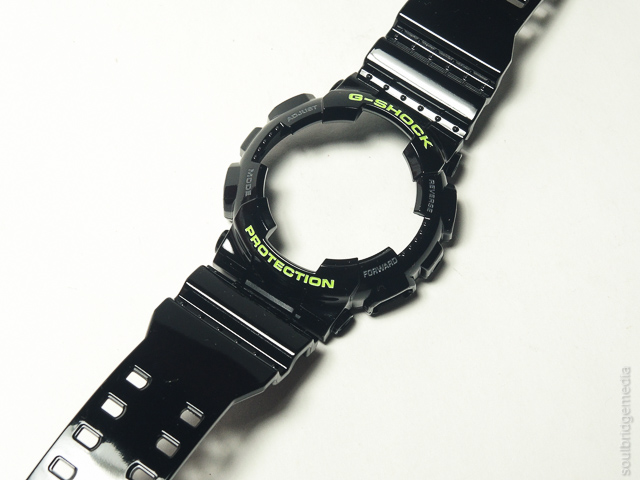
>>Special thanks to Troy for the loan of his PRG3000 Protrek (not that he had a choice since it was already in my possession 😉 ) for this article since I couldn’t find a G dirty enough!
—
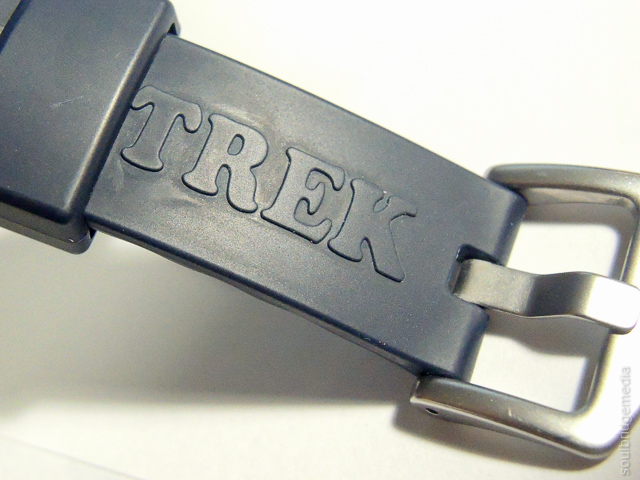
Fig 1 (a). – Grime isn’t always very noticeable and is usually only visible under certain angles. Here you can see a broad coating around the “PR” and localised build up around the raised lettering especially around the “TR”.

Fig 1 (b). – Slightly different angle shows more of the coating
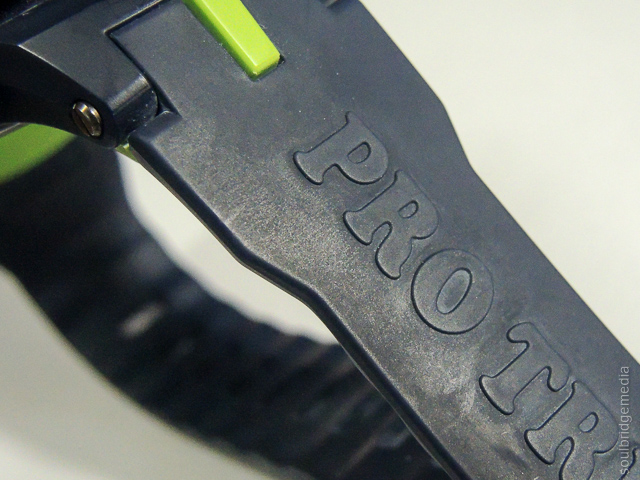
Fig 2. – Sweat salts and the like collecting in the embossed area on the band
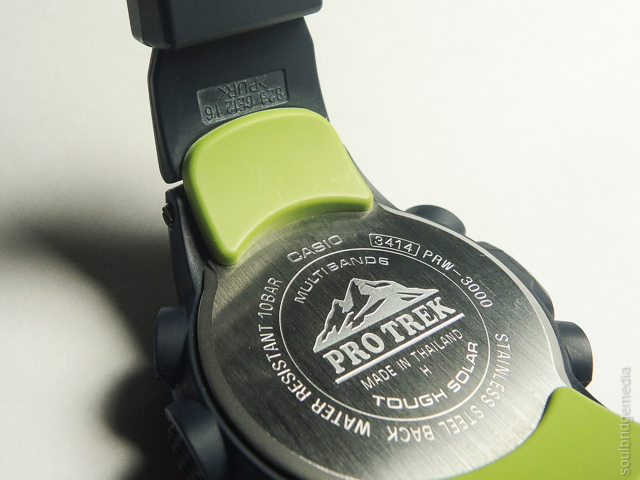
Fig 3. – Sweat salts and the like collecting in the buckle holes
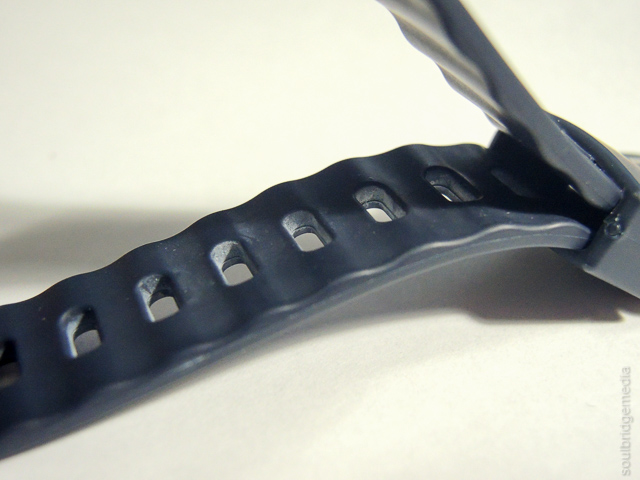
Fig. 4 – Normally for grime its better to use warm soapy water and a sponge but here is an example of the eraser technique, note the visible difference around the K.
If you have any questions about the processes in this article, want to talk about G’s in general or just geek out with some toy talk head on over to The G Collective – a closed group we have created with a couple buddies to do just that (:
Removing and Painting VW badges
This is a bit of a change to my normal posts but hopefully it’ll be just as informative (or at least interesting!)
The net is full of instructions to remove and paint (or vinyl) your VW badges but I found a couple key points were brushed over every time, namely the removal of the front badge where instructions were simply “just turn it a bit” or “turn it about x amount”. It seemed there was quite a polarisation between people that could “just” pop it off and those that had all kinds of trouble to the point of having to remove their grille first, most falling into the latter in the hope to spare doing damage to the badge or grille.
So just like a onesie party or writing a novel about a futuristic amusement park where dinosaurs are brought to life through advanced cloning techniques and calling it “Billy and the Cloneasaurus”, he’s my version of events…
This is specifically for a current model MK6 VW Jetta but I believe it will also apply to Golfs and several previous generations.
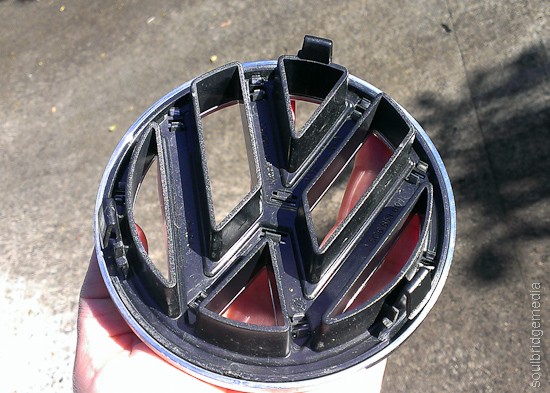
Removing the front badge
The badge is attached to a deep mounting bracket which is held on by 3 clips in a triangle shape. The one at the top can be access from behind near the bonnet latch with a long thin flat head screwdriver.
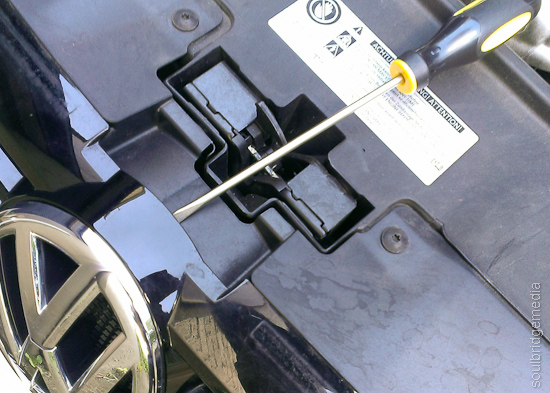
Come in from behind… errr..
First “just” try turning it to the left, you never know, you could be one of the lucky ones, if you are, you only need to turn it till the right side of the V on the badge is vertical. It is quite likely that you will over shoot the mark if you put a bit of force behind it so just dial it back to that position then pull the badge forward and off.
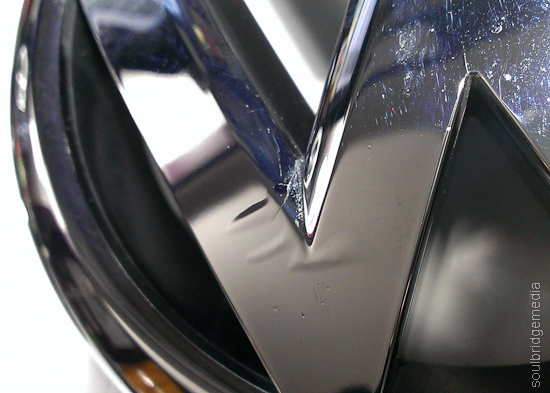
If you’ve put two hands on it and given it a “carn you bas-tard!” heave-ho and it hasn’t budged, itll need the extra persuasion. First check the emblem itself to see if there’s any damage or imperfections on it. If there is, you might want to go a bit gentle on it. As seen in the photos, my badge has a slight bubbling in the chrome and a small crack, both acerbated after a few big cranks to get it free.
Next, lightly (or not so lightly) jiggle the housing left and right and back and forth. Grab that screwdriver and press the tabs towards the center while continuing to turn and twist. There might be a couple creaks of protest but after a little bit you will notice the housing will feel slightly looser in places.
Take the screwdriver and line it up with the right hand side of the top tab and push while turning the housing with your other hand. You may need a bit of force so watch you don’t skin your knuckles or puncture part of the car or yourself with a wayward screwdriver.
As above, you may over shoot the “open” notch, if so, just dial it back and pull it out.
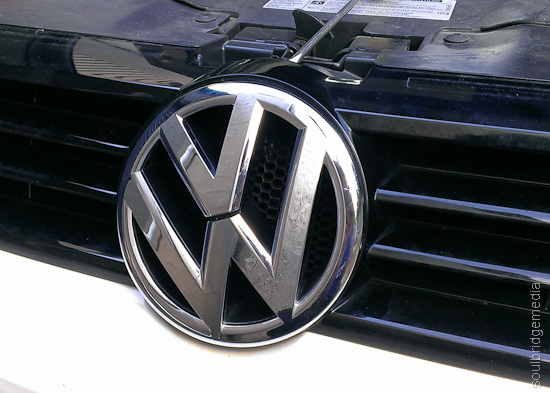
Right side of the V is in the 12 oclock position

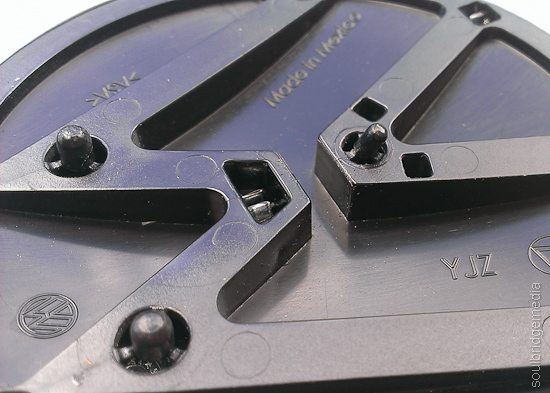
The housing, note the 3 slots for the clips
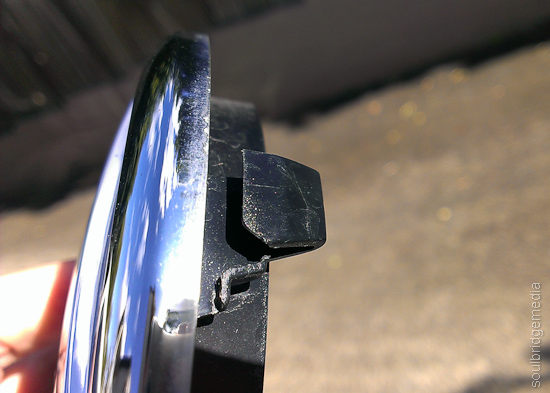
The bane of your existence, note the notch which locks it into place.
Prep and Painting
(I didnt bother taking any photos of the badges sitting on the bench covered in paint, there’s plenty of those online)
Like painting anything, if your base surface isn’t prepped right then you’re not going to have a good time. Any blemishes have to be smoothed out otherwise they’ll be just as visible after painting. I used 400 grit to smooth down the bumps, crack and a couple little dibbits then scuffed up the whole thing (housing and emblem) with 800 grit. I’m painting it black so I didn’t bother removing the emblem from the housing (see rear badge removal for tips below on separating the emblem).
Warts n all
Hit it with a primer, then your chosen colour. Remember with painting anything, don’t get impatient, follow the instructions on the can and give it plenty of time to dry. Sand the first coat as well if you have to.
(Also don’t use old paint (I’m talking close to 10 years), it’ll give a nice marbling effect which you’ll have to sand back and redo… just saying :-\ )
Throw on a couple coats of clear for extra protection, especially since its going to be on the front of the car. If you want a matte finish, use a matte clear. If you don’t have matte you could use a gloss with a 2000 grit sanding over the top to take the sheen off but only if you have a black belt in sanding.
Refitting the badge is as simple as a flick of the wrist and it should just click into place. You may notice the locking notches are a little rounded after removal, this makes it heaps easier to remove for future changes of mind but also for grubby little mitts so a dab of hot glue or some strategically placed two sided tape.

Front – After
Removing the rear badge
This, by the general consensus is a million times easier, and it was. The recommended old credit card seems to do the trick no problems too. The double sided tape holding it on is rubbery and sticky so you could probably even fashion a jagged “blade” from a juice bottle to give more cutting power, otherwise the card will work fine.
Find a spot around the edge that isn’t sitting as flush, you may need to get your fingernails under it to kick it off. If no where really works, try dead center up the top, there’s a small notch in the housing on the underside that might be just enough for the card to slide in. You could also try some dental floss if you get really stuck.
Work your way around to the soft spots, gently lifting the badge as you go. Take care not to scuff your paint or bend the badge up too far, let the card do the work of separating the badge from the car.

When you’re about half way you’ll notice there’s 3 little stems sticking out, these are used to align the badge for mounting. The problem is they’re built on to a very weak frame so in the course of removing, painting and refitting you will no doubt, bend or break at least one of them off. Not the end of the world but do your best to preserve these, it’ll be a godsend when it comes to refitting.
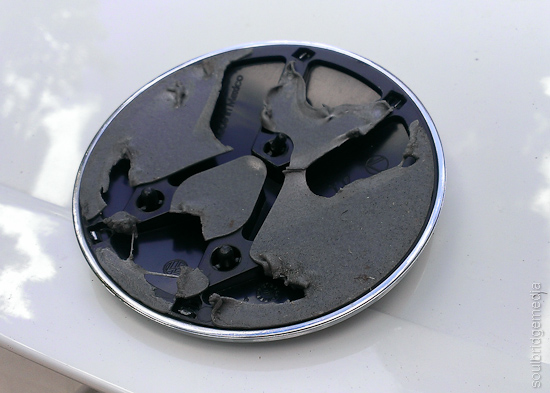
Super sticky goo
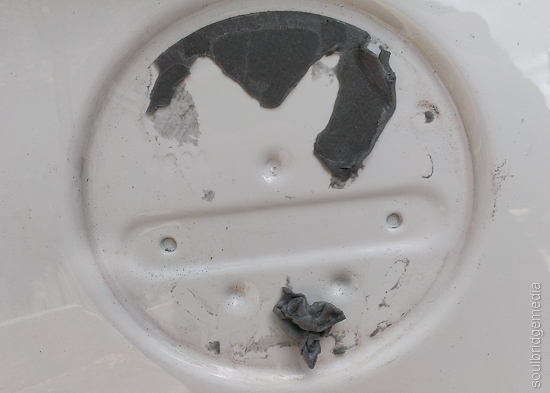
3 dibbits for mounting
Bom-bom. Look how thin those supports are!
I gave them a bit of strength straight away with a couple dabs of glue.
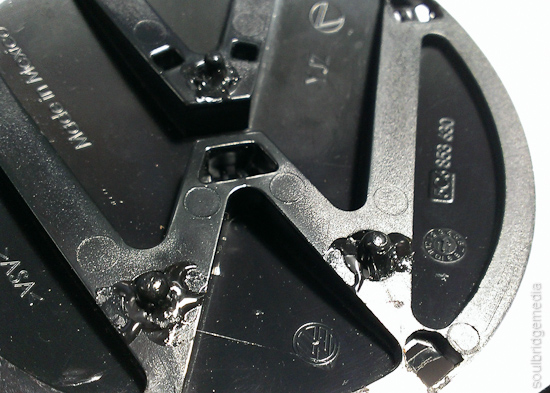
Looks messy but the glue I used shrinks as it dries
Separating the emblem from the housing
Most sites suggest using a screwdriver or other tool to push the tabs through from the back, I found this is pretty much impossible to do without damaging the tabs or slots in some way. The chrome plating is strong but brittle so it tends to crumble or dent with only the smallest amount of pressure so I figured the best way is to not touch them at all, instead just pushing it out with my fingers.
Put your thumb on the front of the housing (black part) and your fingers on the very edge of the underside of the emblem (chrome part). Push with your thumb and pull/peel with your fingers, kind of like opening a can of tuna or baked beans with a pull tab. Work your way around the outside, these are the easier ones. For the center ones you may need to change your grip using more of a 3 finger pinching motion, pulling with your finger tips and pushing with your nails on the same fingers. Pulling from the outside while the center is still attached may bend or crack the emblem where the letters meet the circle so be careful. A bit of wiggling and changing of angles should pop it off eventually.
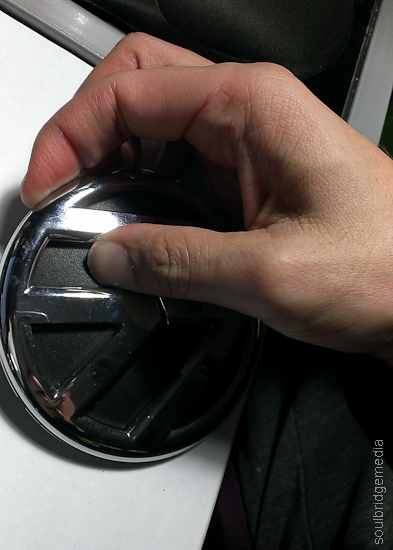
Use two hands and go slow…
One problem I came across is one of the tabs was glued/melted to the housing, possibly for extra security to stop it from falling off. Thanks to the brittleness and thinness of the tab, you can keep going with the “pincher” and it will eventually snap, if you don’t think its going to give, leave it to last so there’s enough room to get a blade in to cut it. Cut the broken tab off to save it from getting in the way when you’re refitting.
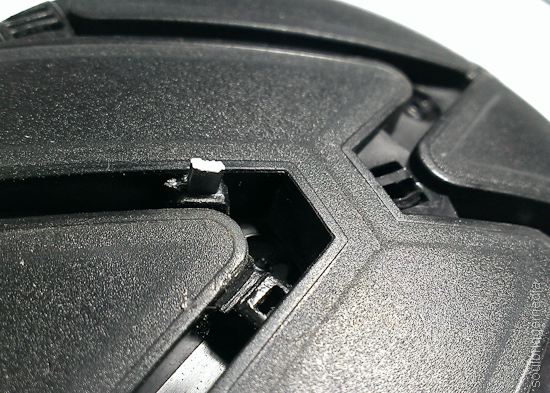
Which one is the anchor on yours? Its a gamble!
Removing emblem from the front housing would be very similar. Even though I didn’t try it, I think you should be able to use a similar method to removing it from the front badge, prying from the front instead of pushing from the back. The problem here is there’s nothing to push on from the front so you might have to try a couple spots around the edge first with the ol credit card, then once you have a big enough gap use something like a disposable chopstick to get in between the two layers and pop the tabs out.
Prep and painting is the same as describe above, but if you are matching the housing to the colour of your car take note that there is some texturing to it so you’ll need some extra sanding and a few extra coats of paint to give it a smooth panel finish. I found the paint still wasn’t very glossy after this (fine in the grooves where the emblem sat tho!) so I topped it off with some clear gloss to better match the car’s body.
Fitting rear badge
Standard double sided tape (the foam stuff might be a bit too thick and may make it easier for thieving hands) from an automotive store should do the trick ($5 for a small roll from Autobarn). Take a hobby knife to the edges to give it a good fit. Before peeling off the tape, give the area a good wipe down to make sure it is free from dirt and old tape. Also check to make sure the areas you have taped are making contact with the body, you may need to stack the tape to give it more height. If you kept the mounting stems itll be a simple matter of lining them up and pressing firmly.
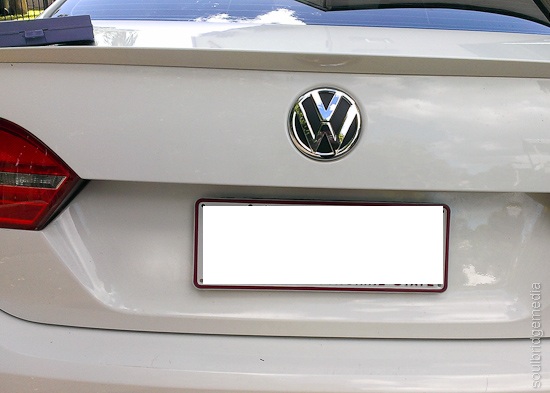
Back – Before
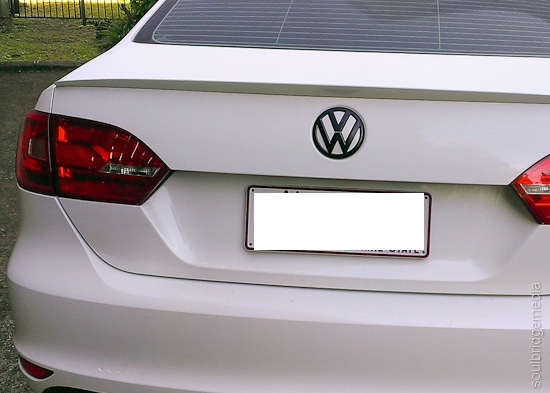
Back – After

Side note: I lazily looked up my paint code online instead of in the manual and found VW’s “candy white” colour code LB9A. Giving this code to the paint man he could only find this colour going up to 2004 but nothing under the model search for a current gen white (weird, I know) so I figured it was the right one. It wasn’t till I got back to the car and threw the stuff I bought into the passenger side that I noticed it was printed on a label on the door sill (derrp) but this was listed as B4B4. I did a quick search but couldn’t find anything about the difference but found plenty of places selling the one “candy white” with both codes. After painting the backing I walked around the car with it and couldn’t really tell the difference on most parts of the car (in fading sunlight). If anything, the small discrepancies would be of a slight fade on the original paint. After fitting it seems to have blended pretty well so I would have to say the codes, to my eye, are interchangeable but please correct me if I’m wrong!
Hope this post helps to clear things up for some people and give a bit of confidence to those who weren’t sure before hand. Happy DIY customising!
ps. I’ll get some proper photos when its clean… and I find some time!
