
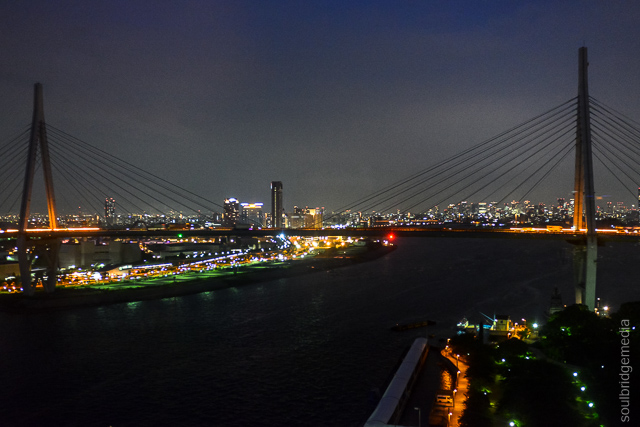
The Osaka Aquarium is located on Osaka bay and is near Cosmo Square, the Tempozan Ferris wheel and a short ferry ride from Universal Studios so you could easily spend days in this area, or just one well planned one. Ok, maybe not all of them, we left off Cosmo square :p
Being a major attraction, getting there from just about anywhere is quite simple, take the Chuo line and let the signage guide you. We caught the Captain Line ferry (takes about 15min) from Universal Studios which is almost door to door, handy!

The aquarium costs about $25AU and is open till 8pm (times may vary) making it a good last stop if you have other things to do earlier in the day. In fact, later in the afternoon seemed to be rather quiet, no lining up for anything and only the odd shuffle around a couple slow moving tour groups.
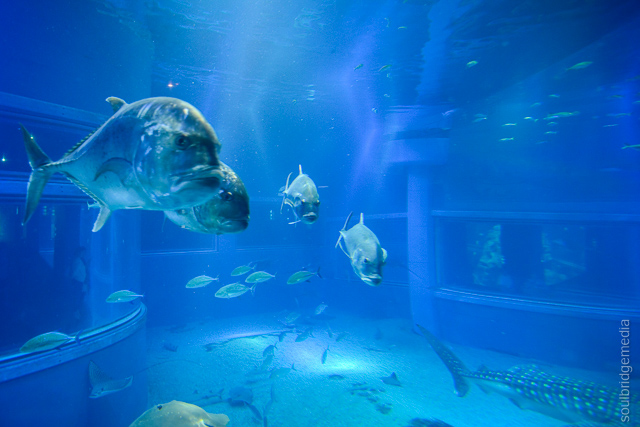

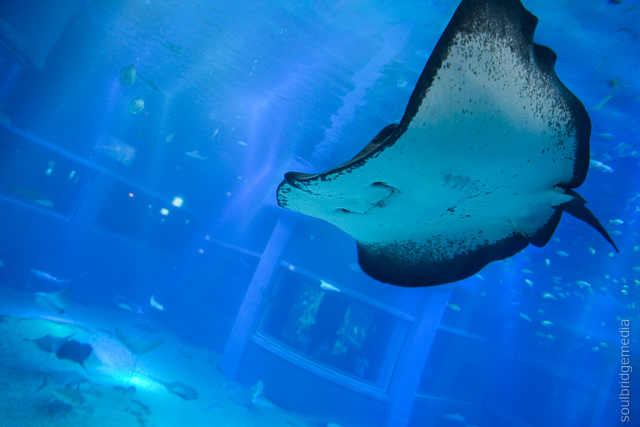

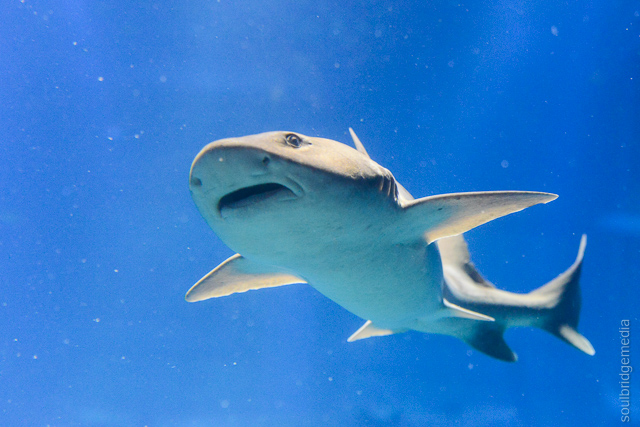

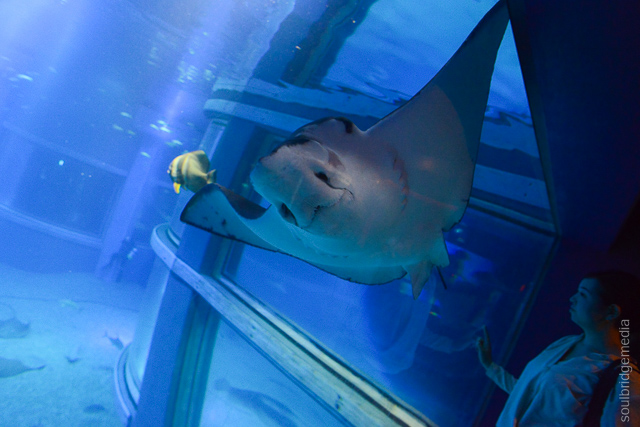
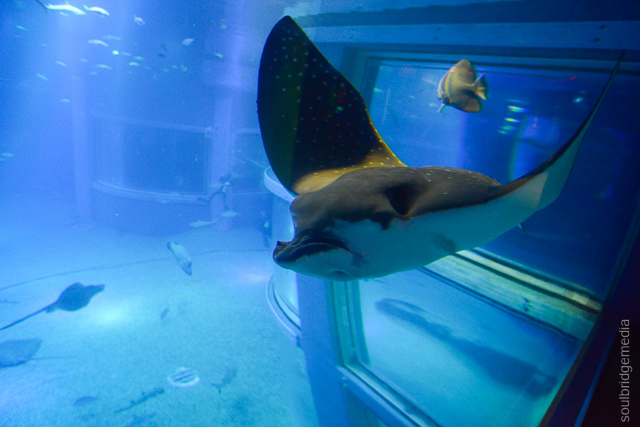

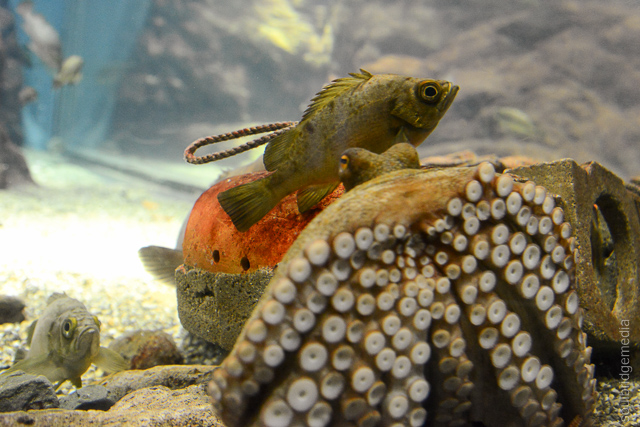
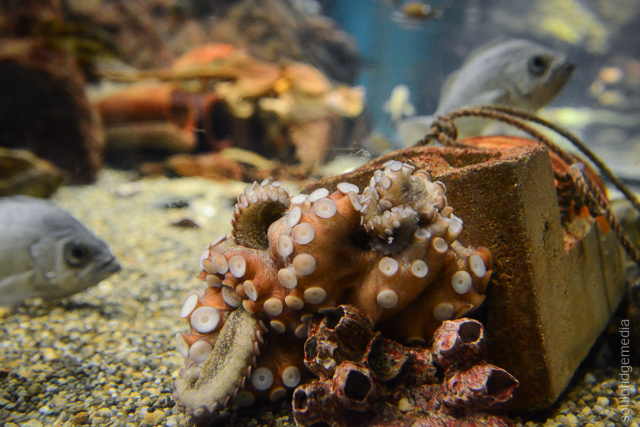
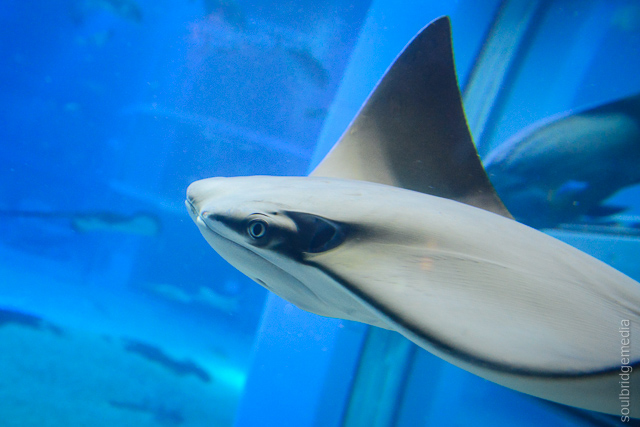
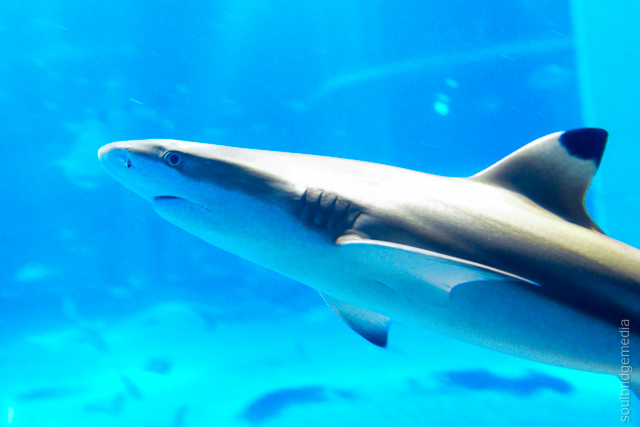
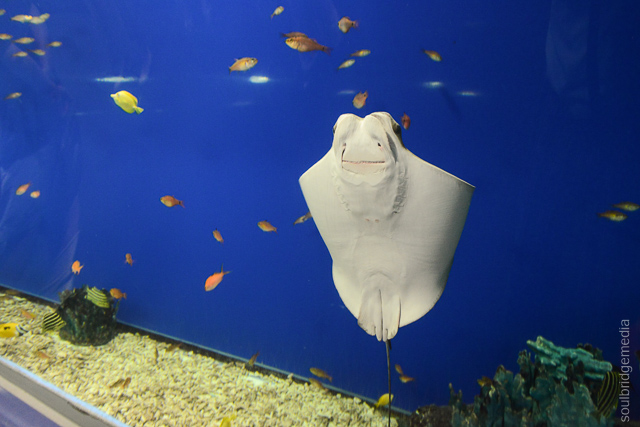
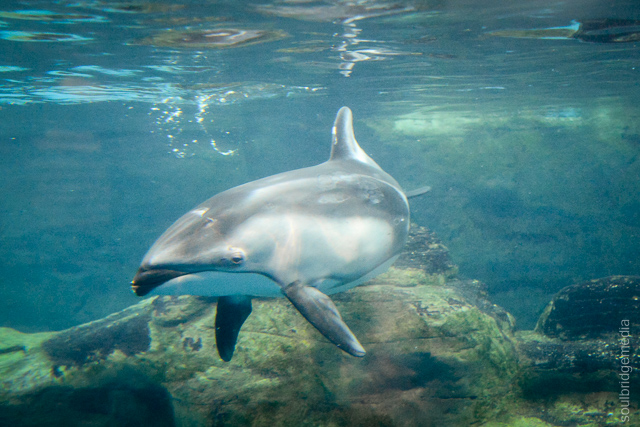
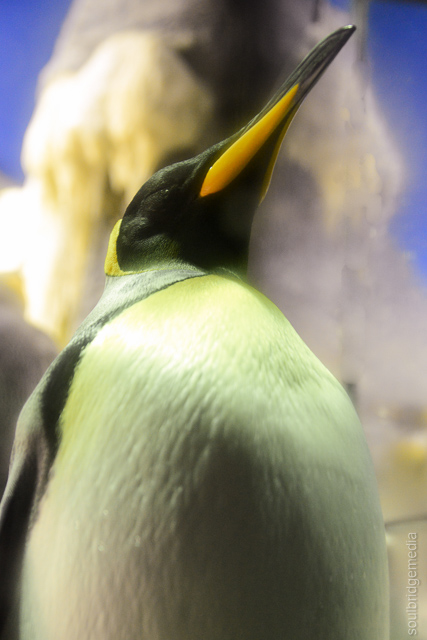
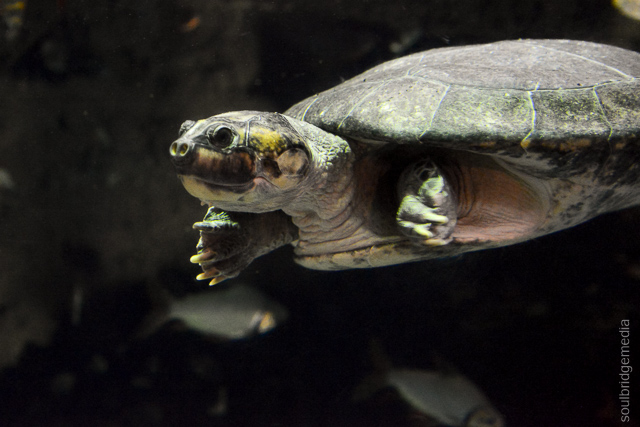
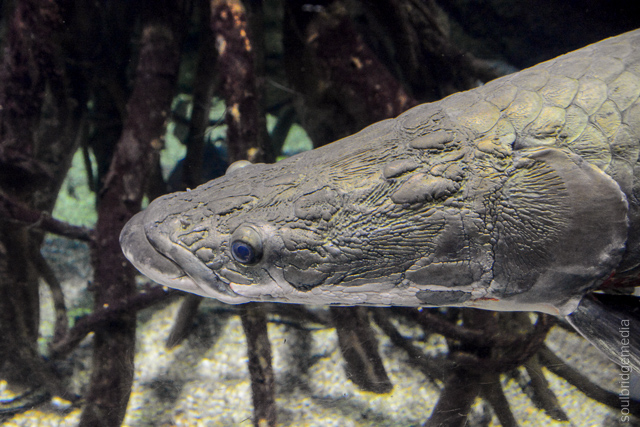
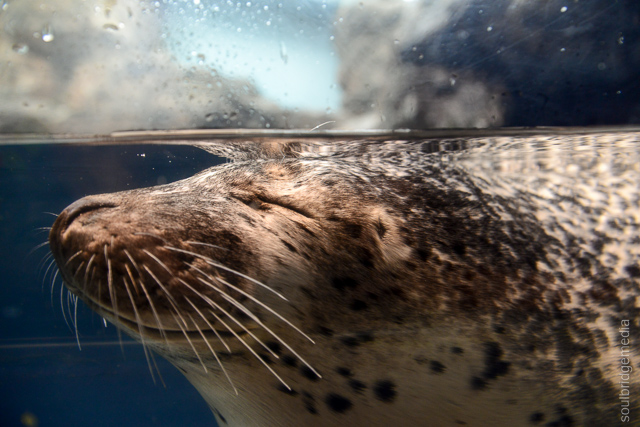
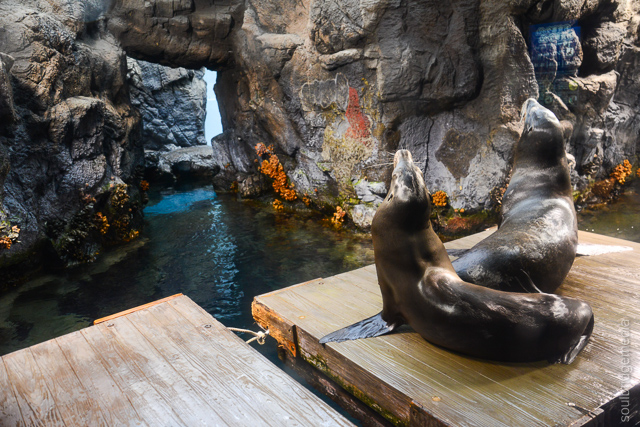
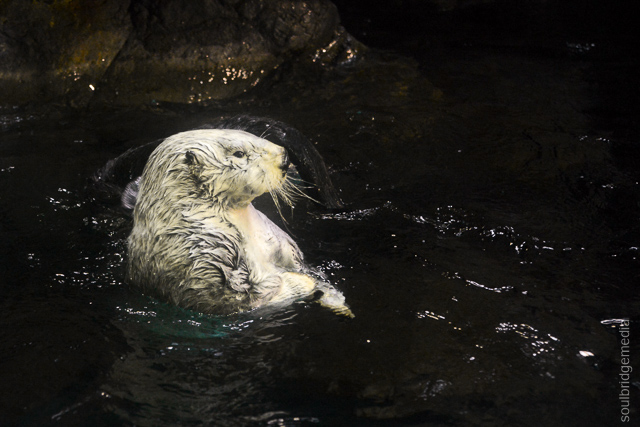
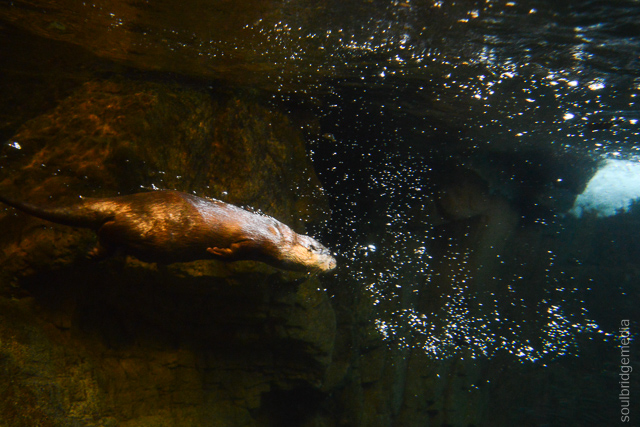
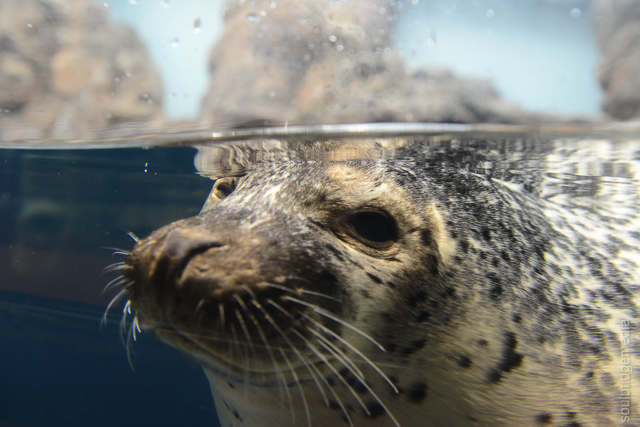
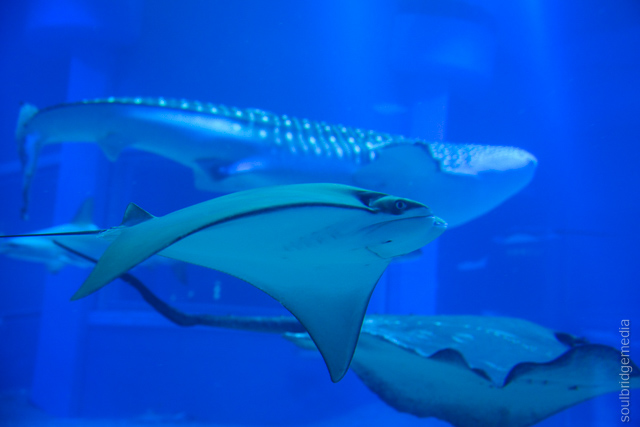
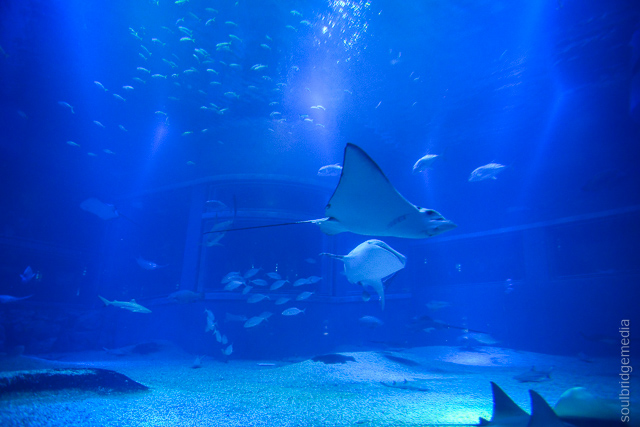
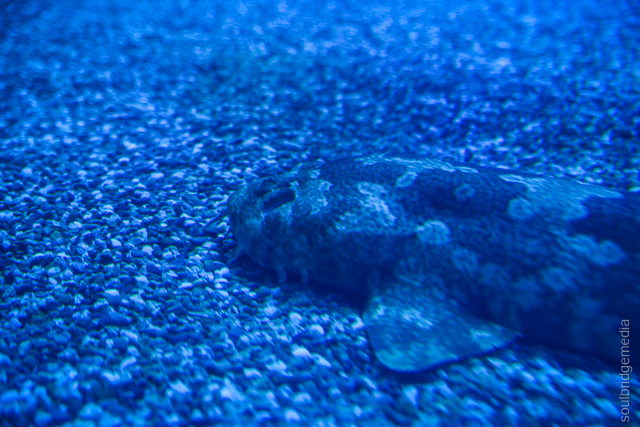
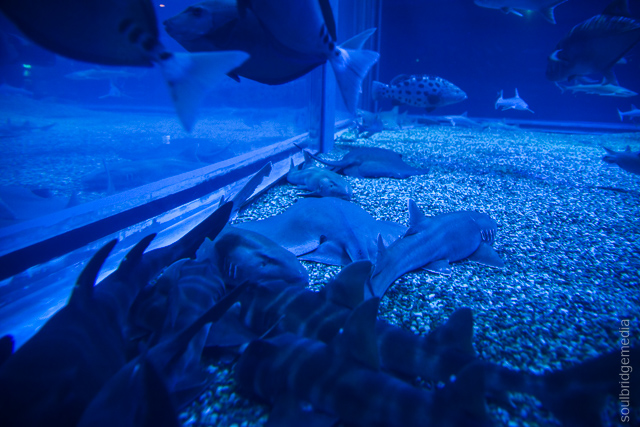
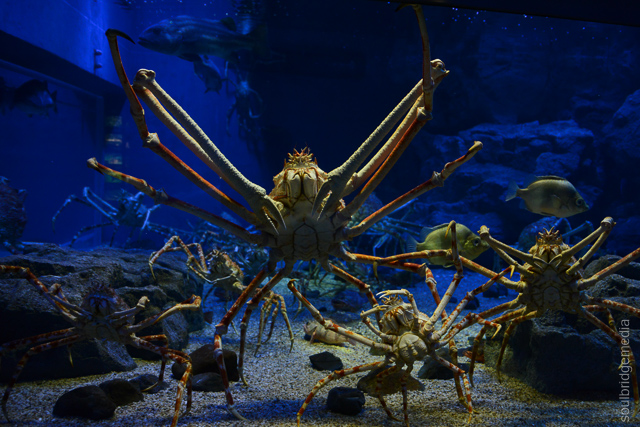
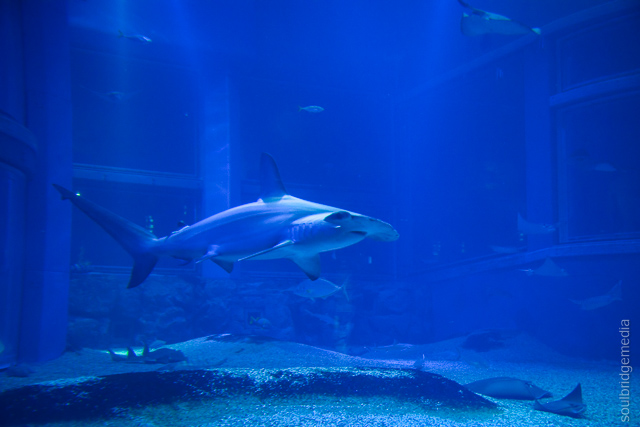
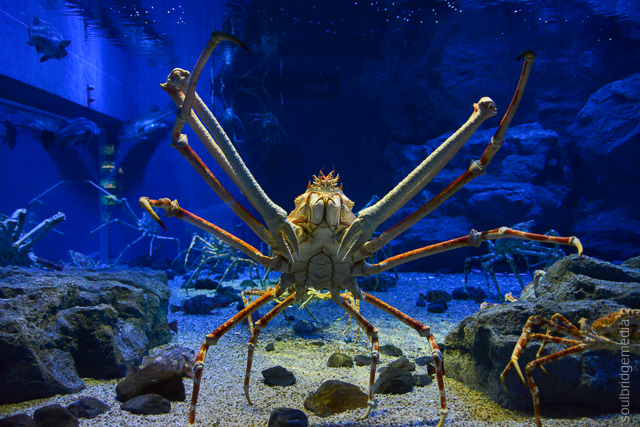
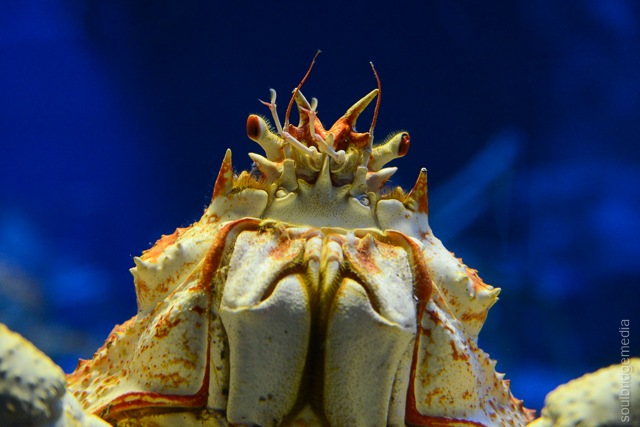
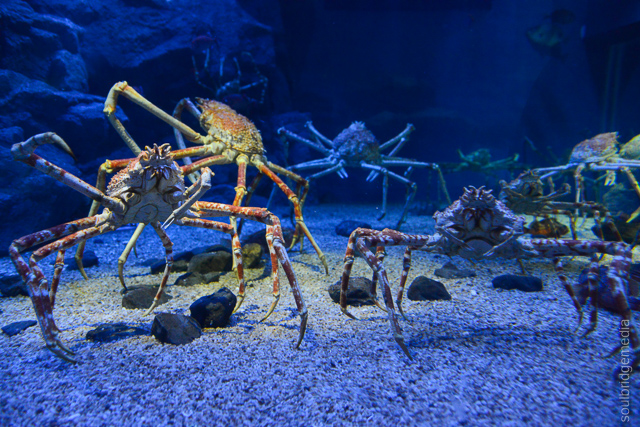
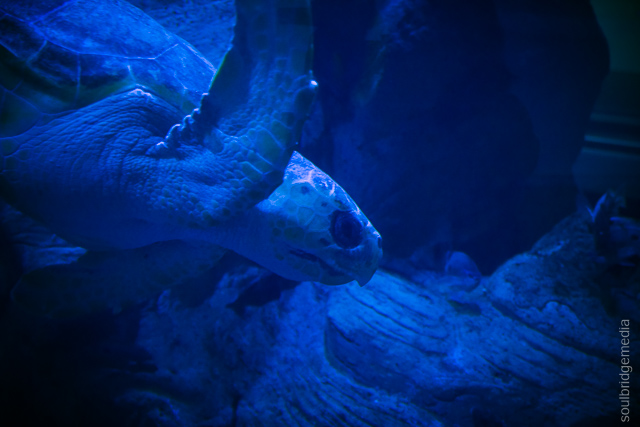
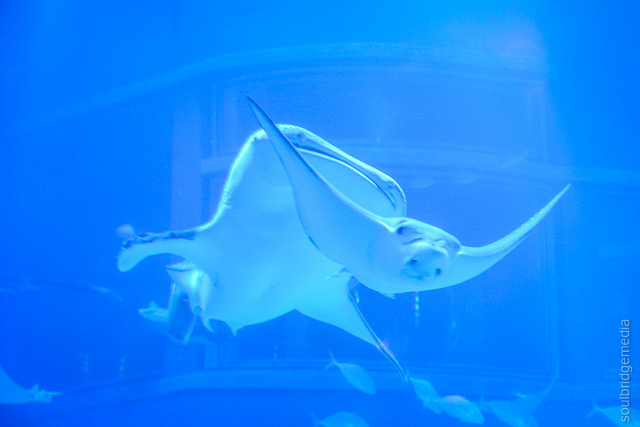
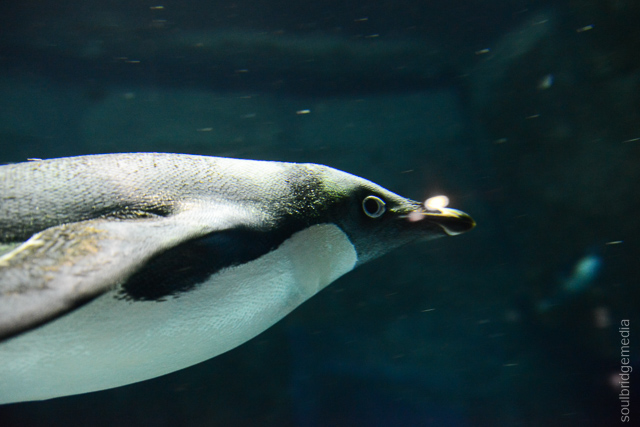
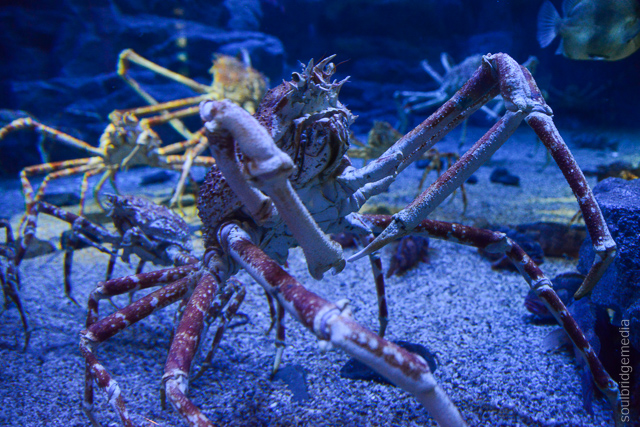
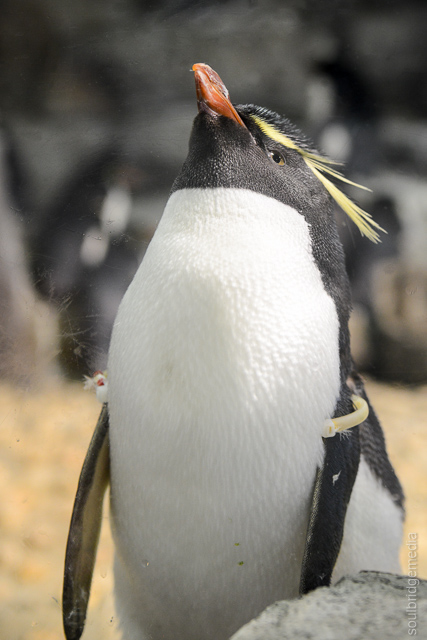
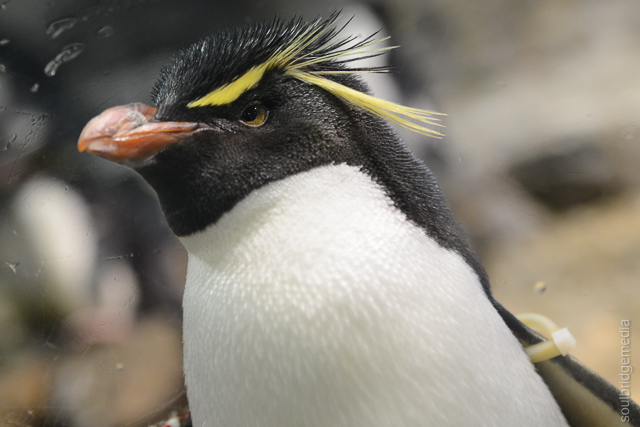
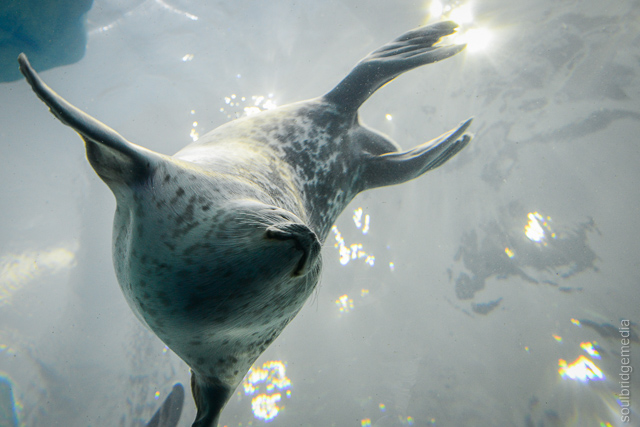
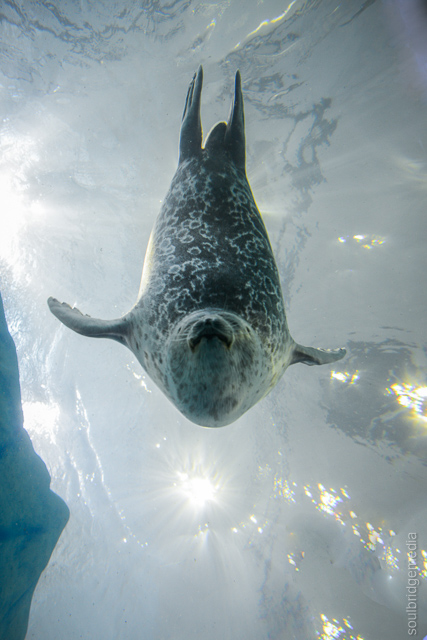
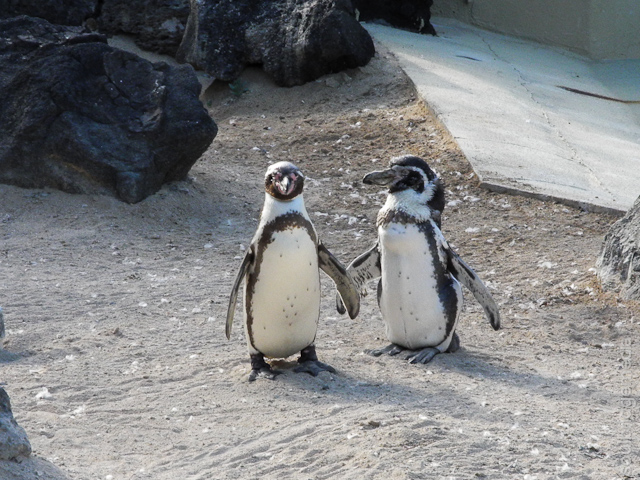
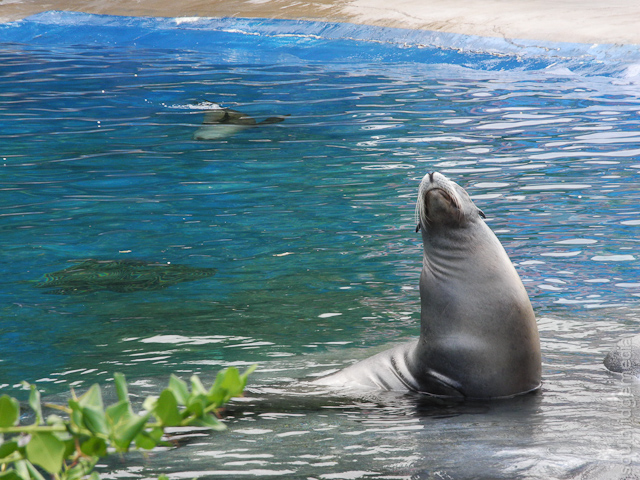
The theme of the venue is to encompass all of the different regions around the Pacific Rim (no, not with giant mecha) with many enclosures representing each area and some of the animals that inhabit them. The viewing actually begins at the top on the 8th floor where it spirals down through tanks and enclosures feature aquatic life, fish, manta rays, crabs and other weird looking bottom dwellers along with everyone’s favourites, penguins and seals.
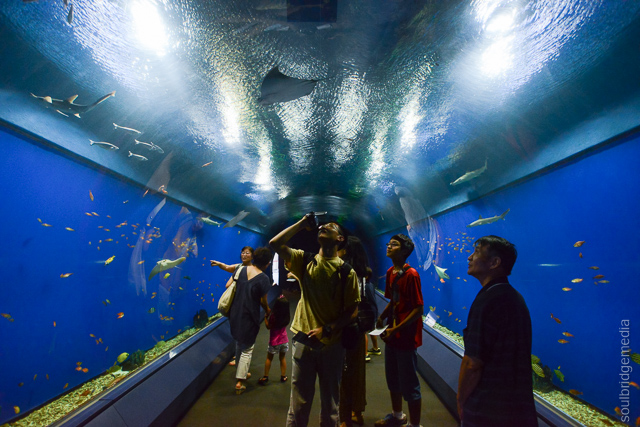
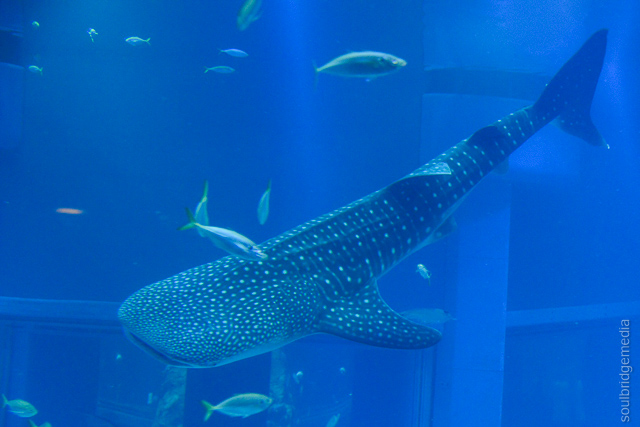
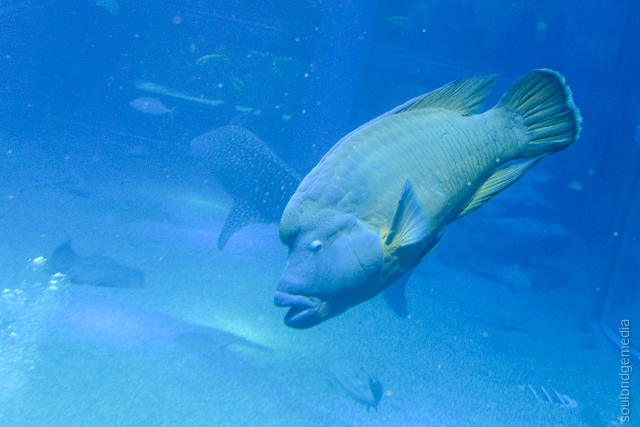
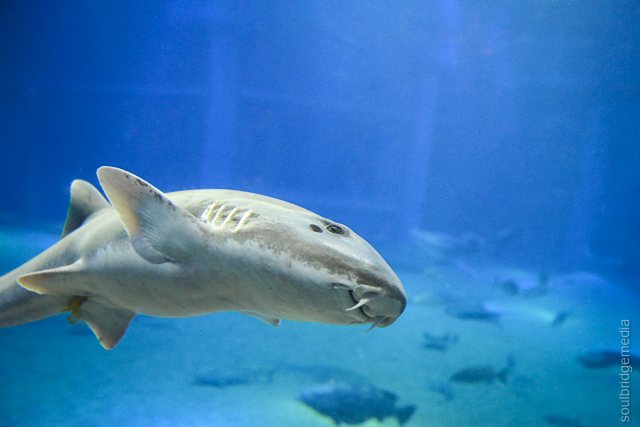
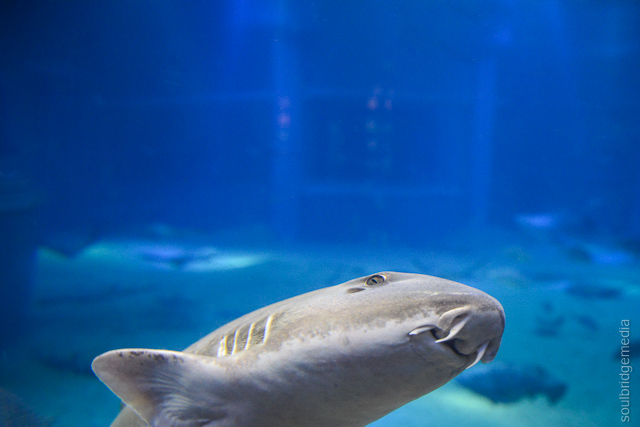
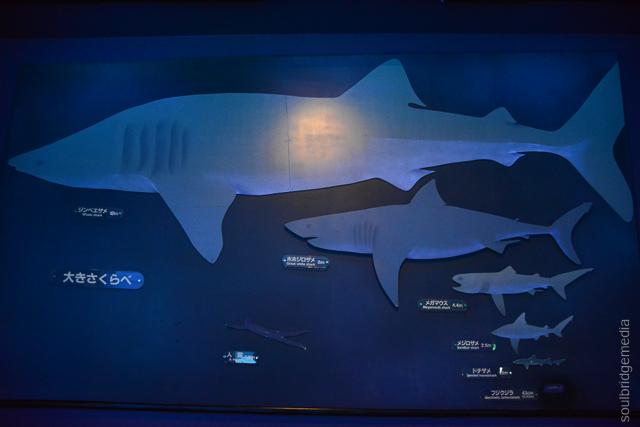
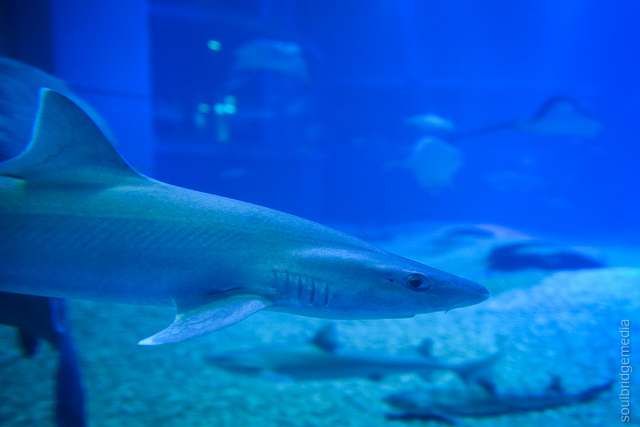
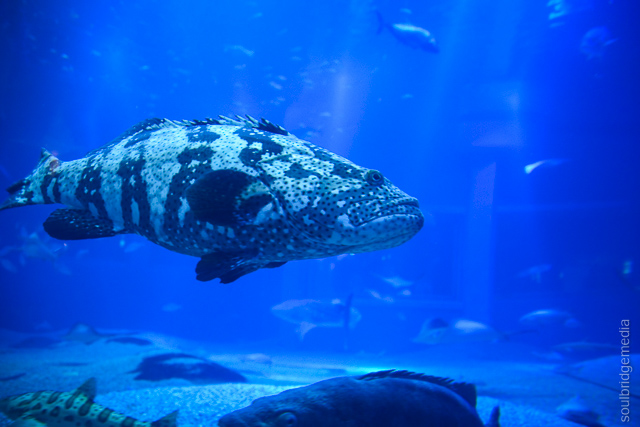
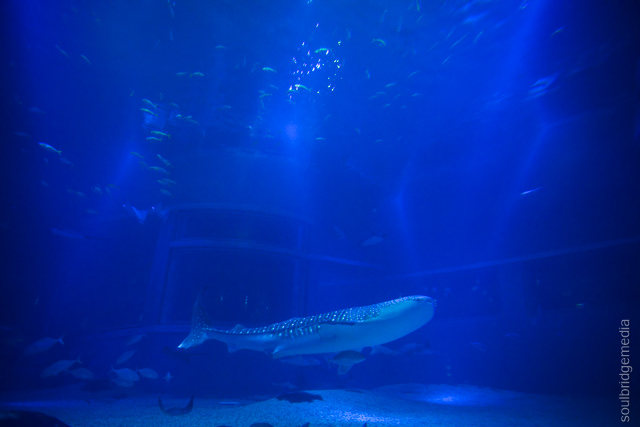
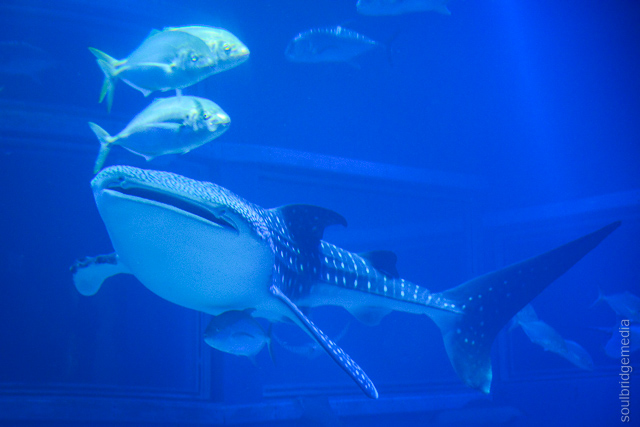
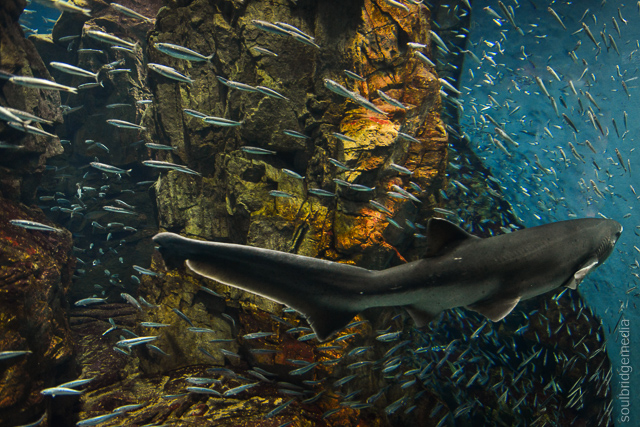
Aquariums are always good for a visit, you get to see creatures big and small effortlessly glide through the water around you but a lot of the time the scale of the animals and their surroundings is lost when viewing through a small window, enter the 10m deep tank with a foot thick of Perspex all the way around! This centerpiece represents the Pacific Ocean and houses a city bus sized crowning jewel, the whale shark.
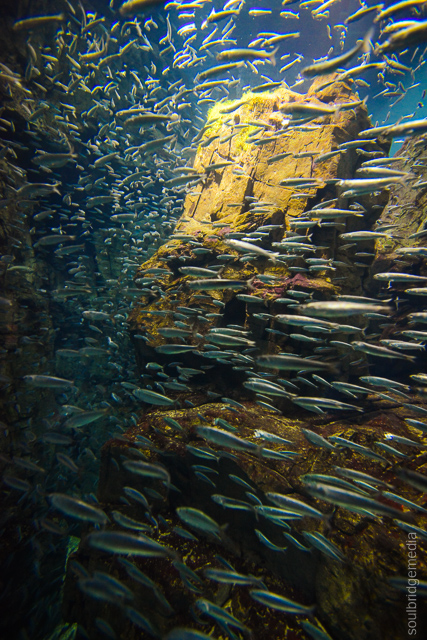
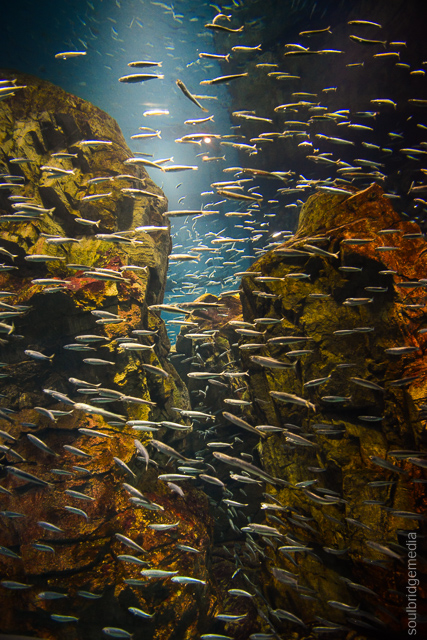
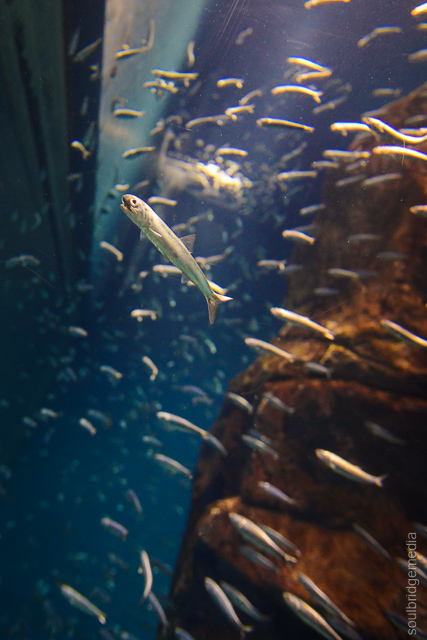
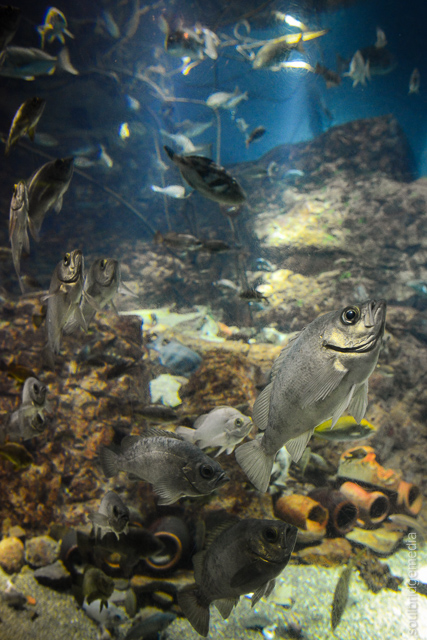
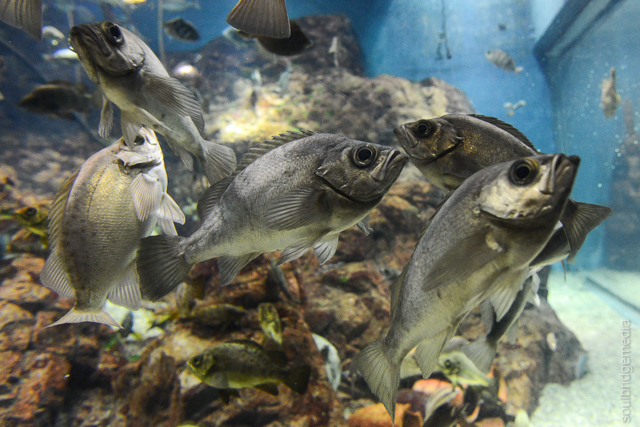
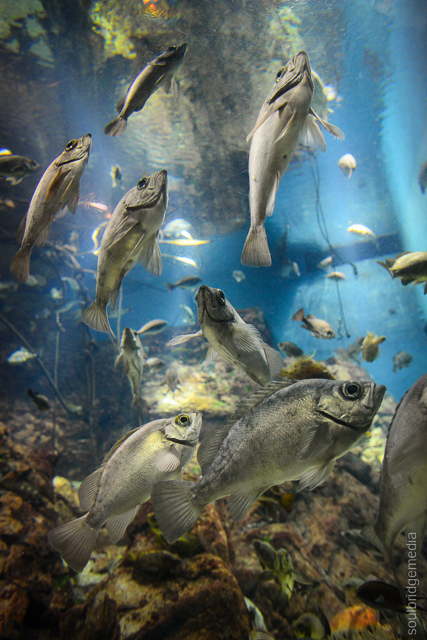
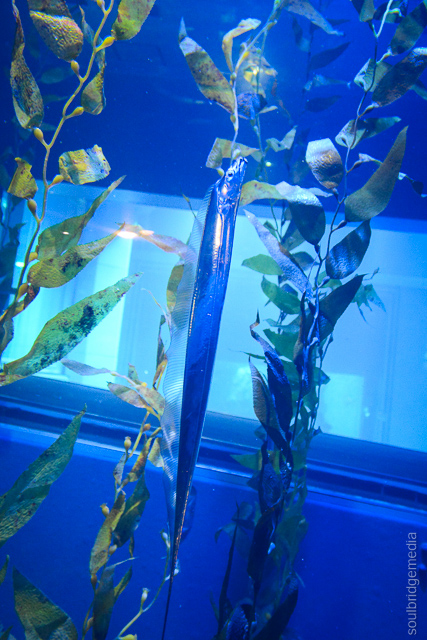
Other smaller tanks cross between floors which give plenty of few spots from different perspectives and the idea of the different layers in an ocean environment.
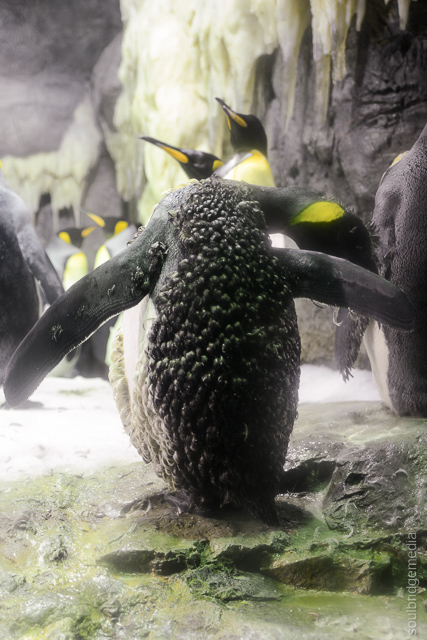
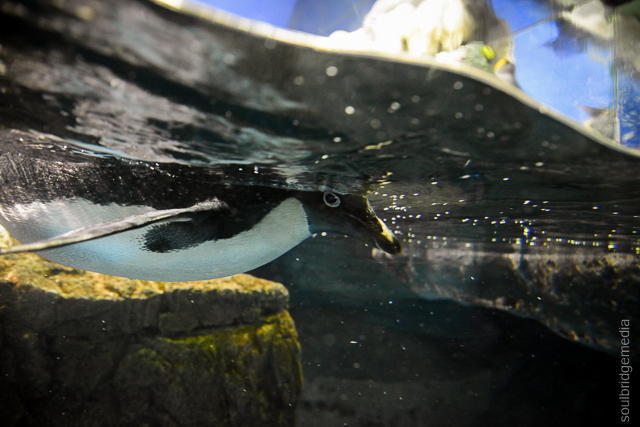
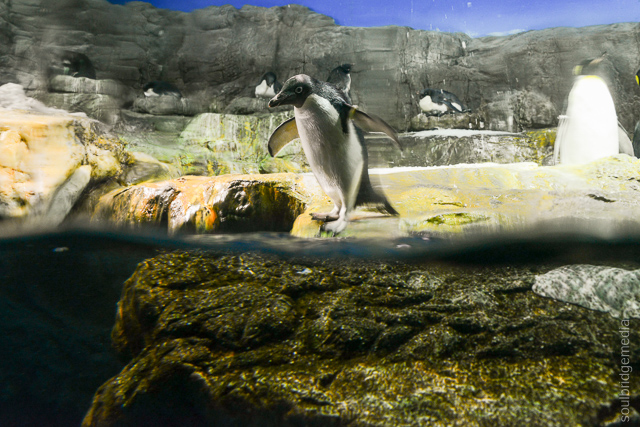
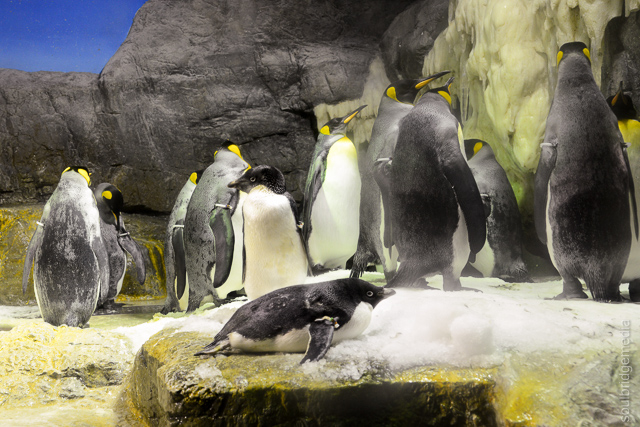
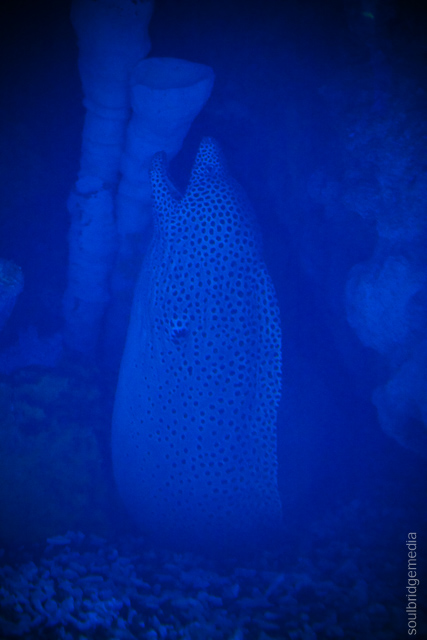
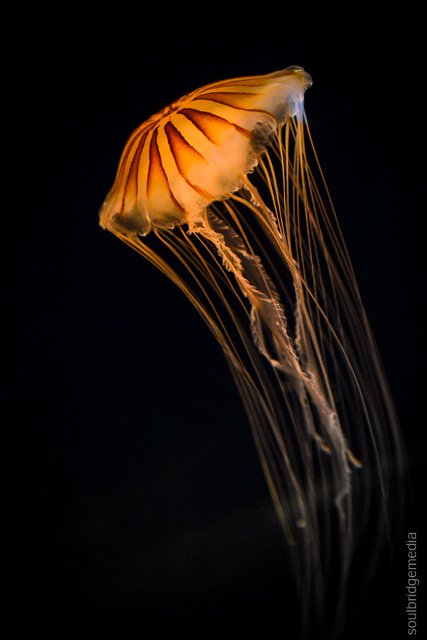
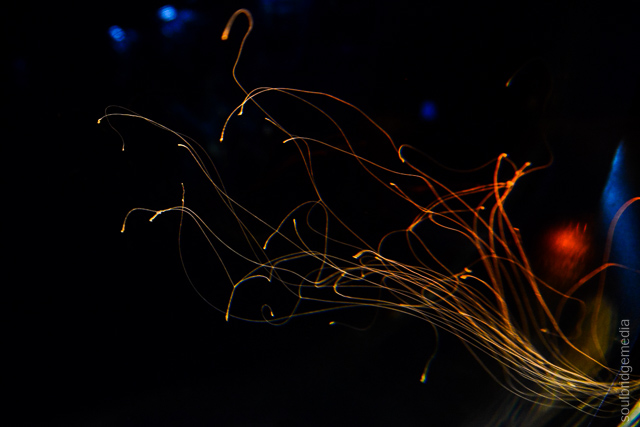
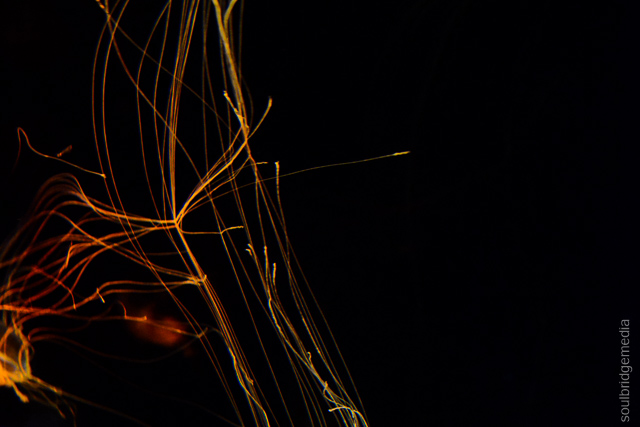
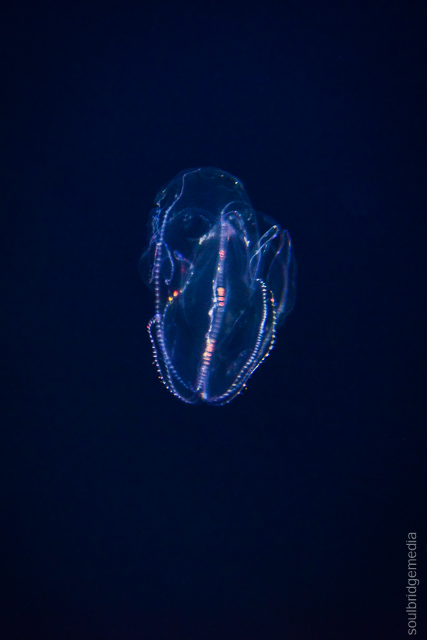
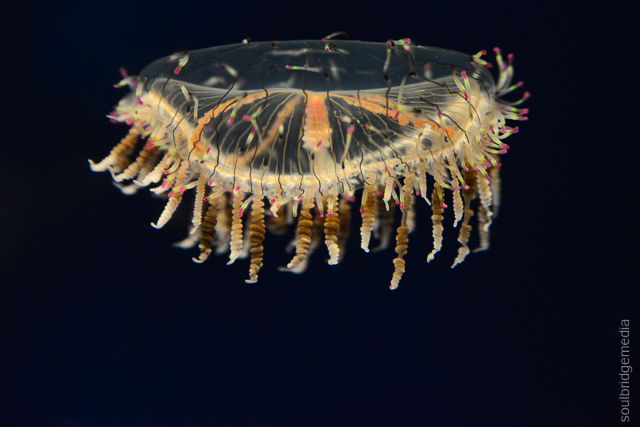
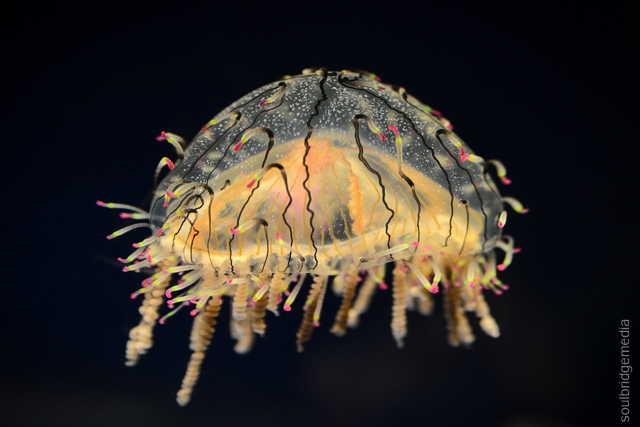
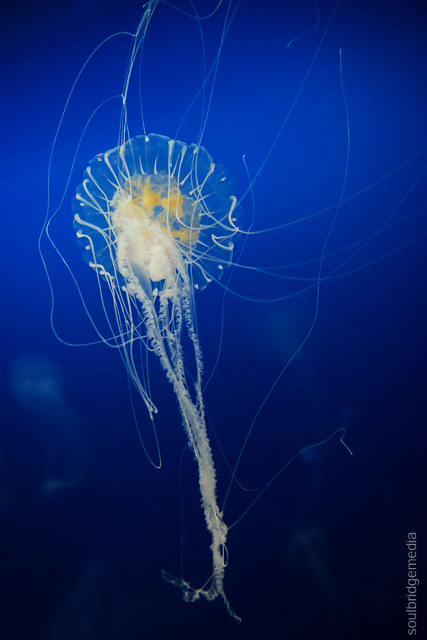
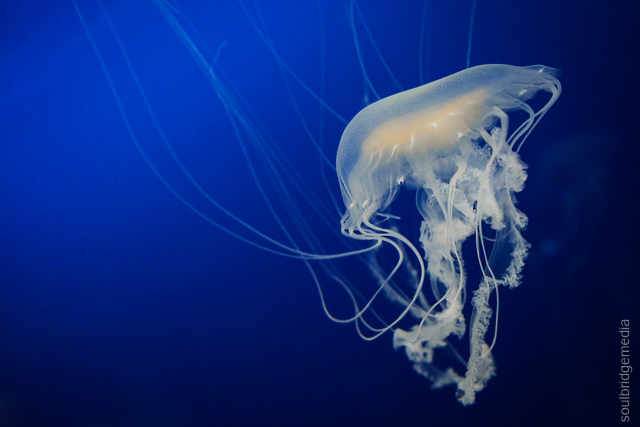
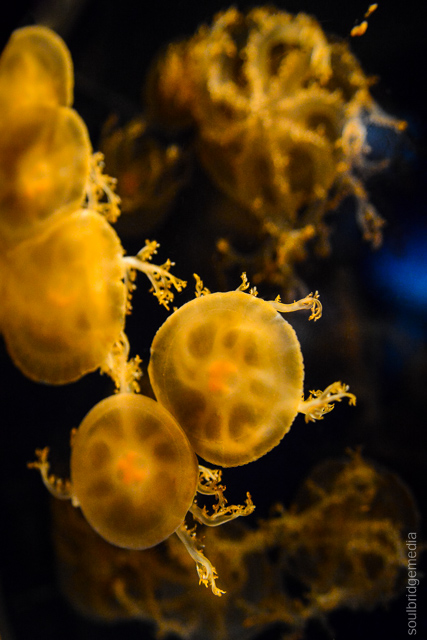
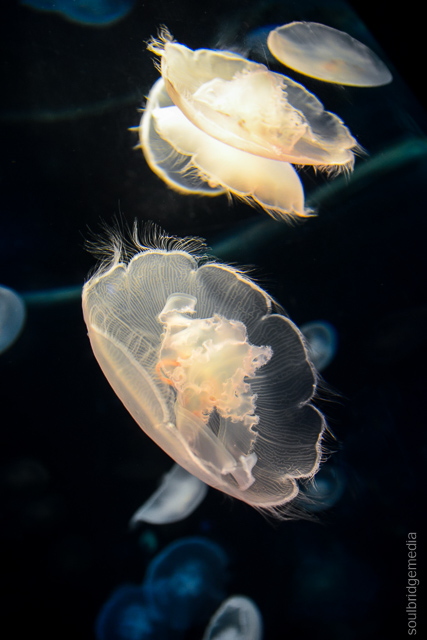
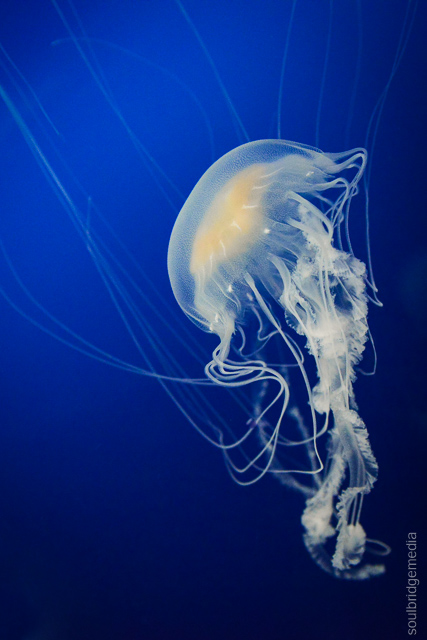
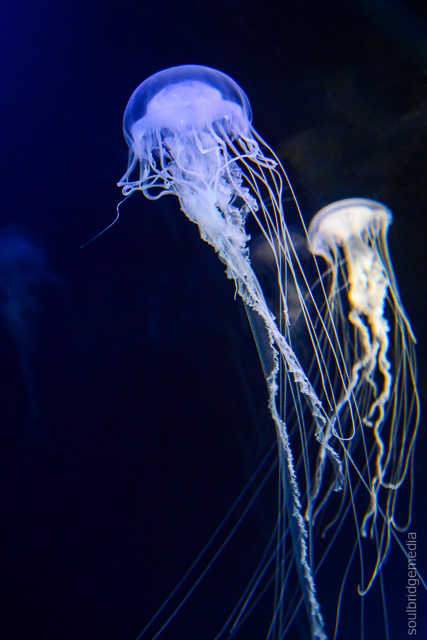
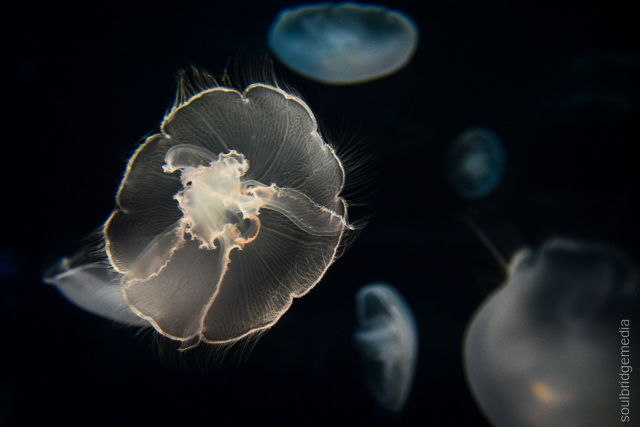
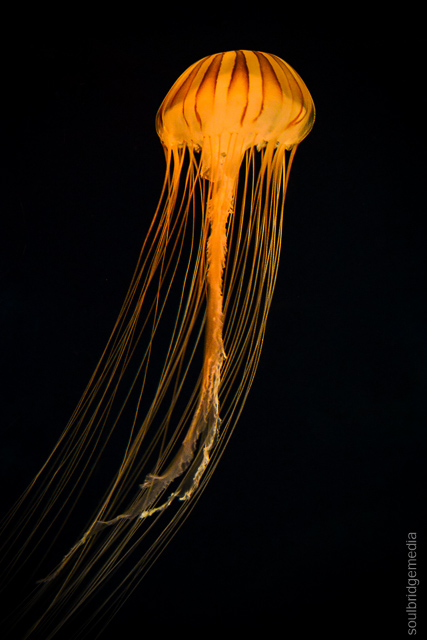
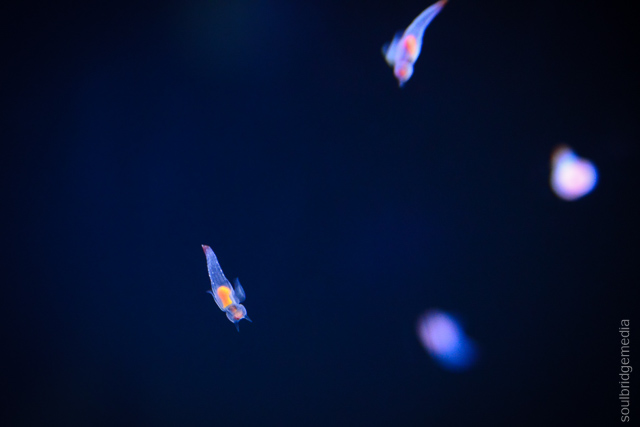
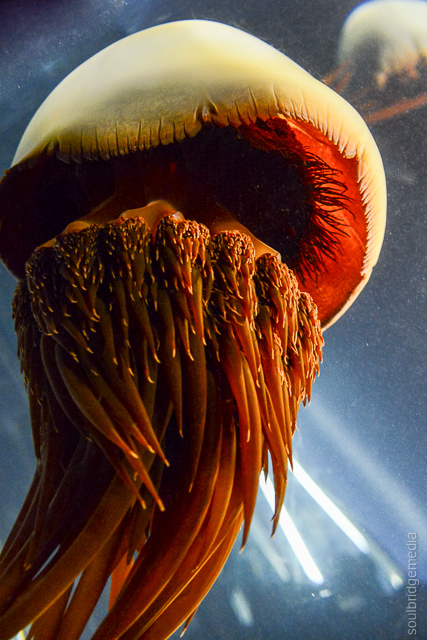
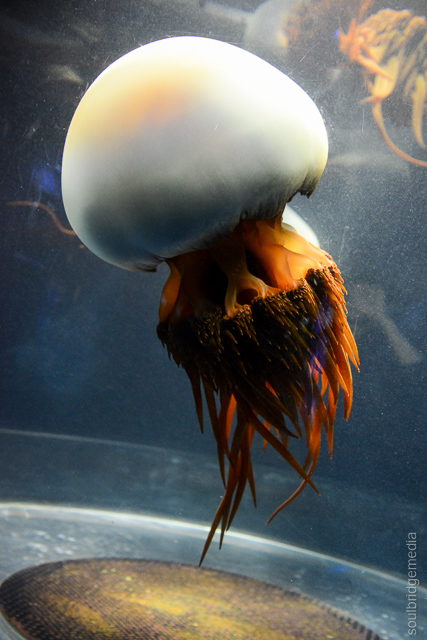
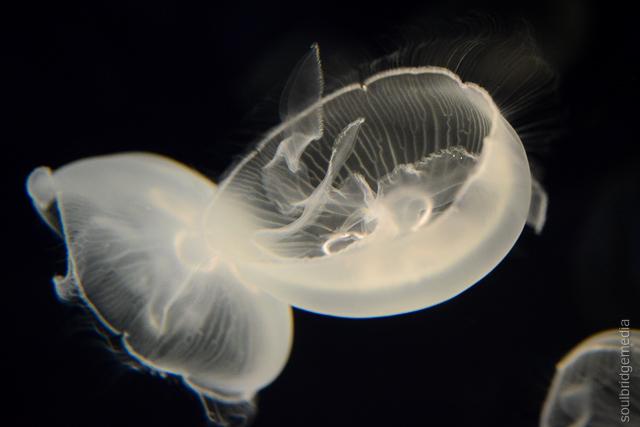
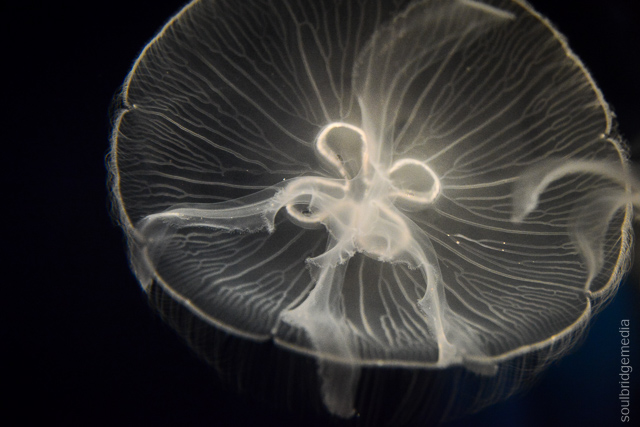
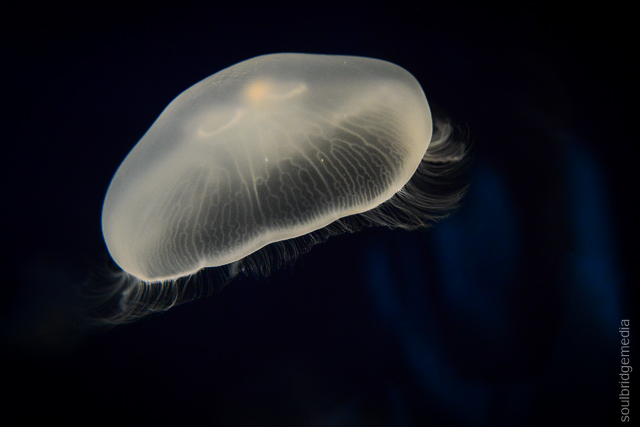
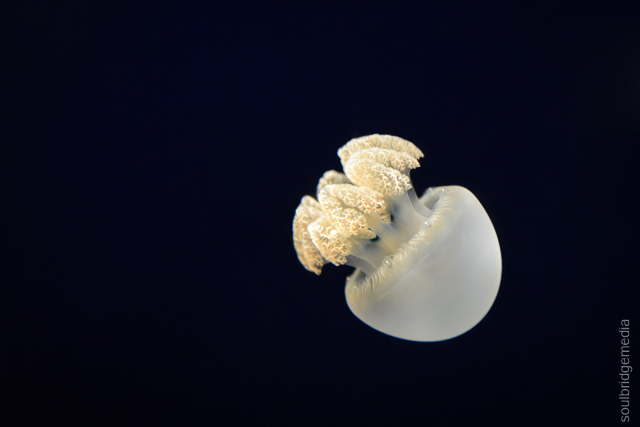
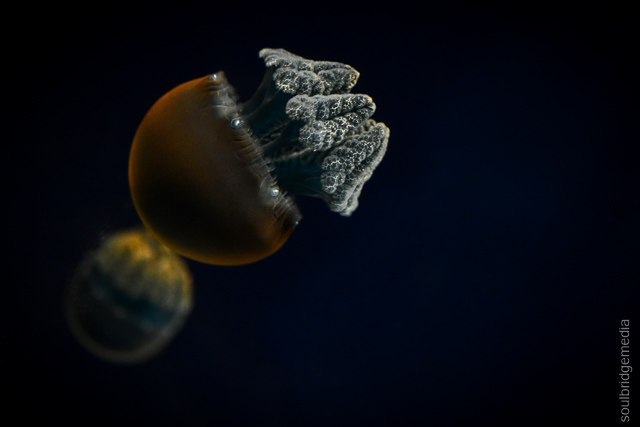
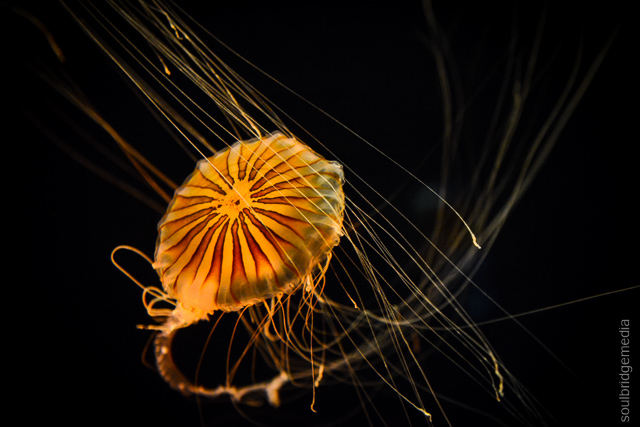
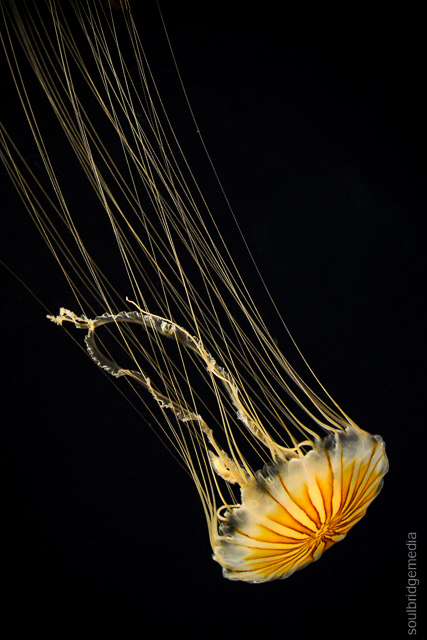
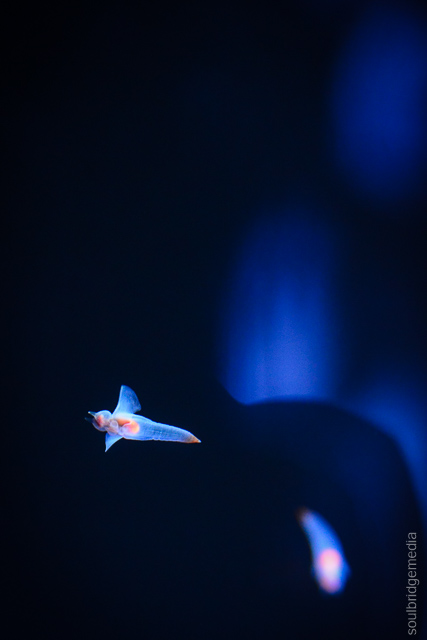
Smaller rooms on the lower level house a large assortment of jelly fish for you to get lost in a lava lamp trance. On the way to the gift shop there’s a hands on section where you can get up close and very personal with a selection of fish and manta rays which vary from slippery soap to “cat’s tongue” in texture. Alot of fun and definitely something the kids would go nuts over. No need to worry about germs, there’s wash stations nearby. There’s also a partially closed off penguin enclosure for you to talk posh with your tuxedo wearing buddies 😀


Travel tip: speaking of kids, there are also a bunch of rubber ink stamps through out the venue which they can collect by stamping their books. Maybe get them a travel notepad so they don’t get any ideas with their passports should they be in possession theirs!
Photo tip: lighting is very dim throughout the venue, not just in the tanks so a fast mid range zoom is in order and don’t be afraid to push the iso to keep your shutter speed up, and as you can see by our bumper gallery there is HEAPS to photograph!


—
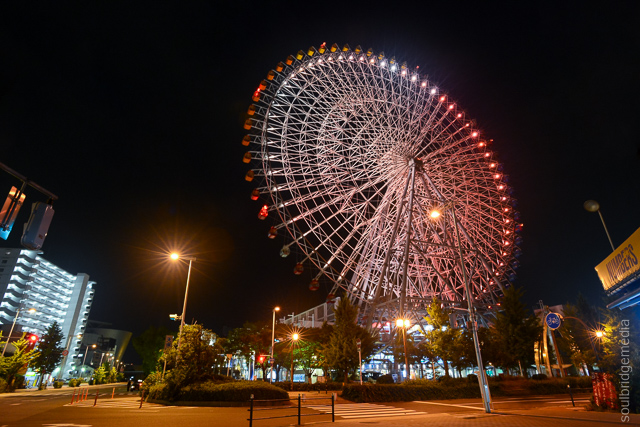
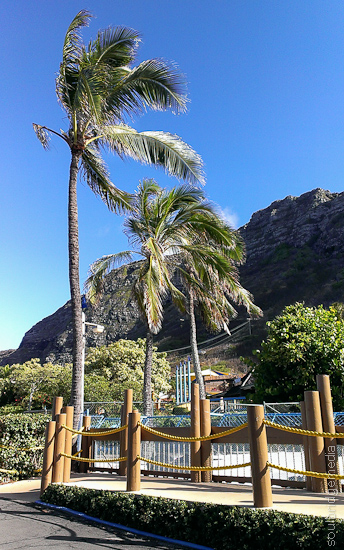
Tempozan Ferris Wheel
Behind the aquarium is a small shopping mall with a food court and several restaurants, only the larger stores/restaurants stay open later for dinner but in true Japanese courtesy, if you catch one as they’re closing they’ll still be more than happy to fire up the stove for you.
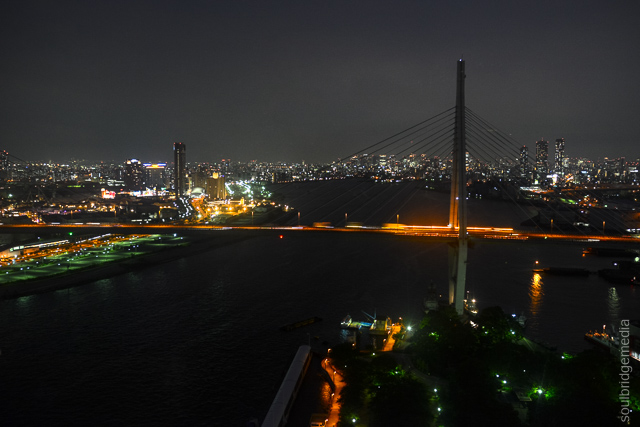
A short walk further is the Tempozan Wheel, it is quite sizeable as one of the largest in Japan giving decent views of the bay area and should be more than romantic enough to get you to first base 😉 (just watch out for the random pedo bear )-:} ). The coloured lights on the outside of the forecast the weather for the following day (orange – clear, green – cloudy, blue – rain) which is handy, although not entirely accurate with an orange reading when the following day was all drizzle!
If you have any questions on our travels, where to buy, what to do, hit us up on our Soulbridge media facebook page.
Japan 2013 part #1 – Arrival
Japan 2013 part #2 – Tokyo International Toy Expo
Japan 2013 part #3 – Gotemba – Premium Outlets mall
Japan 2013 part #4 – Tokyo – Studio Ghibli Museum
Japan 2013 part #5 – Tokyo – Kichijoji and Nakano
Japan 2013 part #6 – Tokyo – Akihabara
Japan 2013 part #7 – Tokyo – Tamiya HQ, Diver City
Japan 2013 part #8 – Yokohama – Zoorasia
Japan 2013 part #9 – Yokohama – Ramen Museum
Japan 2013 part #10 – Nissan HQ and Yokohama
Japan 2013 part #11 – Osaka – Nanba Shopping
Japan 2013 part #12 – Kyoto
Japan 2013 part #13 – Tokyo – Harajuku, Shibuya
Japan 2013 part #14 – Osaka castle, Umeda Sky building
Japan 2013 part #15 – Osaka Aquarium and Tempozan wheel
Japan 2013 part #16 – Osaka Universal Studios
Two of Osaka’s most popular attractions happen to also be conveniently the two most central. The first being Osaka castle, only a few stops from Osaka station and a little bit of a walk.
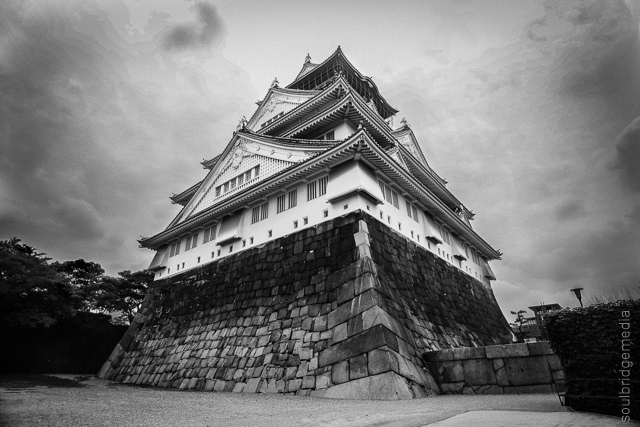
Osaka Castle
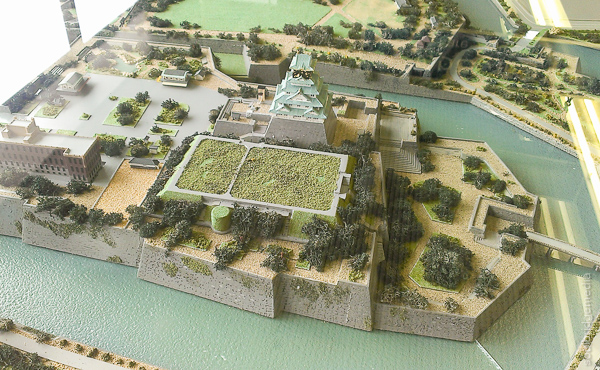
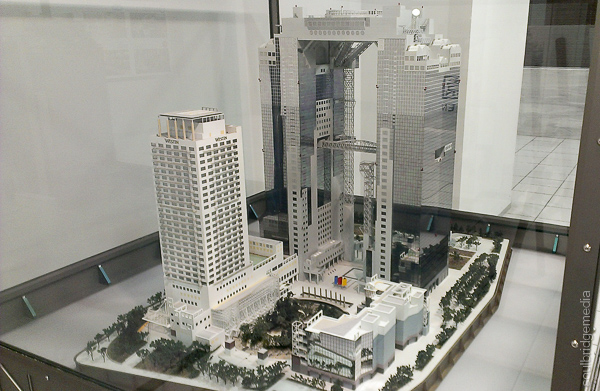
Its much of a muchness by train, regardless of what station you get off, however since we came from Osaka station we just had to stay on it till Osakajokoen station (check out the scale model of the grounds and castle in the foyer). From there its roughly a 1km walk past a lot of open concrete and numerous sporting facilities before you get to the park which has a lot of open spaces and waterways. The trees in the park are sakura (cherry bloosoms) which makes this a very common spot during the few weeks a year (usually late march/early april) when they bloom.
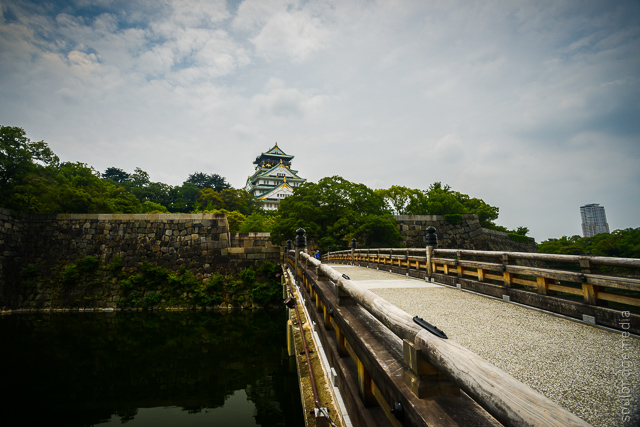
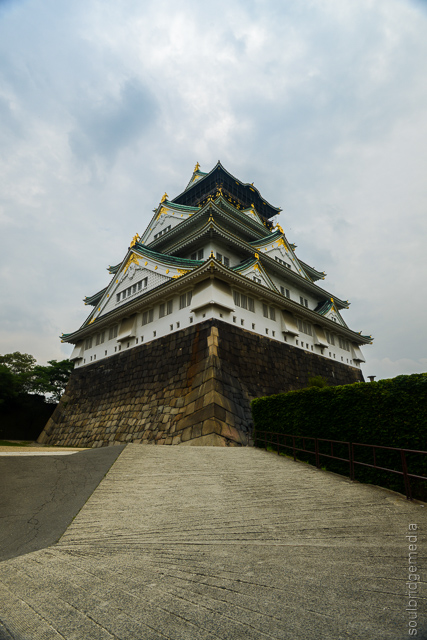
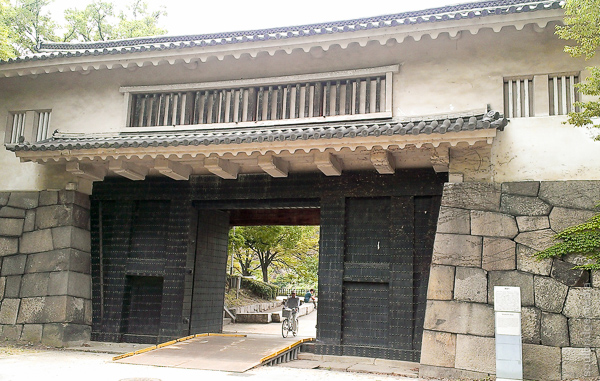
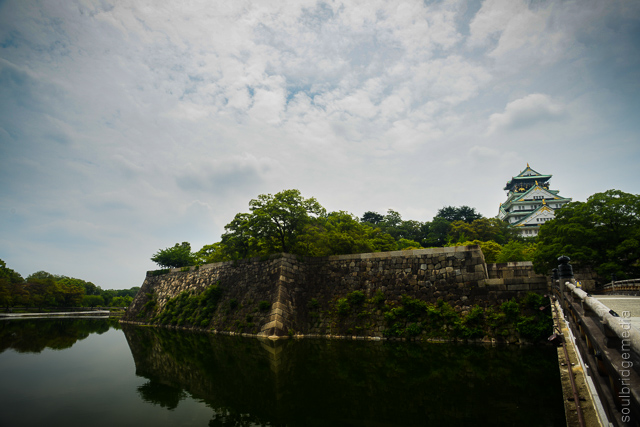
The foliage thickens and becomes almost a little rainforesty once you cross the bridge over the moat. This is where you catch the first glimpse of signs of a “fully functional” castle with battlements and large stone walls surrounding the water. There are also plenty of shaded spots where you can stop for a breather if you’re travelling during the unforgiving warmer seasons.

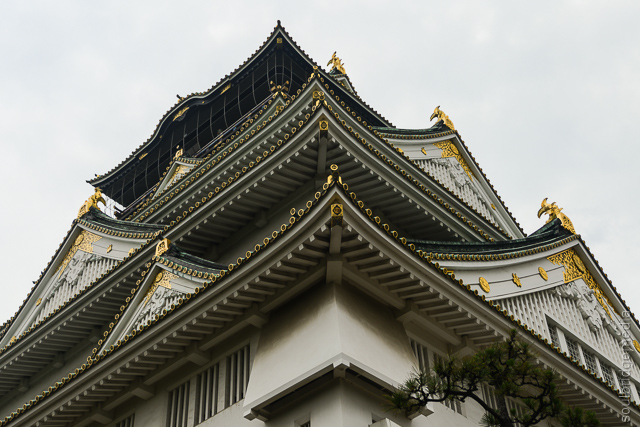
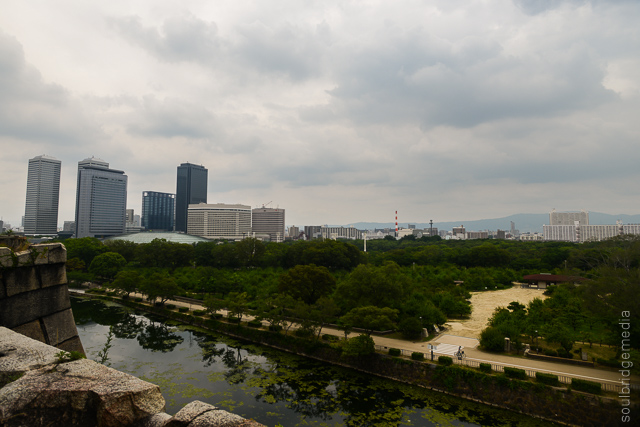
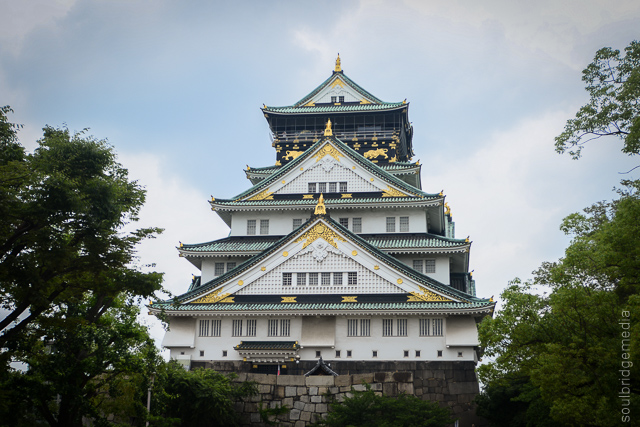
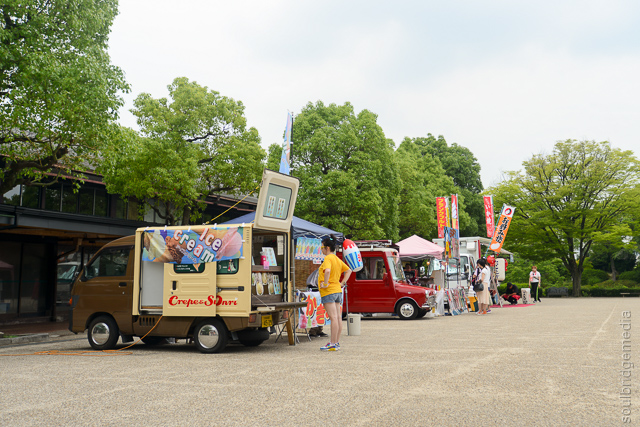
The castle sits majestically high above everything in the surrounding area upon its base of rock and stone and is trimmed with typical Asian rooftop styling and gold finishings. A large courtyard area sits at its base with a selection of vendors in cute little vans selling food and souvenirs. For the history buffs, entry into the castle is about 600Y and about 200Y for the greenthumbs that want to check out the castles extended gardens. Costumed guards frequently roam the grounds for your hashtagging pleasure.

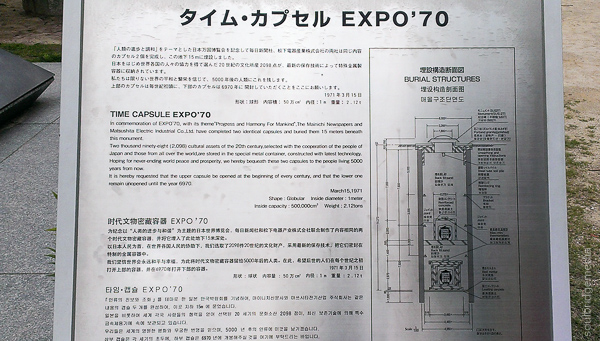

One thing you may not expect to see is a time capsule. Placed there in 1970 for the World Expo, it is built with two levels, the first to be opened every century and the second in the year 6970, probably by Cher.
—
Umeda Sky building
Love going to “The Eye”’s around the world but hate the whole moving thing and still want a good view of the city, then this is the place for you!
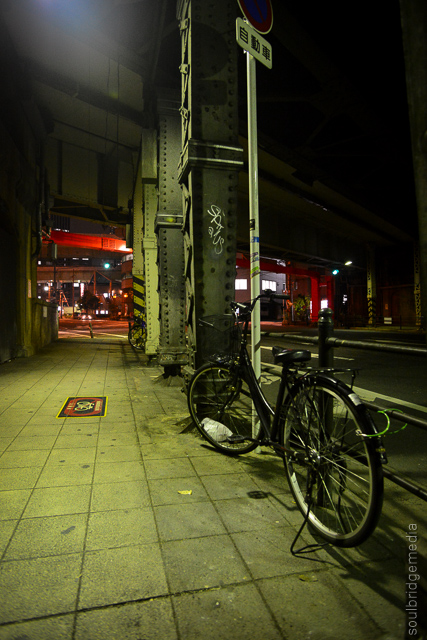
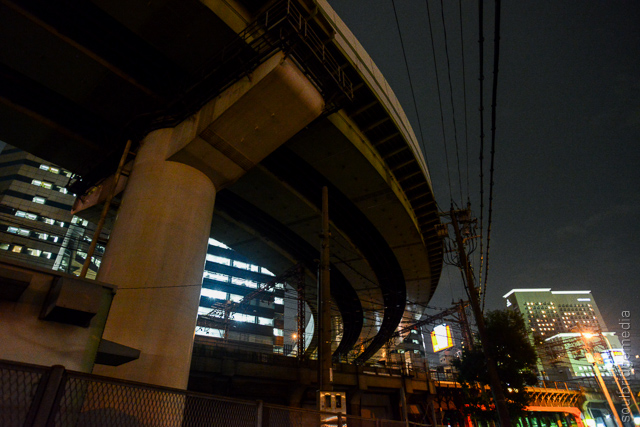
Only about a 10min stroll from Osaka station (longer if you’re anywhere south of the station since you have to walk either around or through it and if you’ve been in Japan more than a minute you’ll know that’s not always as simple as it sounds!) but about 15-20min coming from our hotel via a few back streets for some random street photos.

Travel tip:
The English version of the website has nice simple to follow maps and venue information.
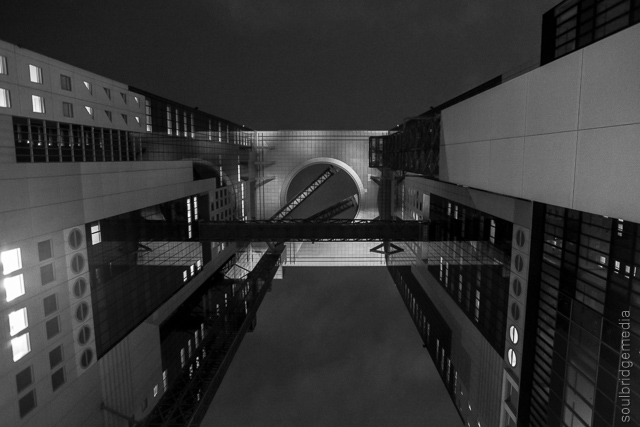
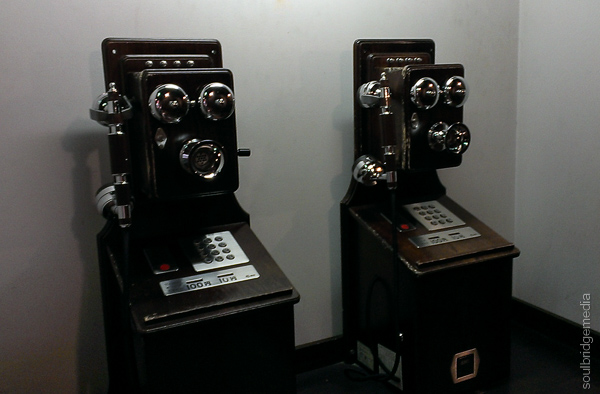
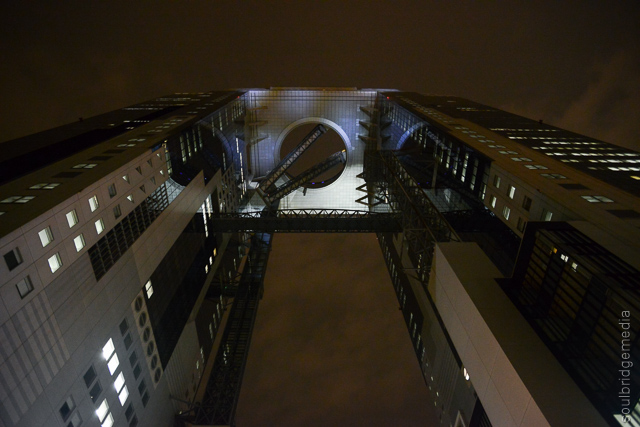
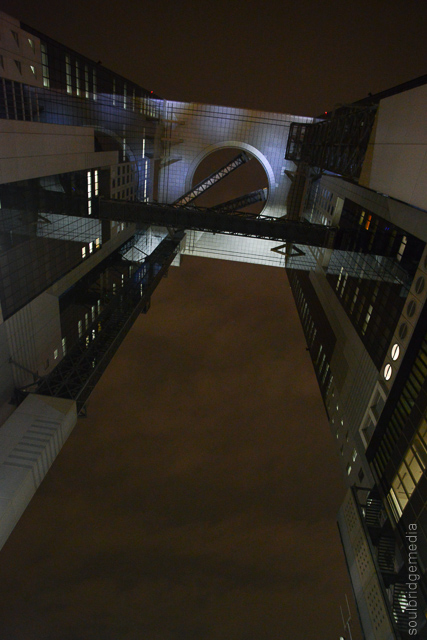
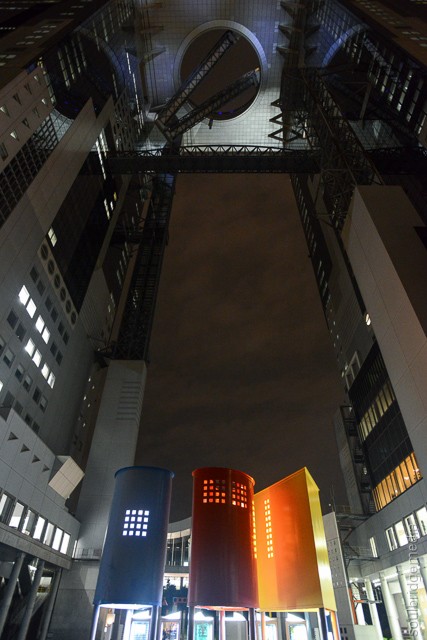
Even from several blocks away (or from our hotel’s external elevator) the Sky building looks menacing in a 90s scifi where the bad guy is the only rich person in the world kinda way.
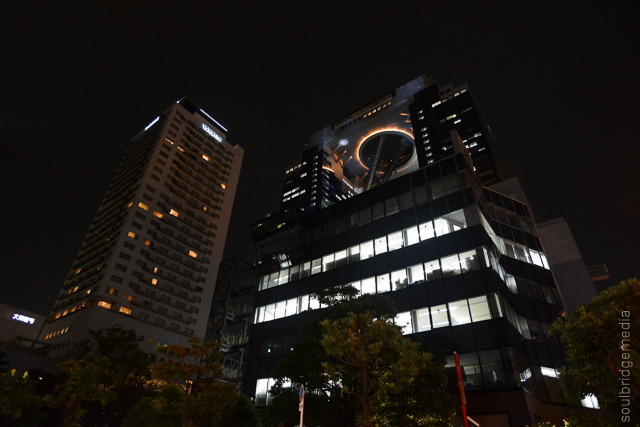
Photo tip:
If you’re going later in the evening, get your “from the ground” photos first as they turn off the upper lights before closing time, and check out the art installs while you’re at it
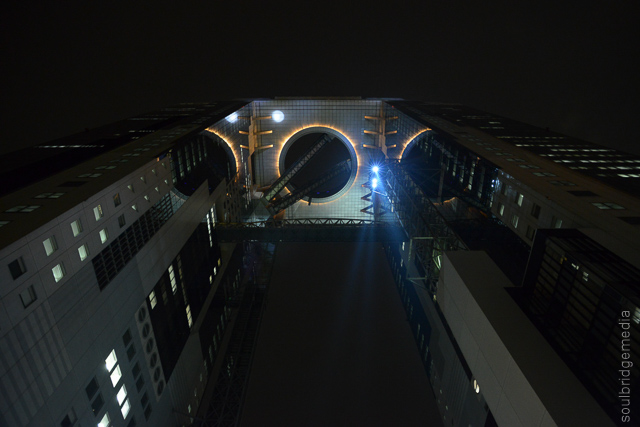
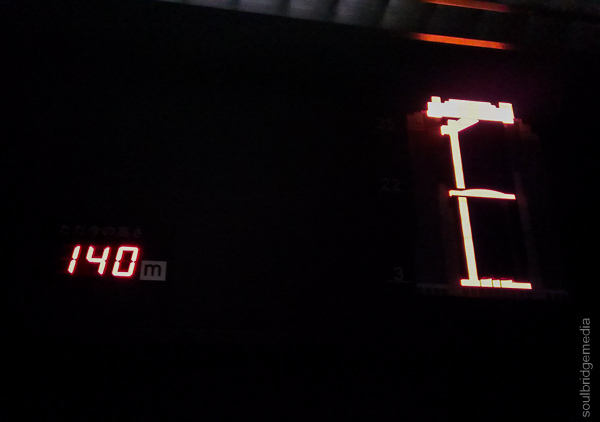
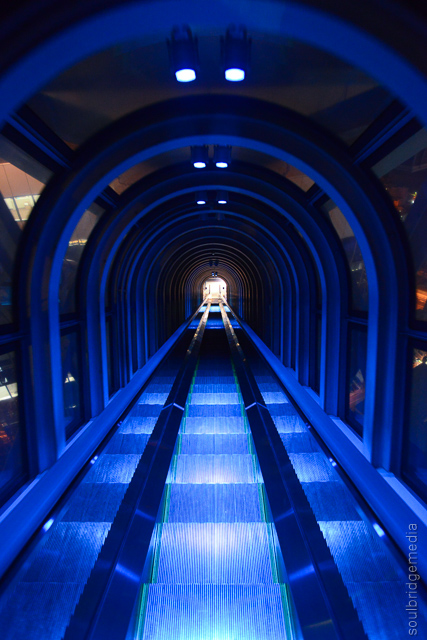
Like any building with an observation deck, there’s a bit of cueing and staring at elevator floor numbers clock over like it’s the pledged amount on a telethon but you’ll get to the deck in no time. The last section is up a see-through enclosed escalator before arriving at the closed-in viewing deck. This section would definitely be handy during the colder months or if you’re unlucky with the weather, it still offers decent views but if you don’t want the headache of taking photos from behind glass at night, head on outside.
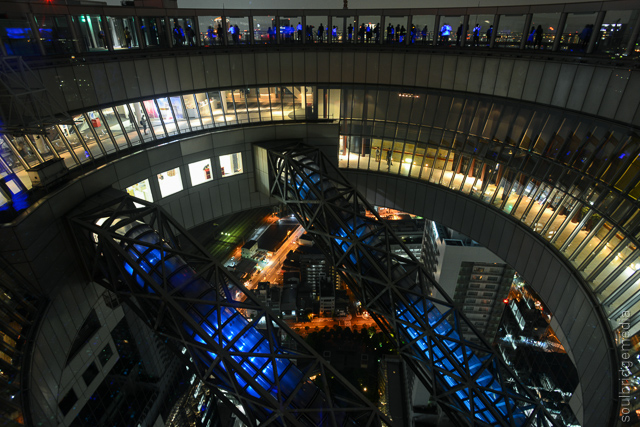
First impression, you will be forgiven if you think you’ve accidentally stepped into a 90s UV rave. UV paint splatters cover the ground while your white clothes and teeth glow in typical freaky fashion but thankfully this doesn’t detract too much from the view and more so the ability to take some nice photos!
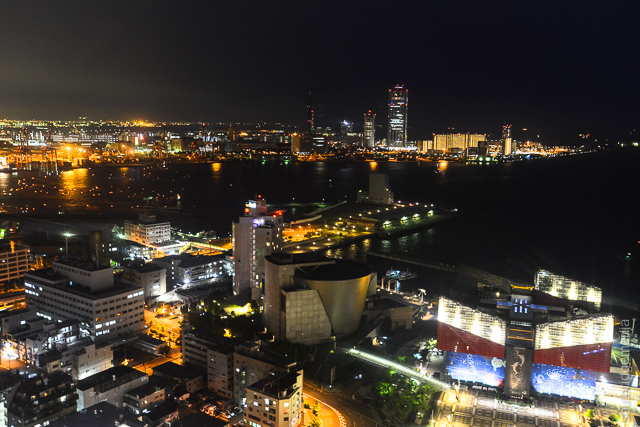
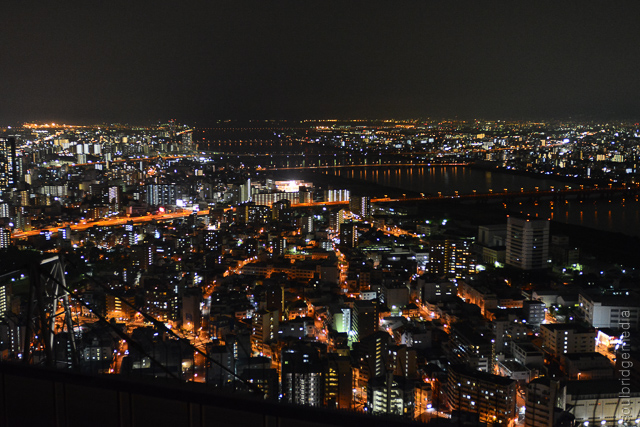
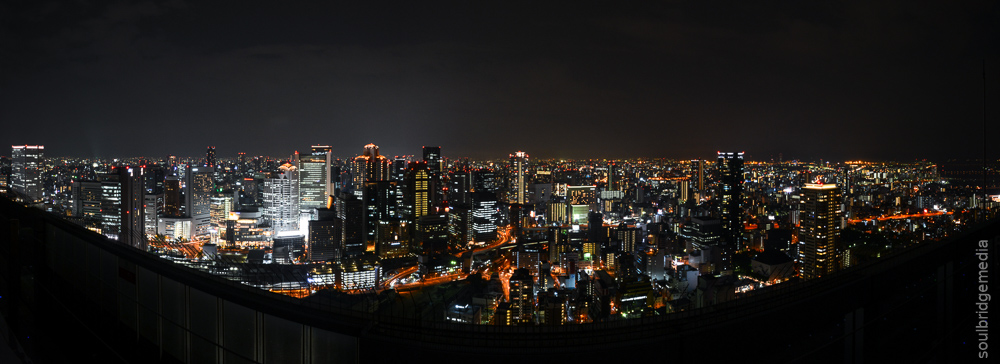
The deck offers almost 360 degree views of downtown Osaka and Osaka bay and even when busy, the crowd ebbs and flows enough that if you stand still you’ll eventually get any spot you choose.
Photo tip:
It’s not a cluttered skyline and the building sits high above anything near by so you may even consider a mid range zoom instead of a wide angle. Like most night shots, a tripod helps alot, even better if you can be bothered carrying something with some height to clear the barriers/railings. There will be plenty of others with the same idea as you so you may need to be patient with nabbing a good spot.
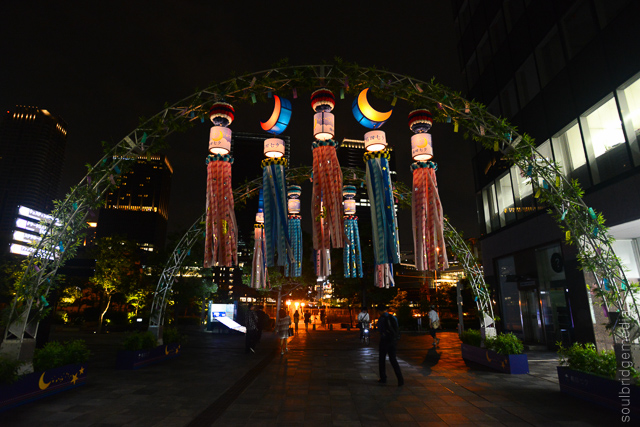
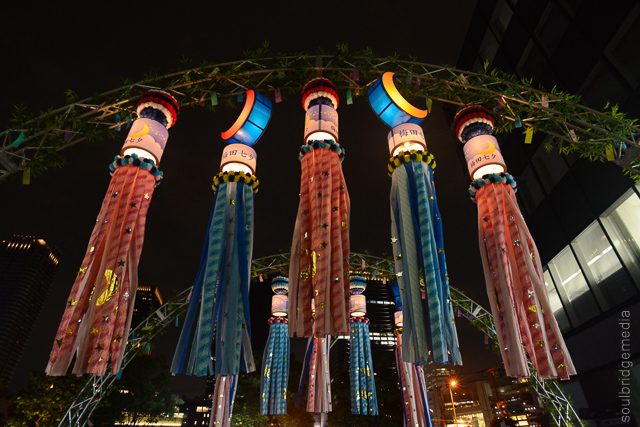
If you get bored or are waiting for a spot to free up, head to the “lumi deck” for a wall with lit up squares making different shapes, of course the very Sleepless in Seattle-esque heart shape is a clear winner for those thinking it could easily be the Empire State building. The fun continues inside with an interactive light room which… you guessed it, changes shapes and colours as you move like Elaine dancing.
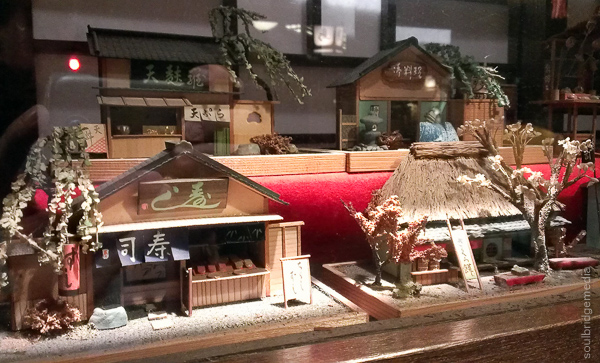
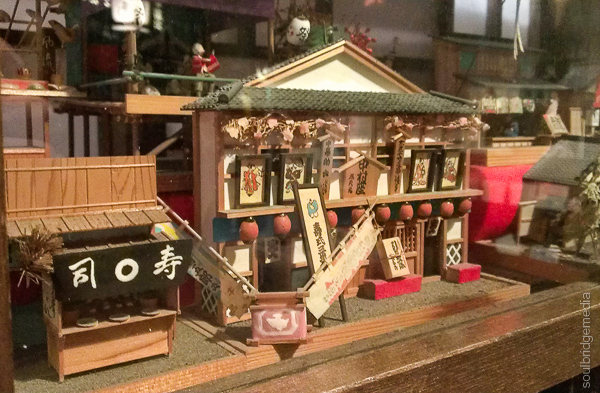
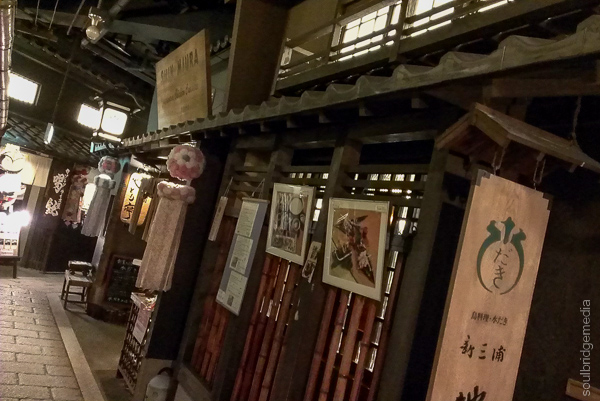
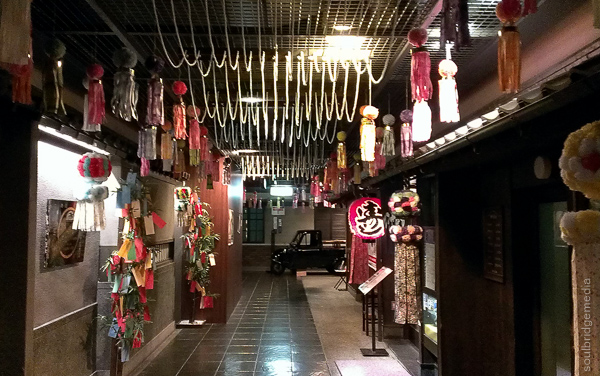
Finally, after (or perhaps before) you’ve returned to ground level, there are several restaurants on the basement level that is themed in an “olden days” fashion not too unlike the Ramen Museum but most close well before the observation deck so get in earlier if you’re after some grub.
Next stop, the Osaka Aquarium!
If you have any questions on our travels, where to buy, what to do, hit us up on the Soulbridge media facebook page.
Japan 2013 part #1 – Arrival
Japan 2013 part #2 – Tokyo International Toy Expo
Japan 2013 part #3 – Gotemba – Premium Outlets mall
Japan 2013 part #4 – Tokyo – Studio Ghibli Museum
Japan 2013 part #5 – Tokyo – Kichijoji and Nakano
Japan 2013 part #6 – Tokyo – Akihabara
Japan 2013 part #7 – Tokyo – Tamiya HQ, Diver City
Japan 2013 part #8 – Yokohama – Zoorasia
Japan 2013 part #9 – Yokohama – Ramen Museum
Japan 2013 part #10 – Nissan HQ and Yokohama
Japan 2013 part #11 – Osaka – Nanba Shopping
Japan 2013 part #12 – Kyoto
Japan 2013 part #13 – Tokyo – Harajuku, Shibuya
Japan 2013 part #14 – Osaka castle, Umeda Sky building
Japan 2013 part #15 – Osaka Aquarium and Tempozan wheel
Japan 2013 part #16 – Osaka Universal Studios
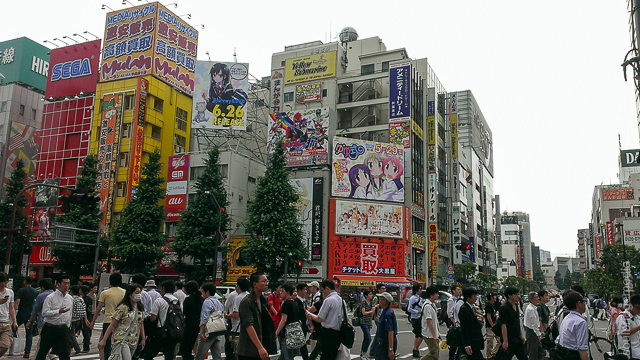
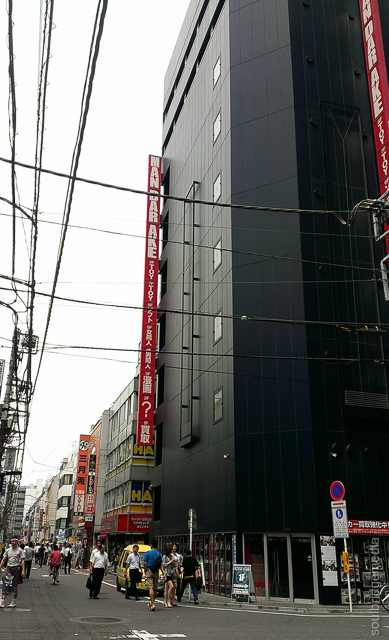
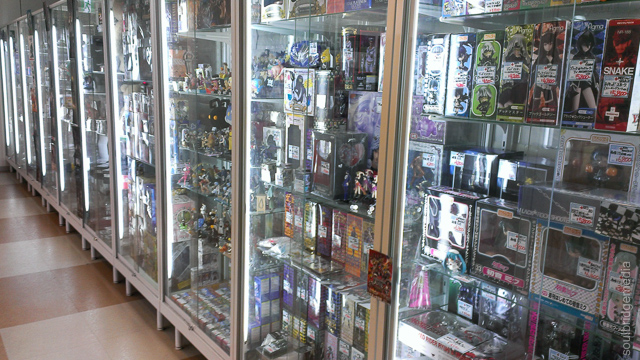
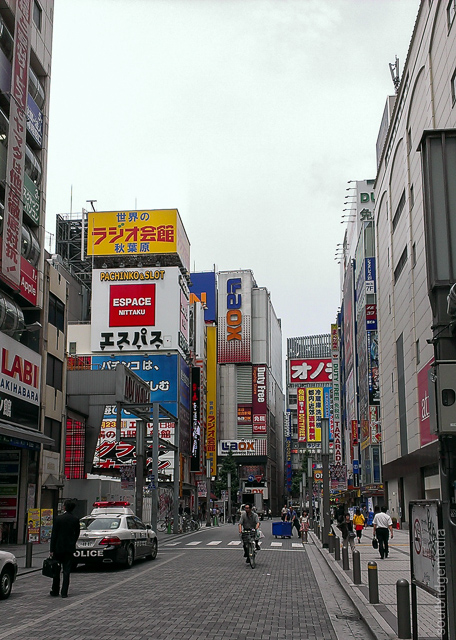
Aki’ba, THE geek mecca (and mecha!) of the world. We covered a few spots on our last visit but its one of those places that you can continually go back to and not only find something new every time but you’ll never cover all of it! It’s a bit hard to reference each store, especially when a lot of them don’t even seem to have any obvious naming (having rubbish Japanese reading skills doesn’t help!) but know that if you work your way north from the station keeping within a block or two of the main drag you cant go too wrong. The best part is uncovering hidden treasures in stores that, at first glance, don’t look like they’d have what youre looking for.
A couple of our fave stops include:
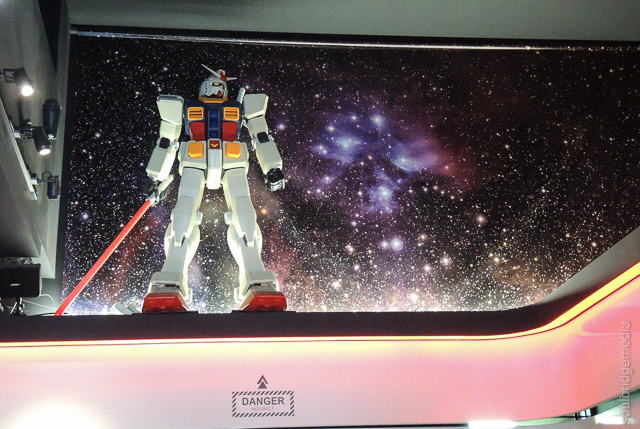
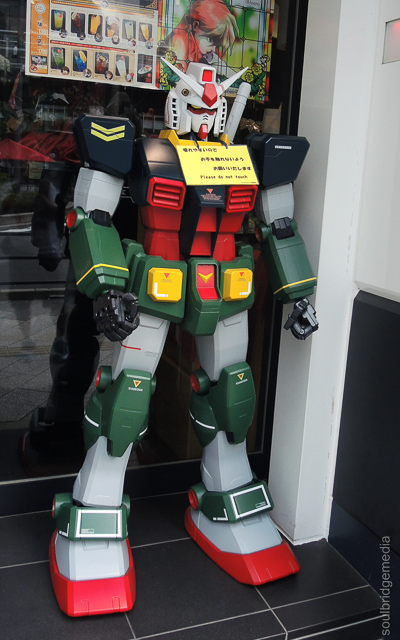
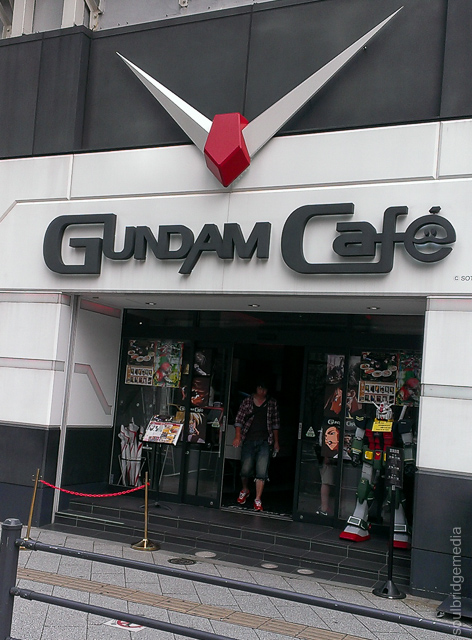
The Gundam Café – exactly what it says on the box. A café celebrating all that’s Gundam with Gundam referenced food and drinks and nifty décor. Also a good place to grab a couple café related souvenirs – mugs, biscuits etc. as well as a small selection of Gunpla. Next door is AKB48, the girl band, the theatre, the hourly shows. Sick of waiting years to see your fave act or missing them because they didn’t come to your city? AKB48 has you covered where you can go to them and see them play any day of the year and even in different parts of the country on the same day! How is this possible? Well having 48 members (now into the hundreds!) helps. Though if you’re not a tweenage girl or business man it may not be your cup of Miso.
Mandarake – Big black building. Toys. Cosplay. Old, new. Lots. If you’ve read any of our posts about Japan previously, you’ll know how much we champion this place, go there.
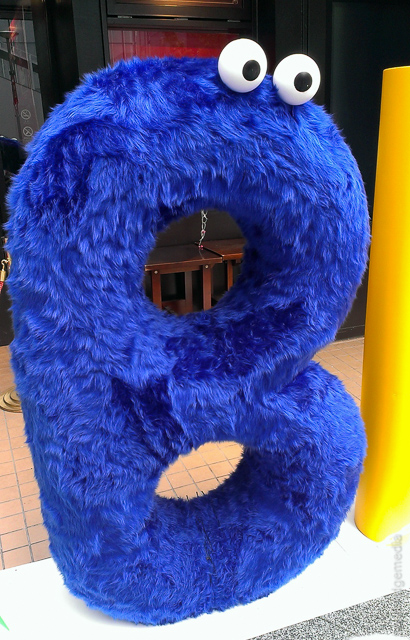
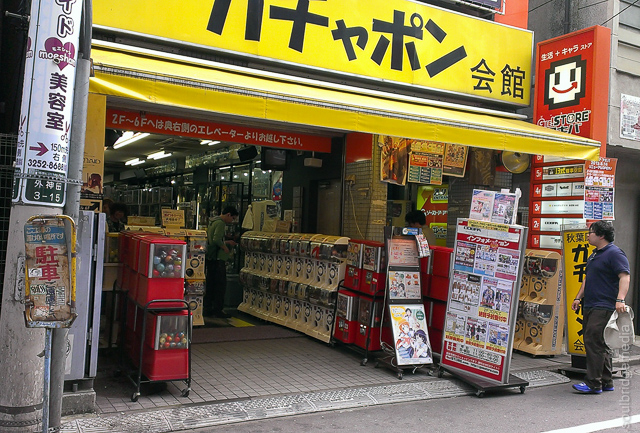
Gashapon store – A whole shop just for gashapon! While the thrill of the hunt is always fun, I’m finding I’m more inclined to just pay a slight premium to get the “discovered” pieces and either cherry pick or buy the whole collection that someone else has taken the time to collate. If this sounds like you as well, the rear of the store and upstairs has display cases and shelves full of the ones you’ve been chasing, didn’t know existed or have been out of production for years.
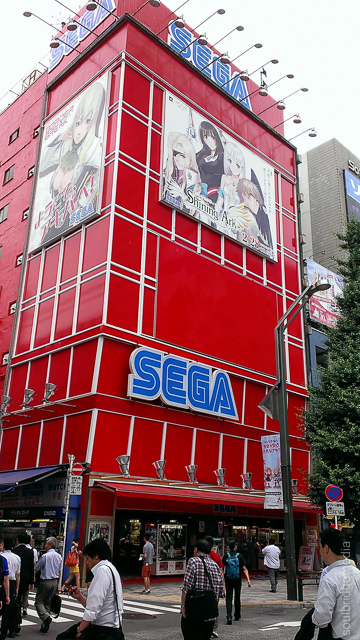
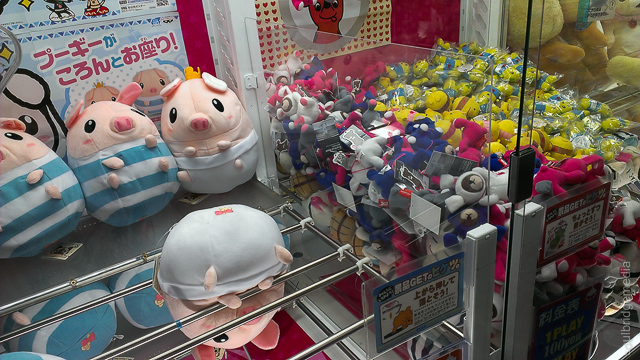
Sega – There are plenty of multi storey gaming buildings but none stand out quite like Seee-gahh (cue sparkly shine). Many hours and thousands of Yen can be spent without blinking an eye. But of course if you cant master the “giant metal nail punching holes in the paper” or “push the pig through the bars” technique, there’s always the cop out of simply finding a store that stocks the prize you’re after and buying it 😉
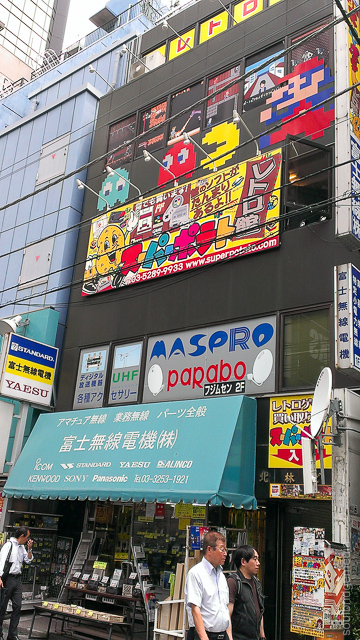
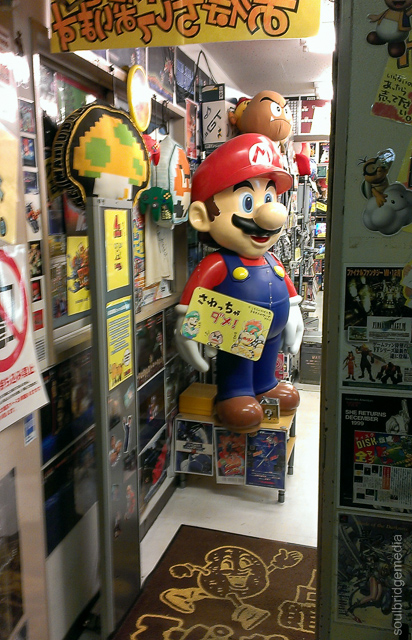
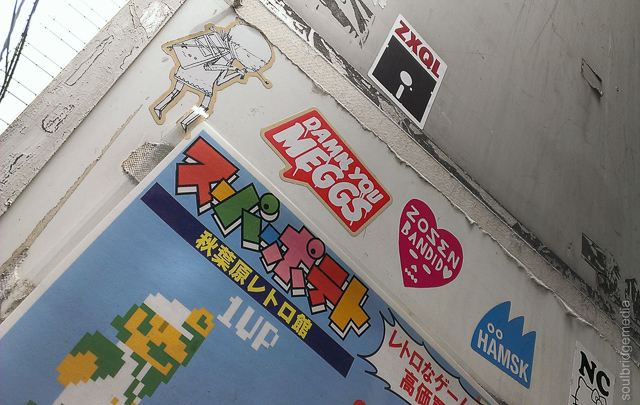
Super Potato – Wall to wall retro console gaming, even if you’re not after a cartridge or console there’s plenty of items that would make great wall/desktop display pieces.

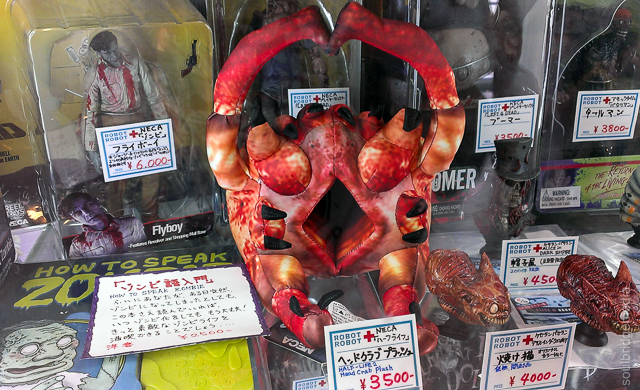
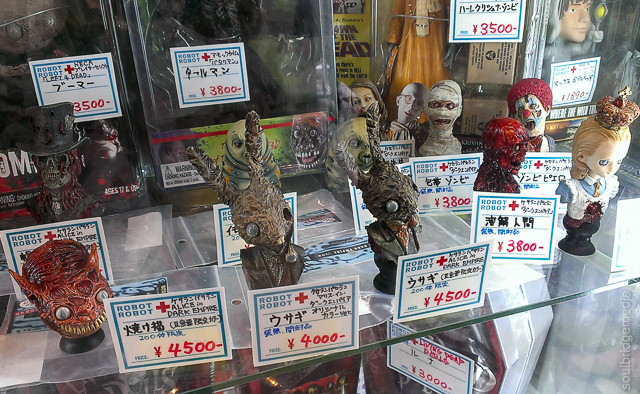
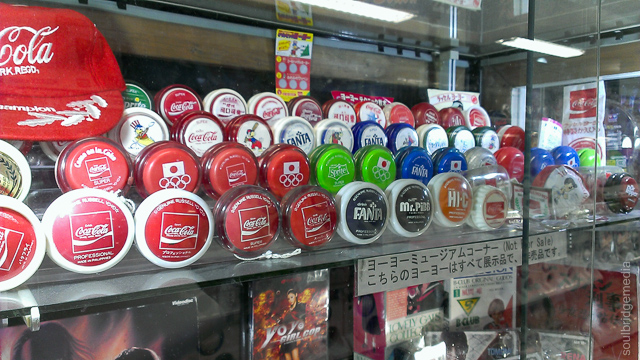
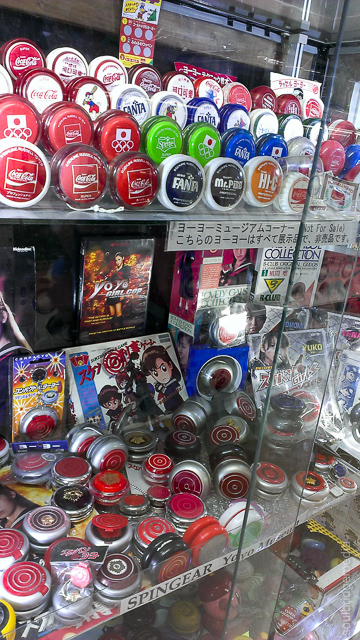
Robot Robot – Thankfully this was one of those times judging a shop by its name paid off! With no street frontage and only a sign to go by, it was always going to be a gamble but the trip up the elevator was worth it not just for Robot squared with its extensive range of Hot Toys style high end collector products with leanings towards horror movies and gore in general …and vagina-like monsters (why are they always vagina-like??) but for the smaller accompanying stores on the same floor with a great selection of new and used toys and collectibles. Want to see a fair chunk of Coca Cola’s history as a yoyo? Yep, you see that here too!
Of course there’s also the plethora of electronics stores like LAOX which really need no description, if it’s a new gadget, they’ll more than likely have it. Pricing is however average or slightly better with greater bargains to be had online but finding a JDM only model or colour can be worth it.
We stumbled across a “Rollertarg” a bit further down so lunch was an easy choice 🙂 continue walking and you will end up in Ueno. However, unlike last time the market gods were not kind to us and a lot of stores that we previously come across had moved on, though its always a good place to walk through, you’ll never know what you’ll find and the nearby park is more than worth the trip.

—
If you have any questions on our travels, where to buy, what to do, hit us up on the Soulbridge media facebook page.
Japan 2013 part #1 – Arrival
Japan 2013 part #2 – Tokyo International Toy Expo
Japan 2013 part #3 – Gotemba – Premium Outlets mall
Japan 2013 part #4 – Tokyo – Studio Ghibli Museum
Japan 2013 part #5 – Tokyo – Kichijoji and Nakano
Japan 2013 part #6 – Tokyo – Akihabara
Japan 2013 part #7 – Tokyo – Tamiya HQ, Diver City
Japan 2013 part #8 – Yokohama – Zoorasia
Japan 2013 part #9 – Yokohama – Ramen Museum
Japan 2013 part #10 – Nissan HQ and Yokohama
Japan 2013 part #11 – Osaka – Nanba Shopping
Japan 2013 part #12 – Kyoto
Japan 2013 part #13 – Tokyo – Harajuku, Shibuya
Japan 2013 part #14 – Osaka castle, Umeda Sky building
Japan 2013 part #15 – Osaka Aquarium and Tempozan wheel
Japan 2013 part #16 – Osaka Universal Studios
If you don’t know what Studio Ghibli is, stop reading and head down to your video store and at the VERY least hire out Ponyo. Its one of the most readily available works and is easily digestable with some big name Hollywood actors lending their voices to the characters. For the uninitiated it’s a good place to start for a peak into the world of the creations from co founder, animator and director, Hayao Miyazaki and Japanese anime in general (that doesn’t involve Mecha or demon tentacle rape).
Yes it’s a kids cartoon but it and the Studio Ghibli philosophy of wide eye wonder and innocence is something many would say is missing from today’s society. Where Disney portrays a lot of things happen by magic, the SG way of things is much more whimsical in a simple acceptance that there are many worlds and realms within our own and characters from each interact freely.
This simplicity and untainted wonder can be traced directly back to what some might say “eccentricities” of Hayao Miyazaki. Very much a traditionalist in the art of animation with most bar a couple of his recent works being all drawn, coloured and animated by hand and he has on many occasions voiced his displeasure with technology, not owning a computer or DVD player and even going as far as saying people using iPads are making masturbation gestures (though isnt that just Apple users in general? 😉 ). This rejection of technology is imposed at the museum where absolutely no photos are permitted. Some (including myself at first) will think this is a bit of a jip feeling like you’re back in an 80’s theme park without film and stuck having to resort to buying your overpriced memories from the giftshop! As true as that may be it adds to the wonderment and for once in a long time (apart from those nights where you’re too drunk to take photos (or ones worth keeping)) many will not have a minute by minute running commentary of their outing and will have to rely on their other body’s sensors not the one in their camera. So this reduces our usual story by pictures account of events but it just means you’ll have to go experience it for yourself 😉
Travel Tip: All tickets are prepaid and are limited to a certain number each day to maximise your experience and comfort (if only all tourist spots did this!). For international tourists, the best way to secure a ticket is to purchase them through authorised dealers/travel agents in your home country, they are also available via some convenience stores in Japan but this choice would be for those with a flexible schedule. Tickets go on sale 3 months in advance so you have plenty of time to plan your stay if you’re on a tight schedule like we were. In Brisbane we used H.I.S. travel in the city.
Getting there:
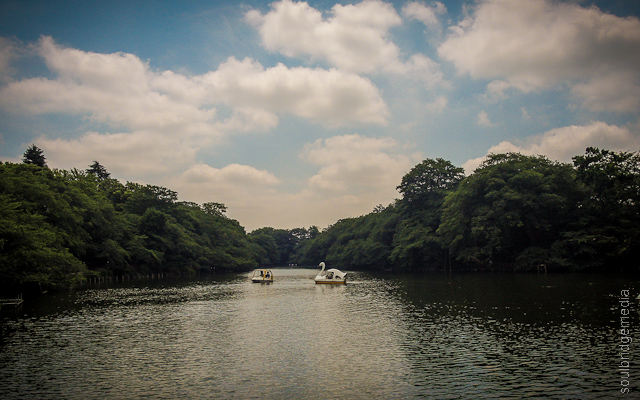
The website suggests a couple different ways of getting there, namely shuttle bus, but we recommend leaving your hotel a little earlier, catching the train to Kichijoji station and walking. Head south out of the station, through some lanes of boutique stores and follow the signs to Inokashira park (a highlight from our previous visit, with a rather different look in the summer), then on to the museum. The walk takes about 30-45min which includes regular stopping for photos through out the park but once you hit the major road it’s a straight run to the unmissable destination.
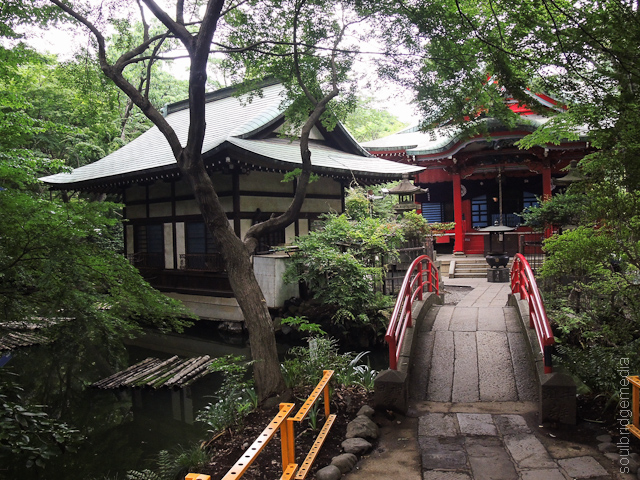
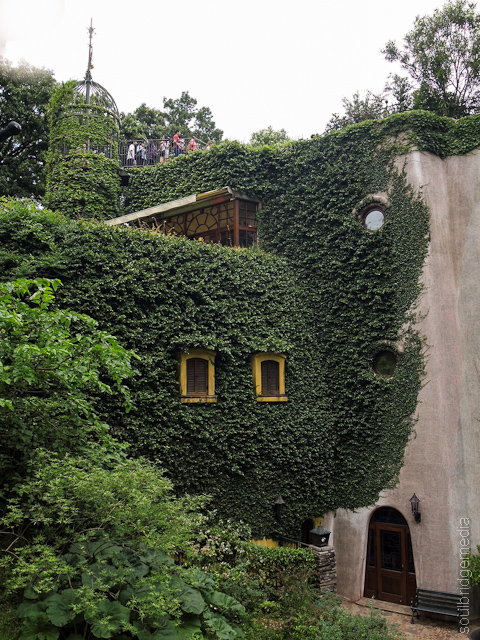
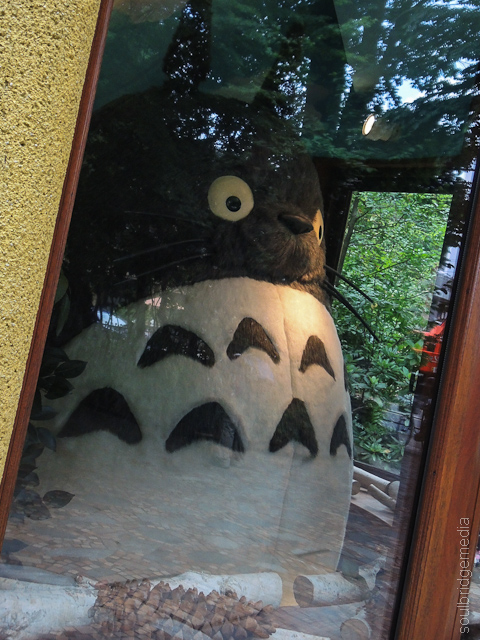
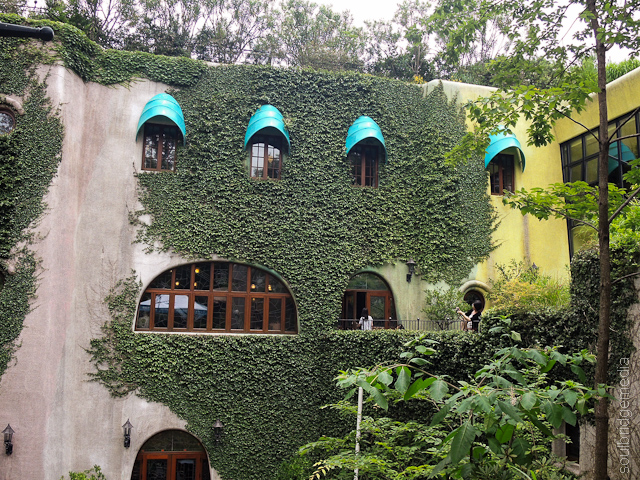
Unmissable in the sense that…well, it’s a castle! Despite this, with help from plenty of wall crawling natural follage, it blends well into the surrounding cityscape bar the pseudo ticket booth manned by everyone’s favourite keeper of the forest, Totoro. Its not until you head inside does it feel like you’re truly stepping into one of his films. Descending a grand stair case like royalty lands you on the ground floor which houses a cinema and an open floor where you can see up three stories to skylights and a ceiling fan made of airplane wings.

Rooms branch off from the center with one housing a selection of basic animation techniques. A large carosel houses a fully detailed scene with Totoro figures sequenced like stop motion but more like a flip book where the preceding “frame” is a short distance behind the current. The characters come to life as the wheel spun and a strobe flickered. These types basic principles and methods used in animation are displayed in varying forms of timed live “shows” and hands on exhibits as you work your way up to the top level.
Here you’ll see a re-creation of several of his work areas, which looked pretty much like a fair portion of his house. Anyone who’s dabbled in anything artistic in the way of painting or drawing would instantly recognise the chaotic yet “I know exactly where that is” layout of clutter over desks and shelves. An airbrush sits at the ready like a six shooter, sketches with annotations, scrawls and correction sit to the side of a current half completed work, piles of loose pages are on top of sketch books propped up on big jars full of pencils which have been sharpened down to a “roach” sized nubbin in amongst ash trays full of butts surrounded by shelves of coloured paints of all kinds of mediums while every last inch of wall and shelf space is covered with all matter of completed works, art, figures, toys and other kinds of inspiration. The room exhibit themselves being a work of art… in a haphazard Hoarders TV show kind of way. All that was missing was a framed “Bless this mess” cross-stitching to tie it all in together 😉
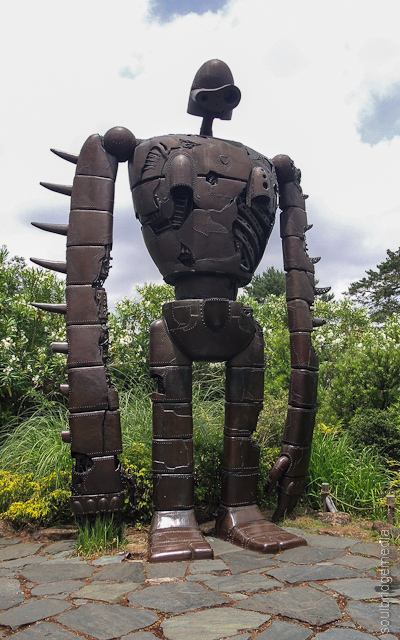
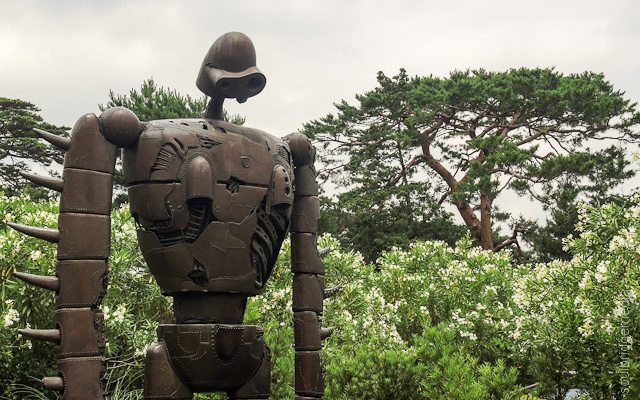
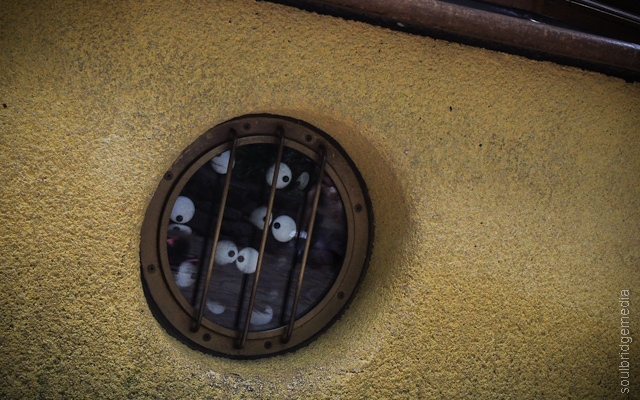
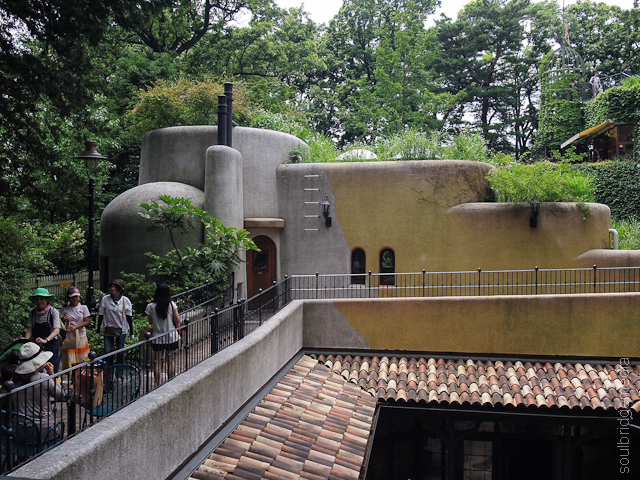
Also on this level you’ll find the kids play room with a third scale Cat Bus and Soot sprites! (only for kids tho ): ). Before you get too bummed about that or embarrass yourself by yelling “My turn! My turn!” before pushing them out of the way, head out the door and climb the spiral stairs to the roof to visit another friend you might know from Castle in the Sky. Hes sneakily hiding amongst the trees (quite a feat considering his size) and is barely visible from the ground. Grab a photo of him by himself then get the person behind you to take one of you together. It was pretty much an unspoken production line for those waiting. People behind would shoot for those in front, it worked out quite well and the line moved quickly for the most part. Note: the path behind the sculpture goes no where.
Finally, if you’re chasing refreshments, there is a coffee shop and restaurant on site however the restaurant had a long queue the whole time we were there and getting a table inside or out was pretty much impossible. Better to just pack some snacks and pop into one of the restaurants back towards Kichijoji station.

That pretty much wraps it up, though you could easily go here 10 times and spot something new each time in the restrooms alone! (seriously check them out) The best part is that its not just a collage or library of the studio’s work but a homage to the art of traditional animation, the man behind it and the inspiration he and his work has had on numerous movies and big Hollywood animators.
Travel tip: Like most museums, your outing can take anywhere from a couple hours to the better part of a day if you choose to read all the info plaques and watch whatever is screening in the cinema but generally budgeting half a day including the walk out and back is enough time to get you back to Kichijoji station for a late lunch.
Travel tip: While there are literally hundreds of choices to eat, we found a chain store (only because we ended up seeing the same restaurant everywhere) that had the perfect balance of variety and value for money. Not having any skills in reading Japanese we aptly named the place “Rollertarg”. Why? Because the first symbol in its name looked like a rollerskate, very similar to the Chinese character “ma” for horse and about ¾ along there was a red target just like the logo for… Target. Ingenious! Yea we thought so too 😉 It was quite distinctive and made it easy for many last minute decision makings through out our trip. You want value? Try this on for size – 2x Miso soups, a meat and vegetable dish, a fried rice dish and a side of Gyozas …for around $14AU! Yep we were completely stuffed after that effort and no Cat Bus anywhere to be seen to chauffer us around! But it was welcoming to have the strain was on our bellies and not our wallets! Note: this particular restaurant (and many others in Japan) allow smoking. Its usually in a separate section or designated tables but this place had it after a certain time in the evening.
So with the extra Yen we saved burning a hole in our pockets we waddled off for a wander around Kichijoji.


If you have any questions on our travels, where to buy, what to do or just want to share your own stories, hit us up on the Soulbridge media facebook page.
Japan 2013 part #1 – Arrival
Japan 2013 part #2 – Tokyo International Toy Expo
Japan 2013 part #3 – Gotemba – Premium Outlets mall
Japan 2013 part #4 – Tokyo – Studio Ghibli Museum
Japan 2013 part #5 – Tokyo – Kichijoji and Nakano
Japan 2013 part #6 – Tokyo – Akihabara
Japan 2013 part #7 – Tokyo – Tamiya HQ, Diver City
Japan 2013 part #8 – Yokohama – Zoorasia
Japan 2013 part #9 – Yokohama – Ramen Museum
Japan 2013 part #10 – Nissan HQ and Yokohama
Japan 2013 part #11 – Osaka – Nanba Shopping
Japan 2013 part #12 – Kyoto
Japan 2013 part #13 – Tokyo – Harajuku, Shibuya
Japan 2013 part #14 – Osaka castle, Umeda Sky building
Japan 2013 part #15 – Osaka Aquarium and Tempozan wheel
Japan 2013 part #16 – Osaka Universal Studios
Japan 2013 part #1 – Arrival
The age old problem with travelling is when to go, easy if you’re not timing it to an event but the event we had in mind was the Tokyo International Toy Expo. At the time of booking there was no official confirmation of the date and having spent our last trip to Japan solely in Tokyo, we thought this time Osaka could be our base with a couple shinkansen (bullet train) trips to Tokyo, that idea however quickly disappeared when the date was confirmed. We were set to arrive on the Saturday night with the Sunday being the last day of the event! We could have pulled an Amazing Race and legged it to catch the last shinkansen to Tokyo 40min after landing but not wanting to stress ourselves out the first night there, we decided to take an overnight pit stop in Shin-Osaka (right next to the station) then catch the first service the following morning.
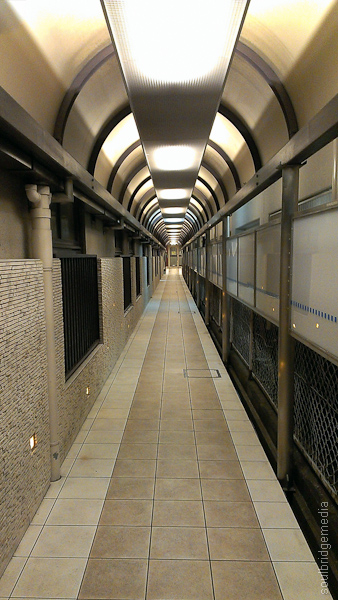
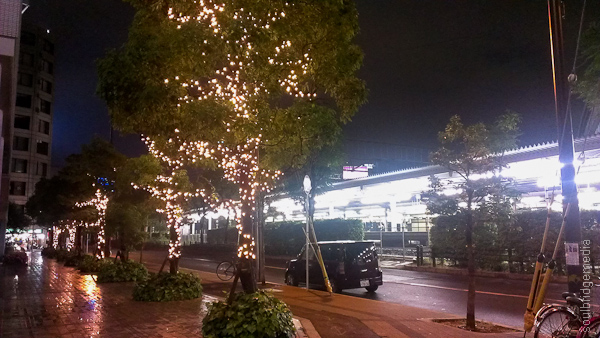
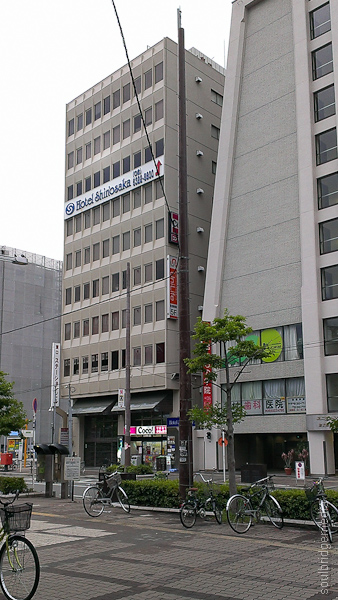
Travel tip: If you’re doing the same or are staying in Osaka and need quick access to the shinkansen, we recommend hotel Hotel Shin Osaka, literally across the road from the station (follow the long corridor) very reasonably priced and with a few eating places and picturesque street scenary near by.
Travel tip: If you plan on catching the shinkansen more than a couple times you cant go past a JR Rail pass. An almost* unlimited pass to travel on all JR branded transport. For more info and prices see their website here. The initial outlay may seem a little steep but after some rough sums you’ll find a 14 day pass pays for itself after about 2 runs between Tokyo and Osaka. Cheaper and more convenient than dealing with transfers to and from the airports. Also note that unlike the Suica or Pasmo cards you never need to top it up. Simply flash your pass at the manned ticket gate and away you go (we were only asked for our passports once on the first use). The slight downside to this is having to deal with people asking questions blocking the manned gate but don’t let them slow you down, show the pass clearly, pause, wait to be acknowledged, head nod bow, thank them and be on your way.
* – pass only available on JR transport, not available in some private subways and buses in further out areas and smaller cities like Kyoto. Also not available for booked seats on the shinkansen, this option however is available at purchase.
Travel tip: purchasing the JR Rail pass – this can only be done outside of Japan. If you’re going through a travel agent they will organise it all for you but if you want to save on price and add ons like $6-8 for registered post from Sydney then finding a local dealer is the way to go. In Brisbane the place to go is H.I.S. travel in the Brisbane arcade, they can also arrange tickets for Studio Ghibli.
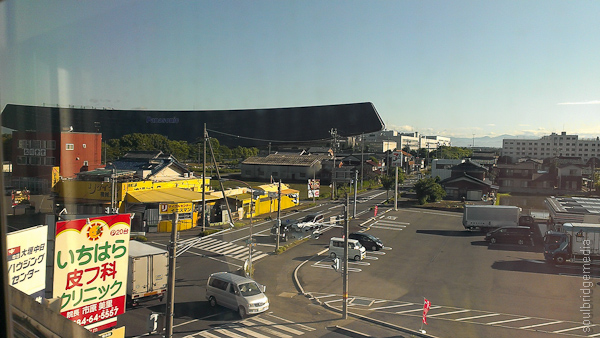
Photo Tip: The scenary between Osaka and Tokyo is littered with photo opportunities from the shinkansen with mountains, rice fields, industrial areas and commercial buildings. About 45min out from Tokyo you may even get the chance to see Mt. Fuji if its not blanketed in cloud. Best advice is to find a seat next to a clean window.
Mt Fuji on a good day :p
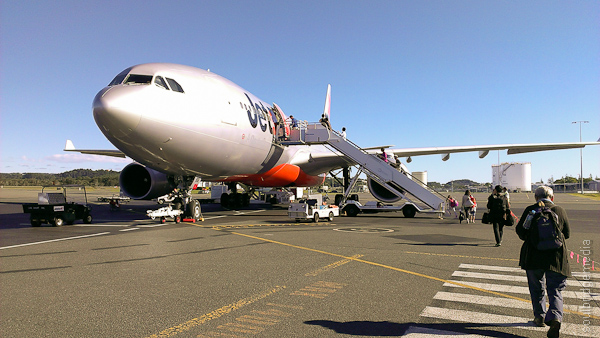
So with that, we arrive in Tokyo and hit the muggy and drizzling ground running towards the Tokyo Toy Expo.
If you have any questions on our travels, where to buy, what to do or just want to share your own stories, hit us up on the Soulbridge media facebook page.
Japan 2013 part #1 – Arrival
Japan 2013 part #2 – Tokyo International Toy Expo
Japan 2013 part #3 – Gotemba – Premium Outlets mall
Japan 2013 part #4 – Tokyo – Studio Ghibli Museum
Japan 2013 part #5 – Tokyo – Kichijoji and Nakano
Japan 2013 part #6 – Tokyo – Akihabara
Japan 2013 part #7 – Tokyo – Tamiya HQ, Diver City
Japan 2013 part #8 – Yokohama – Zoorasia
Japan 2013 part #9 – Yokohama – Ramen Museum
Japan 2013 part #10 – Nissan HQ and Yokohama
Japan 2013 part #11 – Osaka – Nanba Shopping
Japan 2013 part #12 – Kyoto
Japan 2013 part #13 – Tokyo – Harajuku, Shibuya
Japan 2013 part #14 – Osaka castle, Umeda Sky building
Japan 2013 part #15 – Osaka Aquarium and Tempozan wheel
Japan 2013 part #16 – Osaka Universal Studios

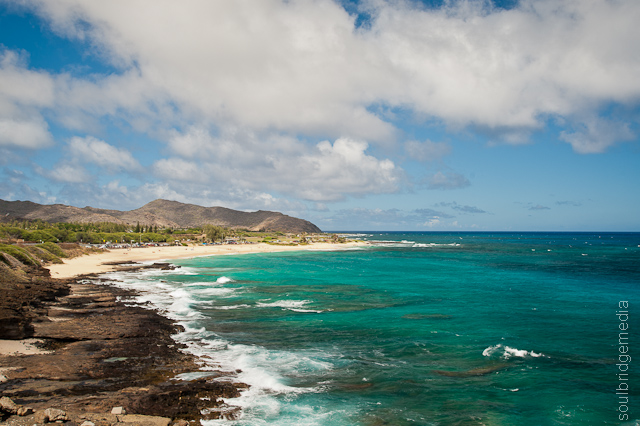
For our final day, we wound things down starting with a relaxing drive out to Hanauma bay.
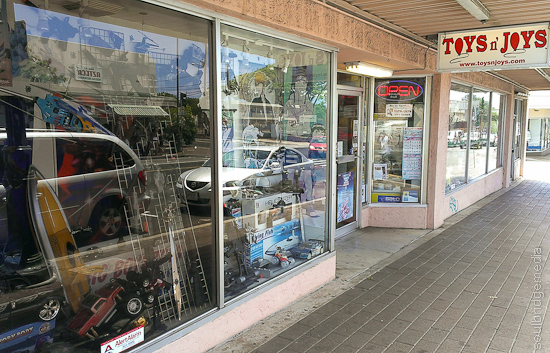
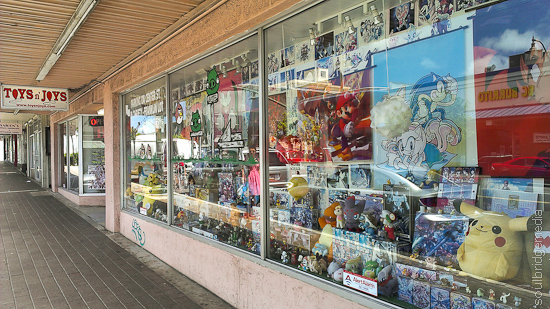
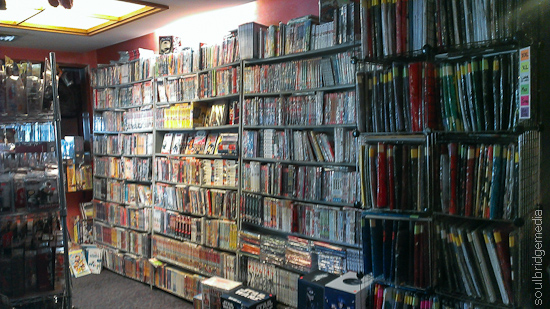
From Honolulu we took the Lunalilo Fwy to the Kalanianaole Hwy, it’s the most direct route and also runs through Kaimuki. Pretty much a blip on the map but it is home to Toys and Joys’ main store which if you had to make only one stop at a toy shop, this would probably be it. Prices were on the high side but the range and quantity of stock makes it a worthy stop for figures, games and RC gear along with the standard cutesy fair.
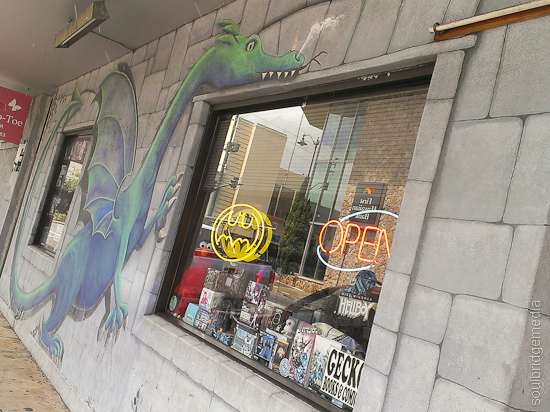
A block or two away there’s also Gecko Books and Comics (surprisingly pretty much no web presence!) which would definitely be up there as Oahu’s most extensive range of comics. They also have an eclectic range of collectibles, toys and games.


A few minutes down the road is the Kahala Mall. It’s a decent sized mall in a regional sense but nothing really of much note apart from Champs… and Pretzelmaker 😉
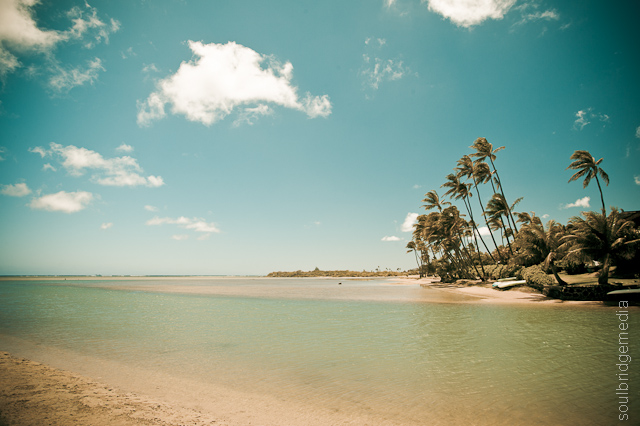
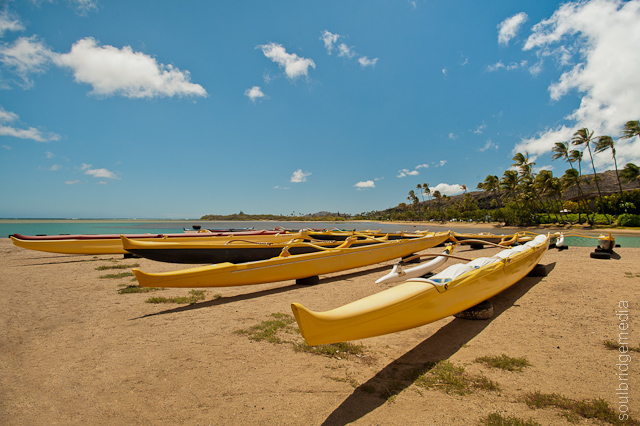
Onward along the Kalanianaole Hwy there are plenty of coves, boat ramps and sand bar lagoon areas, any of which would make a more than nice spot to stop for a cuppa, picnic or spot of sunning.
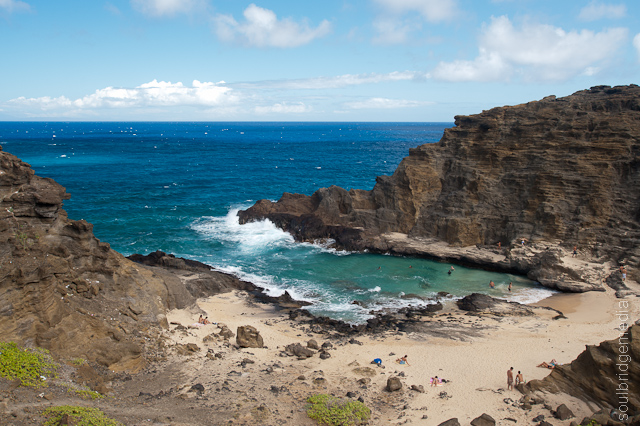
You know you’re getting close to the entry to Hanauma Bay when the traffic grinds to a halt and you guessed it, you see paid parking. The parking is up the top at the lookout, which if you want to venture down to the beach is quite a hike but thankfully there are (paid) shuttle buses to spare your legs.
The beach itself is actually a private beach so you will have to pay to play. Going by recent reviews, it used to be the place to go to for amateur snorkelling but now (no thanks to its popularity) the natural reef is almost none existent till a lot further out. Closer in, they have tried to regrow sections by mounting coral to plastic frames, not quite the same ambiance.
For us the best spot was up on the lookout points. There are several around the top of the bay all with its own merits but the center point to fully take in the bay’s horse shoe shape was a clear stand out. Add it to your list of things to do before or after bumping shoulders with other greased up tourists down on the beach.
Photo tip: online reports mention its well worth your while getting there for a sun rise… but of course that would mean getting up early. No easy feat when you’re on island time!
You can pretty much continue along the highway to explore more of the coastline which gives way to specklings of hidden secluded beaches and sweeping golden sand.
—
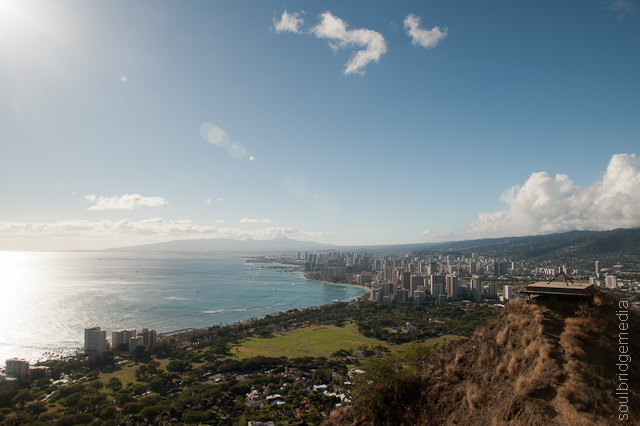
Diamondhead Crater
The crater is definitely one of the biggest landmarks on that side of the island. It’s clearly visible on take off or landing at HNL airport and always looming on the southern horizon. Its a short drive from Waikiki so it wouldn’t be a stretch to head out on a moped if that was your only mode of transport. The parking is, you guessed it, paid, $5 per car but this is entry to the park as well. You can avoid the fee by parking in the lower carpark but only if you’re prepared for a long uphill walk BEFORE you even get to the foot of the crater and you will still have to pay $1 per person if you arrive on foot.
The upper carpark is actually on the crater floor, here you’ll find restrooms, vending machines and the odd food truck. The hike to the lookout takes you up the inner wall of the crater to a south west point. If you’re reasonably fit and don’t dawdle it takes about 45min to get to the top (about 30min coming down).
Travel tip: Like any hike, make sure you have sturdy shoes, if you’re wearing heals, dressy shoes or thongs (flip flops) save yourself the blisters, stubbed toes, rolled ankles and whinging and just wait down the bottom. A fair portion of the track is very uneven with loose and jagged rocks, it would be even more treacherous in the wet. Depending on the time of day there is little to no shade so water and sunscreen is a also must.
Photo tip: There are a few places on the way up to take photos but they all pale in comparison once you reach the top. Save unpacking and repacking the slr till then.
The “top” is actually one of a few large battlements which line the crater top. Being an outpost and early warning location for the USA you can just imagine the kind of artillery they would’ve had up here during the World Wars.
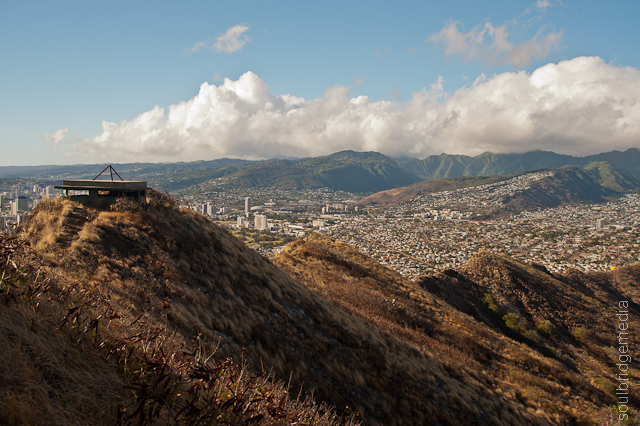
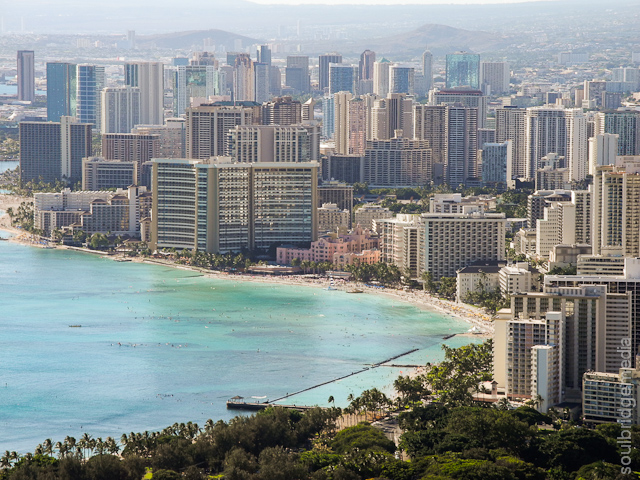
The view to say the least is well worth the climb. You can see the whole breadth of the island from Waikiki and Honolulu in the west through the central mountain range to off shore islands in the east. Get there at the right time and you’ll even catch the scheduled afternoon rain shower rolling in and an obligatory rainbows.

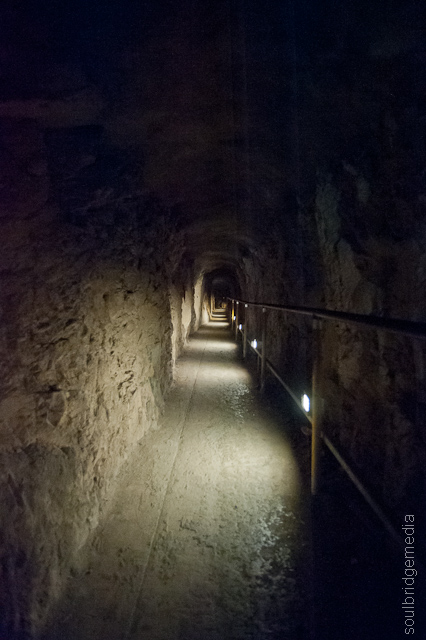
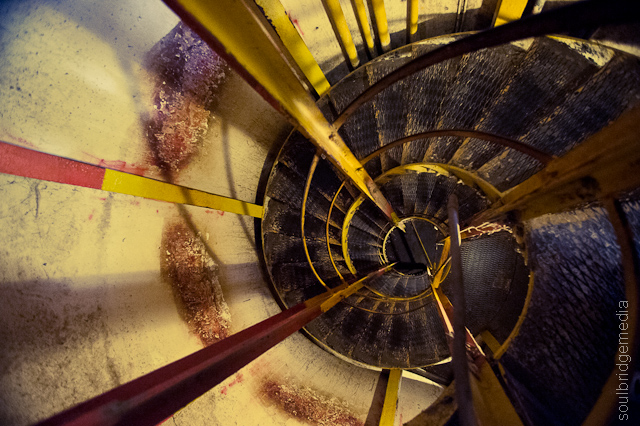
After some view savouring we took an alternate route and ventured down through the internal stairwell of the battlement, a little creepy but a lot cool. I’ll leave you to explore the area to find the entrance 😉
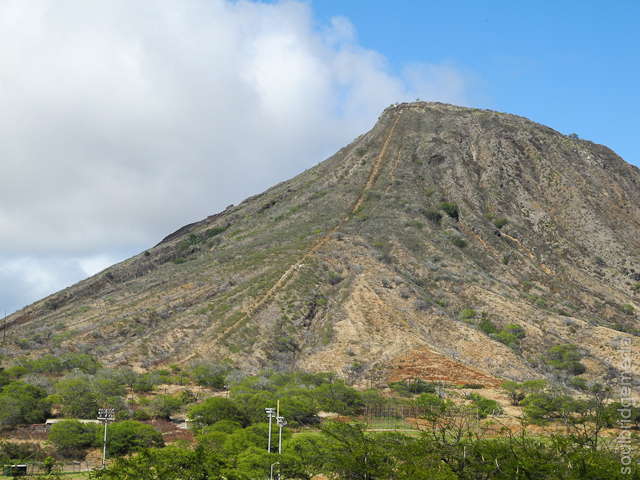
For those that are a gluten for punishment or want the ultimate downhill mountain biking rush, there’s THAT “hill” nearby.

And with that, another one of our adventures comes to a close further cementing our motto, overseas holidays are for doing stuff, relax when you get home!
ALOHA!
…and, Moshi moshi!
Yes I know its taken some time to get through these, more than a year again! Hopefully I’ll be able to find the time so you don’t need to wait as long for the next batch! Coming soon, Japan 2013! Tokyo, Yokohama, Osaka and Kyoto – highlights include the Tokyo International Toy Expo, Studio Ghibli, the Ramen Museum, Universal Studios Japan, outlet malls and more toy shopping than you can poke a 1:1 scale Gundam at!!
As always, if you have any questions about our adventures or where to buy something, just hit us up on the Soulbridge Media facebook page.
Hawaii 2012 part #1 – Arrival
Hawaii 2012 part #2 – Waikiki
Hawaii 2012 part #3 – Honolulu shopping – Part A
Hawaii 2012 part #4 – The Big Island – Volcano tour
Hawaii 2012 part #5 – Shopping Honolulu – part B
Hawaii 2012 part #6 – Tattoo Honolulu / Boardshorts: A Perfect Fit art exhibits
Hawaii 2012 part #7 – Pearl City area
Hawaii 2012 part #8 – Swap meets and Made in Hawaii festival
Hawaii 2012 part #9 – Cook offs and Car shows
Hawaii 2012 part #10 – North shore
Hawaii 2012 part #11 – Windward shore and Sealife Park
Hawaii 2012 part #12 – Chief’s Luau at Sealife Park
Hawaii 2012 part #13 – South shore – Diamondhead crater, Hanauma bay
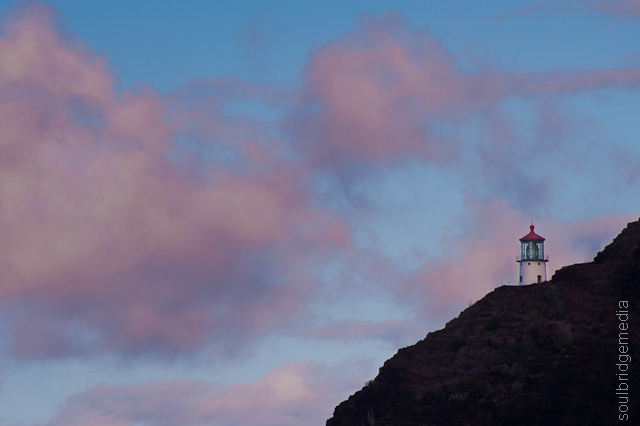
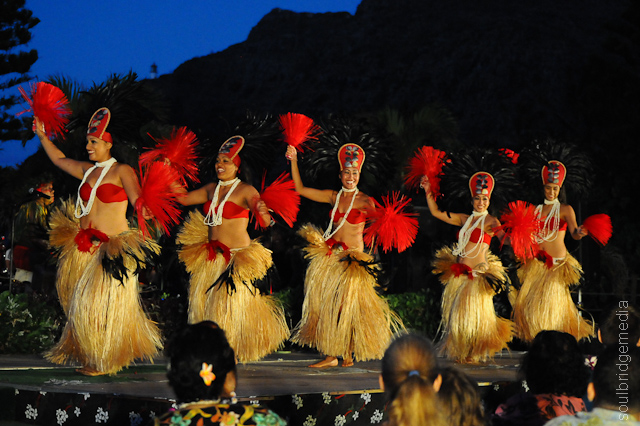
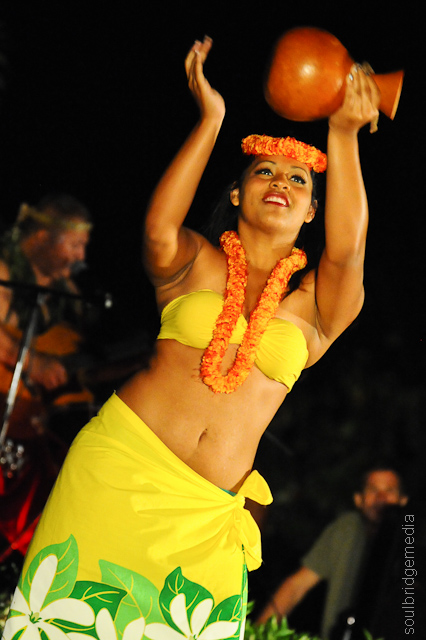
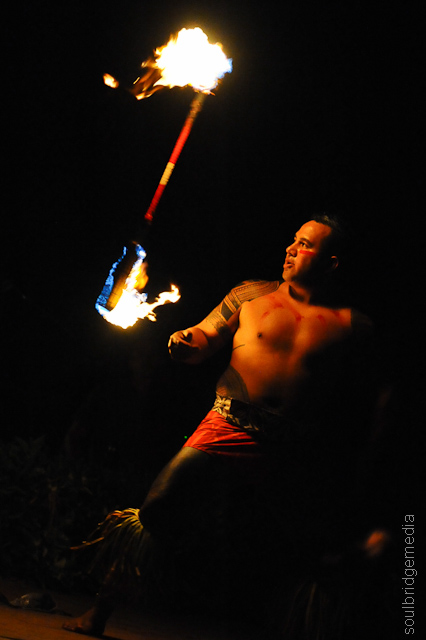
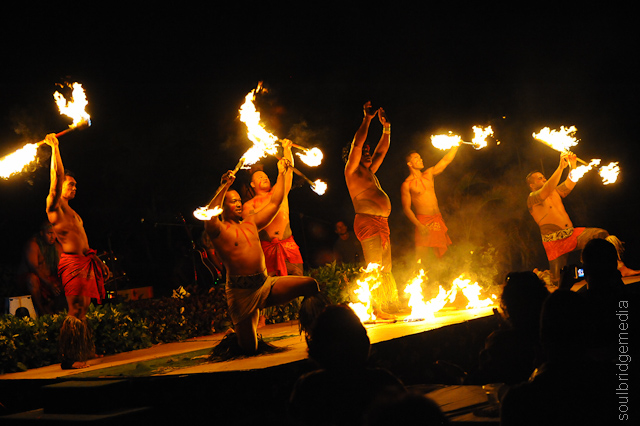
View from the Chief’s Luau
Finding a luau in Hawaii is like finding a bad tattoo at a music festival or a fight on St. Patty’s day, you can (should?) do it with your eyes closed! There are quite a few well known ones on the west coast that have rave reviews but what stood out about the Chief’s version is that he’s the man behind the show and in the show, not just a bunch of uni students on rotation. Being able to time it with our Sealife visit helped it work out perfectly. The “then its settled” moment came when we realised he and his gang of merry men (and women) appeared on one of the legs of Amazing Race 2011 (not surprisingly one of our favourite reality tv shows 😉 ).
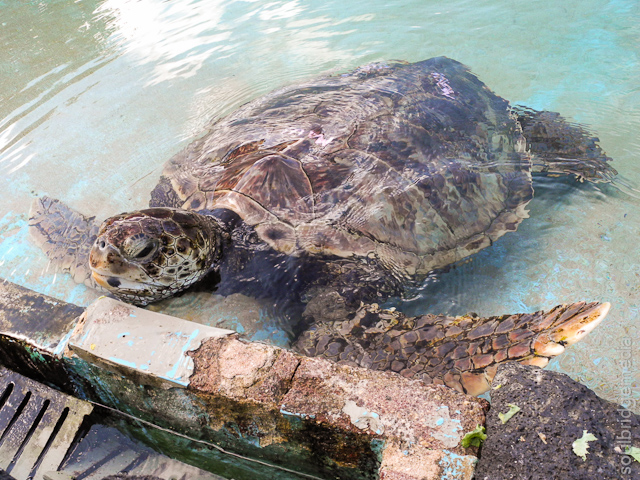
There are a few package deals to choose ranging from $77 to $135 for adults, the main difference being the seating areas. The selling point for the Paradise upgrade package is priority queuing for the buffet and centered table seating while the Royal Package (*snicker*) has table service and “front of house” seating. They also throw in a turtle, sharks and dolphin “mini tour” before hand but if you’re already considering going to the Sealife park this will be redundant.
So what it essentially comes down to is the type of lei you want because even though there’s roughly 3-400 people, the grouped tables with assigned seats are all arranged so viewing isn’t very difficult from any angle and its easy enough to get up and step to the side if you want to snap some photos. The priority buffet line up is unnecessary, there is literally so much food that you wont miss out on “the good stuff”. They will also announce when you are allowed to go up for seconds so the “cheap seats” are just as good if you want the experience minus the frills (or lei flowers as it were). All options however are clearly listed on the site if you feel the urge to splurge for a special occasion.
Photo tip: If you’re planning on taking a lot of photos, your choice of package will have some influence on your shots. Front seats trade close proximity for shooting angle and the ability to stand. Seats off to the side/back will require a long lens. Almost all the photos seen here were shot with a 300mm, lighting is quite dimm when you factor in the higher shutter speeds you will need to freeze the action so be prepared to push the iso.
Travel tip: If you want to save a few bucks on parking, stick to the dirt area at the front of the park near the street. Its only a short walk (about 100m) up the hill to the entrance.
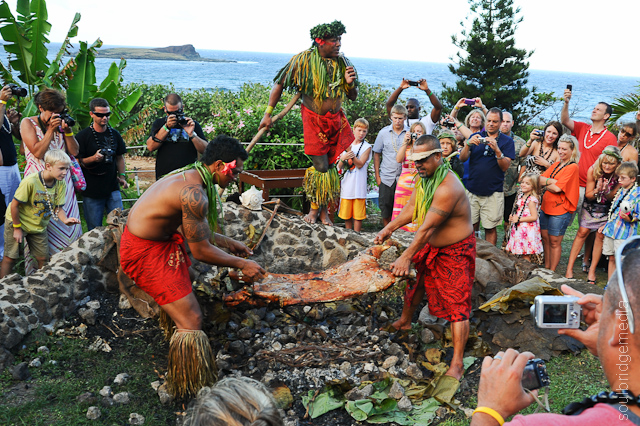
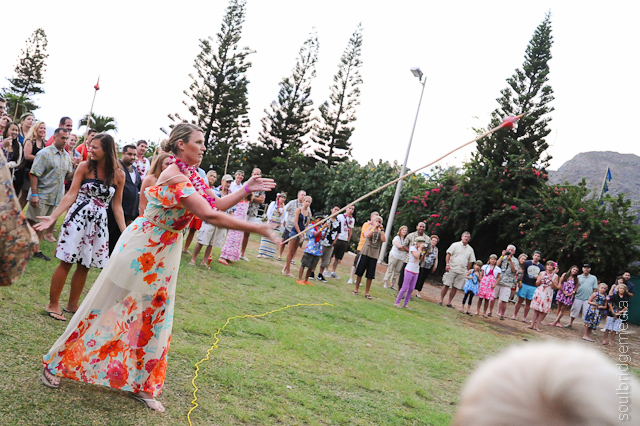
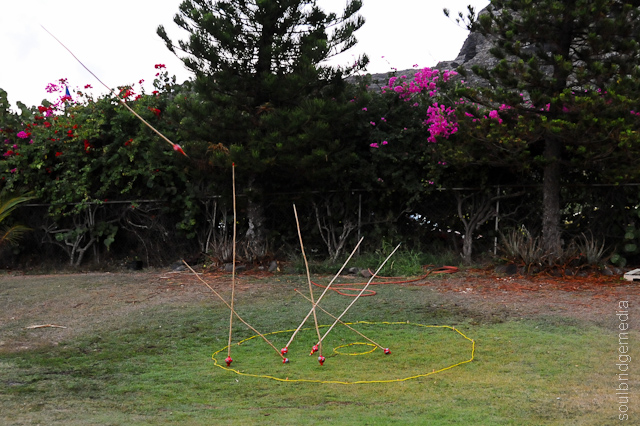
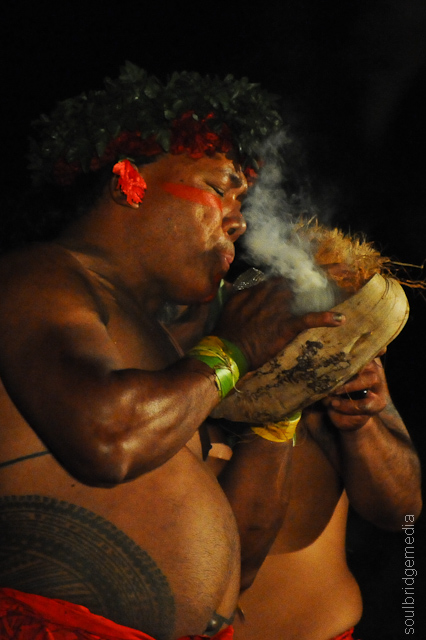
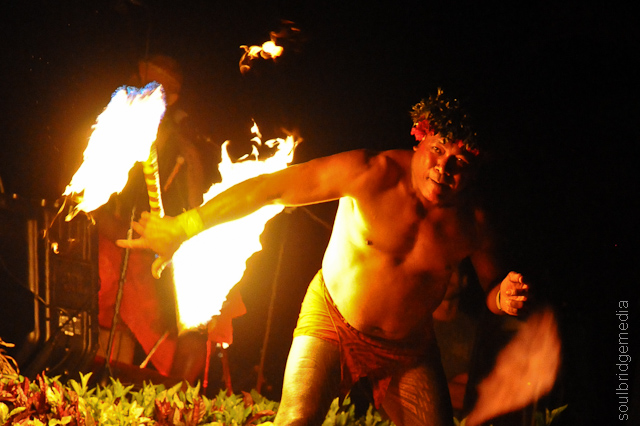
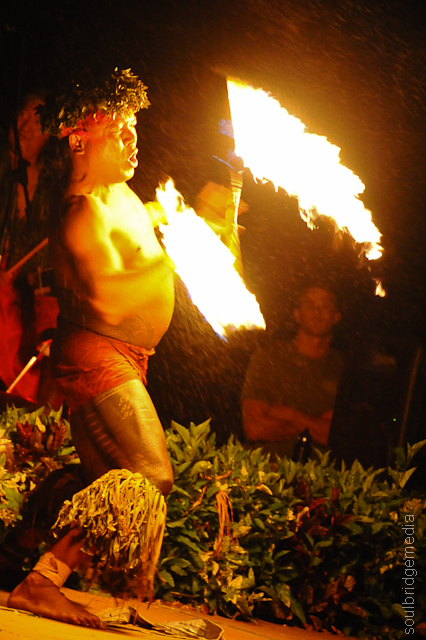
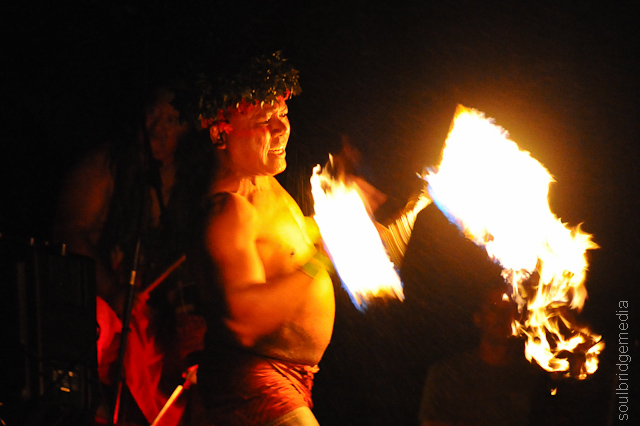
The luau conveniently starts before the park closes so there’s no waiting around if the park was first on your list. Get in early for demonstrations and interactive activities like hula lessons, headband weaving, tattooing, spear throwing and fire making. Luaus are all about song and dance and things get started accordingly. Halved whole pigs are blessed as they’re lowered into a home made hot coals pit – later to be filling our bellies!
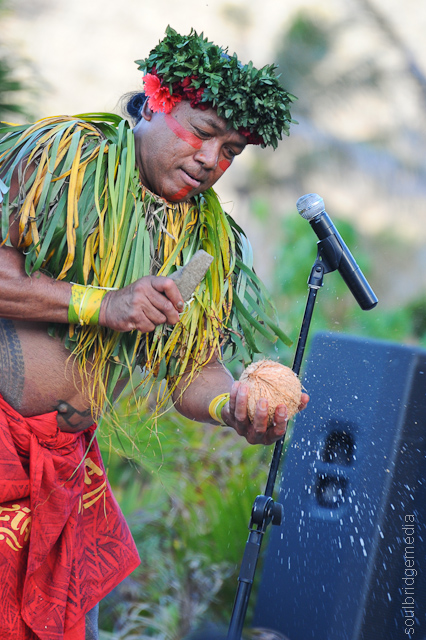
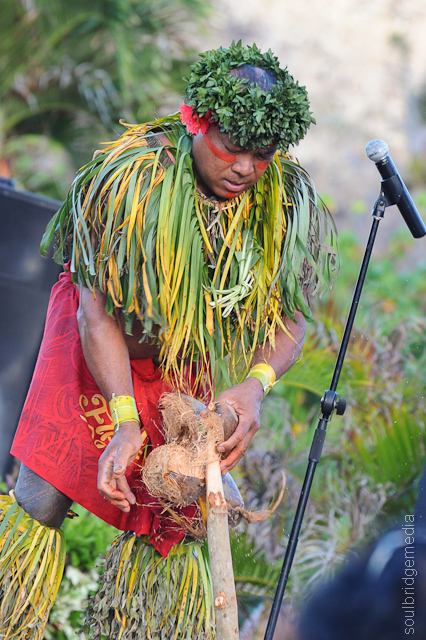
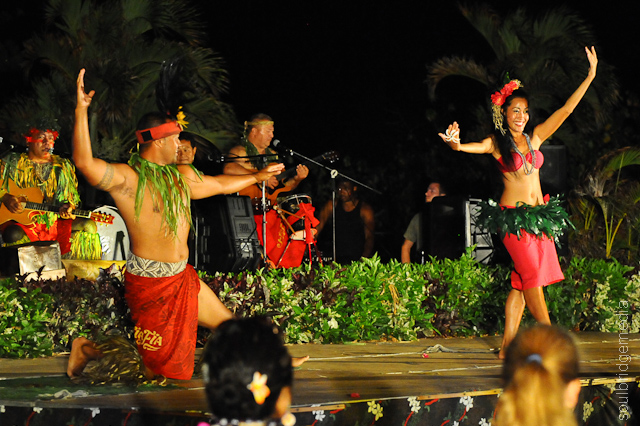
The ceremony starts with a traditional welcome and some light history and story of a Queen and her tribe, a theme which continues through out the night. The charismatic Chief kicks off one of many stand up, slap stick routines with his larger than life personality which basically makes learning about the island way of life like demonstrating the husking of a coconut far more interesting and funny. With a few flicks of the wrist the coconut is skinned and cracked and he’s sipping the milk from it like he just cracked a beer instead.
The break for dinner is roughly an hour or so which leaves you plenty of time to eat and digest. Compliment your meal with some cake, fruit salad or maybe a spot of spear throwing.

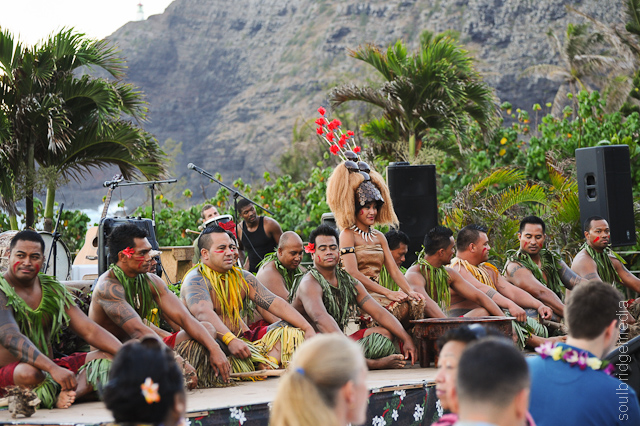
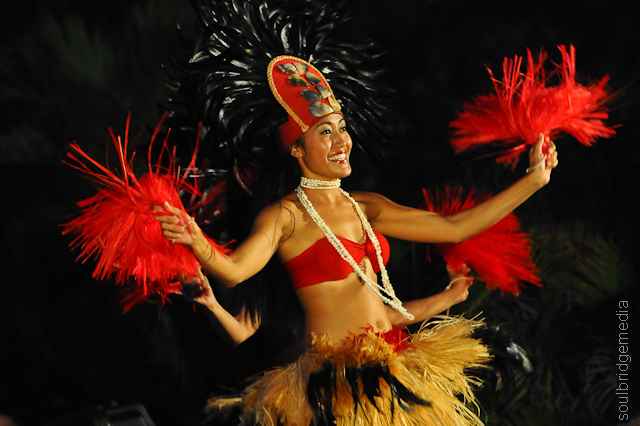
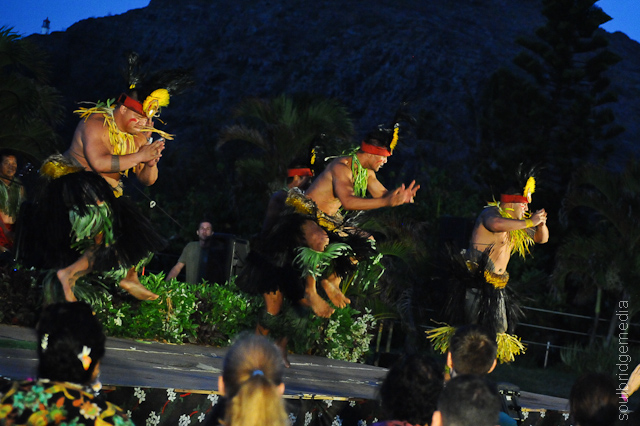
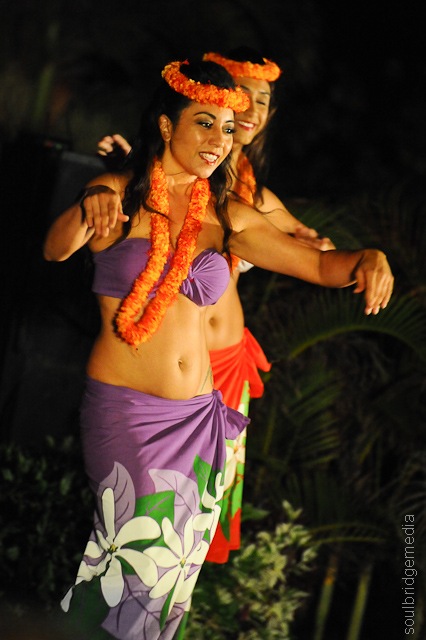
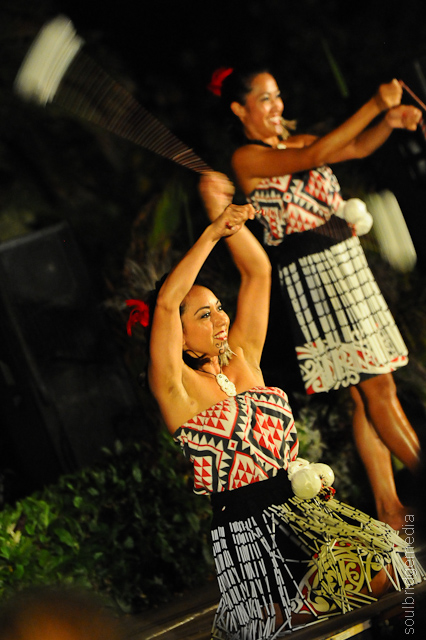
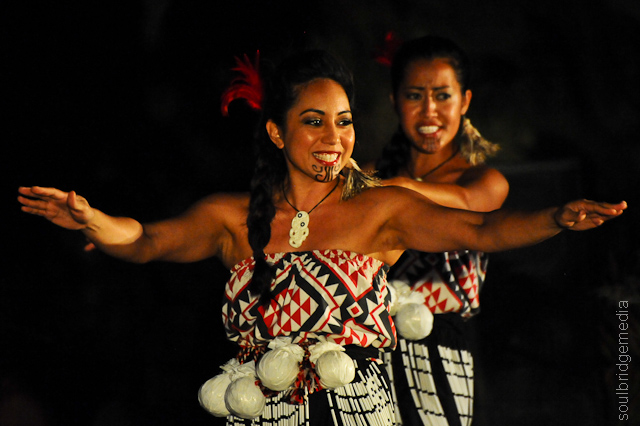
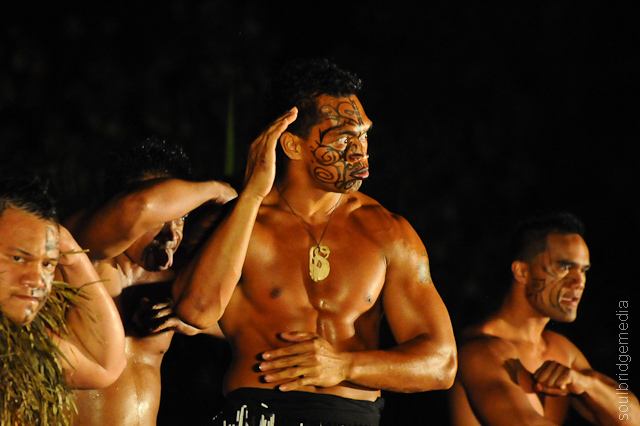
The on stage entertainment continues with traditional dances from neighbouring islands, Fiji, Samoa, New Zealand and other cultures that have influenced and fused with Hawaiian culture. After this, things get “hands on” with crowd participation. I can hear all the Marge Simpson’s out there mumbling “don’t make eye contact, omg theyre interacting!!” but its not that bad. They eventually get almost everyone up on stage in one way or another, be it guys doing the Hakka or girls doing the hula. Just think of it as dancing awkwardly with your old rellys at a wedding, it might be uncomfortable at the time but you get to bring home a memorable experience. You might even score a lei (or a lay?? Ay ay 😉 😉 ) for your troubles.


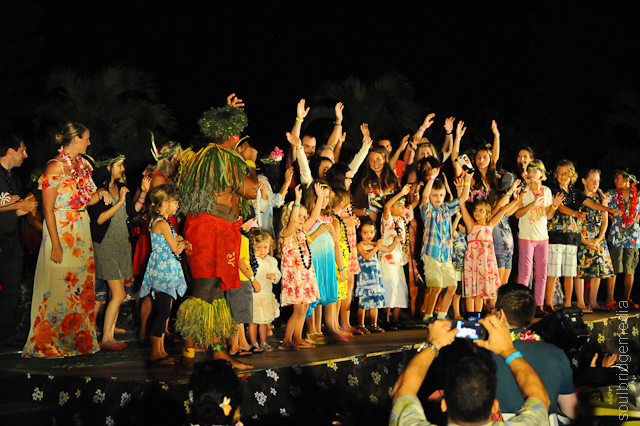
That is of course unless you are me… then things got -REALLY- interesting. I stood off to the side or at the back for a lot of the show snapping photos but that of course left me standing out like a bullseye saying “pick me for something embarrassing and slightly traumatic”. The stage was already full with audience members for a group dance so I thought they just wanted me up there to fill the last spot on the end, next thing I know I’m being whisked out the back amongst the dancers getting changed and before I could say “hey, at least buy me a drink first” I was getting donned in a grass skirt, lei and headdress with the instruction “when I say, “now” you run up on to the stage and yell out “ALOOHHAA”, then just follow the ques from the Chief. Don’t worry, you’ll be fine…. NOW!”. I didn’t even have a chance to poo my pants…
What proceeded was what seemed like an eternity (though in reality about 5min) of me making a fool of myself; getting props from fellow Aussies; quite possibly disrespecting/objectifying the tribes’ Queen and trying to learn how to hula by following fruit related commands from the Chief (apple was left hip, papaya was right etc) – all the while having to face the strikingly beautiful and scantily clad Queen and mimic her actions. Now, I lived through the 90s and am no stranger to the dance floor having conjured up a repertoire of moves from the likes of R Kelly, Janet Jackson, Johnny Gill, Vanilla Ice and EYC so I can at least move to a beat but to contort my spine in a way that even Gumby would look… Gumby? That, I could not and subsequently looked like a short circuiting C3P0 next to the hipshakin mama’s. It got worse before it got better with the rest of the dancers joining the Queen on stage and really shaming me out, thankfully by the end, the sequencing had dissolved into a freestyle circle, not so thankfully, I was still in the middle but at least now I could battle under my own terms and unleash the destructive force that is the running man!!! I believe it was purely coincidental that the music stopped at that time :p
In true (almost) nightly show fashion, the rest of the performance rolled on like clock work but my time on stage wasn’t done, they called all honeymooners and anniversary celebrators to the stage. Apart from a “you again??”, it was much more pleasant and very romantic slow dancing with my wife as the Chief serenaded us on acoustic guitar.
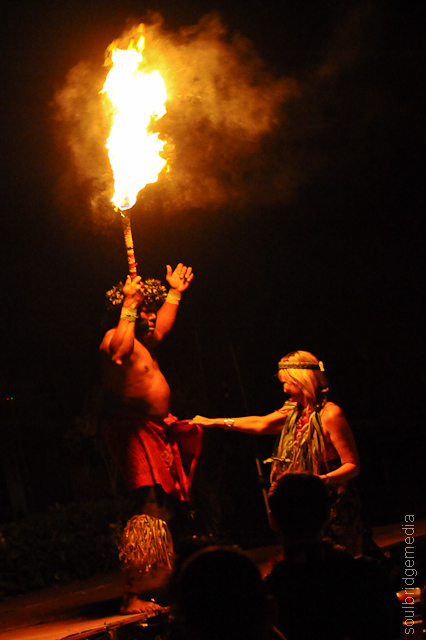
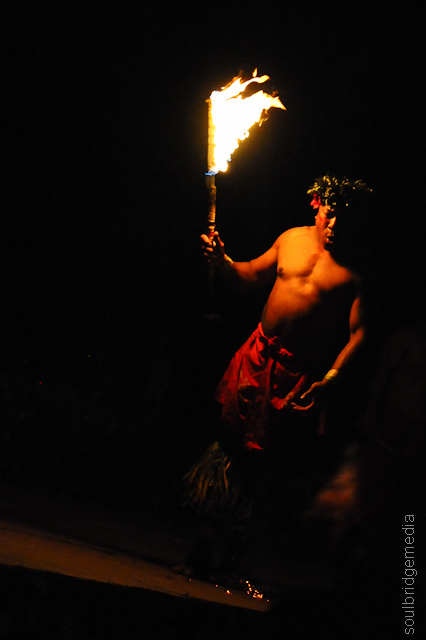
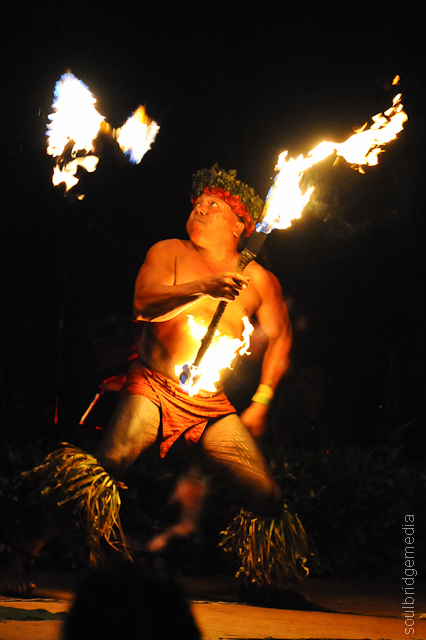
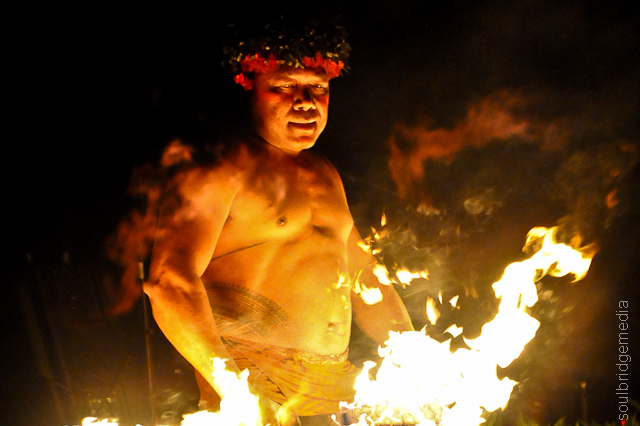
The night closed out with an explosive fire dance with the Chief showing his hefty frame had no hindrance on his agility or skill.

There were high fives aplenty in the toilets afterwards, some actually thought I was part of the act. Maybe my performance didn’t completely stink… or maybe they were just “good sport”-ing me??
In short, it was easily one of the most memorable nights in Hawaii, so much so that we’ve already vowed to return for an anniversary one year. It goes without saying that we highly recommended this luau.
AALLOOOHHAAAA!
Next up is the finale as we wind down our island getaway with a spot of sight seeing and hiking.
As always, if you have any questions about our adventures or where to buy something, just hit us up on the Soulbridge Media facebook page.
Hawaii 2012 part #1 – Arrival
Hawaii 2012 part #2 – Waikiki
Hawaii 2012 part #3 – Honolulu shopping – Part A
Hawaii 2012 part #4 – The Big Island – Volcano tour
Hawaii 2012 part #5 – Shopping Honolulu – part B
Hawaii 2012 part #6 – Tattoo Honolulu / Boardshorts: A Perfect Fit art exhibits
Hawaii 2012 part #7 – Pearl City area
Hawaii 2012 part #8 – Swap meets and Made in Hawaii festival
Hawaii 2012 part #9 – Cook offs and Car shows
Hawaii 2012 part #10 – North shore
Hawaii 2012 part #11 – Windward shore and Sealife Park
Hawaii 2012 part #12 – Chief’s Luau at Sealife Park
Hawaii 2012 part #13 – South shore – Diamondhead crater, Hanauma bay
For most, the main reason to head over to the East coast aka the Windward shore is the Kualoa Ranch movie site tour, which is a famous location for movies such as Jurassic Park and 50 First Dates. While some of the off road activities are appealing, its essentially just rain forest and grass with a few pieces of memorabilia, a far cry from a working production set some may be hoping for. There are however, plenty of other things to see and do, along with kilometers of beaches fair less busy than those on the west coast.
—
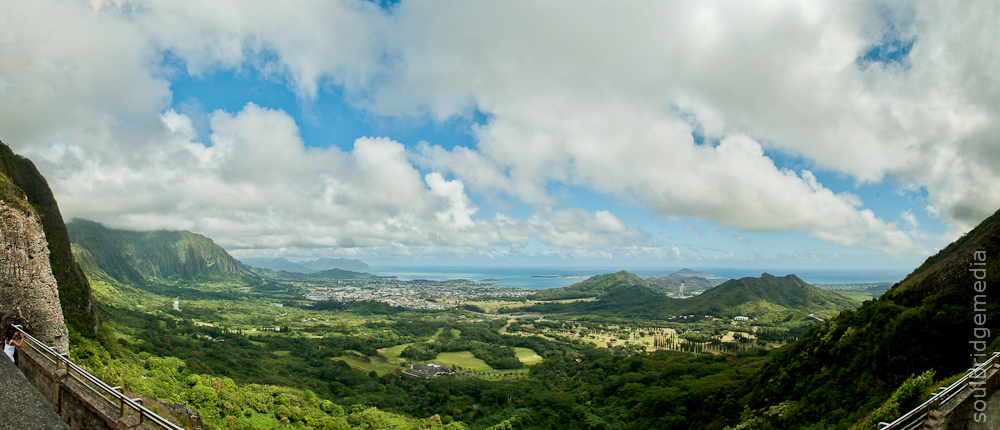
Nuuanu Pali lookout
On the way to the east coast via the winding forest roads of the cross country Pali Highway, take a quick stop at the Nuuanu Pali lookout. This will help you understand why they call it the Windward shore, windward being a severe understatement! Even on an otherwise quite warm day of mid to high 20s weather it was quite cold thanks to the wind chill factor dropping temps easily by 10-15C! Needless to say, a jacket is a must, ideally a softshell will give you the most comfort and protection.
The view however is worth a short bit of discomfort overlooking the valleys towards Kaneohe and the ocean.
There is no cost for entry but there is also no free parking for tourists (locals just need to show proof of residency). The $3 fee apparently has only come about in the last couple years, its a bit of a greedyy since there’s no facilities or anything else justifying the cost for a short 15-30min visit but worth it none the less.
If you have time to kill there is a hiking path leading down from the lookout point or to make a day of it, head to near by Manoa Falls. Just be warned that the falls aren’t really falls any more after a landslide a couple years back but terrain may have once again changed since this was written.
—
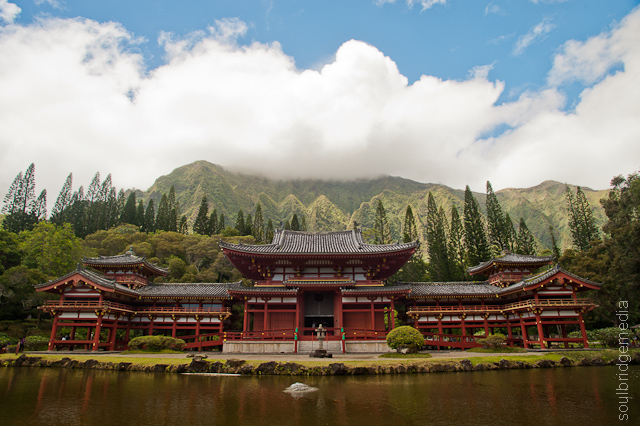
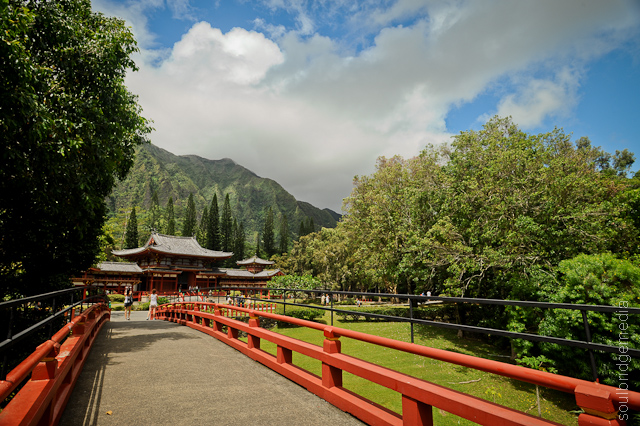
Byodo-in Temple
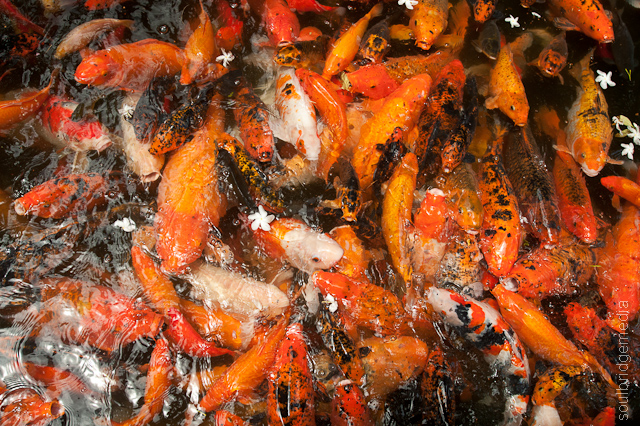
The Byodo-in Temple is a little north of Kaneohe nestled in lush rolling foothills. It is a commemorative replica of the same temple in Japan and features Japanese gardens, bridge and koi pond with literally thousands of koi carp. The place also lays its claims to fame with appearances in Hawaii 5-0 and Lost.
The grounds aren’t overly big so you wont need more than an hour of slow strolling to cover it.
Entrance fee is $3 for adults but at least here you know that money is going to the maintenance of the grounds and not pocket lining!

—

Windward mall
Image courtesy of Oahu Paradise Homes
Windward mall
On the way down to Sealife park the only major shopping stop is the Windward mall. While quite sizable, there is little variation in the stores and probably for the most part can be skipped over if you already hit the big centers on the west coast. One store however that made the stop more than worthy was Sears. Normally it falls into the “killing time” category for us with its Myer/David Jones assortment of stock but this particular store was more like an outlet version with almost everything on sale or at clearance prices. Brands and content read more like parts of a Karmaloop catalogue with Dickies, Southpole, Zoo York, Levis, Lee, Carhartt and a bunch of business attire basics undoubtedly from their incorporated chain, KMart. A great stop for the ladies as well with heavily discounted underwear and swimwear.
Oh, I lied when I said there was no reason to stop.. they have a Wetzel’s Pretzels 😉
—
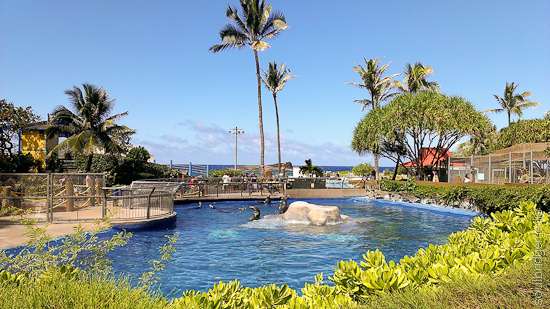
Sea Life Park
Sea Life Park made the list for two main reasons, swimming with the dolphins and the Chief’s Luau.
The almost obligatory claim to fame is 50 First Dates – seriously that movie is like a walking billboard for Tourism Hawaii! There were no penguins in Hawaiian shirts but the dolphin we swam with was in the movie! Real down to earth guy too, you wouldn’t pick it from the obnoxious character he plays on screen 😉
– Dolphin swimming
Want to mingle with celebrities? Well you know you gotta drop some coin to let them know how you roll! Luckily costs are available on their website and you don’t need to leave a Benjamin for the “help”. Take your swim wear, cos, you know, you’ll be swimming (more like wading and fighting the powerful currents stirred up from the dophin’s wake). There are a couple change room areas, there’s even one in the briefing area so you don’t have to arrive in your swim gear. The staff along with a short video will explain everything pretty clearly and there’s really not much else to it.
Travel tip: A note to those with piercings, you will be asked to remove them so if you have a face full of metal you may want to get a start on that before hand. Girls, if you have something like a belly button ring, wearing a one piece may help you avoid having to remove it, but they are very strict and rightly so to protect ocean friends.
Photo tip: since you cant take anything into the pool, let alone a camera, photos are taken by staff and sold at the usual exuberant theme park prices. The shots look like they’re taken on full auto, with no colour correction which leaves you looking a nice shade of sea sick green! So its best to get someone in your group that isn’t swimming to snap some shots for you (or maybe sweet talk a stranger into emailing some to you). Spectators are free to move around outside of the barrier so a good angle wont be too hard to find.
The rest of the park houses the usual aquatic life from small tanked fish and sea life to large compounds with seals and penguins.
If you purchased one of the value combo deals which includes the Chief’s Luau, its just a short walk from the gift shop. Those hip shaking good times are up next!
As always, if you have any questions about our adventures or where to buy something, just hit us up on the Soulbridge Media facebook page.
Hawaii 2012 part #1 – Arrival
Hawaii 2012 part #2 – Waikiki
Hawaii 2012 part #3 – Honolulu shopping – Part A
Hawaii 2012 part #4 – The Big Island – Volcano tour
Hawaii 2012 part #5 – Shopping Honolulu – part B
Hawaii 2012 part #6 – Tattoo Honolulu / Boardshorts: A Perfect Fit art exhibits
Hawaii 2012 part #7 – Pearl City area
Hawaii 2012 part #8 – Swap meets and Made in Hawaii festival
Hawaii 2012 part #9 – Cook offs and Car shows
Hawaii 2012 part #10 – North shore
Hawaii 2012 part #11 – Windward shore and Sealife Park
Hawaii 2012 part #12 – Chief’s Luau at Sealife Park
Hawaii 2012 part #13 – South shore – Diamondhead crater, Hanauma bay
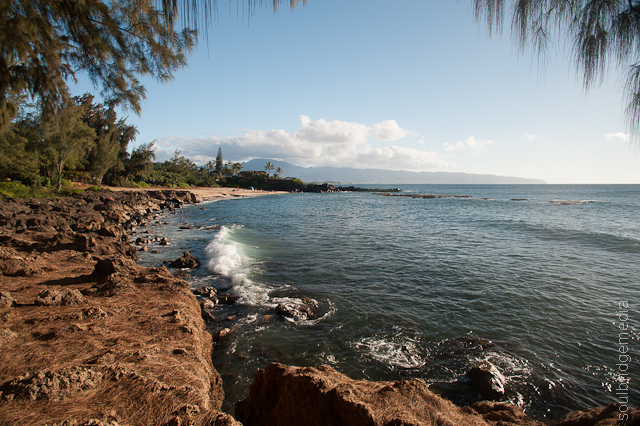
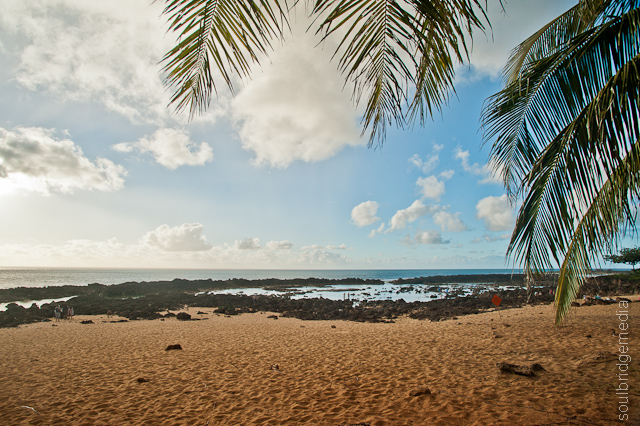
Home to any number of clichés, movies, tv shows and the stereotypical surfer lifestyle is Hawaii’s North shore with rolling waves on one side and lush rainforests on the other.
Getting there
Its not particularly a long drive with an average car run taking under an hour but it really depends on the traffic which can go from “Sunday drive” to “LA peak hour” depending on the time of day/year.
There’s a couple different routes you can take which are about the same travel time.
The H2 to route 803 is the gps choice, you could try the 99 on the way back but you may get stuck with some local traffic on the smaller roads. Take the 750 if you’re up for the scenic route.
Travel tip: If you’re venturing up during the cooler months when the surfing comps are on, be prepared for ultimate chaos and getting no where fast..slowly!
North Shore Locale
Haleiwa – Is the major town in the area which you’ll see coming over the mountain range. Its pretty much a blip on the map but hosts more than enough amenities for tourists and locals alike with food, souvenir and surf stores dominating the landscape. This however isn’t the only stop for services, there are plenty of other places and road side vendors along the coast line.
Waimea
Bay – One of the most popular beaches in the area which means parking can sometimes be a pain during the day. Later in the afternoon sees the crowds die off
Falls Park – Is the national park home to gardens, hiking paths and even craft demos. Cost is $24 and opening/closing times vary from day to day so check the website
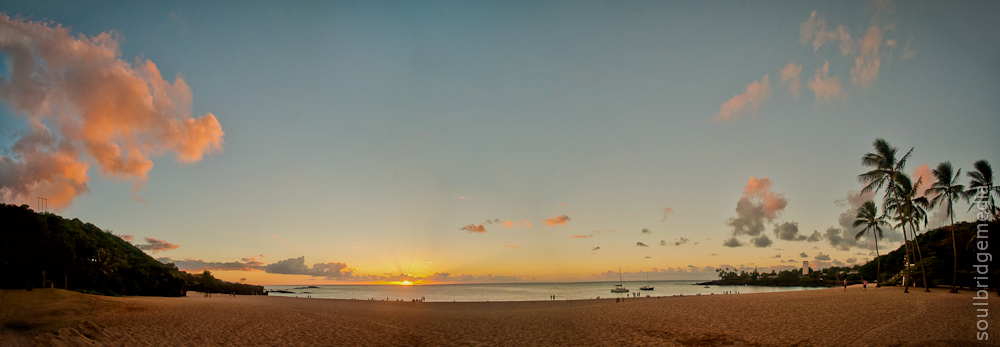
Valley – If you’re lucky enough to catch a sunset with some drama, this is the place to be. Sadly not the case for us!
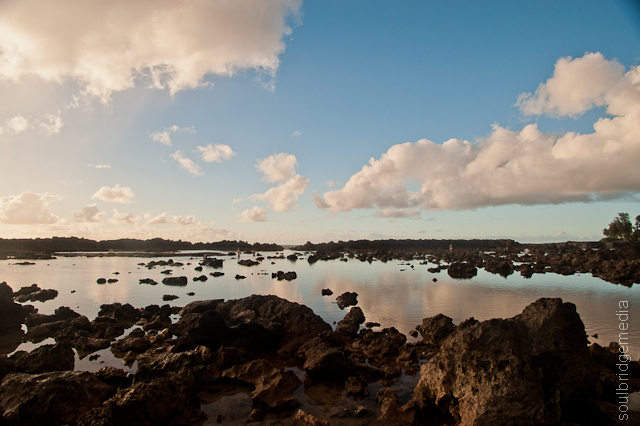
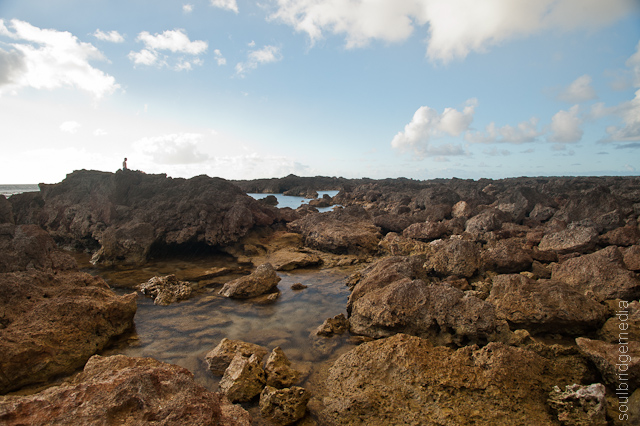
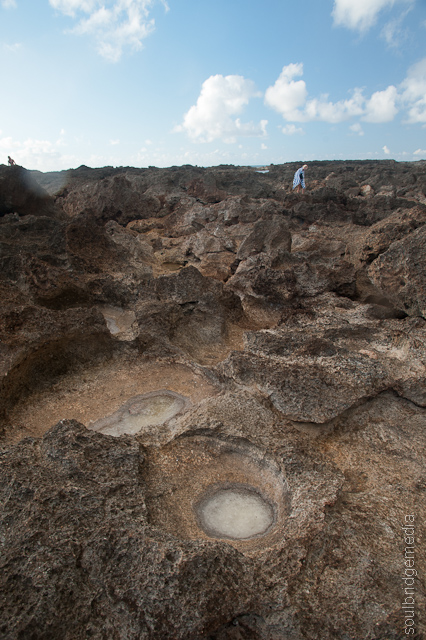
Pupukea beach, Sunset beach, Turtle bay beach, Laniakea beach and Sharks Cove are all roughly linked together and continue up the coast line so there’s plenty to choose from when you are looking for a spot to beach, relax or swim/surf. Plenty of rock pools crop up at low tide as well which will help with interesting photos (if you have the sky to match).
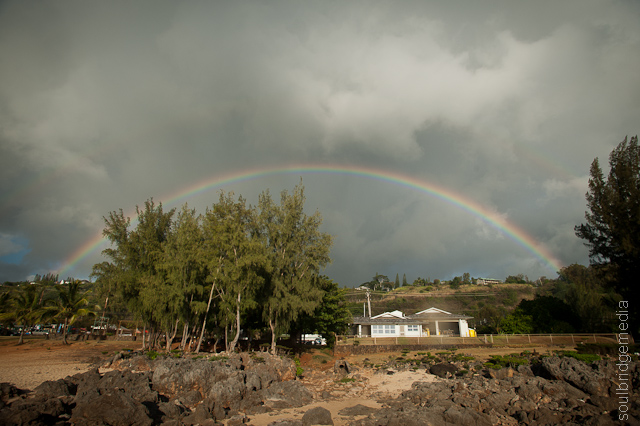
Travel tip: Don’t let the scheduled daily afternoon sun showers deter you, they clear as quickly as they come, just keep a brolly handy or be within dashing distance to your car if you’ve set up a picnic.
As always, if you have any questions about our adventures or where to buy something, just hit us up on the Soulbridge Media facebook page.
Hawaii 2012 part #1 – Arrival
Hawaii 2012 part #2 – Waikiki
Hawaii 2012 part #3 – Honolulu shopping – Part A
Hawaii 2012 part #4 – The Big Island – Volcano tour
Hawaii 2012 part #5 – Shopping Honolulu – part B
Hawaii 2012 part #6 – Tattoo Honolulu / Boardshorts: A Perfect Fit art exhibits
Hawaii 2012 part #7 – Pearl City area
Hawaii 2012 part #8 – Swap meets and Made in Hawaii festival
Hawaii 2012 part #9 – Cook offs and Car shows
Hawaii 2012 part #10 – North shore
Hawaii 2012 part #11 – Windward shore and Sealife Park
Hawaii 2012 part #12 – Chief’s Luau at Sealife Park
Hawaii 2012 part #13 – South shore – Diamondhead crater, Hanauma bay
