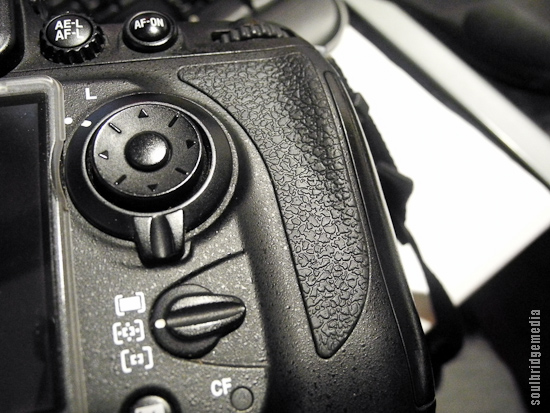
If you’ve owned a Nikon DSLR for a couple years with reasonably heavy use you’re probably more than familiar with the problem with the rubber grips, for me its been the thumb grip in particular.
Basically the rubber wears thin, the adhesive comes loose and the rubber stretches out from the cut out area and pretty much becomes an irreparable annoyance. It also seems this is more prevalent with heavier bodies like the D700. On the plus side it’s a quick and easy fix.
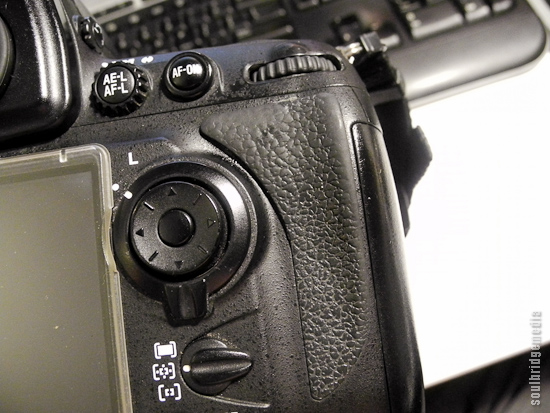
Old grip - noticeably thinning and stretched beyond housing
1. First of all you need to track down the grip you require. Ebay is a good place to start and is where I got my thumb piece for about $15-20US but there are plenty of other places that stock them. Apparently Nikon USA sells them direct to the public, however I have yet to confirm this for Nikon AU confirmed – these are also available through Nikon AU (thanks Aaron!). The best thing is they come with the OEM adhesive tape already on so application is quick and tidy. You’ll also need some toothpicks, cotton tips and acetone (products like “Goo off” are good choices as well).
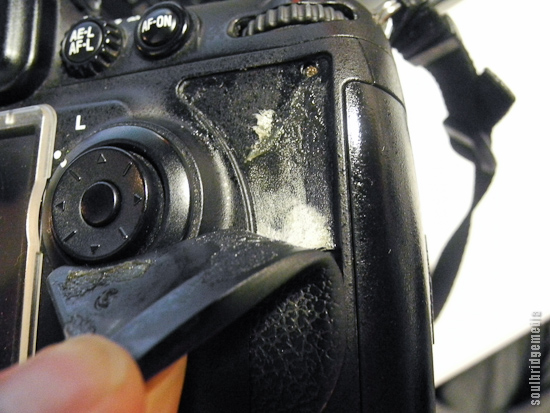
Step #2 - Old adhesive strip - melted, full of grime, sweat and dirt
2. Peel off the old rubber, don’t worry there’s no sensitive parts underneath
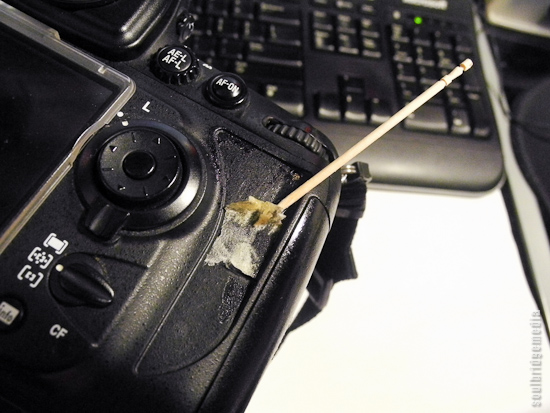
Step #3 - Pick
3. Use a toothpick or similar scraper to scratch away as much of the old adhesive and gunk as possible. I found it works best if you ball up the adhesive to collect the smaller bits as you go, kind of like Blutack. Be sure to clear the access screw area, in case your camera ever needs servicing.
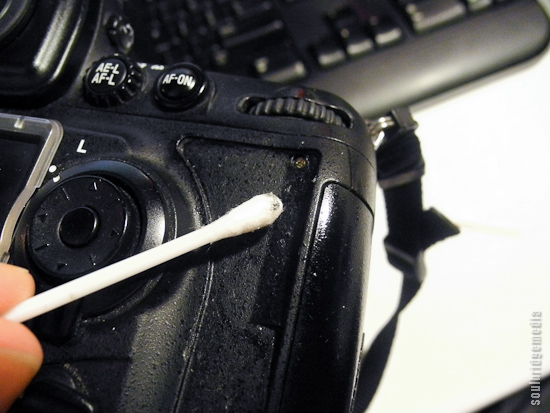
Step #4 - Swab
4. Take a cotton tip and dip it lightly into the Acetone. Use this very sparingly as it will strip a little colour from the plastic housing, but dont fret, its completely unnoticeable. Go over it a few times, using a fresh tip each time to gradually pick up the pilled adhesive. Eventually it will be smooth (other than the texture of the casing) and non sticky to touch. After this I did a once over with a cotton tip dipped in water to pick up any stray dust and lint.
Step #5 - Affix
5. Once its dry, stick the new rubber piece on. It fits perfectly so you either get it in the right spot or you don’t. Apply pressure for a minute or two to allow the adhesive to bond and you’re done! Your camera’s original textured grippy goodness has been restored and you saved some dollars in doing so. I’d say replacing the other grips would be just as easy.
Note 1: When your camera is serviced, the grips are usually removed to gain access to the body screws. The service center will say they lovingly replaced the grips while they were at it but really its because they had to, of course you will be charged for that lovely courtesy.
Note 2: This is a guide only, if you feel uncomfortable with undertaking this, pay a professional to do it for you. No responsibility will be held for accidents or plain stupidity :p
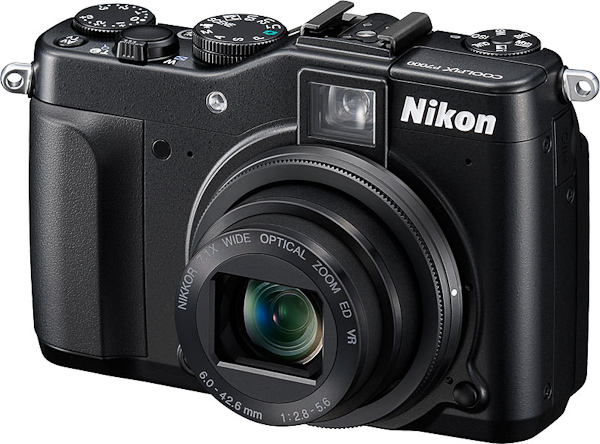
Well I don’t know about anyone else but I’ve been waiting close on 2 years for this to happen, ie. The next generation of high end compacts from Nikon. After a lacklusture attempt and a subsequent beating from Canon, its finally here, the Nikon P7000.
Rewind a couple years and you have the P6000, compared to the Canon G10 equivalent of the time it struggled, especially in the noise handling department, but generally it felt like a rushed release and barely made a dent in Canon’s hold. Even dedicated Nikon enthusiasts like Dave Hobby raved about the G10 and subsequently converted.
But like they say, good things come to those who wait, and I must say, not a moment too soon. Earlier in year we travelled to Tokyo, Los Angeles and New York City, while the DSLR came in handy at scenic locations and the zoo with a 300mm, generally it was more a burden than a benefit. Especially on those dedicated shopping days spent mostly in doors, where you’re spending more time reaching for your wallet than your camera. There is also the issue of whipping out a DSLR that gets you unfavourable attention in some stores or neighbourhoods. This would have to be my main reason for going compact, something suitable for lightweight travel/everyday use and a lot less conspicuous.
The other reasons would be having an emergency back up for my DSLR thanks to the hotshoe and a macro mode with a crazy 2cm minimum focus distance. More on these features in a bit.
So, to the camera itself. This will not be a detailed technical review of the functions etc. there are plenty of those online, just let your fingers to the walking. This will be more about practicality, everyday use and why I think it’s the bee’s knees 🙂
Firstly, local stock has been available for at least a couple months now. Major chains like Ted’s are retailing them for around $700 (camera only at time of writing), if you don’t mind a bit of gray marketing you can find them online for around $600 (usually including a memory card and a couple other bits like a screen protector, mini tripod etc). You don’t get any form of a case (not even one of those thin microfiber sunglasses style ones) with the camera so the first thing to do would be to have a look at the Lowepro or Tamrac range. Thanks to the popularity of the Canon G series, Tamrac has a case that fits the P7000 perfectly, model # 5689. These are available from CR Kennedy in Albion (Brisbane), have a chat to Brad there, mention us and you might even get a good deal depending on if he’s had his pub lunch yet or not 😉 either way you wont be paying the high prices found on ebay.
So it fits the same case as a Canon G series, but the similarities don’t stop there, side by side at a glance you’d be forgiven in mistaking it as the soon to be released G12 or one of its older brothers.
The palm foot print is probably at the limit for a compact at a size similar to an iphone. You can still get it into the back pocket of your pants but in general you’re better off with a case, a bag to throw it in or using the included neck strap.
The upside to the extra bulk is you’re never mistaken of its presence in your hand, which helps when coming down from a DSLR.
Performance – put simply, for a compact it’s top notch. I liken it rather closely to the handling of my old Nikon D80. Does 800 ISO quite casually but after that it gets the wobbles, though 1600 is still more than usable, which is a huge step up from the usual camera phoning at ISO 400 for most other point and shoots. Start up time is almost instant and there is only a minor delay between shots while the image is saved.
Here is an example straight out of the camera (apart from resizing):
Auto mode: ISO 1600 f4.5 1/60

100% crop
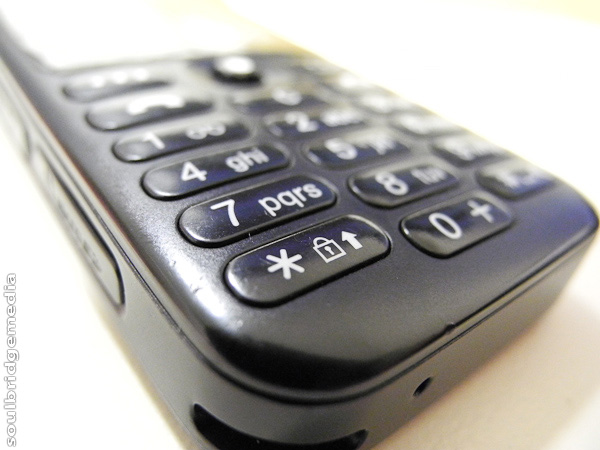
One thing I have missed while owning a DSLR, and something a lot of compacts can actually do quite well is macro shooting. A dedicated macro lens was next on the list but it lost out to the P7000. Where the P7k stands out from the others is its crazy minimum focus distance of a “yep, that’s going to bite me for sure” closeness of 2cm.
I’ve yet to roam my house looking for (un)expecting insects but here are some common items. Manual focus helps with composition but like any macro photography, a tripod helps alot, specially in shadow areas to keep the shutter speed down instead of pushing the ISO up.
Some macro mode examples straight out of the camera:
Samsung e500 (actual size approx ¾ of a business/credit card)
Macro mode, ISO 1600 f3.2 1/25
Sony MDR EX91 (wow, they really are dirty!)
Macro mode, ISO 1600 f3.2 1/25
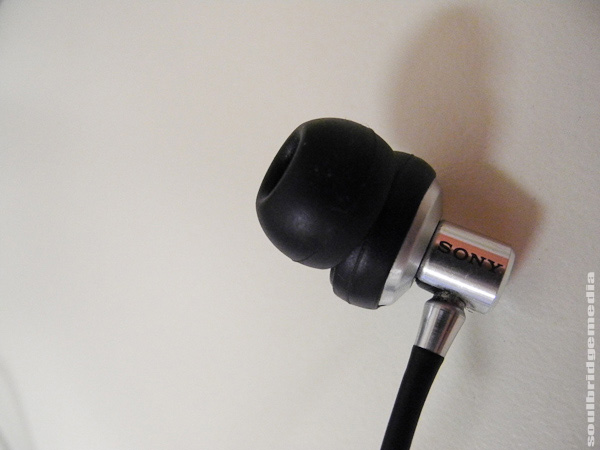
100% crop
Macro mode, ISO 800 f3.2 1/55
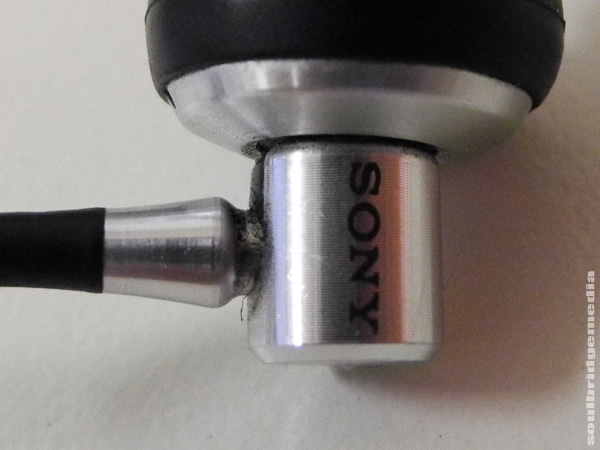
100% crop
Macro mode, ISO 1600 f3.2 1/125
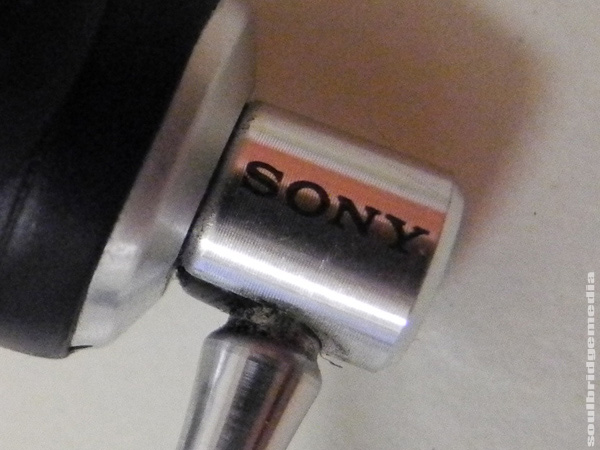
Macro mode with onboard auto flash
ISO 200 f6.3 1/30
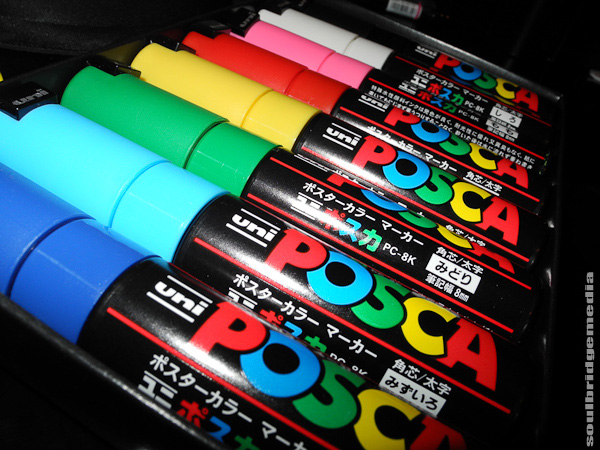
Speaking of the flash, it is what it is, small and harsh. Thankfully the hotshoe takes any modern (re: digital) Nikon speedlight which, just like on a DSLR, instantly changes the look of the photo either by coverage or the ability to bounce (example below). The drawback of course being it becomes very top heavy, even with the baby of the range, the sb600 gives it an uneasy off balance feeling, but that doesn’t matter too much if you’re using a sync cable or remote trigger. Shame they didn’t build in CLS (wireless remote triggering and control), that would’ve been a nifty feature.
Simple bounced flash shot off white ceiling with SB600 speedlight
Video function is another thing I’ve been missing from my arsenal, not necessarily award winning stuff but a quick live summary of an event or mental note that a couple still frames just cant capture is a definite bonus. Like alot of cameras/phones with video modes, quick panning is a bit poor but otherwise more than usable for everyday footage.
The included View NX2 software is pretty standard, the video editing feature allows a simple story board with a small selection of transitions and the ability to add stills and audio. No overlaying, speed of play control or advanced editing but enough there to throw together a montage of little Timmy’s birthday party.
All in all, it is what it is, a high end camera for those down grading from a DSLR. If you’re upgrading, keep on cruising, you only need to spend about $100 more to get yourself a full blown DSLR like the Nikon D3000. Body is still quite small for a DSLR and of course you get a nice big APS-C sensor (as opposed to the 1/1.7″ of the P7K).

Tokyo part #6 – Akihabara
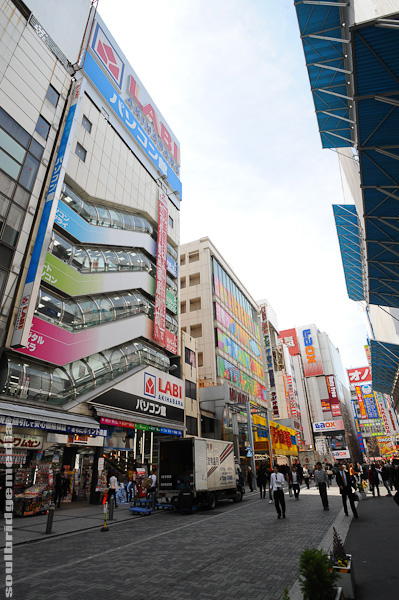
Akihabara, Tokyo
No trip to Japan would be complete without a (rather big) glimpse of what makes the country tick… and whirl, and buzz. Electronics! And there’s no better place to get your geek on than Tokyo’s CPU, Akihabara aka Akiba aka Electric town. Just picture Jaycar or Dick Smith times a million and you’re getting close. Any kind of premade electronic product EVER from radios, to game consoles, to cameras and computers to the components used to make them, replacement parts, capacitors, inductors, circuitry, you name it, if its powered by electricity, you’ll find it here… somewhere.
The station is only about 1km from Ueno, so it’s an easy walk or a couple minute train ride.
The first obvious places are the larger stores as you walk out of the station’s west exit (follow the signs to “Electric town”) being the multiple LAOX and Sofmap stores. These have an army of staff which are helpful and speak quite good English (some stores even have Caucasian staff) and also have duty free. They have similar style layouts, with a level dedicated to a certain type of product eg. Cameras, computers, watches, home goods etc. and a big index sign on the ground level will help you save precious shopping minutes 😉
While you will more than likely find what you’re looking for in these shops, nothing can prepare you for the onslaught from the mothership on Akiba station’s north east, that being the Akihabara Yodobashi Center.
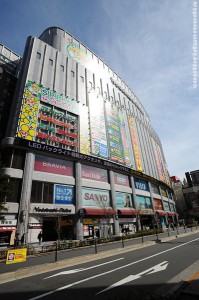
Yodabashi camera store, Akihabara, Tokyo
Eleven floors of every model of every colour of every electronic item release in the last 5years (or there abouts). They even have sporting goods, toys and a floor of restaurants. I’d say its like Harvey Normal times 1000 but Yodobashi actually has good service and good prices (yea, I went there). Speaking of prices, while they are very competitive to the local AU market, they’re very similar to online (overseas) prices so you may want to save yourself some import fees when coming back through customs by not going all out on big ticket items. In saying that, being able to handle and eyeball similar products for a hands on, real life comparison, is indispensable.
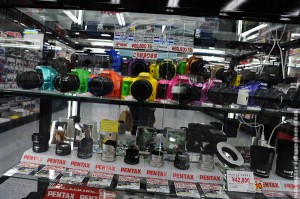
After we surfaced from a sea of electric razors and toothbrushes, we headed to Super Potato (I know, right!). They specialise in retro gaming. Forget about your wifi enabled, pizza ordering, “I’m in a rap video” gaming consoles, its back to the roots with the 3 commandments. Shooting, driving, and jumping and maybe even all three! So basically anything prior to the Playstation 1, wall to floor to ceiling of games and consoles. Since very few cartridge games were reissued, they’re mostly all originals but are all still in good to mint condition.
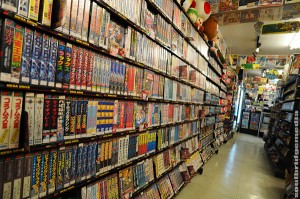
Super Potato, Akihabara,Tokyo
Atari, Nintendo, Mega Drive, Master System to the ill fated Saturn, Dreamcast and Game Cube are all covered as well as plenty of domestic market releases that never saw the light on the world stage and a bunch of quirky little handheld games and mini consoles. Just remember when buying any mains powered devices from overseas, that it will work on your local voltage supply, if not you will need to purchase a separate power transformer. Anything powered by batteries is fine since DC current is universal.
Back out on the main drag amongst the cosplay girls handing out flyers, you’ll see more “Pichinko” (or “Taito”), no not something Elliot from Scrubs would say, but gaming houses filled with slot machines. Half a block away you’ll hear the deafening wave of bells and whistles as the automatic doors open and close. There are also plenty of gaming places dedicated to claw machines, but these are the same the world over. Only enough tension in the claw to give the prize the gentlest nudge of hope so you continue to funnel in your coins. You seriously have more hope getting a prize from a wishing well, so you’re better off just buying one from a toy store.
What’s that? Toy store? You thought I forgot didn’t you? Not at all! A couple blocks north of the station is another Mandarake store. Multiple levels include buying on the ground floor for those with a bit of buyers’ remorse, cosplay and 2 levels of figures and collectibles. They also have items for the die hard fans, like the actual helmets used in filming Power Rangers and uniforms from local productions.
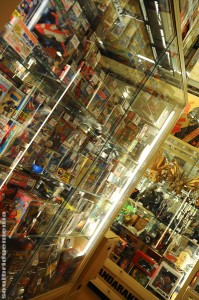
Mandarake, Akihabara, Tokyo
Over near Yodobashi there is another large toy store called Animate. Unfortunately during another “can’t see the forest for the trees” slash “damn you google maps” moment we couldn’t find it but later discovered it in the background of one of our photos! Anyway, what you need to do is get to this store on a Sunday, when they close off a lane and its filled with performers and cosplayers.
Finally if you’re having withdrawals from sneakers or music, there’s still a few ABC Marts and a Music Vox to appease that hunger, otherwise its Gashapon time!
About 2 blocks north of Mandarake off the main street in a small side lane is a dirty yellow signed store that houses a ground floor of Gashapon and 2 upper levels of toys, figures and collectibles. What is Gashapon? You’ll know them as the gumball style machines at the exit of supermarkets that you nagged your mum for change so you could get a toy in a capsule when you were little. The difference here is the toys aren’t a poorly moulded ring, necklace or keyring, they’re highly detailed and painted quality pvc items. Best thing of all, you no longer need to nag your mum, you can buy as many as you want!
Choose anything from your favourite shows/games like Mario, Star Wars and anime characters to the weird and wonderful of light up poo keyrings, telescopic cat paw pointing wands, tote bags, countless mobile phone trinkets and for the (not so) mature crowd, the X rated figures in various states of undress and positions that will have even Paris Hilton taking notes.
The majority of Gashapon cost between 100-500Y, with dedicated stores like this one having a change machine and recycle bin for used capsules. Depending on how many you buy, it’s a good idea to bin the capsules to save luggage space.
FYI, “Gashapon” refers to “Gasha” as in the crank machine that holds the toys and “pon” the sound the capsule makes when it drops. A lot easier to say than click tic tic tac click tacka!
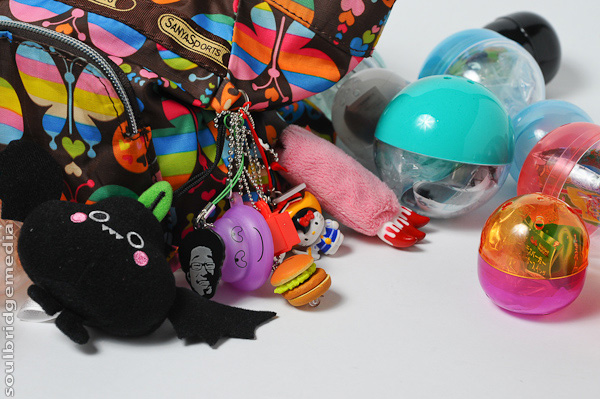
Gashapon
Tokyo part #1 – Ueno for a day
Tokyo part #2 – Getting round Tokyo, Ueno Sakura at night
Tokyo part #3 – Harajuku
Tokyo part #4 – Shibuya
Tokyo part #5 – Kichijoji and Shinjuku
Tokyo part #7 – Odaiba and Leaving Tokyo
Photo Gallery Here

