If you’ve owned a Nikon DSLR for a couple years with reasonably heavy use you’re probably more than familiar with the problem with the rubber grips, for me its been the thumb grip in particular.
Basically the rubber wears thin, the adhesive comes loose and the rubber stretches out from the cut out area and pretty much becomes an irreparable annoyance. It also seems this is more prevalent with heavier bodies like the D700. On the plus side it’s a quick and easy fix.
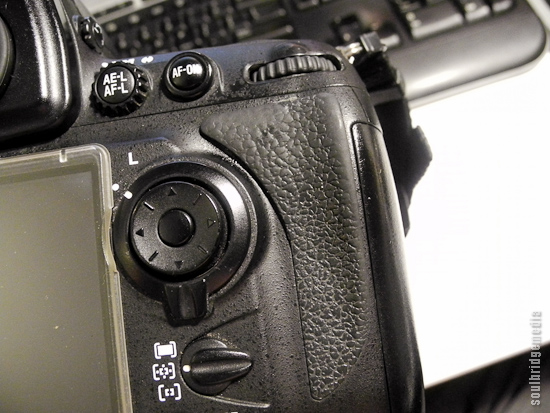
Old grip - noticeably thinning and stretched beyond housing
1. First of all you need to track down the grip you require. Ebay is a good place to start and is where I got my thumb piece for about $15-20US but there are plenty of other places that stock them. Apparently Nikon USA sells them direct to the public, however I have yet to confirm this for Nikon AU confirmed – these are also available through Nikon AU (thanks Aaron!). The best thing is they come with the OEM adhesive tape already on so application is quick and tidy. You’ll also need some toothpicks, cotton tips and acetone (products like “Goo off” are good choices as well).
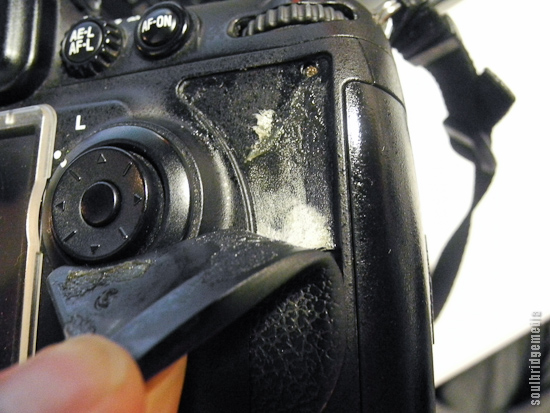
Step #2 - Old adhesive strip - melted, full of grime, sweat and dirt
2. Peel off the old rubber, don’t worry there’s no sensitive parts underneath
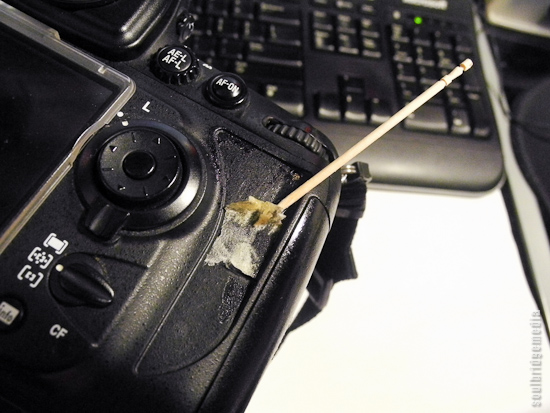
Step #3 - Pick
3. Use a toothpick or similar scraper to scratch away as much of the old adhesive and gunk as possible. I found it works best if you ball up the adhesive to collect the smaller bits as you go, kind of like Blutack. Be sure to clear the access screw area, in case your camera ever needs servicing.
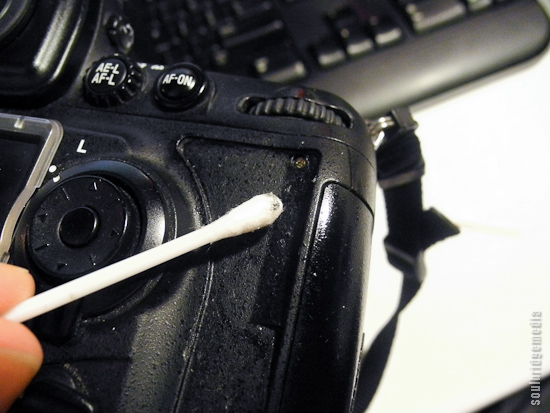
Step #4 - Swab
4. Take a cotton tip and dip it lightly into the Acetone. Use this very sparingly as it will strip a little colour from the plastic housing, but dont fret, its completely unnoticeable. Go over it a few times, using a fresh tip each time to gradually pick up the pilled adhesive. Eventually it will be smooth (other than the texture of the casing) and non sticky to touch. After this I did a once over with a cotton tip dipped in water to pick up any stray dust and lint.
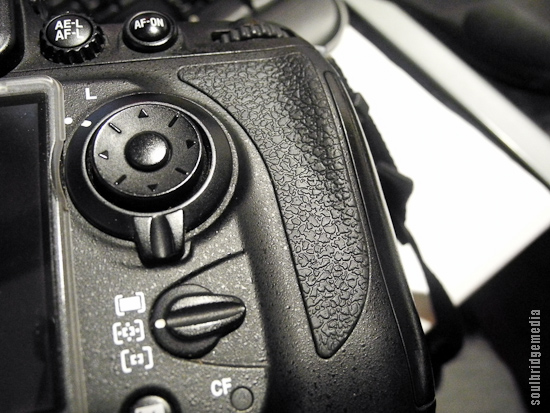
Step #5 - Affix
5. Once its dry, stick the new rubber piece on. It fits perfectly so you either get it in the right spot or you don’t. Apply pressure for a minute or two to allow the adhesive to bond and you’re done! Your camera’s original textured grippy goodness has been restored and you saved some dollars in doing so. I’d say replacing the other grips would be just as easy.
Note 1: When your camera is serviced, the grips are usually removed to gain access to the body screws. The service center will say they lovingly replaced the grips while they were at it but really its because they had to, of course you will be charged for that lovely courtesy.
Note 2: This is a guide only, if you feel uncomfortable with undertaking this, pay a professional to do it for you. No responsibility will be held for accidents or plain stupidity :p

