

Yosemite National Park
Generally in a day you could cover the valley floor and one or two of the shorter mountain/waterfall hikes, however, ideally a two day stay on site would be best to cover a fair portion of the popular areas as well as chances for sunrise and sunset photos and revisiting areas at different times of the day. In saying that, if you’re on a tight schedule, a “summary” tour of the park is doable in about half a day.

Yosemite National Park - one of the many lookout spots on the way in
Firstly, the place is vast, not just in a physical sense but in a commercial way to accommodate the masses of tourists, for the most part its all 2 lane, one way bitumen roads with plenty of spots to pull over. On the way up and over the mountain range its single 2 way roads but still plenty of lookout spots. Travelling in late May, early June will still see plenty of thick snow at the top of the mountain areas. Temperatures were high single figures (Celsius) in these areas but were quite warm on the valley floor, around low 20s. So while you’re active you can easily get away with shorts and t-shirt for most of the day, though temps drop off fast once the sun slips behind the mountains.
On the valley floor, you can actually drive to most of the major sights. This is definitely the quickest way, but of course everyone has the same idea and you will get caught up with those inconsiderate types holding up traffic, triple parked trying to get photos from their car. Even if you choose not to park somewhere, unfortunately there’s no escaping them because of the one way ring road layout of the park. There is a shuttle that loops this ring road but for a relaxing experience and access to extra areas minus some of the strenuous hiking or traffic headaches you can’t go past hiring a bicycle.
The bicycles are hired from the Yosemite village, which is the central point for visitors. Take your pick of mountain bike, cruiser, tandems or even ones with trailers for around $10 hour or $28 for the day. Helmets are included for the safety conscious. Yosemite Lodge is also the major hub for tourist information, eateries and a grocery/souvenir store. The store prices are all reasonable and service was friendly and quick. There’s even free ice water (:

Yosemite National Park - Mirror Lake
For the most part, the ride is quite easy with very little variation in inclines so no prior triathlon experience is required. The steepest part you’ll encounter will be the path up to Mirror Lake but its only a short run before bicycle access is restricted. There are racks at this point but no locks or chains are provided, just make sure you remember which bike is yours! We marked ours with a napkin and rubber band around one of the hand grips (:
The rest of the walk up to Mirror Lake is quite steep. This is where you thank yourself from packing that extra bottle of water 😉 From Mirror Lake you get the classic view of Half Dome and some nice white water river action so make sure you have the camera and tripod ready.

Yosemite National Park
The bike path crosses over the river a few times so plenty of scenic moments can be had. If you have the extra time, head on over to Yosemite Falls, if not you can still see it from the path.

Yosemite Falls
Travel tip: If you’re travelling in the off season, road closures are always imminent around the park and access will be limited so check the forecasts and updates on the Yosemite park site.

Yosemite National Park
After a quick frolick in the snow at a rest area along side a biker gang, we were heading down the mountain and out to the bay area. Next stop… Milpitas!

Yosemite National Park
Milpitas 2011 – Great Mall
Yosemite 2011 part #1 – LA to Oakhurst via Bakersfield
Yosemite 2011 part #2 – Yosemite National Park
San Francisco 2011 part #1 – Arrival
San Francisco 2011 part #2 – Shopping – Haight, Downtown SF
San Francisco 2011 part #3 – Chinatown
San Francisco 2011 part #4 – Japantown
San Francisco 2011 part #5 – Alcatraz
San Francisco 2011 part #6 – Fisherman’s wharf, Golden Gate Bridge
Complete Yosemite 2011 photo gallery here
Complete San Francisco 2011 photo gallery here

Inokashira Park, Kichijoji, Tokyo
Kichijoji is not really a major stop on the usual Tokyo itinerary, well unless of course you’re a sneaker nut, as its home to the famed K-Skit store 😉 otherwise, its a rather small (comparatively) “suburb” lying on the Chuo Line off the JR Yamanote line (change at Shinjuku station). Make sure you catch the right train though, “Rapid” (express) services skip the smaller stops, Kichijoji being one of them. Check the sign on the platform, it shows the stops the train will make. If you’re still not sure you are on the right one after you’ve boarded, just check the in-train route map displaying the stops.
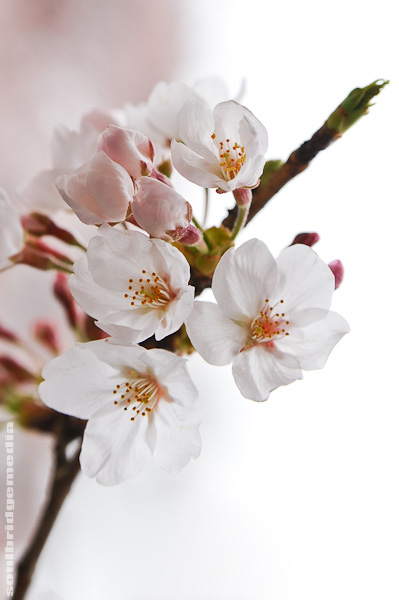
Getting off at Kichijoji station is a far cry from the bustle of Shibuya, which also matches the slightly more laid back feel of the suburb. Its CBD area is quite a bit smaller, but in saying that it still measurable to Brisbane’s own CBD, complete with pedestrian mall. However one thing Brisbane is missing, is a lake surrounded by cherry blossoms!

Inokashira Park, Kichijoji, Tokyo
Inokashira Park is a couple hundred metres walk from the station and is completed with numerous walking paths, foot bridges, temple and my personal favourite, water craft for hire in the form of paddle boats and row boats. 600Y gets you 30min of water time in a paddler (less for a row boat, those of you above 170cm might want to consider the row boat as the paddlers cater more for children and the fibreglass seats aren’t particularly well contoured), which is more than enough time to leisurely work your way round the northern half of the lake and to take in the surroundings re: paddle beneath the blossoms trees arching into the water. Try and get there before 10am, as the lake can quickly get cluttered with traffic making it difficult to dodge those trying to grasp the concept of oars and inertia.
The park itself seems quite popular with the locals for picnickers and artists alike, even more so during Sakura season. It also has a small zoo, museum and temple if you can pull yourself away from the blankets of blossoms.
Heading back up one of the main thoroughfares, after 11am, many of the little shops, cafes and street vendors will start to open. There is also a Starbucks for those missing a “taste of home” and a couple sneaker shops with prices up to 1-2000Y cheaper for similar items in the more built up areas. But save your Yen because we’re heading to K-Skit. A block from the main street and about two from the station it is tucked away in a smaller lane on the 3rd floor but there’s a large sign on the footpath, clearly visible if you’re coming from the station side.
The store is wall to wall, floor to ceiling of sneakers all neatly shrink wrapped and focuses mostly on pre-owned Nikes. Condition ranges from beaters and models that are so old they’re literally falling apart to owned but never worn and brand new. Variety is almost endless, it’s a certainty that you will see a colourway or model that you’ve never seen before. The shelves are sorted by brand/model with a high concentration on Air Force series, Dunks and Jordans. Shoes with multiple tags show the sizes available and their cost. Popular sizes (sz 9-11) on the rarer models are usually more.
Weaving through the narrow aisles you will see sections for other brands like Adidas, Reebok and Timberland along with glass cases for the antique sneakers and the super rares. Staff are friendly and are happy to let you try shoes on, there’s just no where to sit while you do it! I picked up a pair of 2007 Nike Air Force 1 Baltimore 410 “Is Mr. shoe in?” limited editions for only 9000Y (~$100US). Not bad when you consider Footlocker AU hocks current garden varieties for $120-160AU!
It’s a good idea to hit up their website a couple weeks before you arrive to get an idea of what’s in stock. New stock and their “price down” section is updated daily with complete transparency of condition eg. “cracks in upper”, “yellowing of midsole” along with clear detailed photos of the tell tale wear areas such as the sole and inside heal, nothing like the sneaker forums or ebay where “worn about 3 times” really means “worn about 3 years”.
If you’re big on vintage clothing there are several shops in the surrounding block, like Ragtag. Otherwise you can venture north under the train line to LA Avenue. Kind of like the baby brother of K-Skit but with a bit of clothing and a few accessories like G-Shock watches. Of course I couldn’t let a 1995 Guassman in mint condition and original box go begging for only 4500Y 😉
Another block north and you’ll find a 2 level Nike store, an Adidas store, a bunch of little restaurants, cafes, tea houses and burger bars along with the aforementioned mall which houses another Yodobashi Camera store.
Shinjuku
Another big station in another very built up area. The highlights here are camera stores, Yodobashi, Bic, Map, all with in a couple blocks of the station or in the station itself and a few large department stores with the focus towards young women (especially the stores inside the station). The main reason why we stopped here is for the Tokyo Metro buildings, about 600m west of the station towards Shinjuku central park. Two towers with a free observation deck on the 45th floor and opened till 11pm most nights (check the daily times on their site, certain days each month, one building is closed while the other is open), unfortunately on the day we were there, visibility was very poor, down to a few hundred meters at times. It looked like a mixture of low cloud, fog, haze and the usual smog, so it was scratched from the itinerary, still comes recommended as one of the best and cheapest views of Tokyo.
South east of these buildings is Shinjuku Gyoen, a much larger park with feature gardens, recreational paths and water features, another ideal place for Hanami (blossom viewing).
Also while in Shinjuku, look south once you’ve cleared the sky scrapers and you will see the Docomo building, one of Tokyo’s tallest buildings.
Tokyo part #1 – Ueno for a day
Tokyo part #2 – Getting round Tokyo, Ueno Sakura at night
Tokyo part #3 – Harajuku
Tokyo part #4 – Shibuya
Tokyo part #6 – Akihabara
Tokyo part #7 – Odaiba and Leaving Tokyo
Photo Gallery Here
