

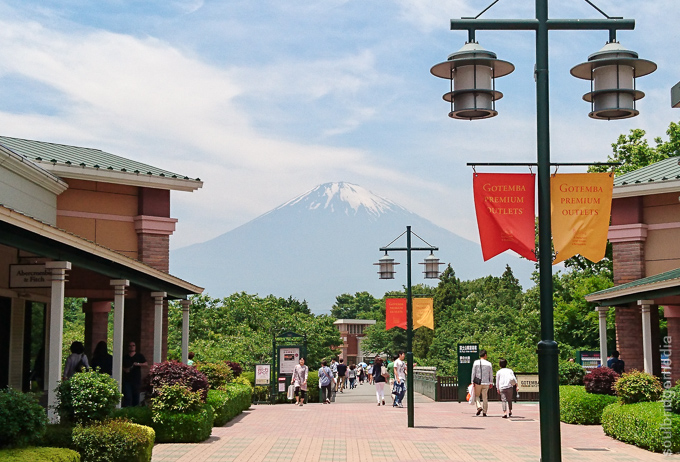
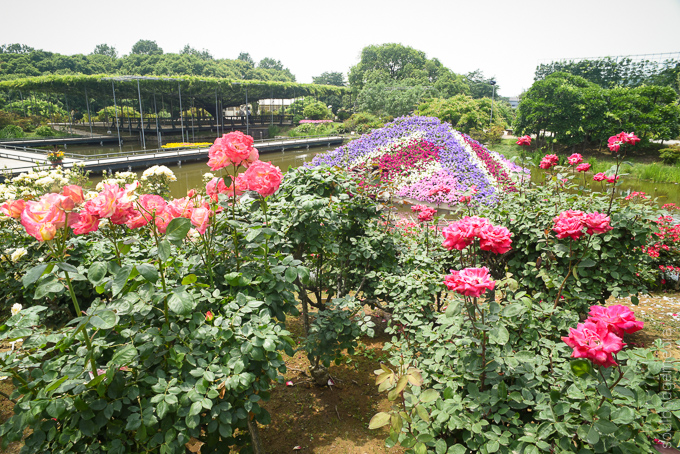
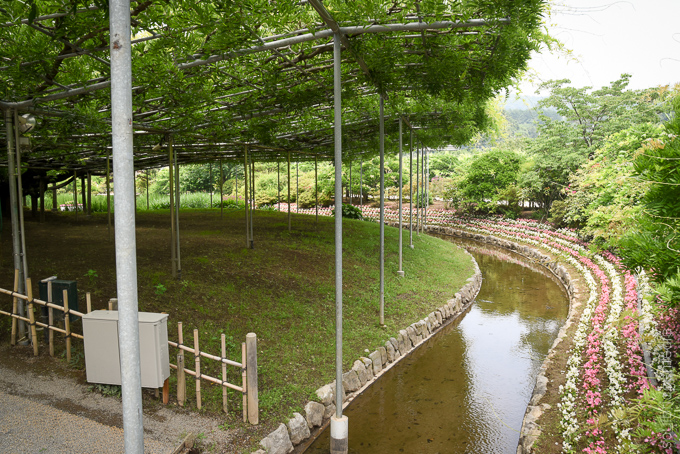
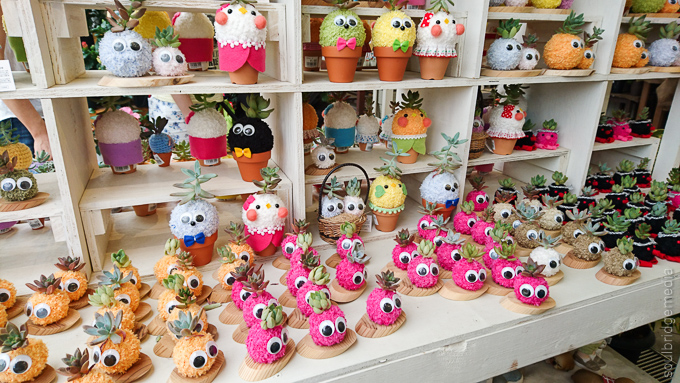
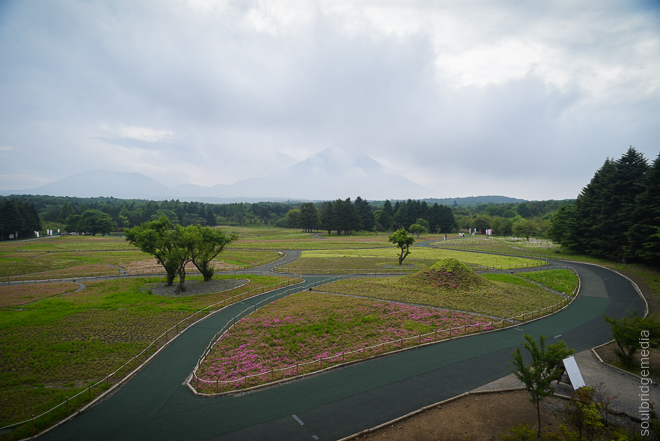
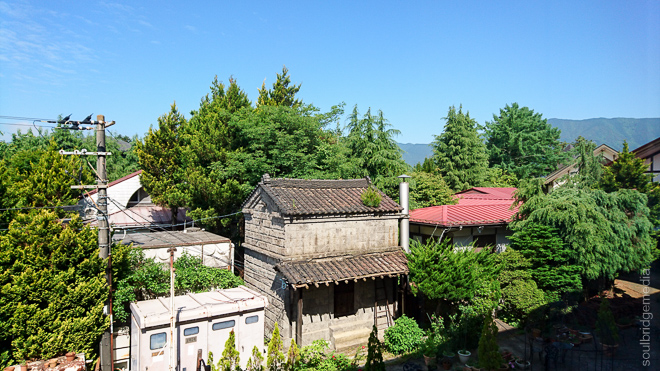
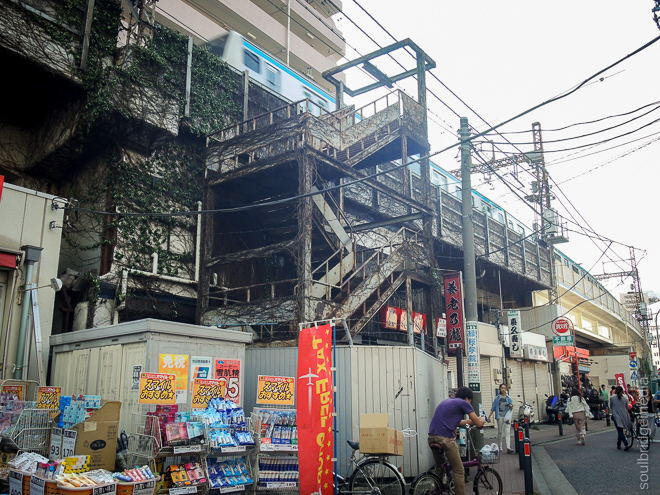
Gotemba Premium Outlets
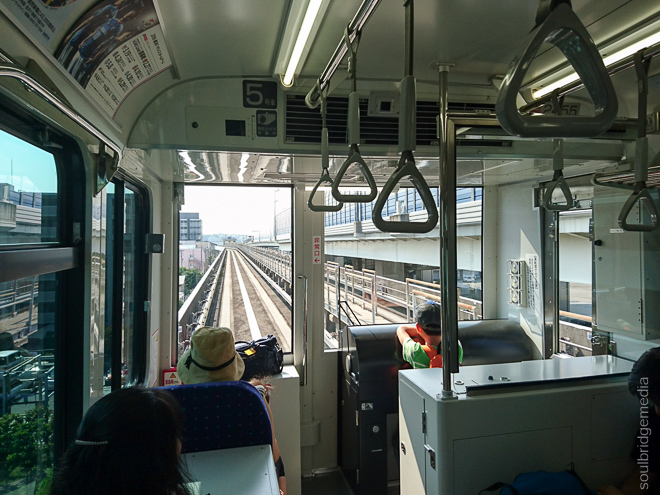
Japanese retailers were really ahead of the curve, how do you get people to come to your stores? Make it a train station and they come right to your door, genius! The same goes for out of the way outlet malls like Gotemba, previously we spent a bit of time navigating a few different trains and a courtesy bus to get there but this time we tracked down a direct service from the Yokohama CAT station. For around 1700Y one way (discount for return trip) we didn’t have to worry about dragging our luggage through stations and finding a seat on a train. Plus it was on the way to the 5 lakes area anyway so it’s a win-win 😀

Travel tip: Bus routes, costs and departure locations for Yokohama can be found here
Travel tip: There are storage lockers on site (to the left of the main entrance from the bus stop, near the toilets)
Travel tip: Remember to grab a coupon discount booklet from the information booth
Travel tip: Remember to check the departure times when you arrive so you can plan your day accordingly as services dwindle later in the day.
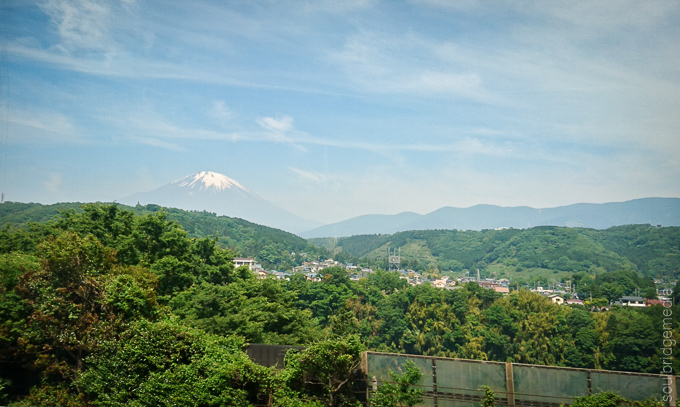
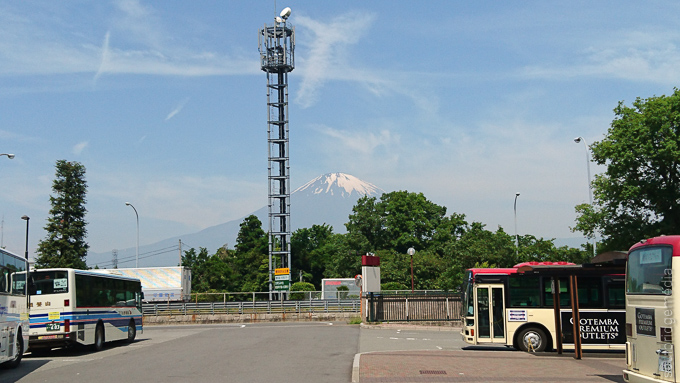
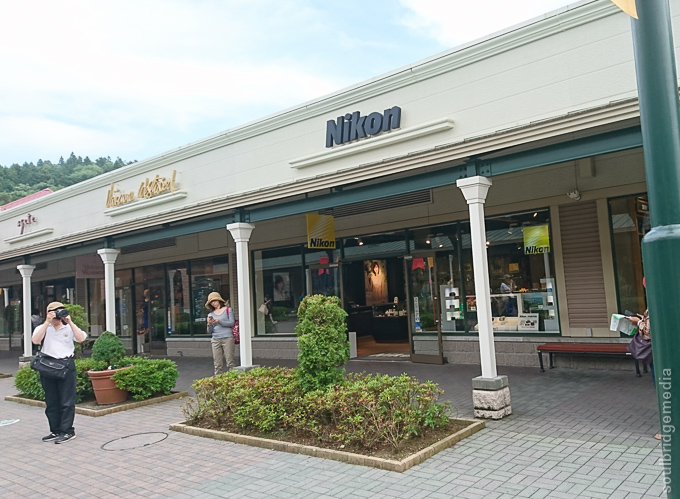
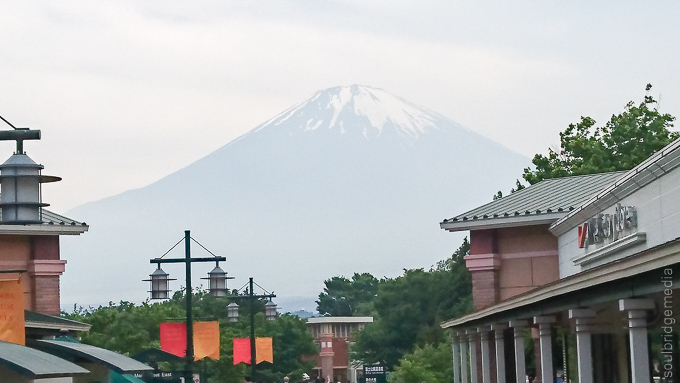
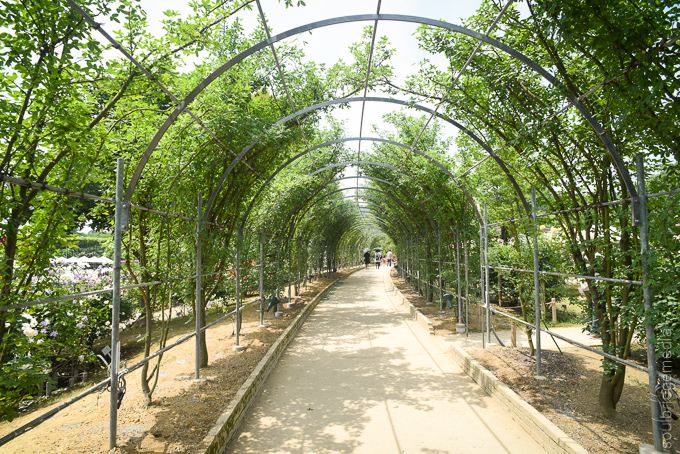
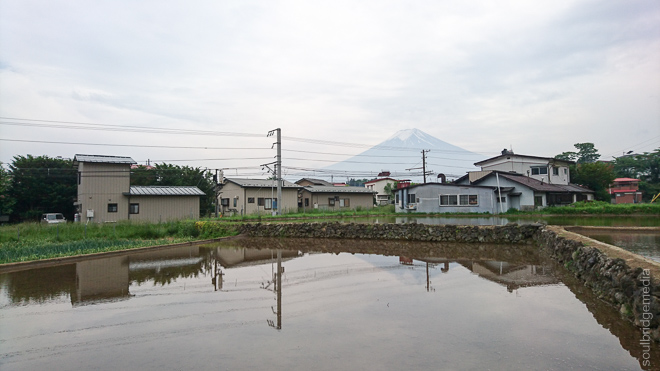
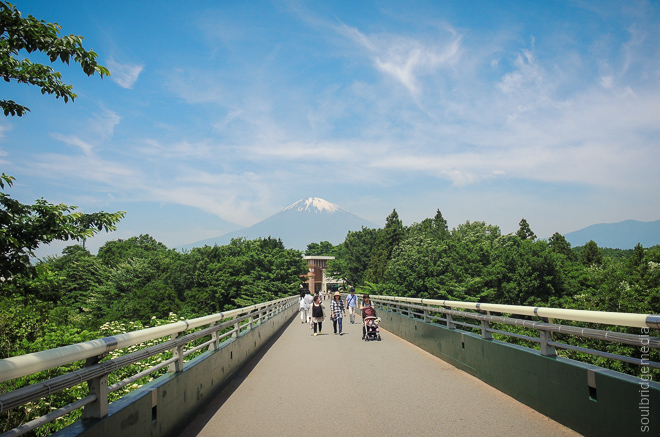
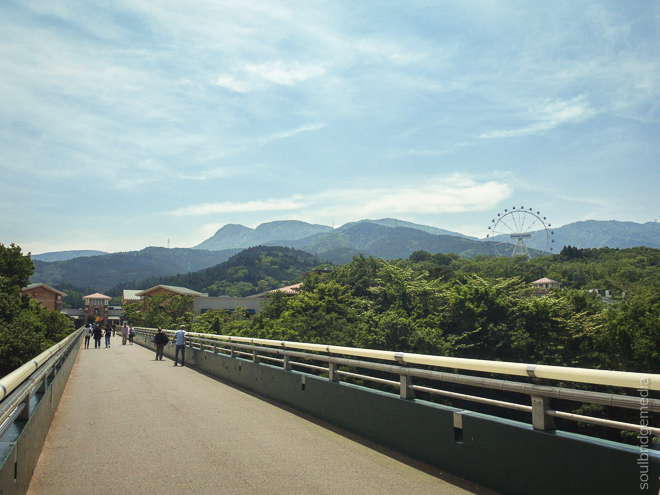
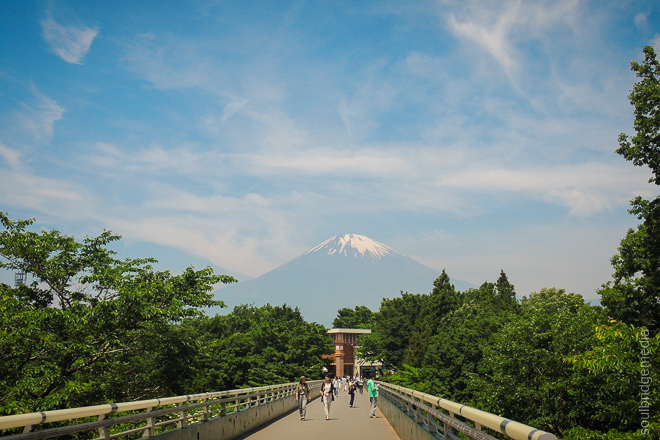
Photo tip: On a clear day, keep an eye out for Fuji-san when crossing the walk bridge between the two mall sections.
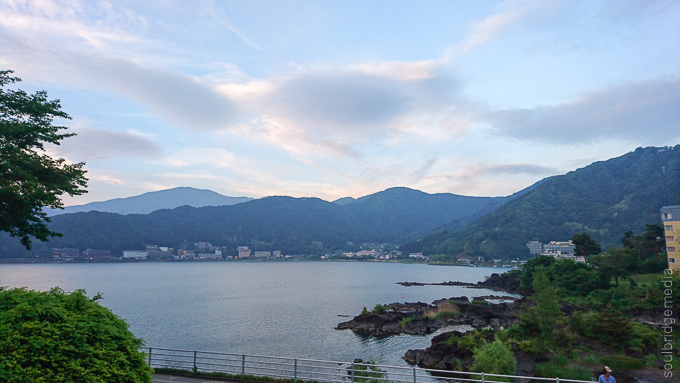
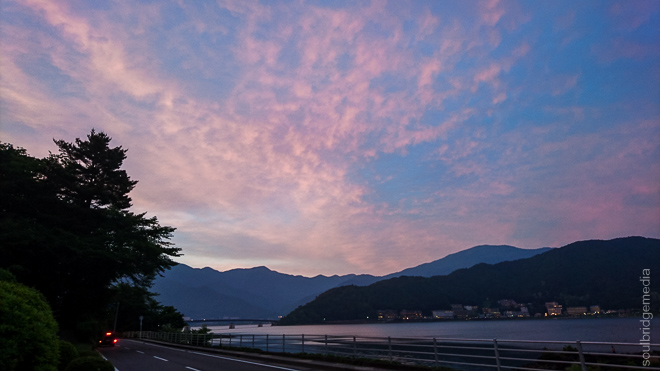
Kawaguchiko
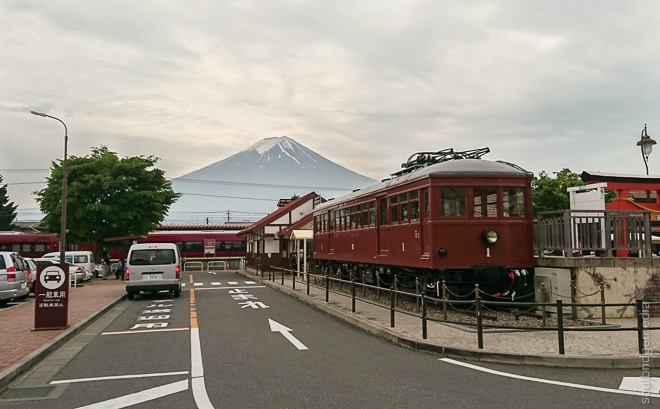
Coincidentally, the Outlets had a bus that goes to where we needed to be next, Kawaguchiko, luck or crafty planning? 😉 Same deal as before, door to door station service, no faffing about.
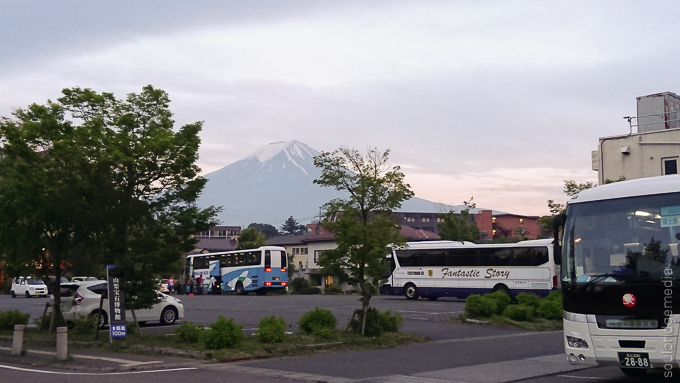
At Kawaguchiko station there are two bus services (red or green) which run in roughly clockwise and anti clockwise routes around the southern side of the lake. These cover most of the affordable hotels and some of the local attractions. They run every 15-30min for only a couple bucks but having arrived late afternoon amongst a couple busloads of tourists, the services were struggling to meet demand, so after about 45min of waiting we grabbed a cab to our hotel (Kawaguchiko hotel). The hotel is only about 1km from the station, easily walkable but not so much after a long day with luggage in tow.

Travel tip: If you did have to wait at the station, there are hot meals available from the small eatery inside.
—-
Full Kawaguchiko Hotel review
Its rare that you can get the trifecta when it comes to hotels – good accommodation, good value, good location, usually one of those has to be sacrificed and its usually cost. Being out in the country side, with a lot less options, makes it even harder to score this so if you want the other two you need to pony up on the dinero. If not, manage your expectations, you saving money means corners are cut somewhere and in this case its in the general upkeep of the place.
To me, it felt a lot more like staying at your friends’ beachside place during schoolies, it was more the fact that you were there that mattered than the place where you dumped your bag and crashed out for the night. Sure, the carpet could use a steam clean (or just have new runners laid) and the window sills and the like could do with a vacuuming but the linen was clean along with the bathroom and for the double room we got, there was a welcomed amount of ample space compared with other places we have stayed at in Japan. In general, it definitely has a mum and pop store feel where they’ve just done the same thing for decades, and its worked, so they haven’t bothered changing anything…at all.
All staff however were the usual Japanese kind of helpful even with minimal English but if you are after a more detailed response, track down one of the younger staff members. Rooms were quiet with minimal foot traffic, though being at the end of a hall helped. Bicycles and paddle boats are available for hire on the lake (not related to the hotel).
We didn’t get to try the in house catering, the restaurant was booked out (and had to be booked in advance) but not to worry, there are plenty of eating places within walking distance. Exit the hotel and go right^, there are a couple buildings that look like they have or more so, HAD a restaurant but we couldn’t tell for sure as they weren’t open at all over the days and nights we were there. Further along there’s a small Asian takeaway but keep walking along the scenic waterfront till you get to a large intersection where the road hooks to the right*, here you’ll see a Lawson’s amongst a string of restaurants and souvenir shops. We went with the Indian place across from Lawson’s with no regret, good portions and reasonable prices.
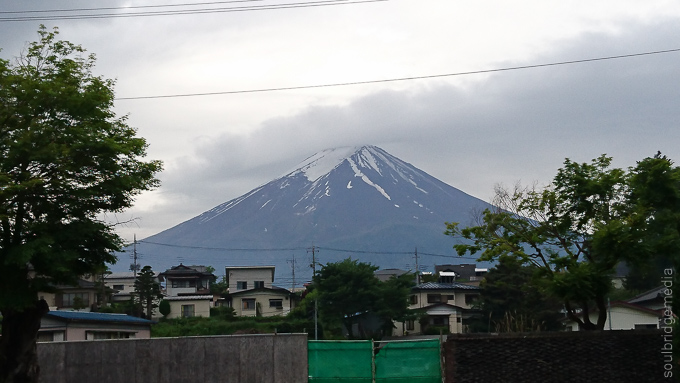
^ – look over your right shoulder, you might be lucky enough to see Fuji off in the distance
* – following this street with a couple back street zig zags will take you back to Kawaguchiko station which is about a 15min walk. Reasonably easy but some of the streets are narrow with no footpath so navigating this with big luggage could be a little difficult, a cheap taxi ride might be the way to go for some. This route also includes a couple smaller supermarkets if you want more than what a convenient store offers.
Hotel staff actually recommended turning left out of the hotel and to go around the block for restaurants, which on a quiet night was a bit difficult to tell the difference between a hotel and a restaurant (the few along this street all looked like hotels). Eventually you’ll reach a major road, turning left here will lead to a few Japanese style fast food restaurants and a convenience store. It’s a much longer walk, about 15-20min but felt much long with no scenery. Google maps shows a short cut route through some very small “not sure if lane or someone’s drive way” kind of “streets” but it was impossible to navigate these at night as most were poorly lit, if at all.
Overall, the location and the surrounds more than made up for the short comings of the hotel, if we end up out that way again, it would definitely be considered.
—-
Travel tip: if you’re going to air clothing on the window sill, don’t open the opposite one ^_^’ but if you do, make sure you know how to use a tripod like giant chopsticks ;p
Next we try to catch some pink moss (yes pink moss) and a glimpse of Mt Fuji at the Fuji Shibazakura Festival and Chureito Pagoda.
Japan 2016 part #1 – Travelling with a plus one
Japan 2016 part #2 – Yokohama
Japan 2016 part #3 – Gotemba to Kawaguchiko
Japan 2016 part #4 – Fuji Shibazakura Festival and Chureito Pagoda
Japan 2016 part #5 – Fuji Q Highland
Japan 2016 part #6 – Matsumoto, Alpine Route, Snow Corridor
Japan 2016 part #7 – Matsumoto castle, Ashikaga Flower park
Japan 2016 part #8 – Tokyo Skytree, Ueno
Japan 2016 part #9 – Tokyo wandering, Odaiba + Disney Sea
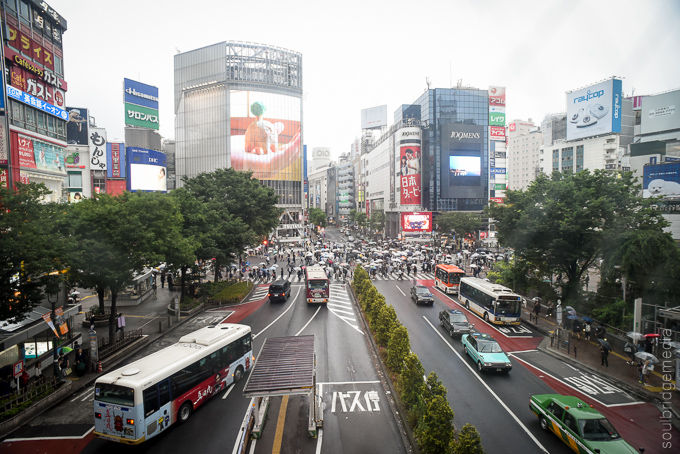
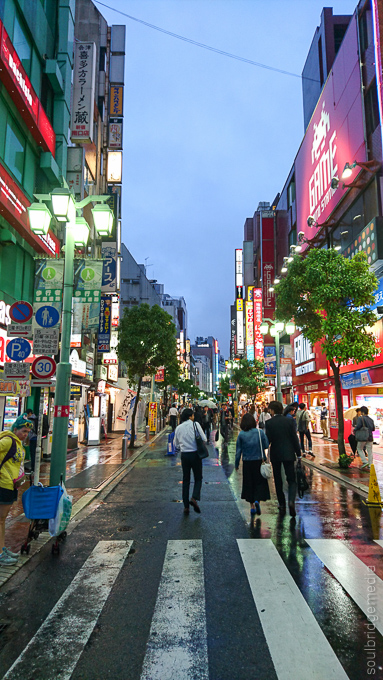
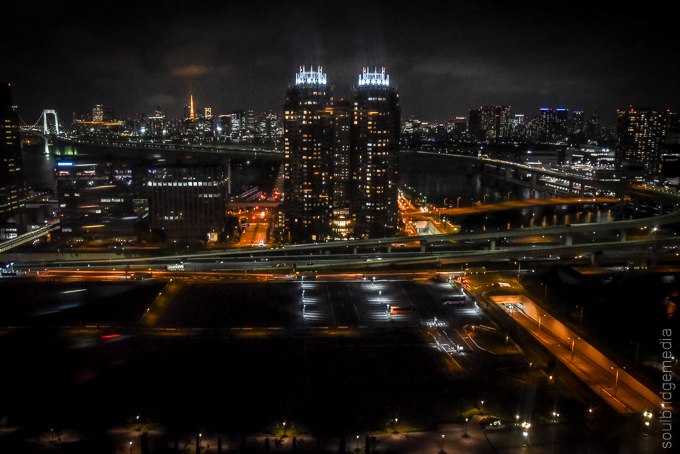
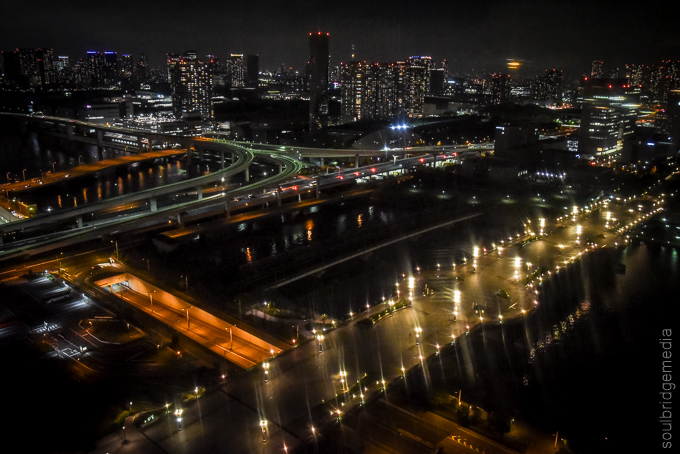
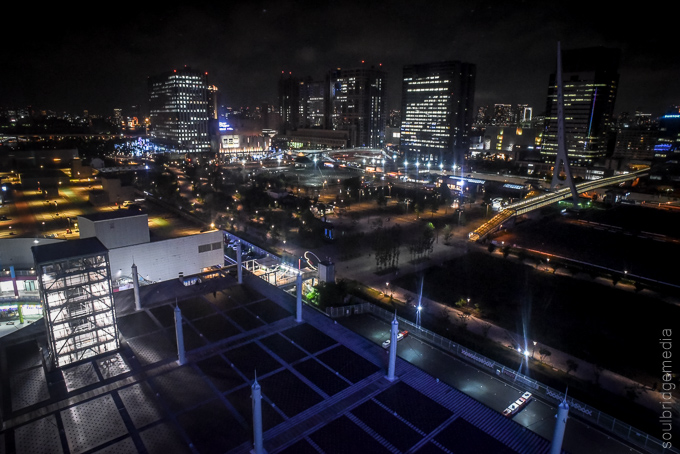
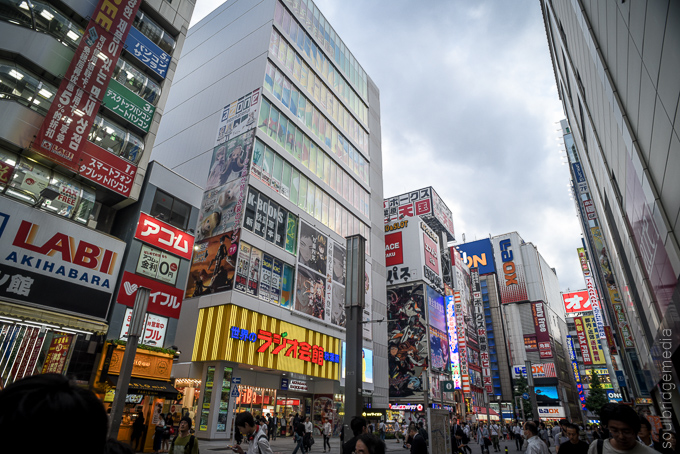
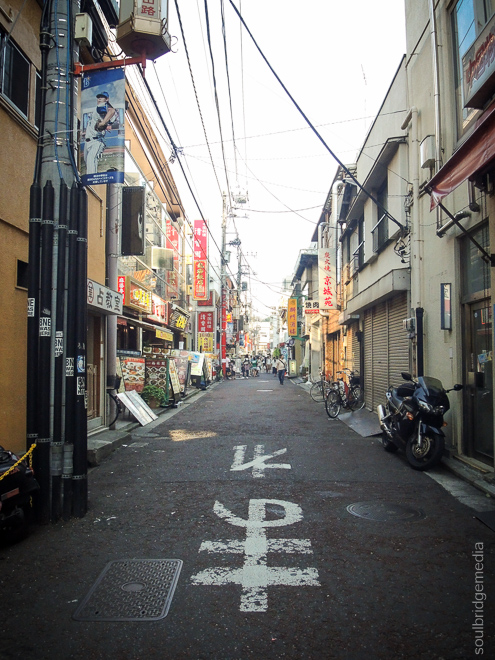
When travelling its pretty easy to get desensitised to the wide eyed wonderment moments of the first couple days where cool alleyways and brightly it intersections blend into one but its always a good idea to snap these simple shots as the magic returns after the smell of ramen and the roar of trains has disappeared. Thankfully there’s a constant reminder with random eye catching ‘gram worthy pics on just about every corner!
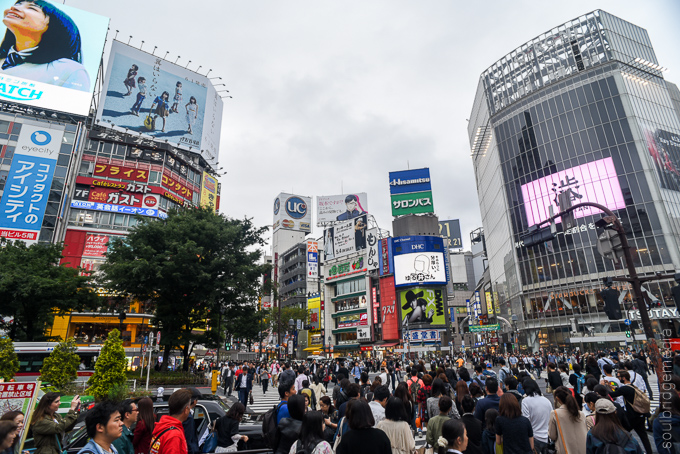
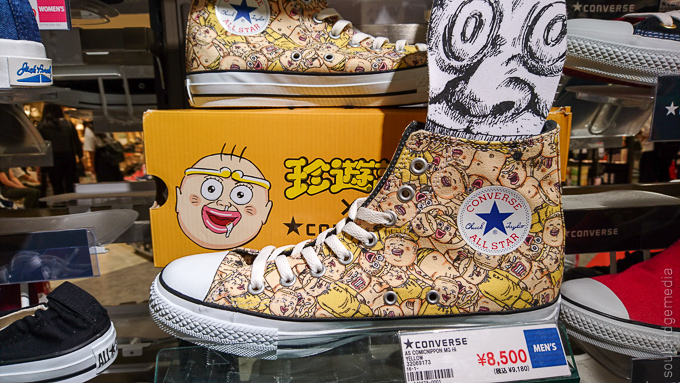
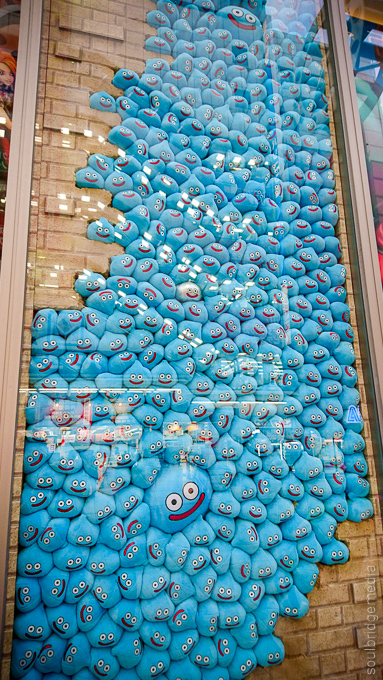
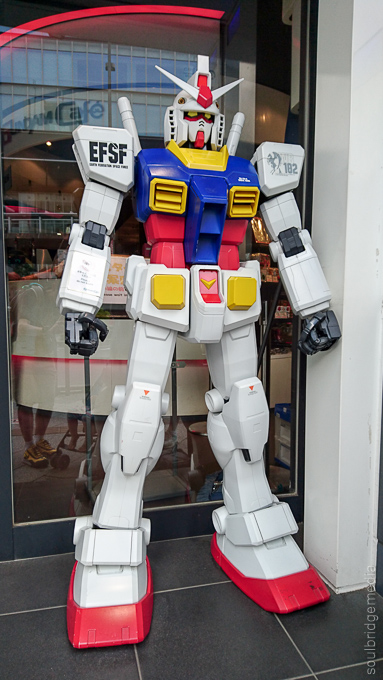
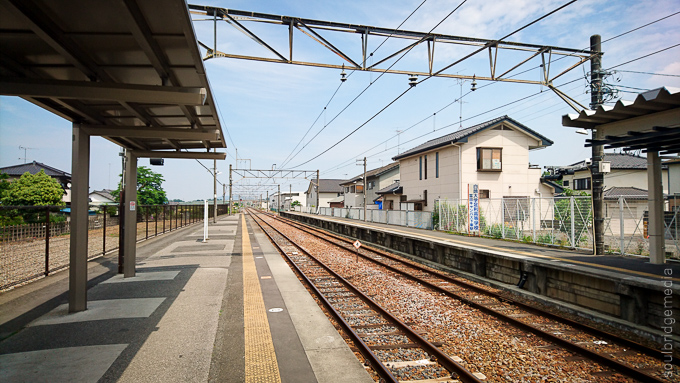
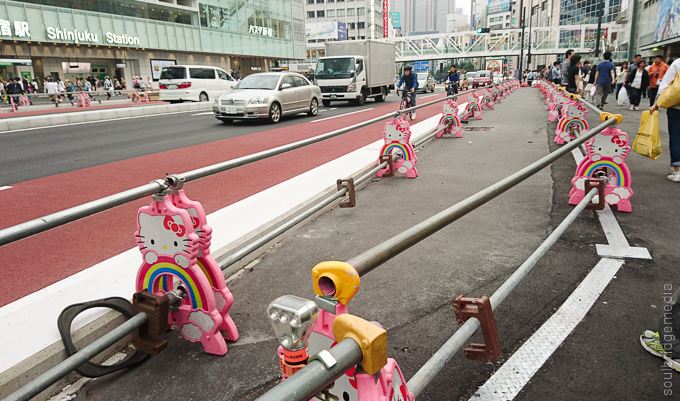
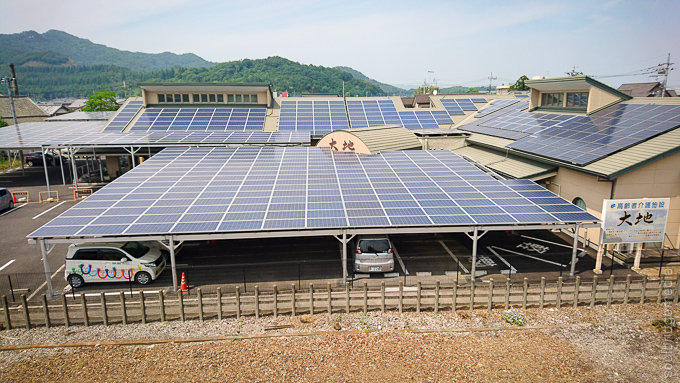
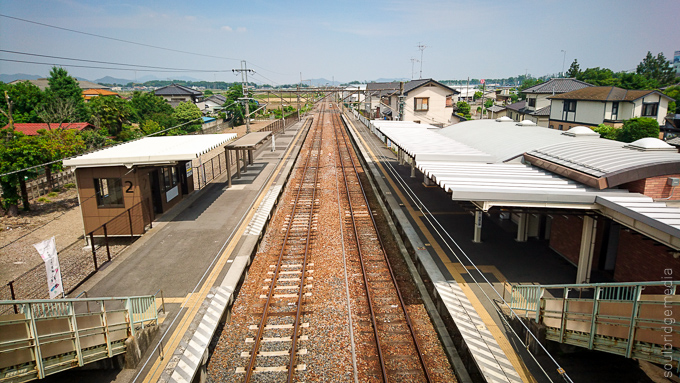
Photo tip: Different times of the day yield different results but it’s amazing what twilight and a bit of rain can do to a scene.
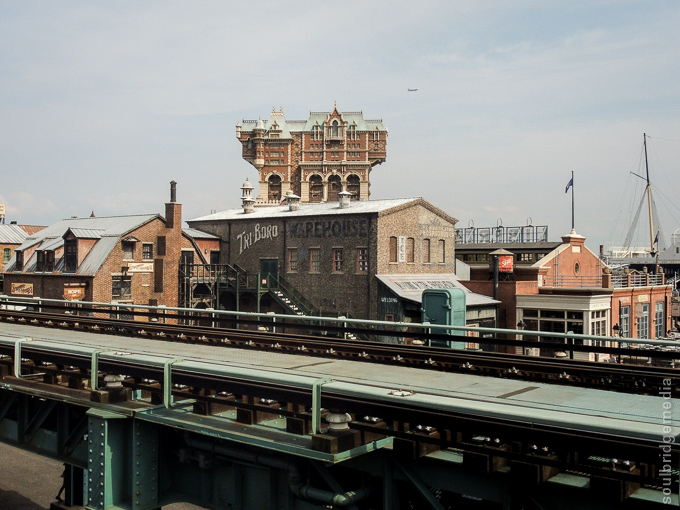
Odaiba
Standard ritual for our Tokyo stop is heading over the rainbow bridge to Diver City shopping mall for dinner and to see our 1:1 Gundam buddy, RX78-2. This was sadly the last year he was at this site but the news is not all bad, he has been replaced by a new Gundam Unicorn RX-0! (look out for a future post on this!)
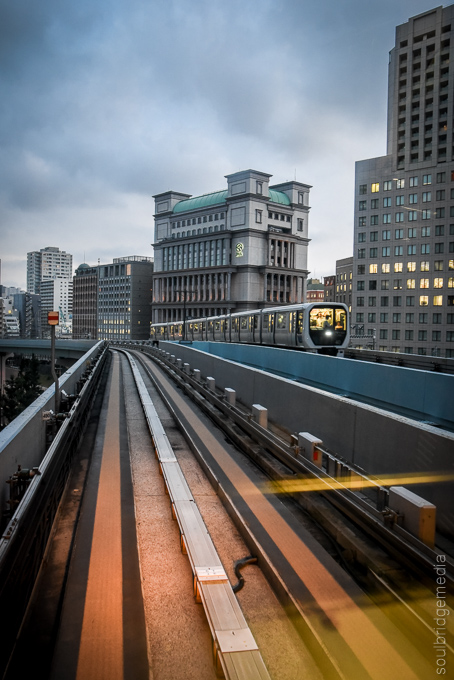
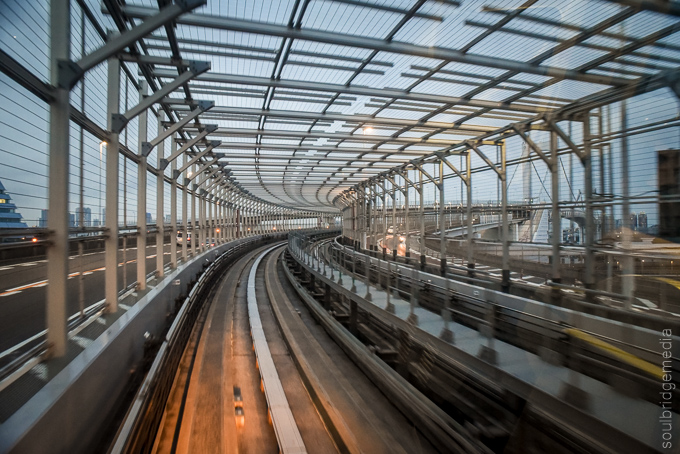
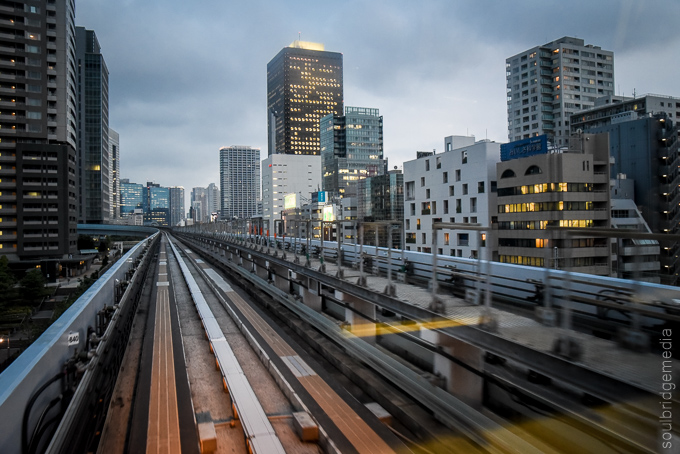
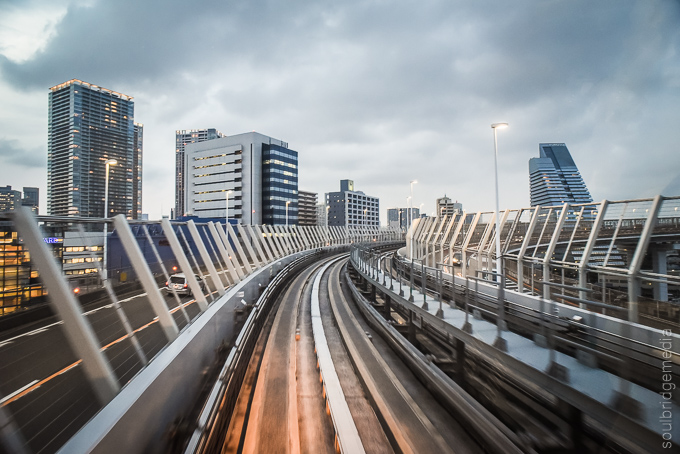
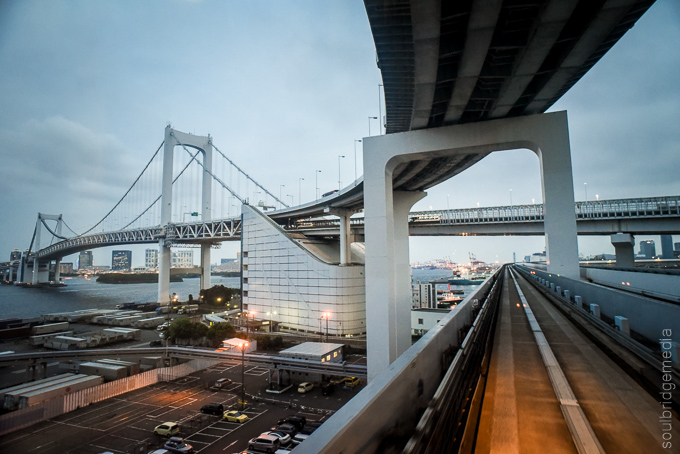
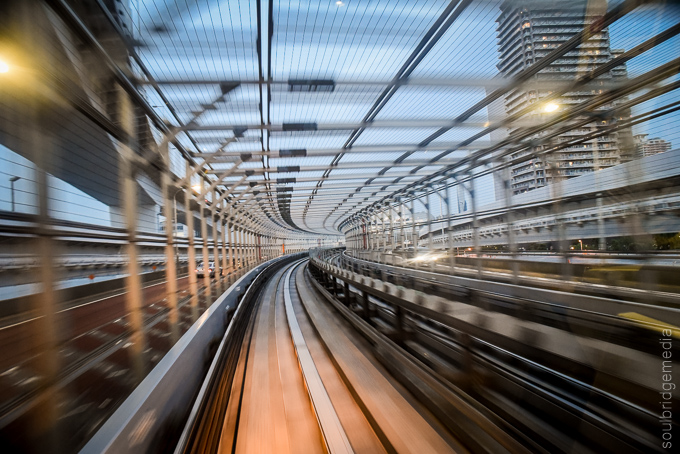
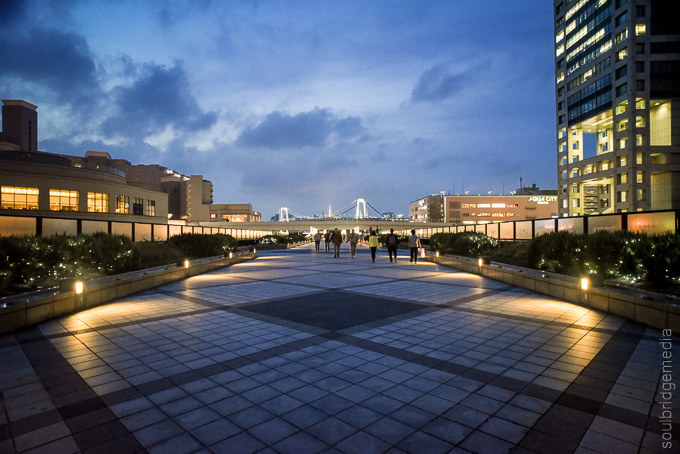

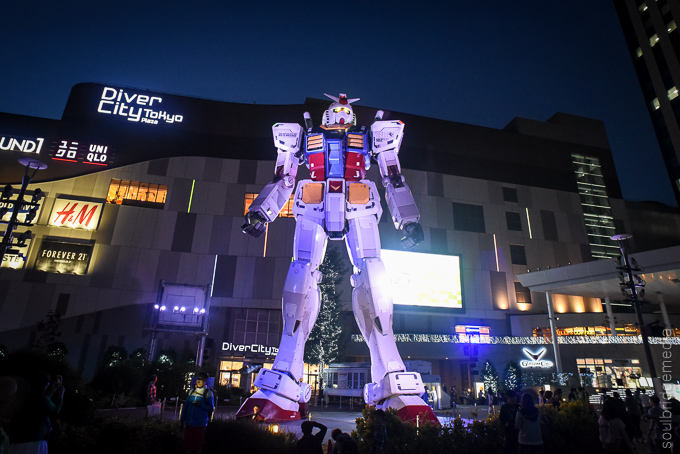
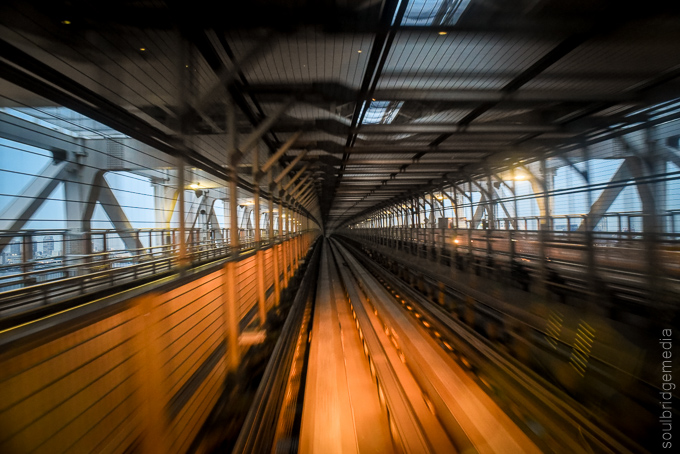
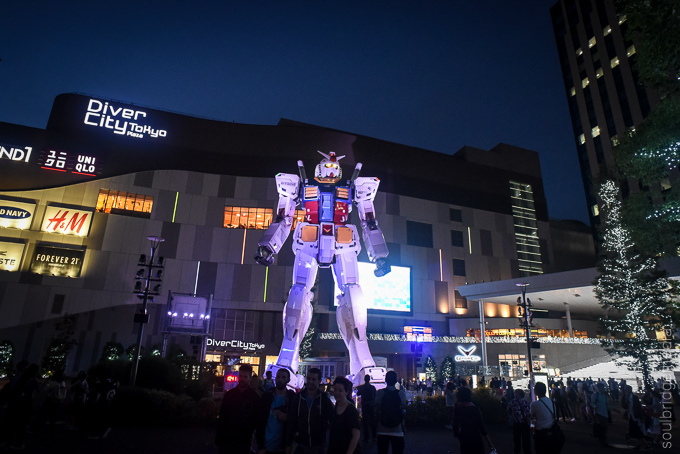
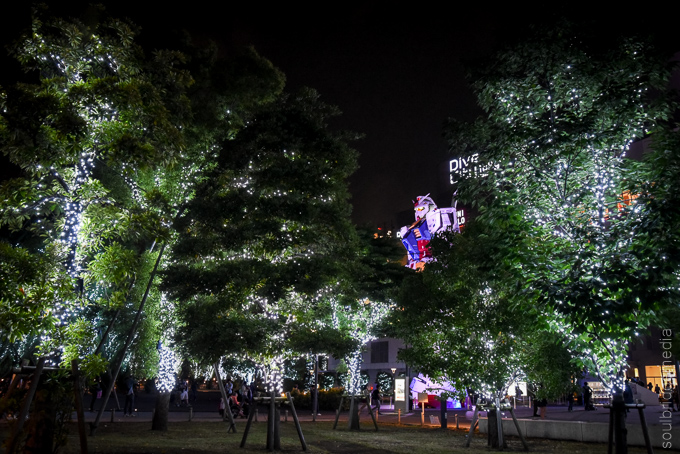
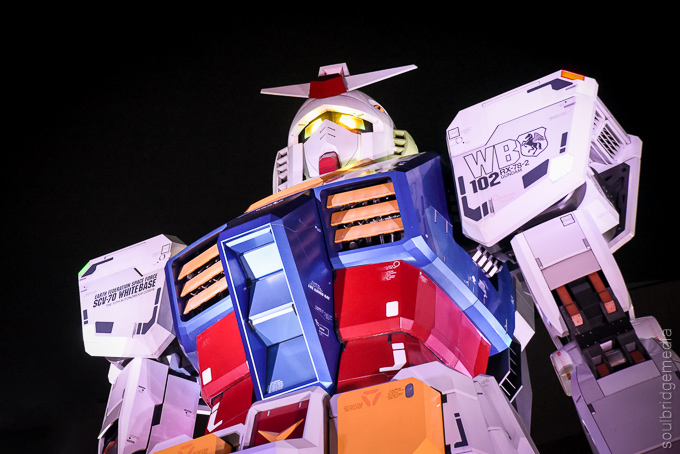
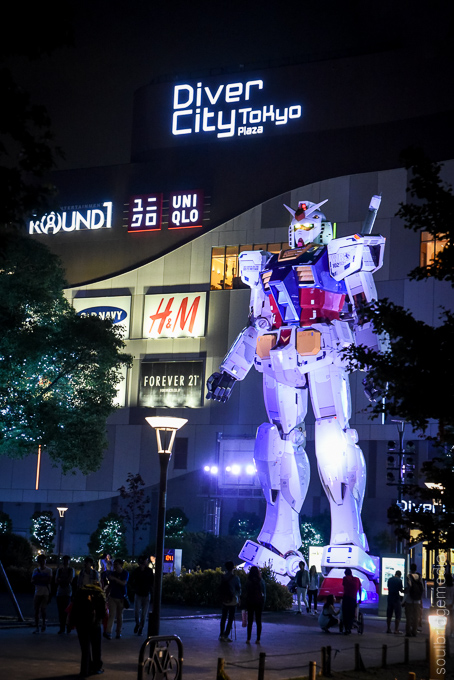
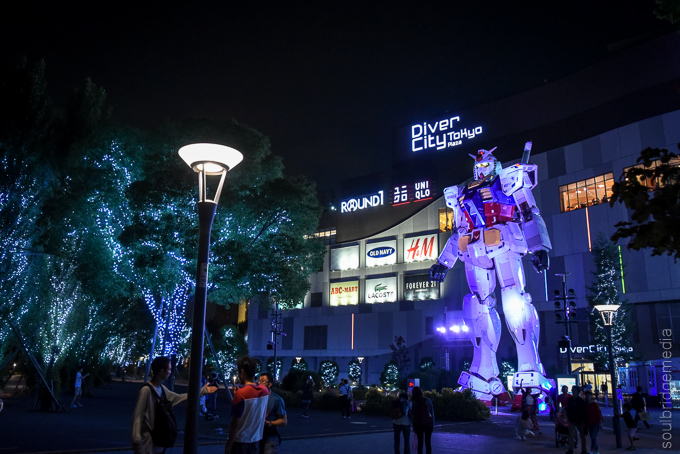
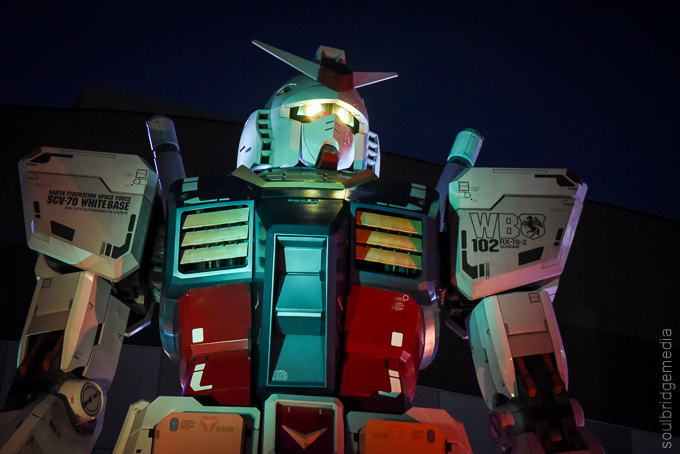

Photo tip: there are some good views from the ferris wheel at Venus Fort but dirty “glass” and movement restricts long exposure shots. Afternoon or early evening would yield better results.
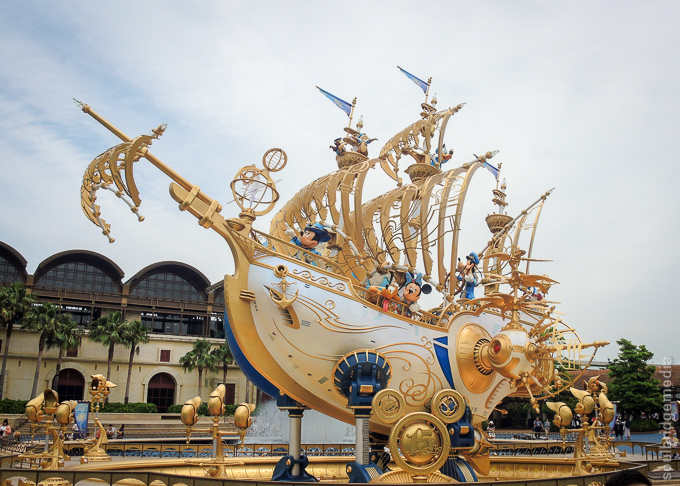
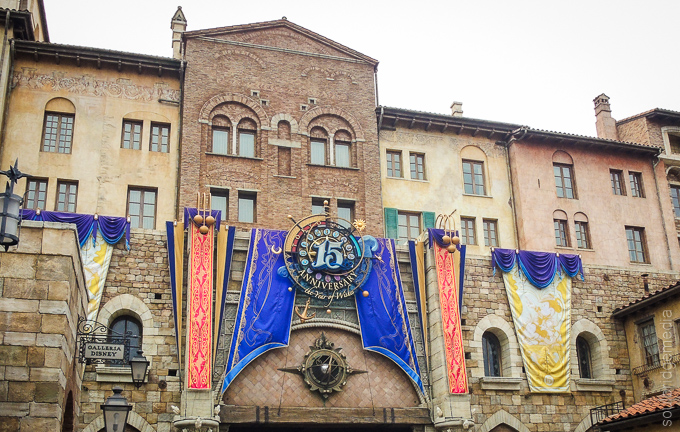
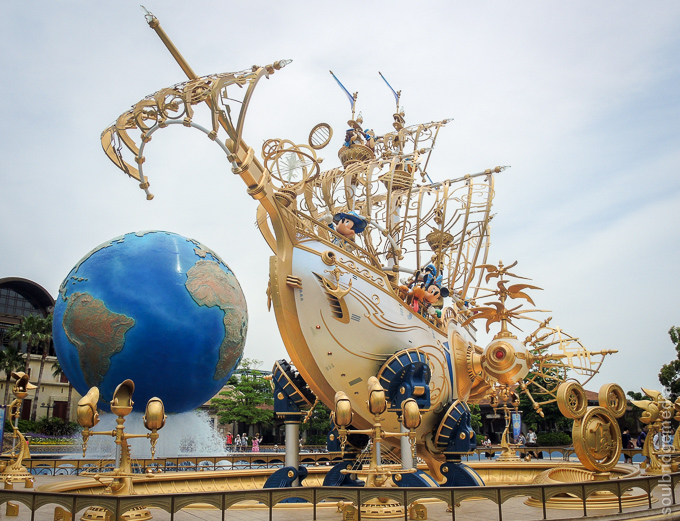
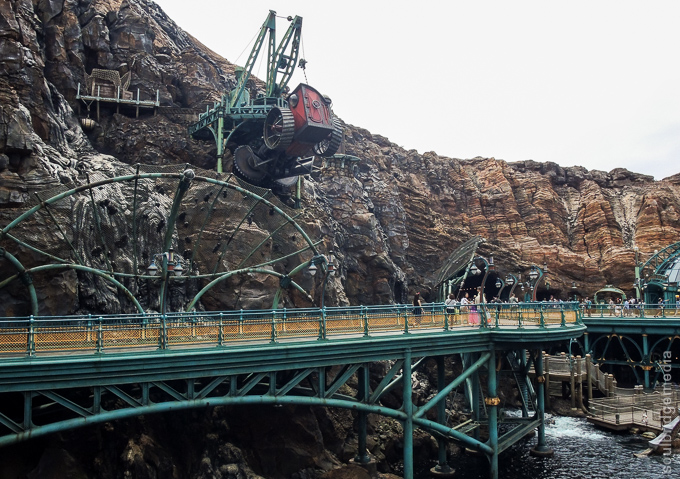
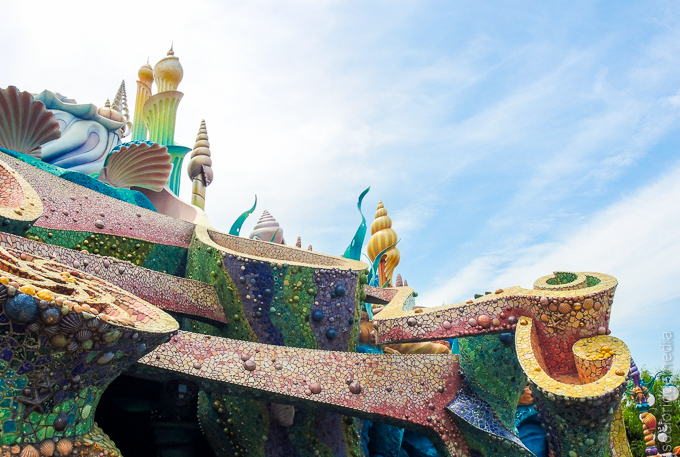
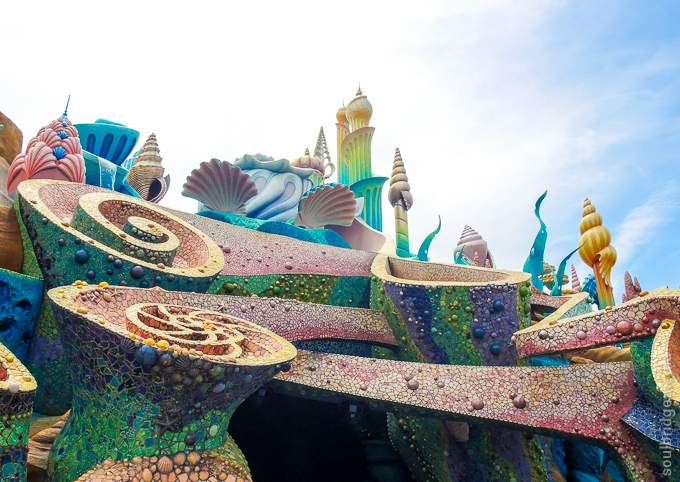
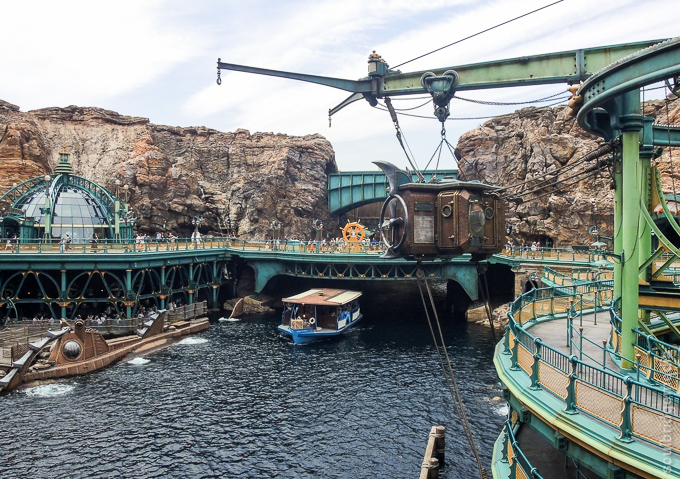
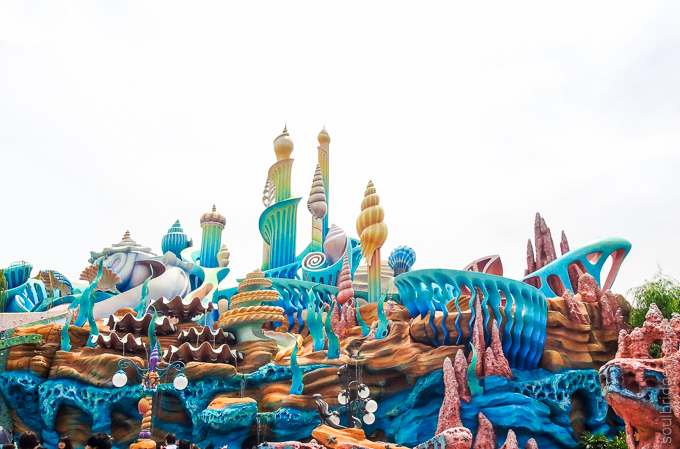
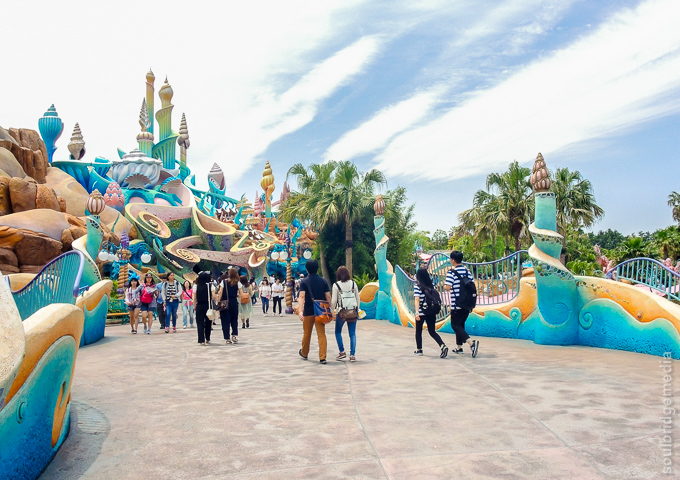
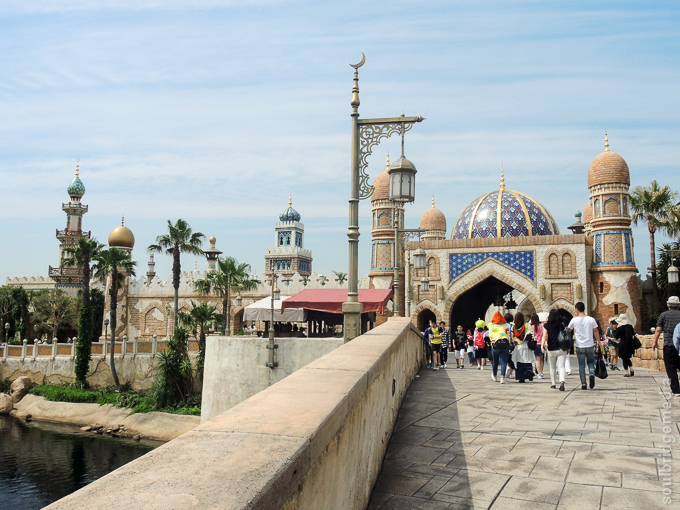
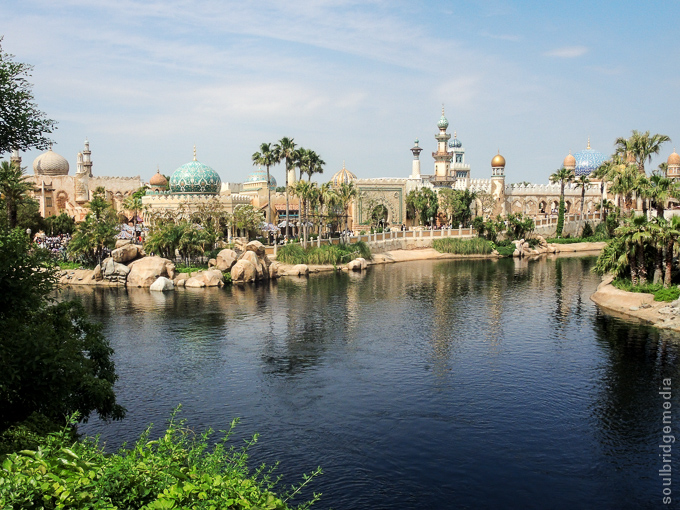
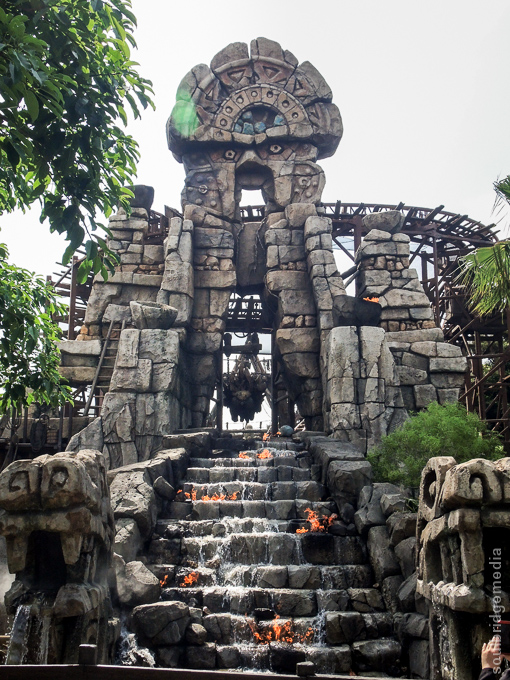
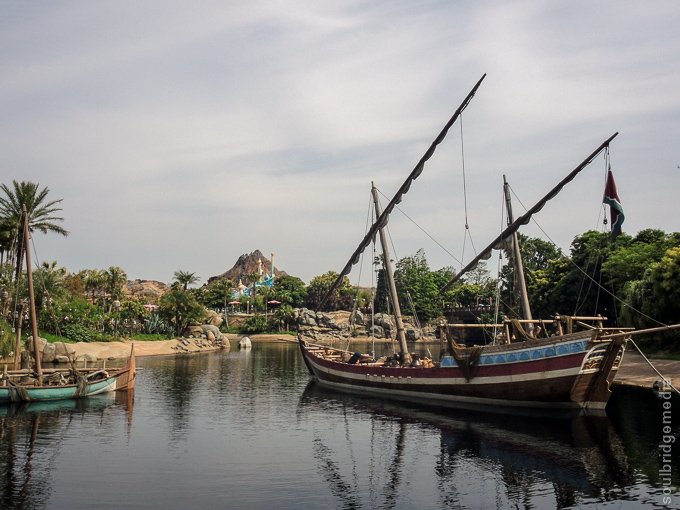
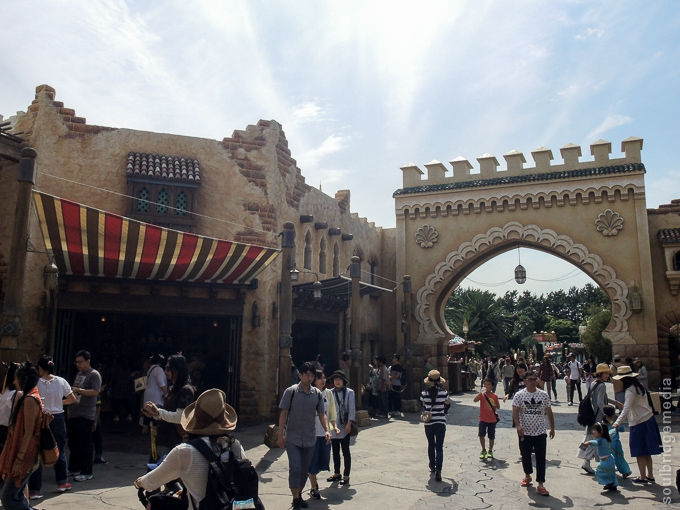
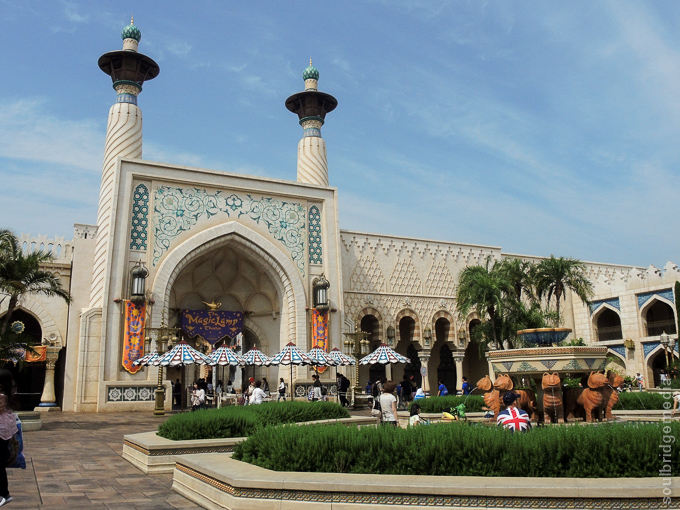
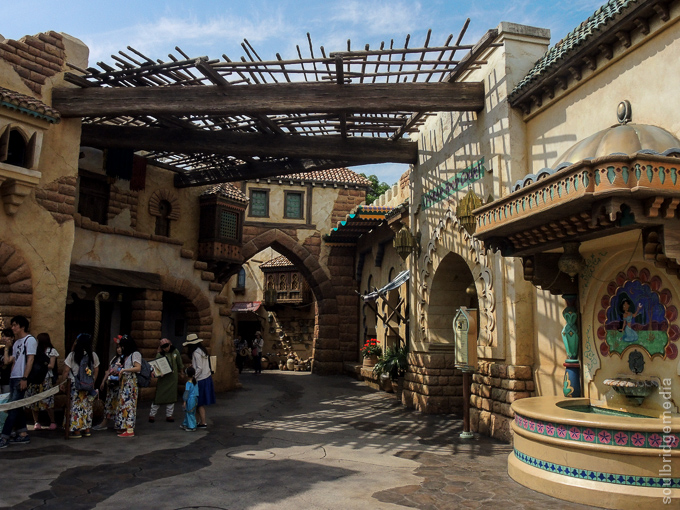
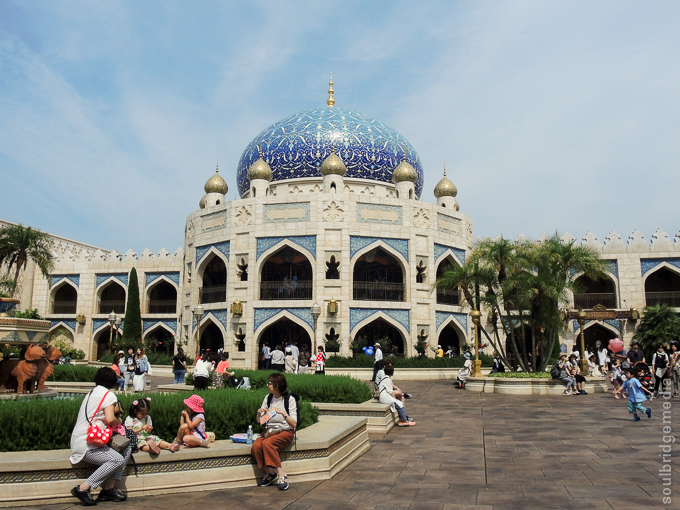
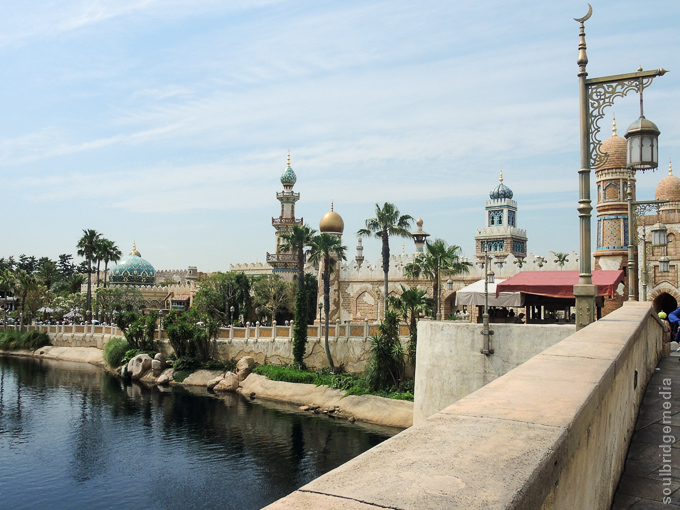
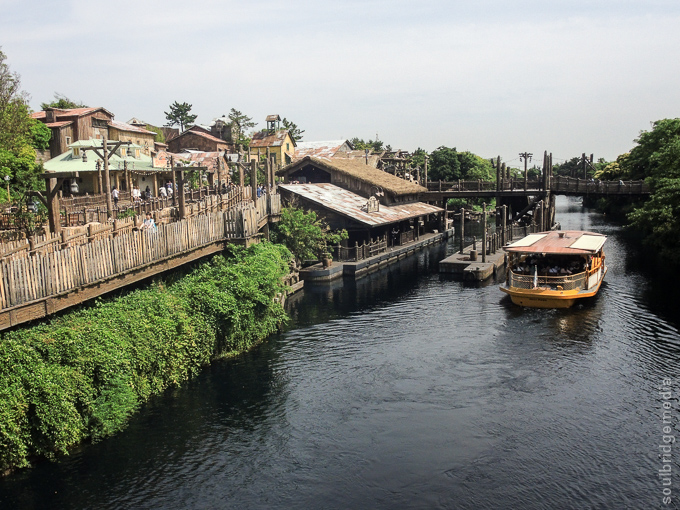
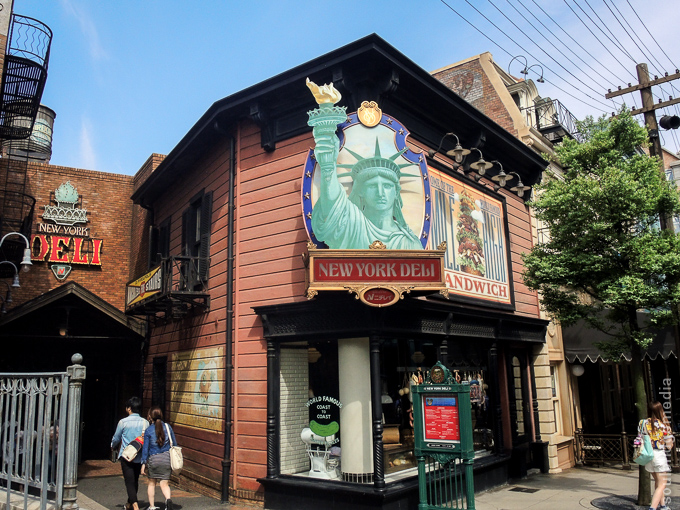
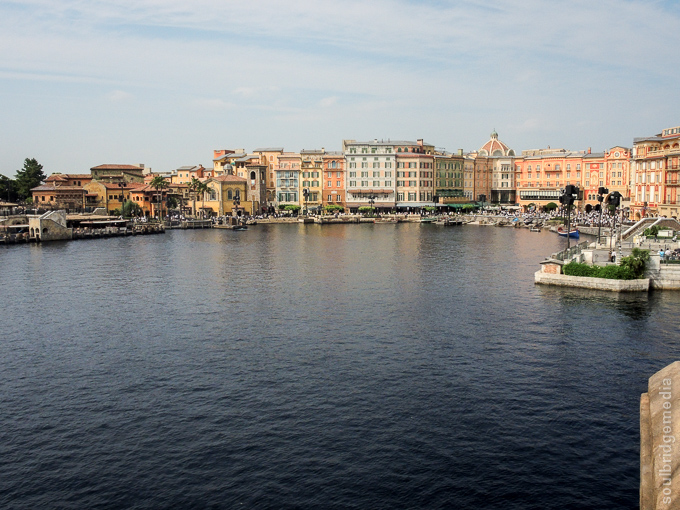
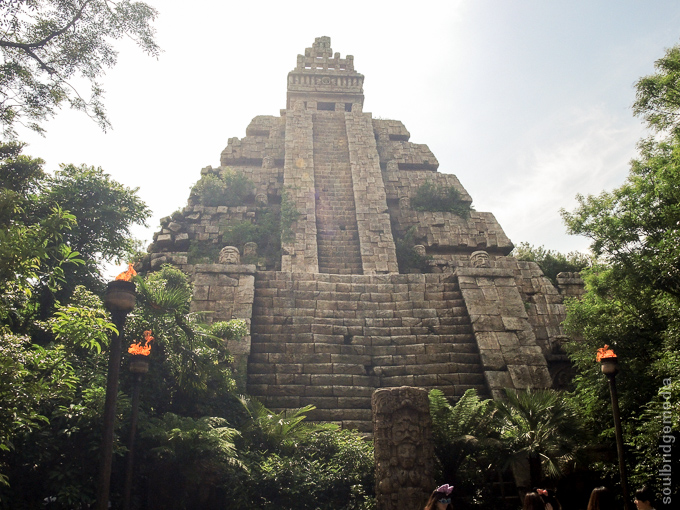
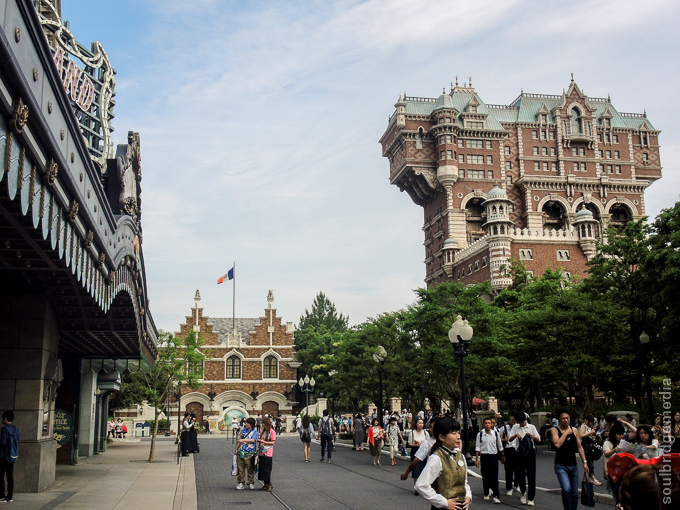
Disney Sea
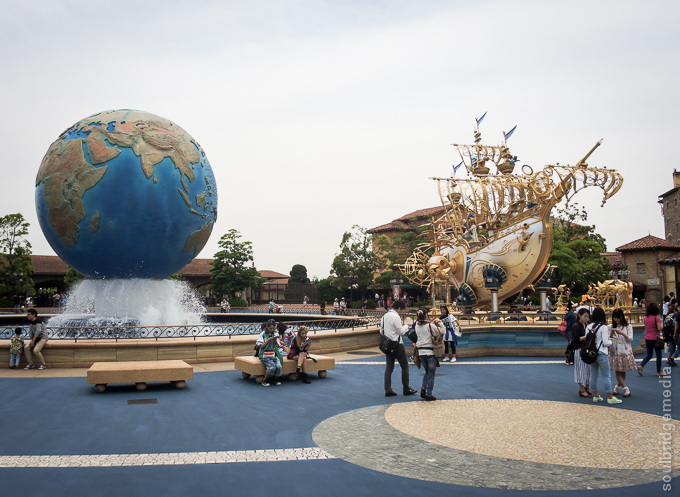
Its Disneyland with a lean towards ocean related themes and places, its what you would expect from a large theme park but being Disney it was a good choice to take a toddler with plenty of options for height disadvantaged kidlets. We happened to stumble across the 15 year anniversary and a commemorative gold pirate ship to match.

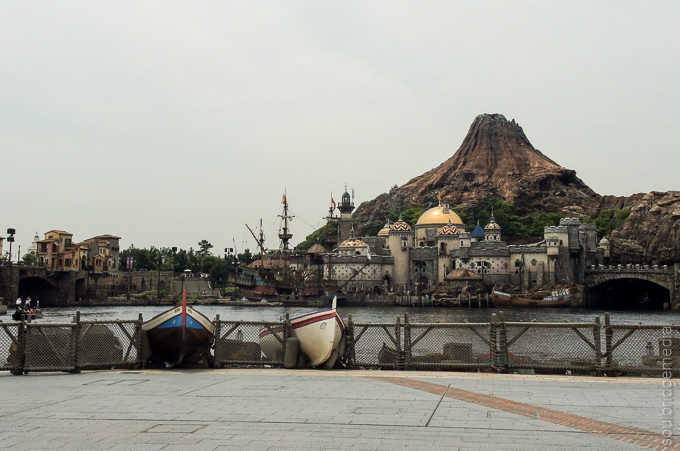
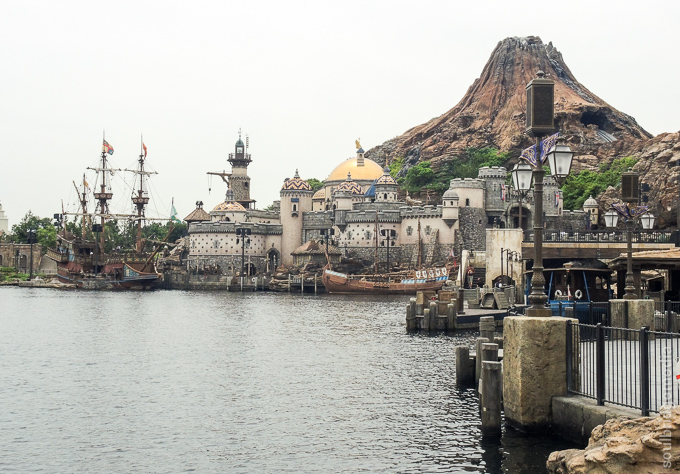
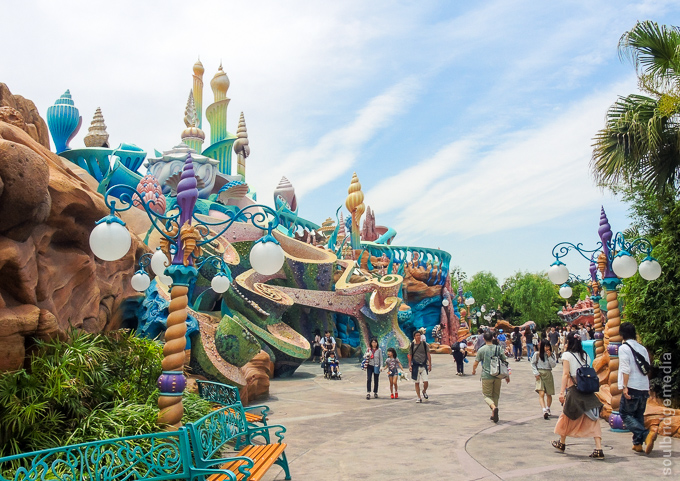
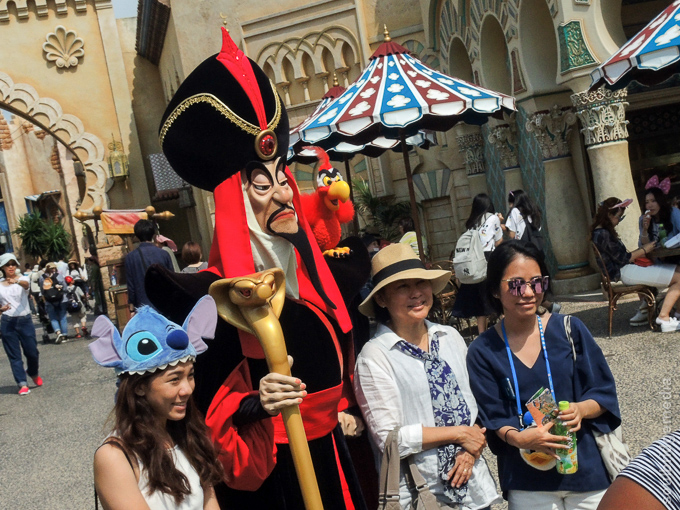
Aladdin fans wishes also come true with middle eastern Agrabah inspired scenes and buildings and of course what would a Disneyland be without a bit of Americana.
—
Japan 2016 part #1 – Travelling with a plus one
Japan 2016 part #2 – Yokohama
Japan 2016 part #3 – Gotemba to Kawaguchiko
Japan 2016 part #4 – Fuji Shibazakura Festival and Chureito Pagoda
Japan 2016 part #5 – Fuji Q Highland
Japan 2016 part #6 – Matsumoto, Alpine Route, Snow Corridor
Japan 2016 part #7 – Matsumoto castle, Ashikaga Flower park
Japan 2016 part #8 – Tokyo Skytree, Ueno
Japan 2016 part #9 – Tokyo wandering, Odaiba + Disney Sea
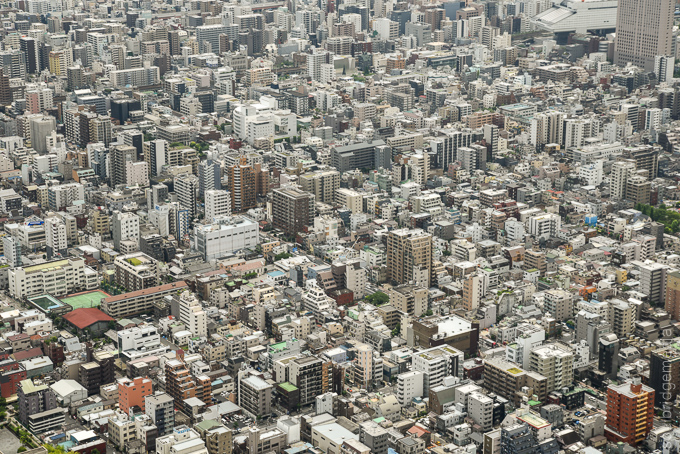
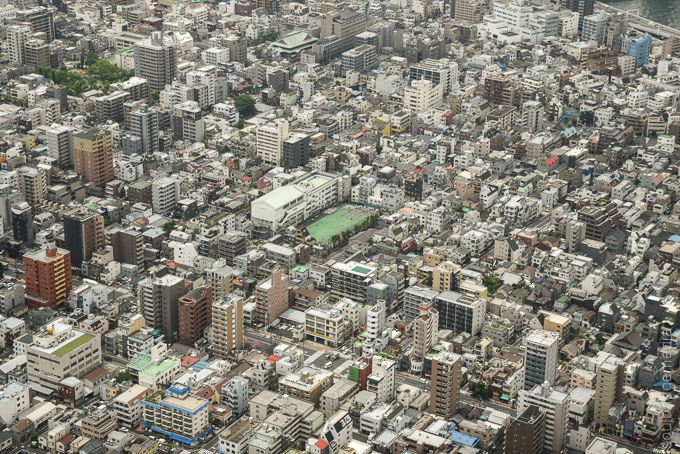
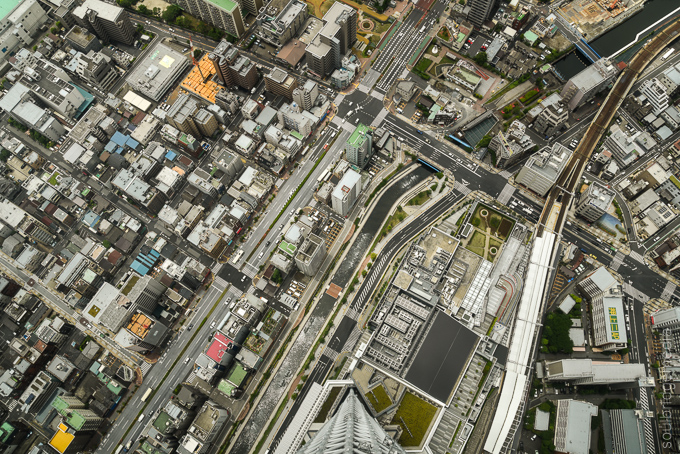
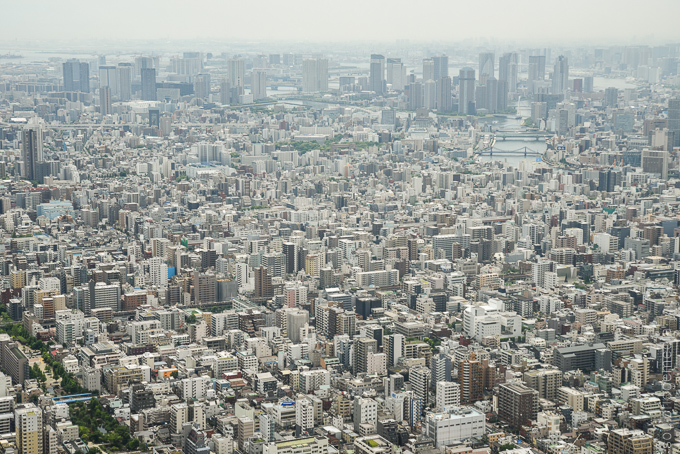
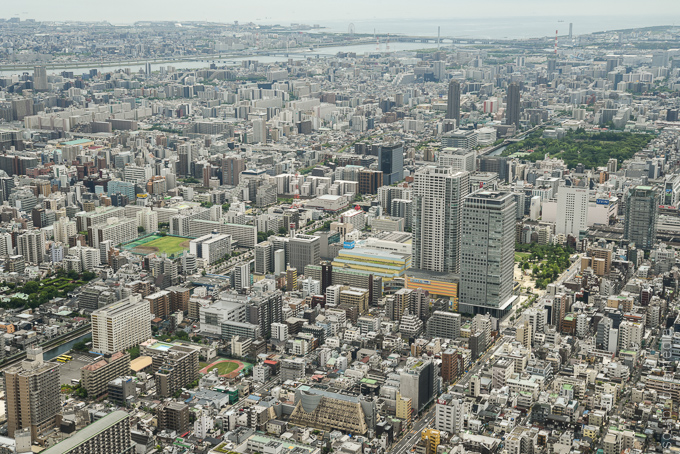
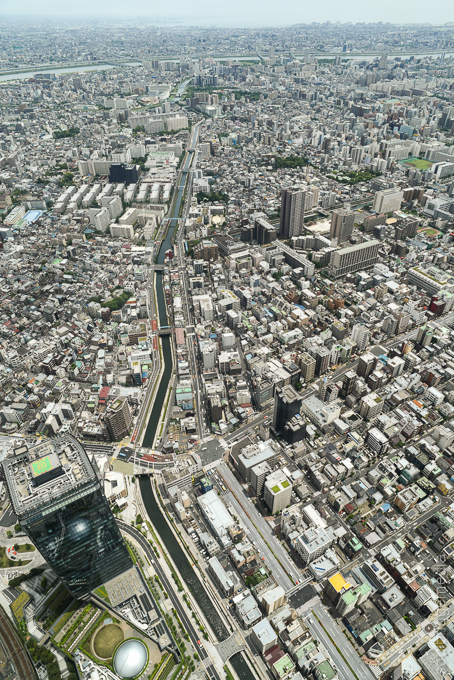
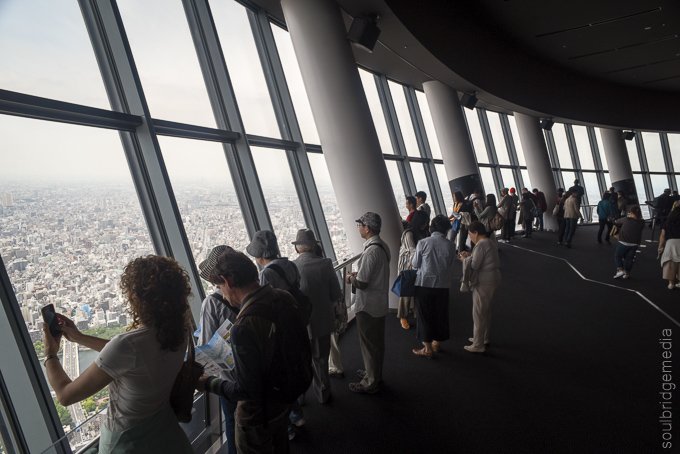
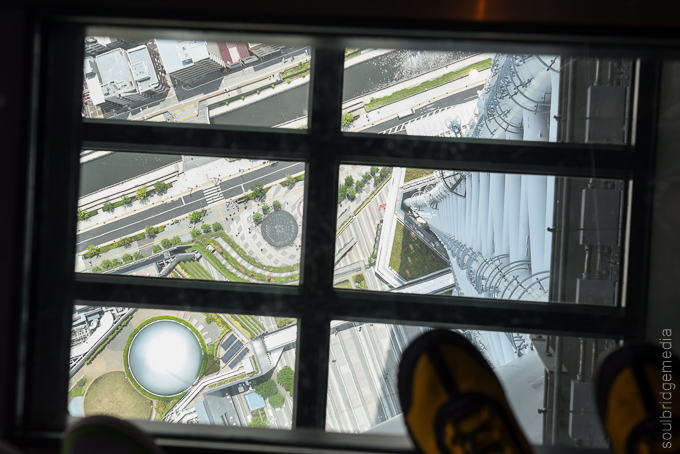
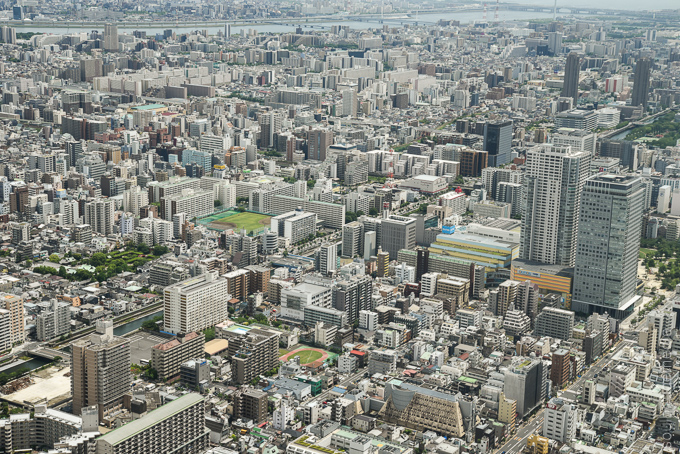
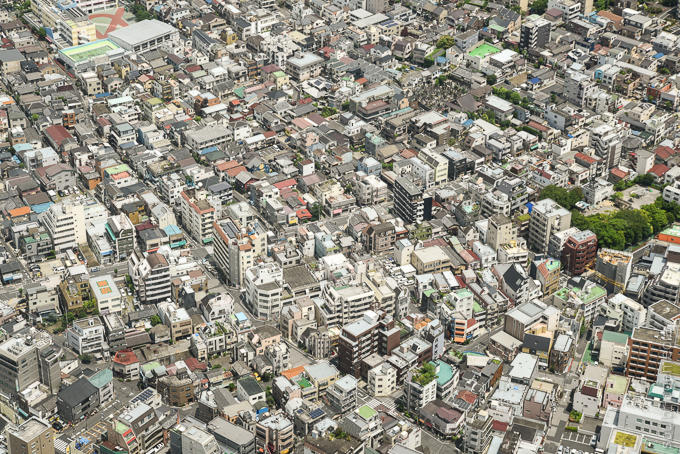
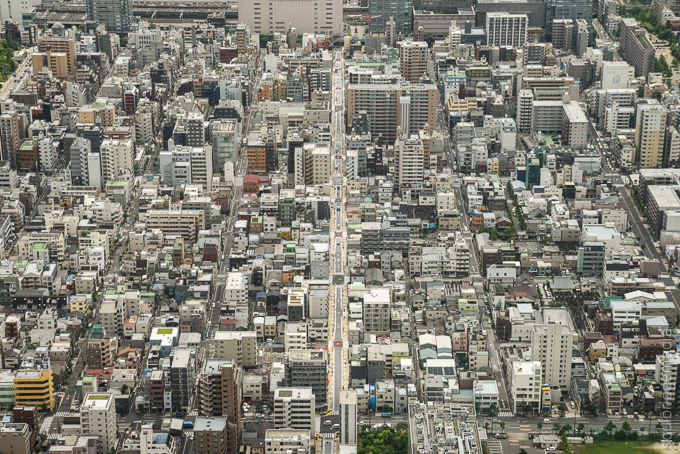
Little boxes, on the hill side…LOTS of little boxes. You cant go past the Tokyo skytree for one of the best vantage points in Tokyo. At over 600m up you get a good sense of just how vast and dense the city is and it certainly makes for some magic-eye-esque type photos (some of these will definitely be printed up poster size!). We could easily sit there for hours watching the ant farm-like traffic and people go about their day. May not be the best idea for Trypophobia suffers though!

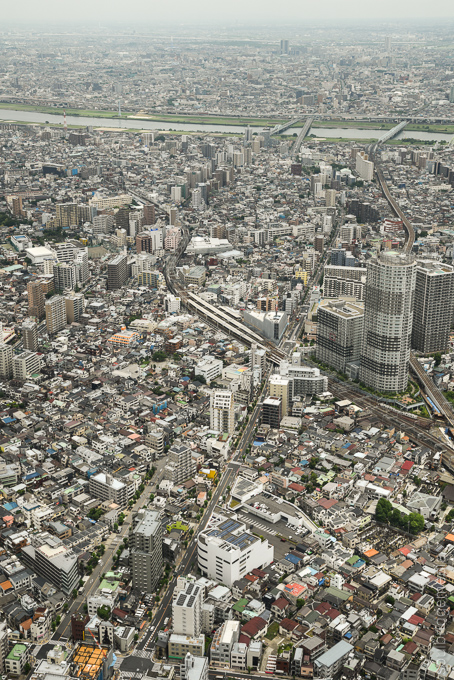
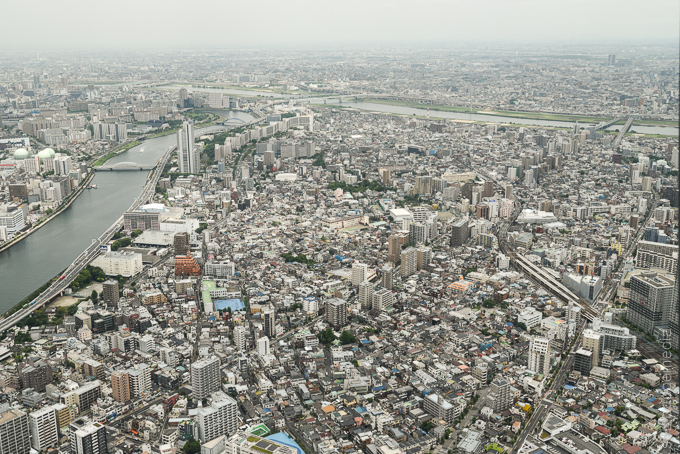
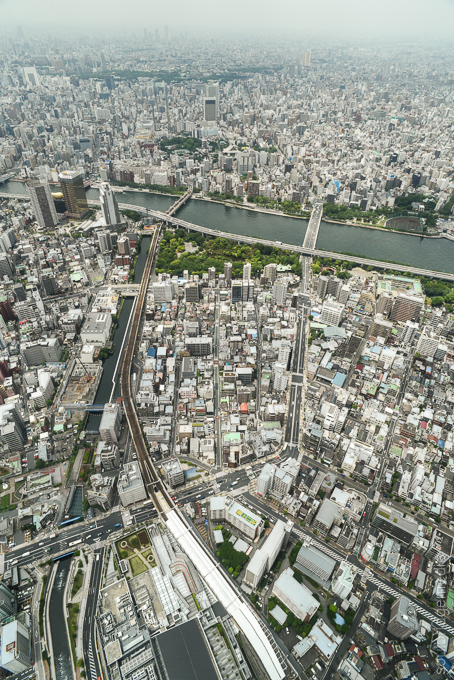
Travel tip: if you have the time and patience, timing your visit for late afternoon will get you day and night shots but of course, everyone else has the same idea. The weather will also play a big part, get the wrong day and your view could be one of thick haze.
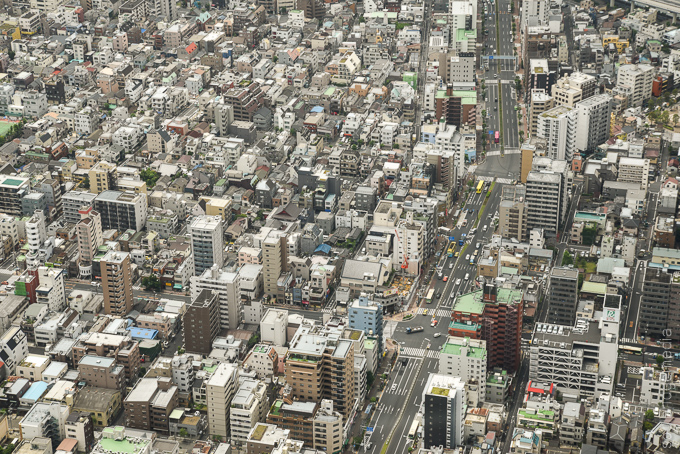

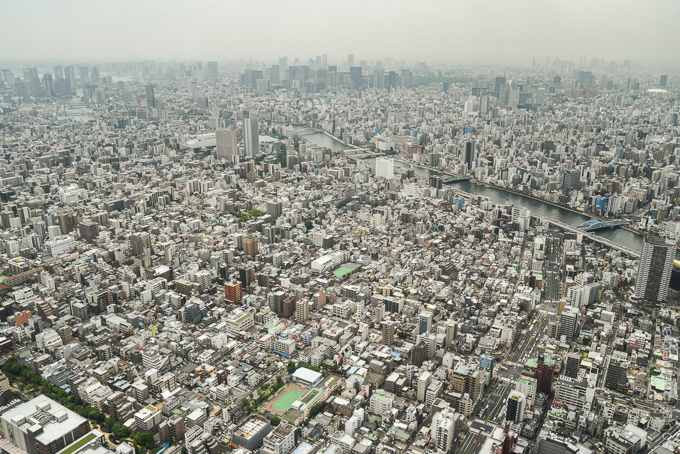
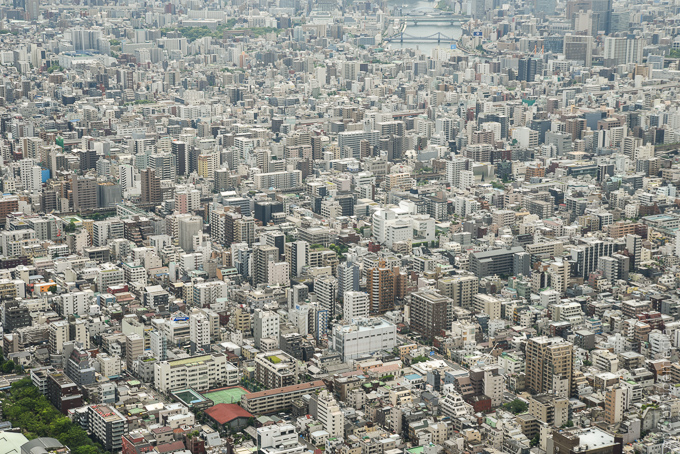
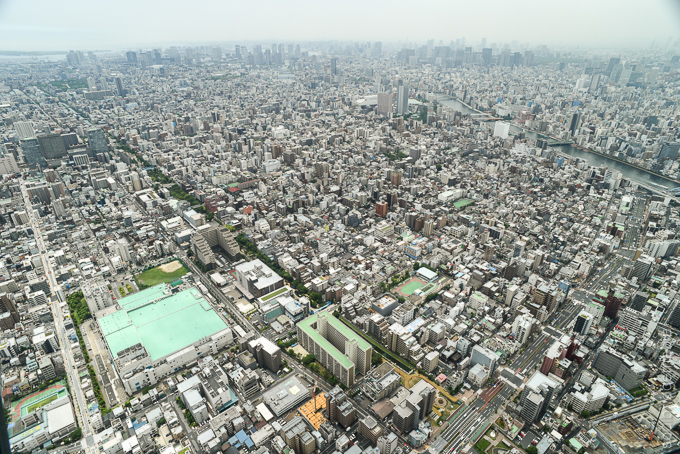
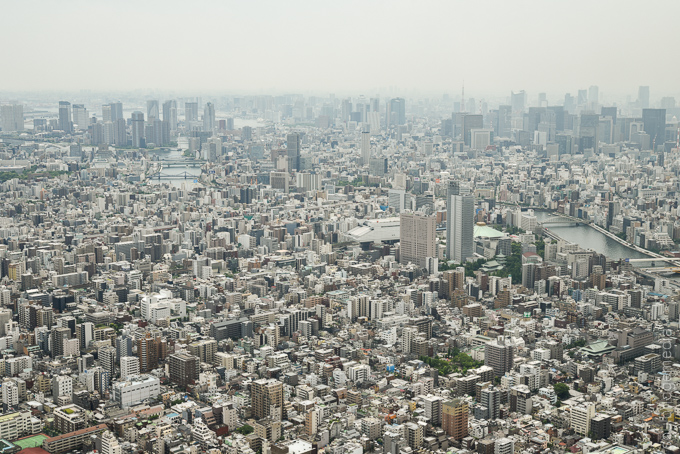
Travel tip: There are two viewing decks, the higher one costs extra. Foreign tourists can now also buy a fast pass at a higher price to skip the potentially long queues
—
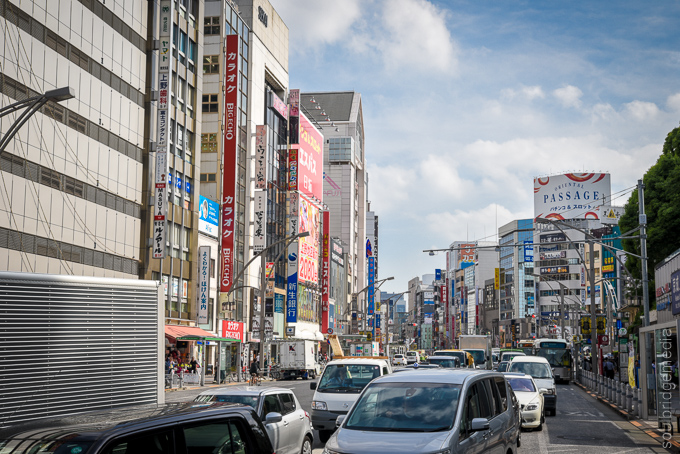
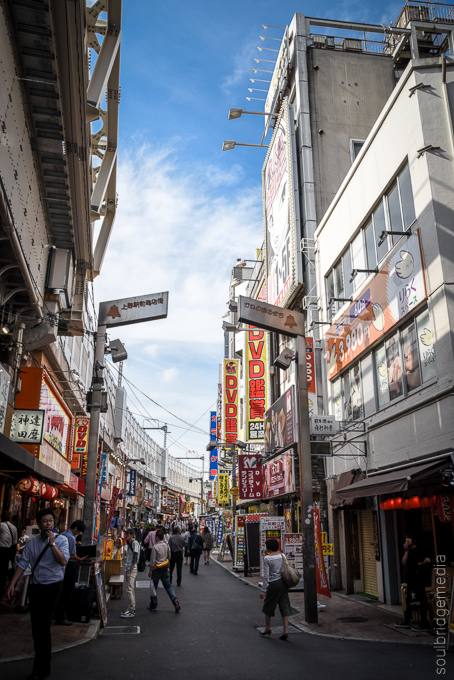
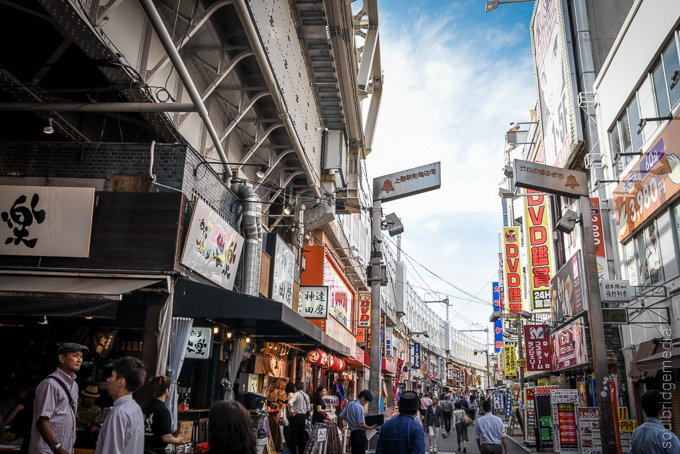
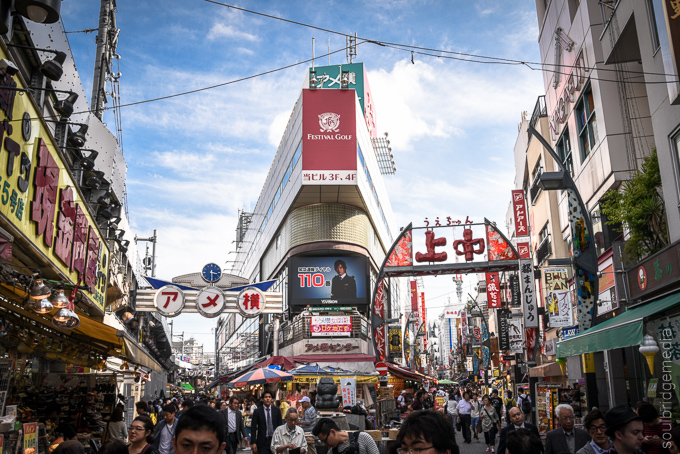
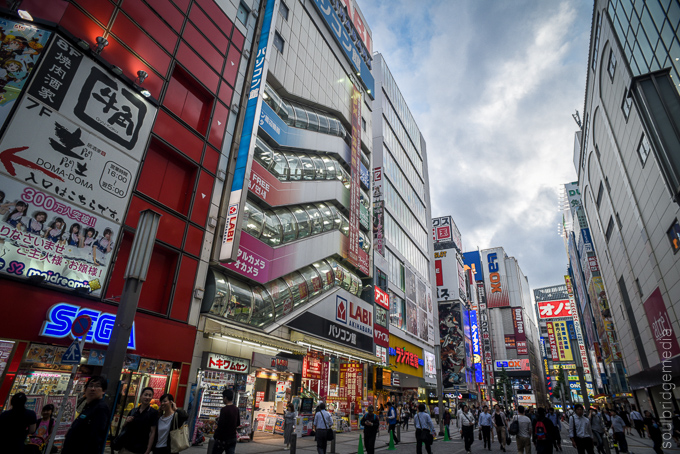
Ueno, Akihabara
Ueno and its Ameyoko markets are always worthy of a quick stop even tho over the years the dinginess and unique stores have made way for more of a mall feel (think Nakano broadway with narrower walk ways) with a lot of repetition, there are however still some gems to be found to fill your suitcase and your belly. Worse comes to worse, there’s always TGI Fridays 😉

Japan 2016 part #1 – Travelling with a plus one
Japan 2016 part #2 – Yokohama
Japan 2016 part #3 – Gotemba to Kawaguchiko
Japan 2016 part #4 – Fuji Shibazakura Festival and Chureito Pagoda
Japan 2016 part #5 – Fuji Q Highland
Japan 2016 part #6 – Matsumoto, Alpine Route, Snow Corridor
Japan 2016 part #7 – Matsumoto castle, Ashikaga Flower park
Japan 2016 part #8 – Tokyo Skytree, Ueno
Japan 2016 part #9 – Tokyo wandering, Odaiba + Disney Sea
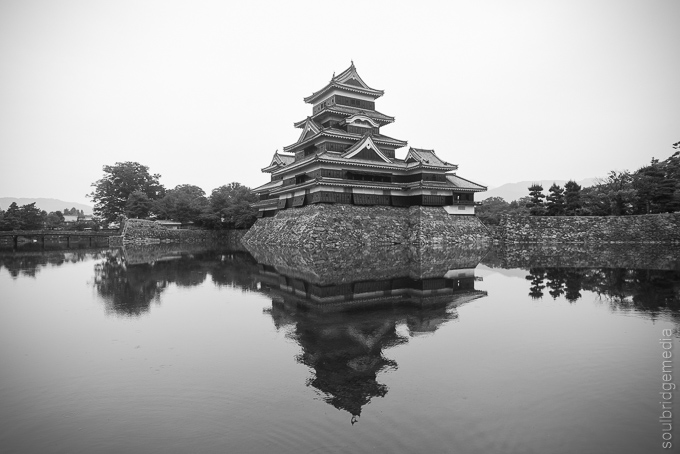
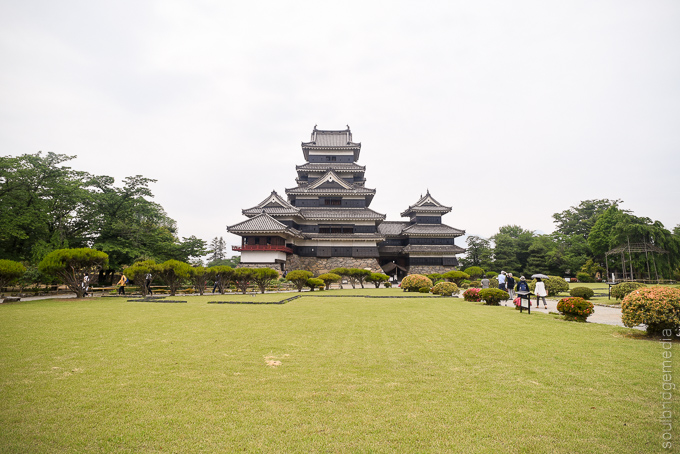
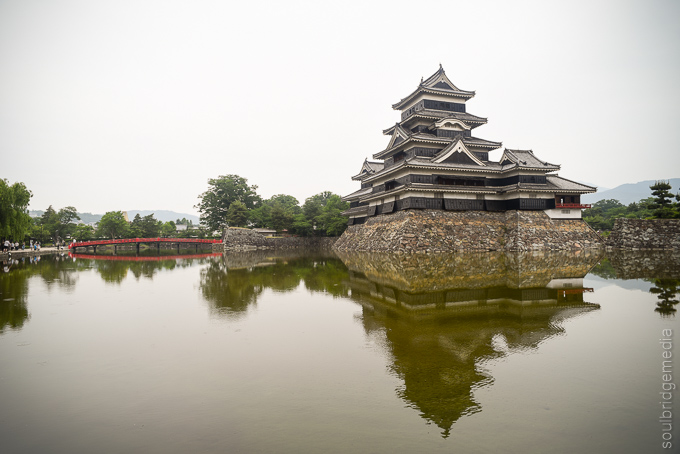
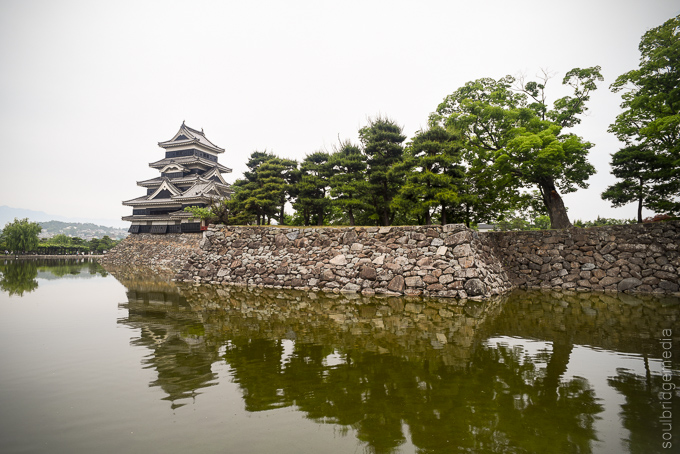
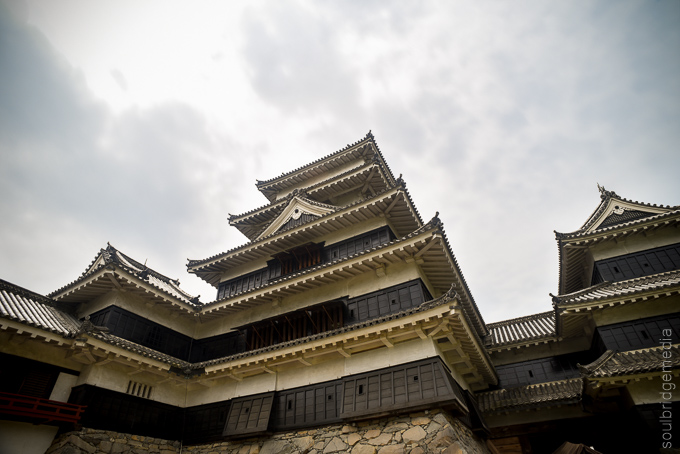
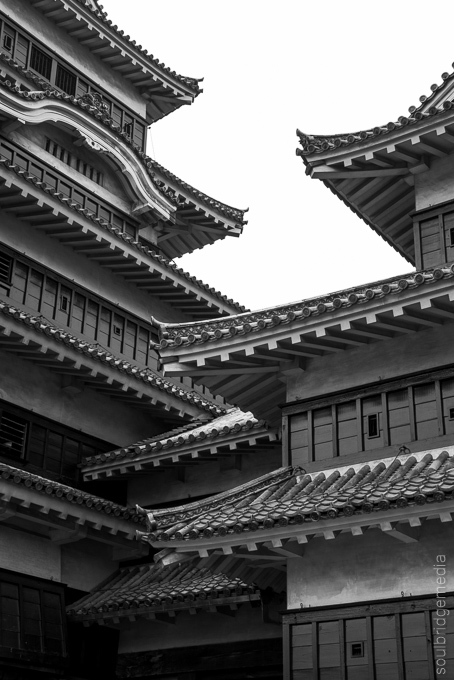
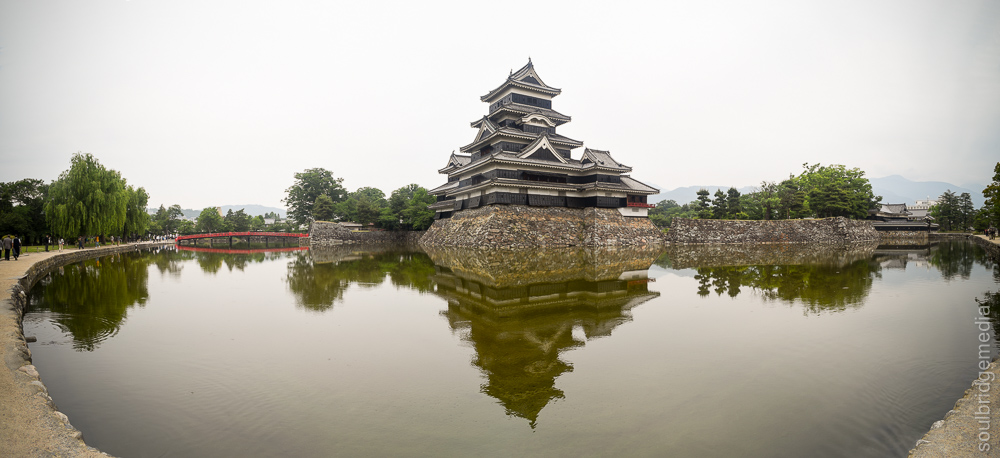
Matsumoto castle
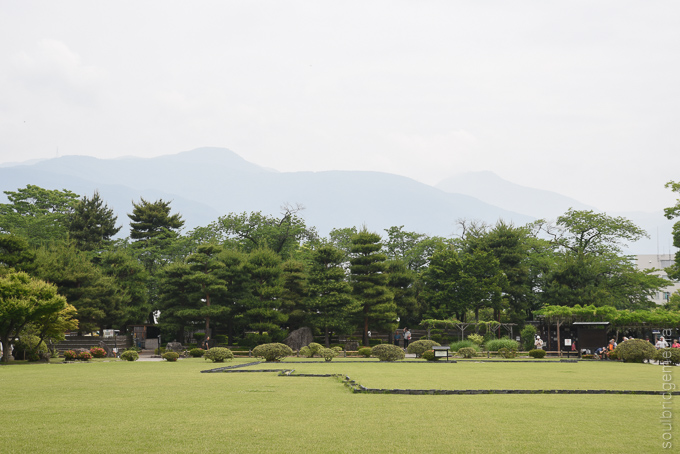
Contrasting to its surroundings, Matsumoto is reasonably flat so getting around town is an easy stroll, even easier if you hire a bicycle, but for short trips, nothing beats taking a walk through some of the alley ways as you make your way to one of the city’s main attractions, Japan’s oldest castle, Matsumoto castle. Also nicknamed Crow castle due to its black walls, it sits proudly beyond a moat with contrasting red railed bridges. Inside the grounds, you can explore the castle itself and surrounding buildings while themed samurai actors will happily pose for photos. Like most castles, it is surrounded by a lot of green space that you could easily spend a relaxing afternoon exploring and picnicking with the family.
Travel tip: Entrance fee is about 5-600Y. Got the goshuincho bug? (ink stamp collecting), there’s one before entering the grounds if you prefer to skip going into the grounds.


Travel tip: the Matsumoto time piece museum is a worthy stop if you like cogs and ticking things
Matsumoto may be over 200km from Tokyo but thanks to a direct line and an express train, you can roll into Shinjuku in about 2.5hrs.
—
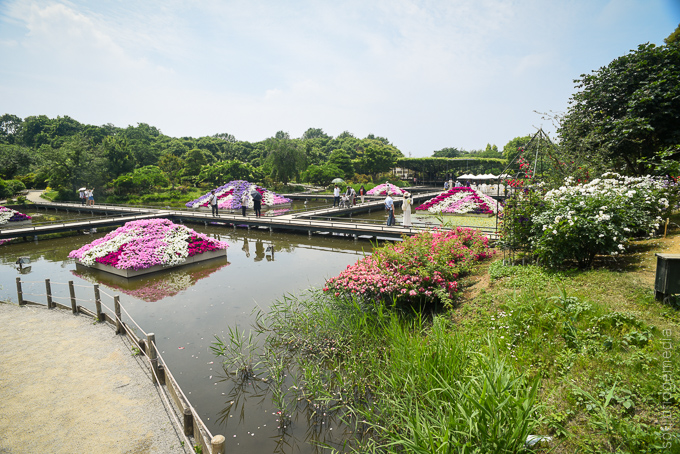
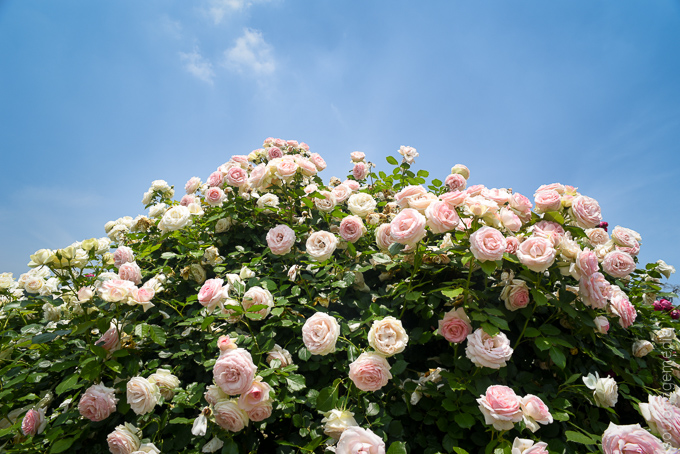
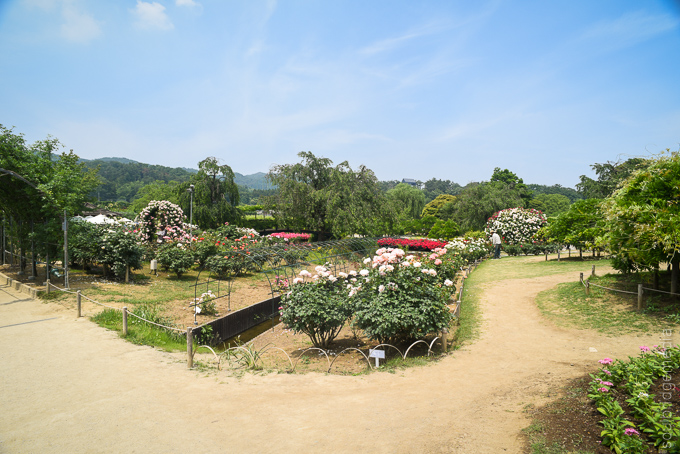
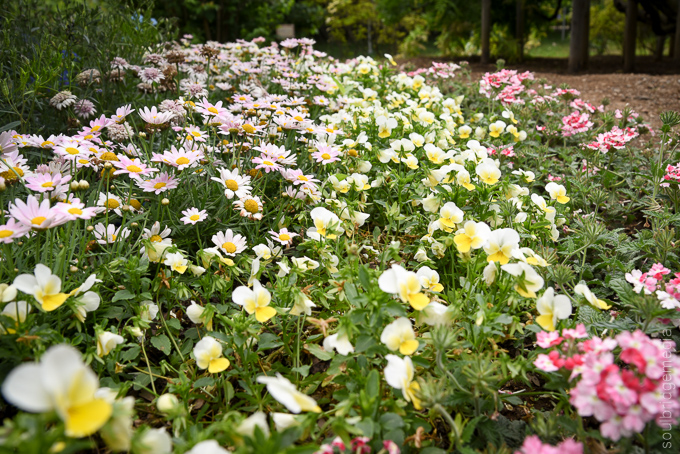
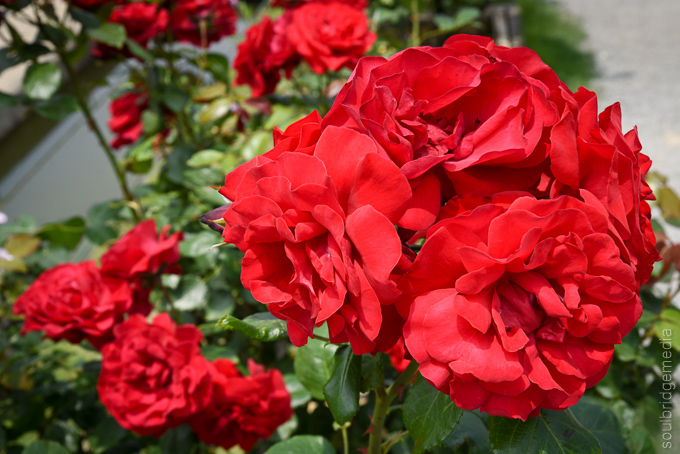
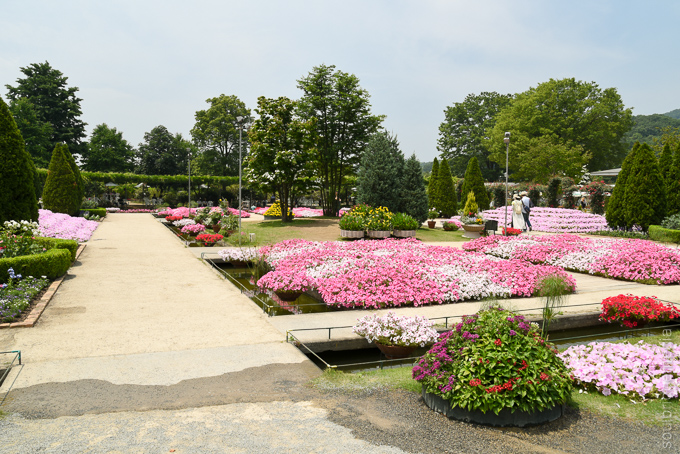
Ashikaga Flower park
When travelling in spring its pretty much a given that a flower park is on the cards. There are plenty of public parks and gardens but if want a truly epic display you’ll need to head to a flower park. There are a few caveats though – you’ll need to pay, the large ones are out of the city and everyone else will have the same idea during the prime viewing times.
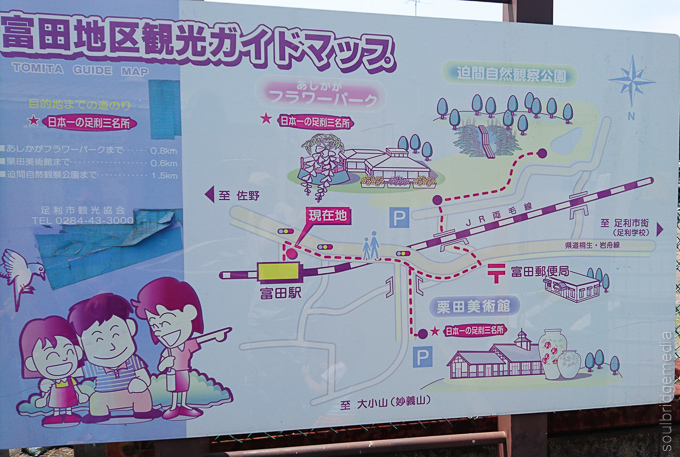
Travel tip: Trains from Shinjuku to Tomita station run regularly and take a bit under 2 hours. From Tomita station, its about a 15min walk to the park.
edit: as of 2018 there is now a Ashikaga flower park station which cuts the walk down to under 5min.
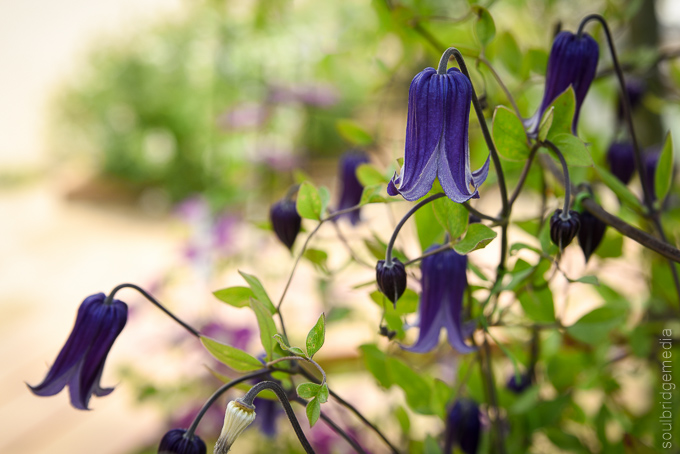
Ashikaga flower park is famed for its beautiful displays of wisteria, a hanging type flower which grows in bunches of pinks and purples, the tree itself ends up looking a little like a weeping willow. Just like the pink moss at Kawaguchiko, you can either see the wisteria in full bloom with thousands of your closest friends that you never knew you had, or you can go off peak and wander freely. Due to the timing of our trip we didn’t really have a choice but there are still plenty of other flowers to see even if the wisteria is scarce.


The huge walls and canopies set up for displaying the wisteria are impressive, even without the flowers.
Travel tip: temps can soar even on a spring day in June so pack the sunscreen or snag yourself a parasol, there is very little cover/shade.


There’s a small group of shops at the entrance selling souvenirs, groceries and snacks. Remember to check what the items are made of and if they adhere to Australian quarantine laws, and don’t forget to declare it.
Japan 2016 part #1 – Travelling with a plus one
Japan 2016 part #2 – Yokohama
Japan 2016 part #3 – Gotemba to Kawaguchiko
Japan 2016 part #4 – Fuji Shibazakura Festival and Chureito Pagoda
Japan 2016 part #5 – Fuji Q Highland
Japan 2016 part #6 – Matsumoto, Alpine Route, Snow Corridor
Japan 2016 part #7 – Matsumoto castle, Ashikaga Flower park
Japan 2016 part #8 – Tokyo Skytree, Ueno
Japan 2016 part #9 – Tokyo wandering, Odaiba + Disney Sea
Getting there:
From Kawaguchiko there are several routes but the fastest and most hassle-free trip is sticking with all trains (there are bus routes as well) to keep the luggage dragging to a minimum.
From Fuji-Q > Otsuki > Kofu > Matsumoto takes about 190mins all up.
Most of the routes out in the regions aren’t covered by the standard JR pass, if you wish to use the JR pass you’ll need one for the Kanto Area.
Kawaguchiko station timetable here
Travel tip:
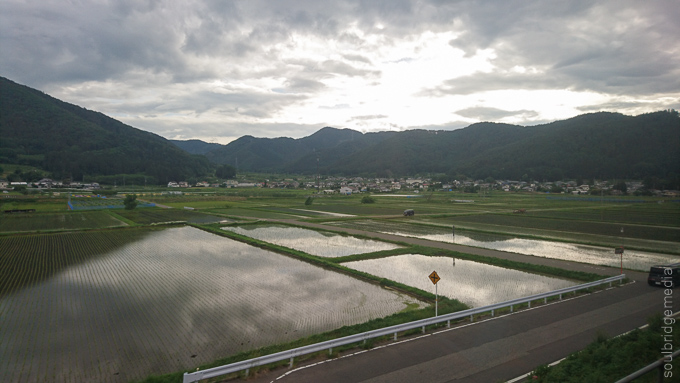
As you leave the built up areas you venture out into the wide rice paddy filled country side, peppered with interesting railways and stations.
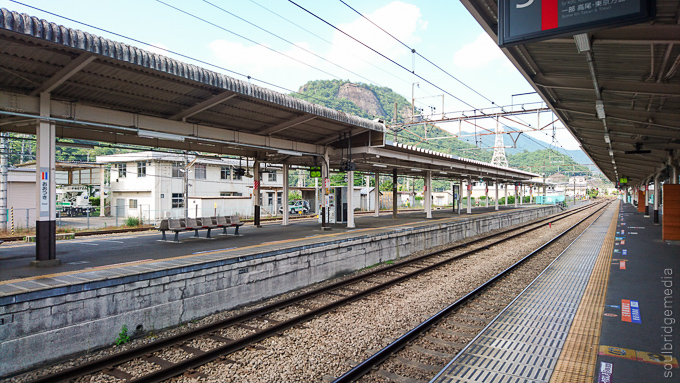
We stayed at “Hotel New Station”, a great value and perfectly located business hotel a couple min walk from the Matsumoto station.
Read the full review here.
——
Hotel New Station – Matsumoto
This hotel is definitely one of those “best bang for buck” gems and it really is close to the station. We actually walked right past it thinking it was further along having only power walked for about a minute or two (it was raining). So as usual, being this close to any major Japanese station, you have access to a whole bunch of mod cons ie. food, shopping and amenities. We didn’t bother with the hotel’s in house food service because of this, instead going with the bakeries, convenience stores and one restaurant in particular just outside the station that was so good and great valued that we ate there every day 😀 *
Being half way through our trip the clean underwear situation was getting dire so it was good to have washing machines and dryers on hand. Detergent and other personal amenities are available from reception. The double room was on the smaller side even by Japanese standards but on par for a Japanese business style hotel, with –just- enough room to have two suitcases open and room to get by them.
Contrasting to its mountainous surrounds, Matsumoto is mostly flat so its an easy walk/ride to the major attractions like the castle and the timepiece museum. There is also a large post office a couple blocks away if you need to get cash out.
We used Matsumoto as a jump off point for The Alps/snow corridor so having a close proximity to the station for those early morning starts was a big plus. The station also has direct services all the way back to Shinjuku which was also very handy.
Very pleased with our stay here, wouldn’t hesitate choosing to stay here again.
* – If you want to check it out too, turn right out of the station (don’t head out to the road) follow the row of shops, past the small fence there is a wide shop front with a big colourful sign with pictures of food. Its also next door to an ice cream shop that has a big plastic light up ice cream out the front. The restaurant has combo deals, lunch specials and speedy service which was also handy.
——————————
There’s two lots of planning you’ll need to do, getting to and from and up and down the mountains, all requiring a bit more than “she’ll be right, mate” if you’re only there for the day and want to maximise your time.
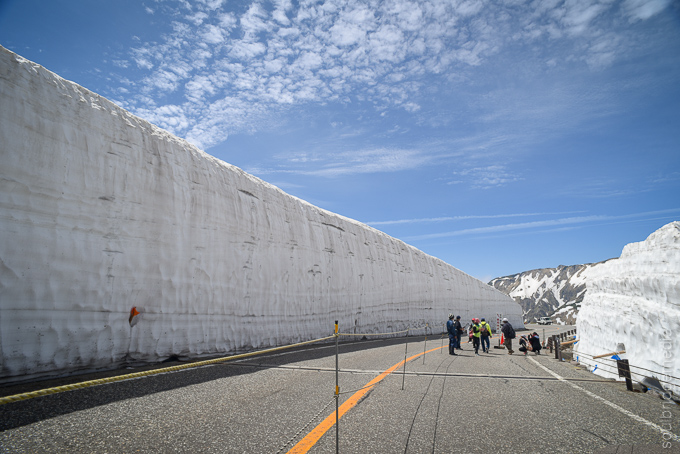
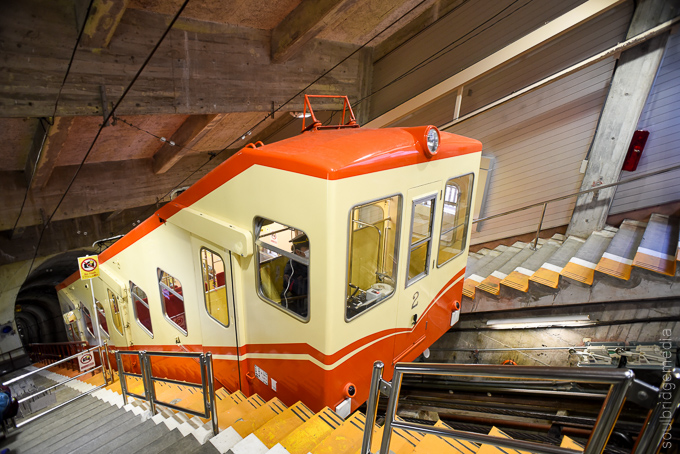
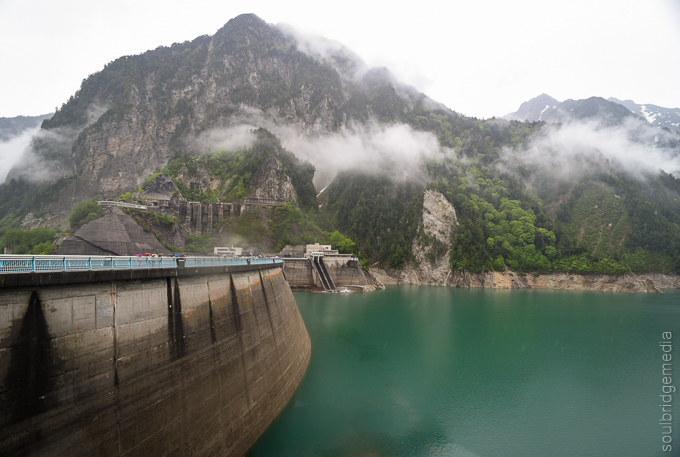
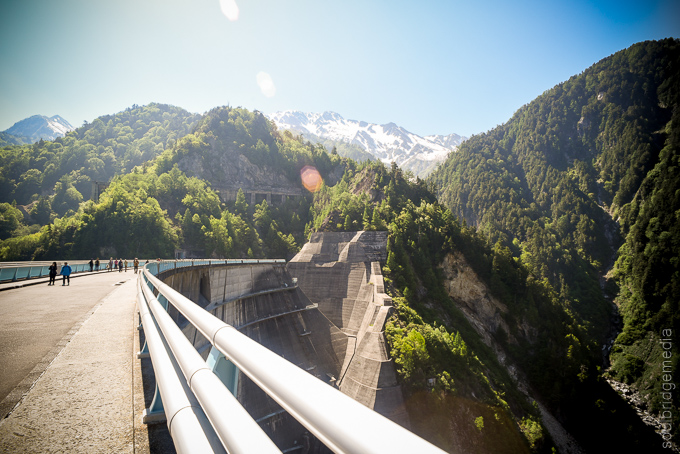
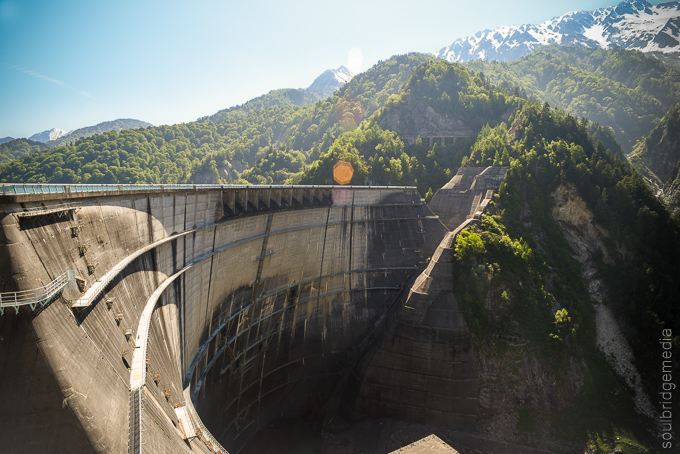
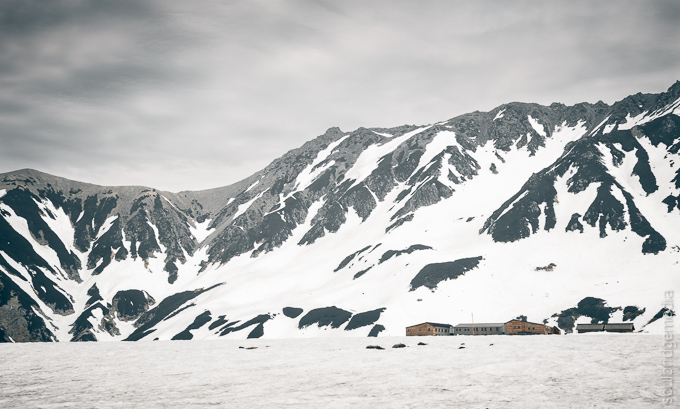
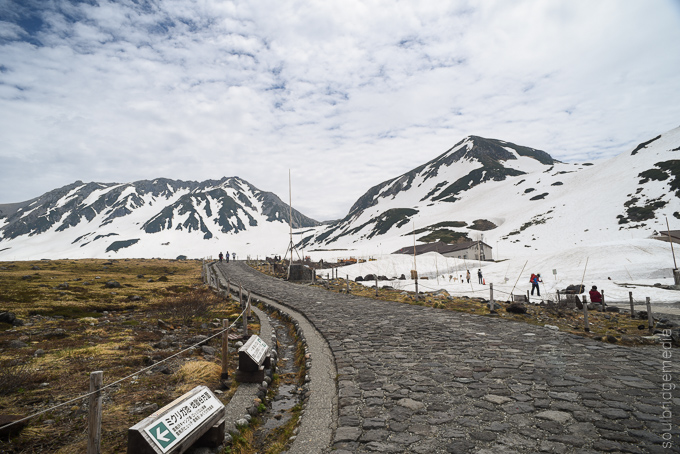
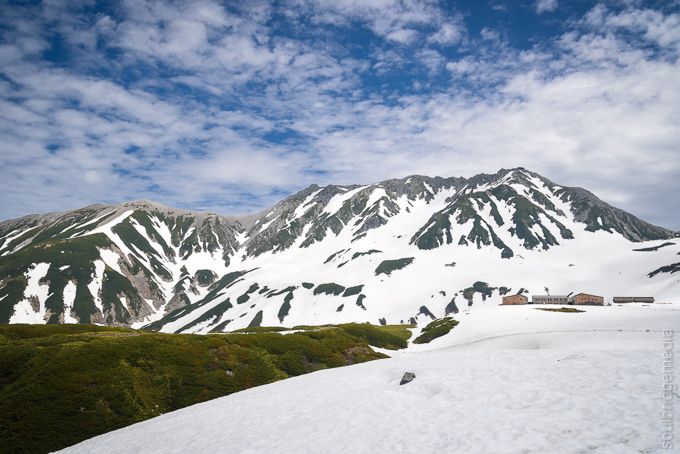
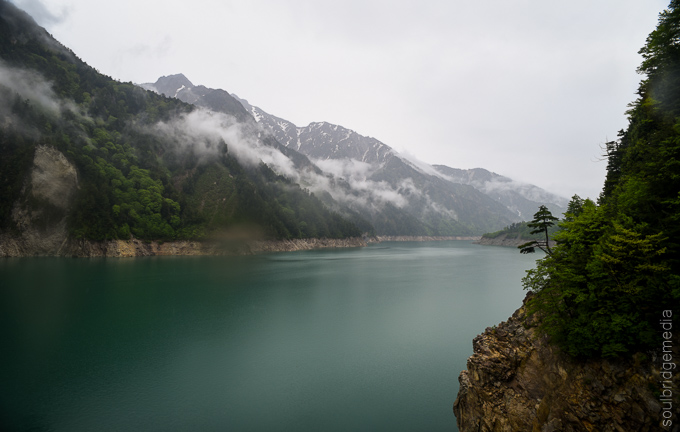
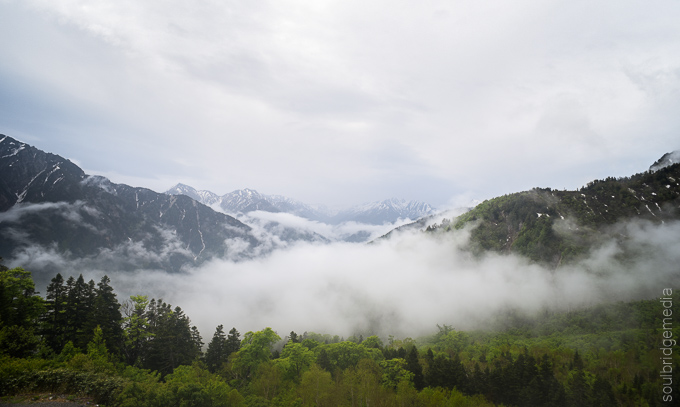
First hurdle is catching a train from Matsumoto station to Shinano Omachi station then a bus to Ogizawa which is the start of the Alpine route. Take special note of the return times if you plan on coming back late in the afternoon. The trips on multiple modes of transport up the mountain is a cross between theme park cueing and peak hour Japanese train ride kaos, thankfully the Alpine route website is very detailed with a lot of route suggestions. If you start early enough, you can take your time as there’s something to see at each station stop along the way, but of course, the two major attractions are the Kurobe dam and the Snow Corridor.


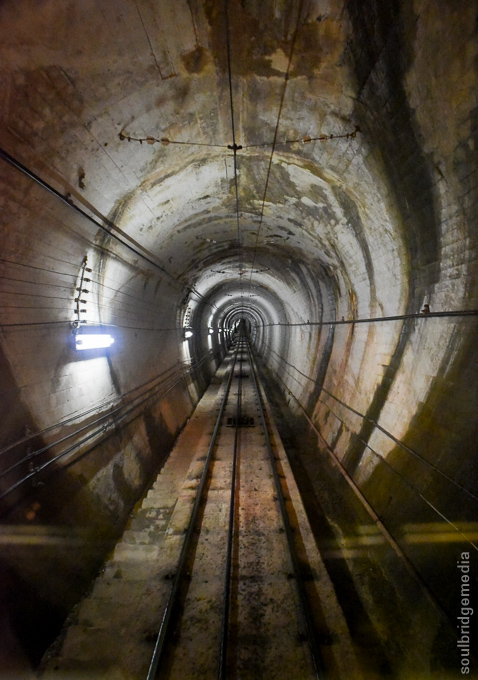
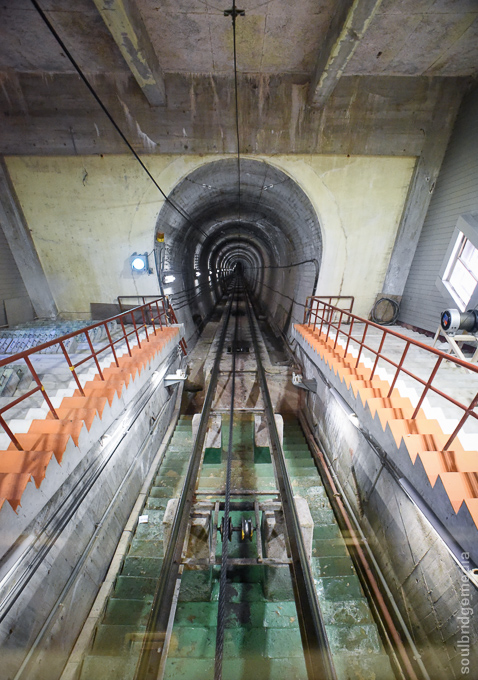
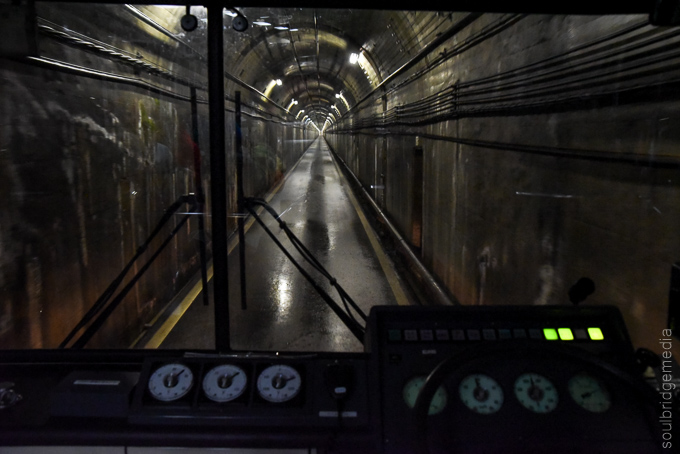
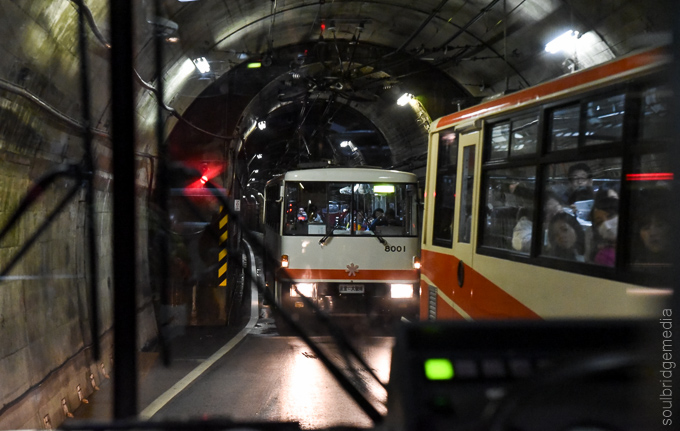
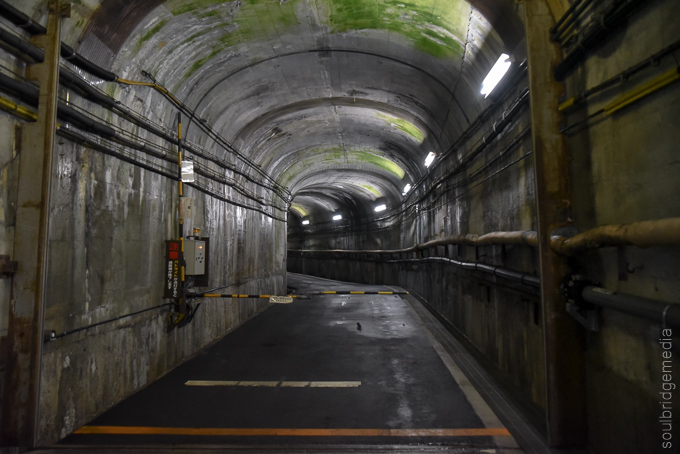


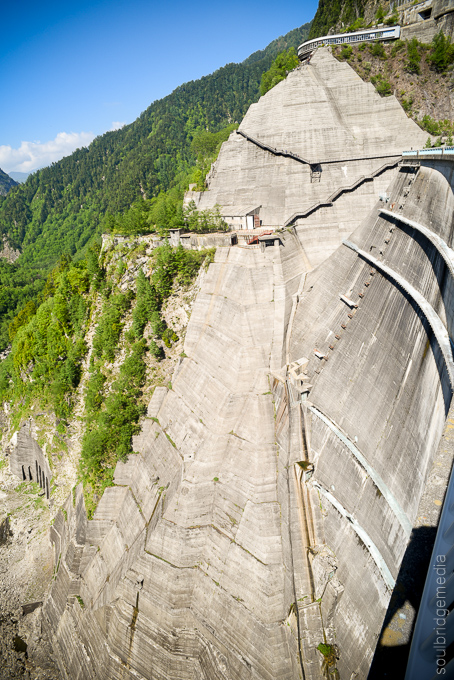
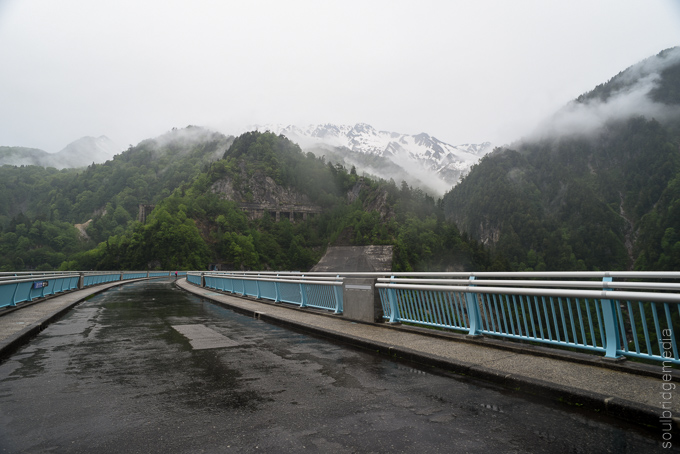
The dam, pushing close to 200m in height is the tallest in Japan. There are many vantage points around the wall and sides and if you time it right, you might even get to see them releasing some water. The route up the mountain also includes a walk through some of the tunnels which may spark claustrophobic anxiety or awaken your inner urbex-er depending on your disposition.
Speaking of tunnels, the trolley buses and funiculars are just 2 of the 7 fun and unique modes of transport that you will ride on your way up the mountain.


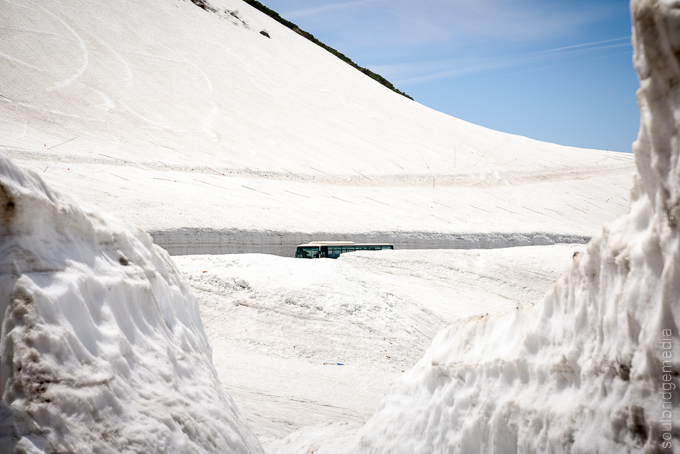
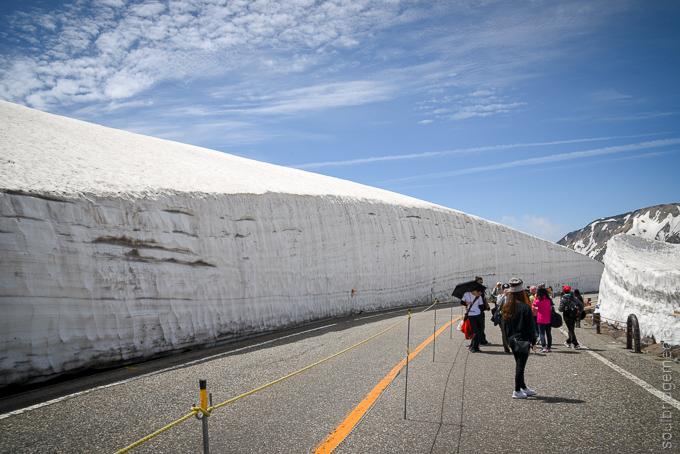
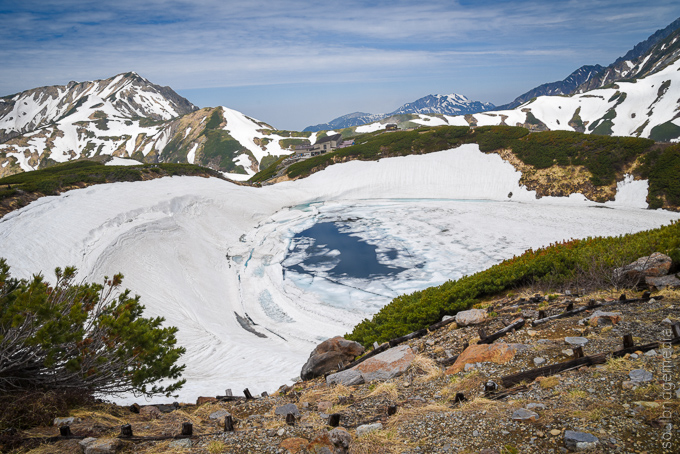
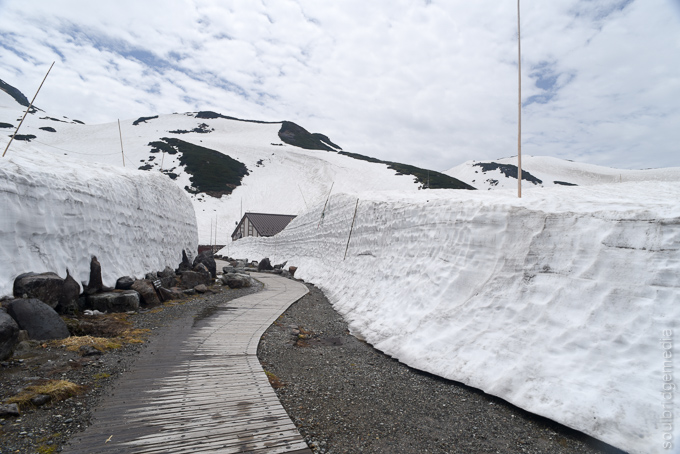
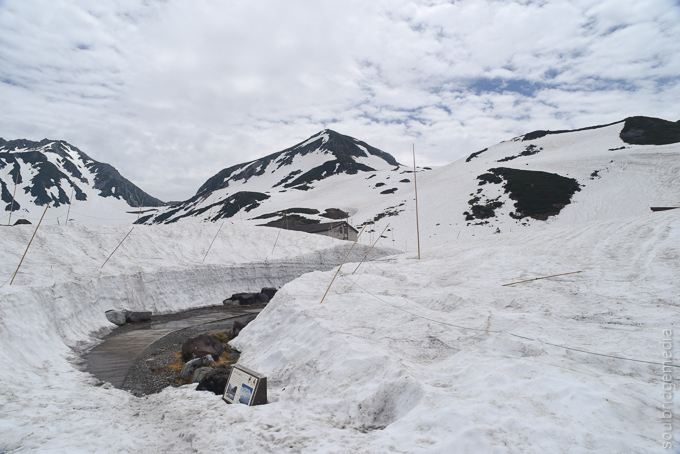
Once at Murodo, you have hiking fields to explore and a short walk to the snow corridor which, even at the end of the season around May-June there is still plenty of snow cover with the corridor easily towering over large buses.

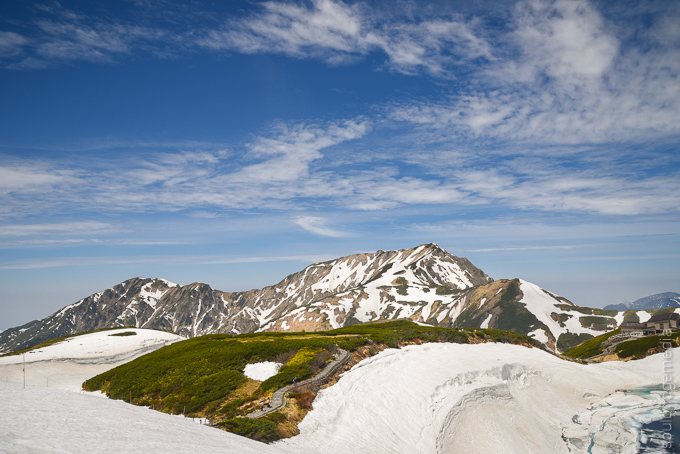
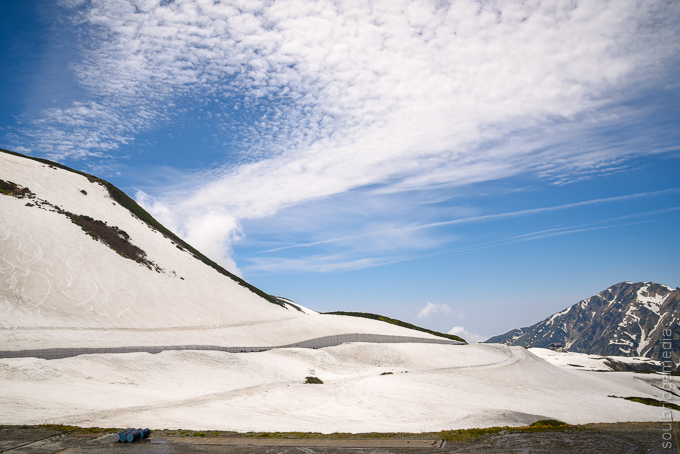
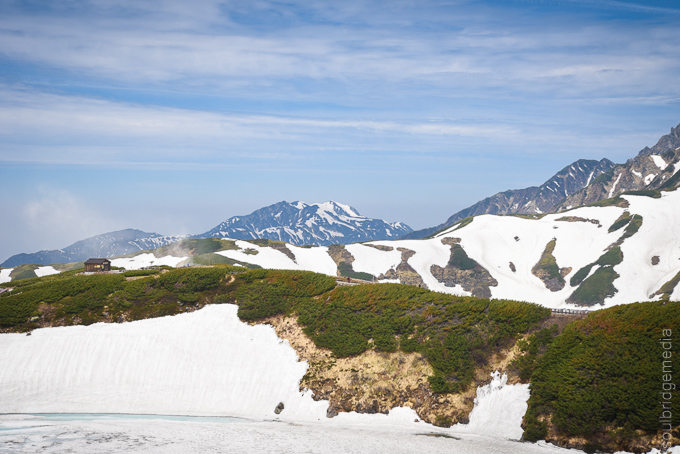

The Japanese Alps are no different than other snowy mountains around the world this time of year, weather swings from warm sunshine, to showers, to haze to icy winds all in the space of an hour or two. The upside of this is, if its raining on the way up, there’s a good chance you’ll have some sun at stops on the way down. Just take a look at the photos we took of the dam, icy drizzle in the morning, sunshine in the afternoon!

Travel tip: take clothing layers you can add/shed along the way and wear waterproof shoes/boots if you want to explore the fields around Murodo. Check the live webcams in the days leading up to your trip to get an idea of what to expect.
Japan 2016 part #1 – Travelling with a plus one
Japan 2016 part #2 – Yokohama
Japan 2016 part #3 – Gotemba to Kawaguchiko
Japan 2016 part #4 – Fuji Shibazakura Festival and Chureito Pagoda
Japan 2016 part #5 – Fuji Q Highland
Japan 2016 part #6 – Matsumoto, Alpine Route, Snow Corridor
Japan 2016 part #7 – Matsumoto castle, Ashikaga Flower park
Japan 2016 part #8 – Tokyo Skytree, Ueno
Japan 2016 part #9 – Tokyo wandering, Odaiba + Disney Sea
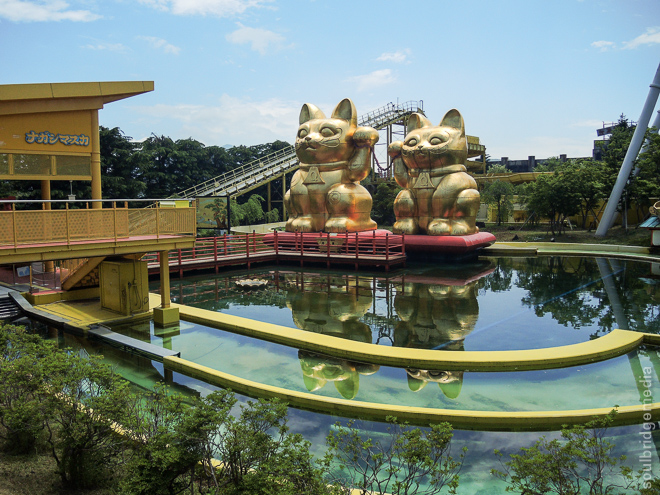
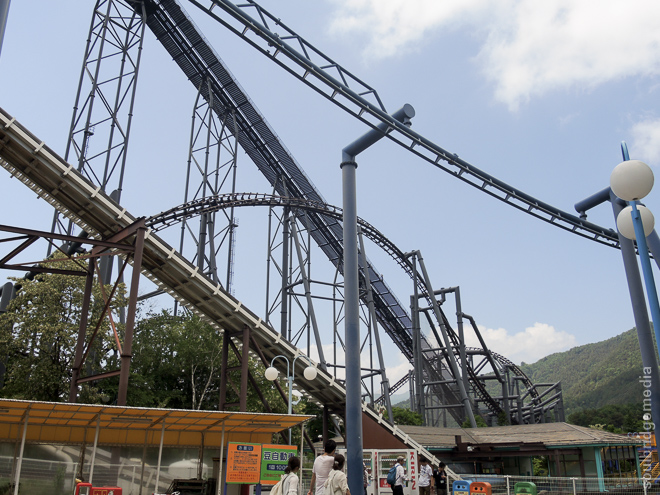
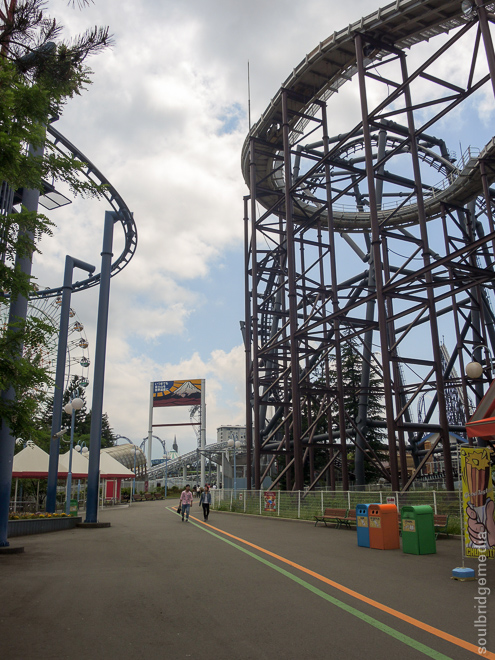
Fuji-Q Highland
So what do you do when you’re staying within a gyoza throw of a rollercoaster theme park with Guinness world record breaking rollercoasters? Go to Thomas the Tank engine land instead of course! ^_^’
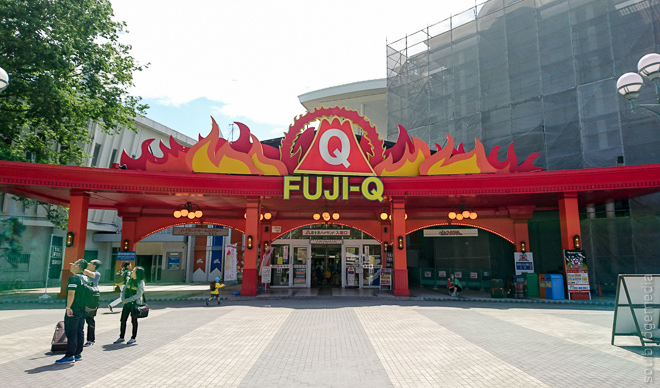
It does seem a little odd having the mayhem of a rollercoaster theme park in amongst tranquil lakes and temples with a Mt Fuji backdrop, ah Japan the land of contrasts, but like they say… when in Rome… I mean, when in Kawaguchiko….
It was our last day in the little lake side town so after checking out we spared the luggage drag and taxied directly to Fuji Q.
Travel tip:
There are storage lockers at both entrances, the biggest size is -just- big enough to fit a large suitcase that’s pushing it’s weight limit. However make sure you get dropped off at the main entrance (near the hotel) if you want to use these large lockers.
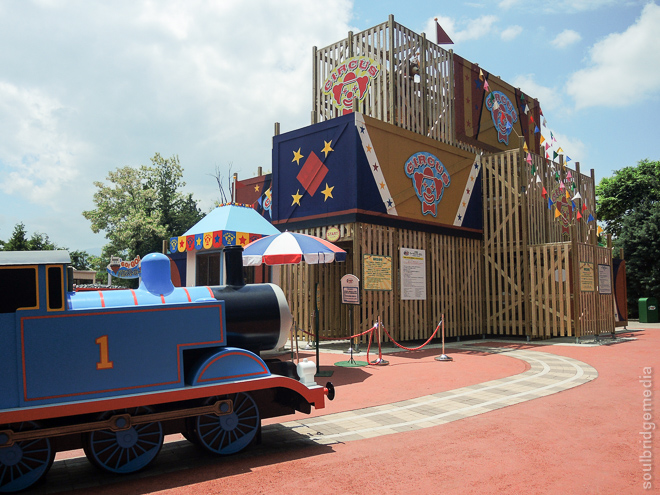
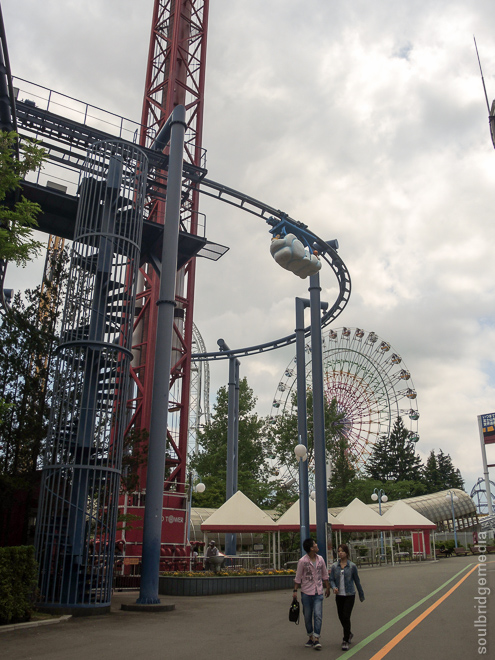
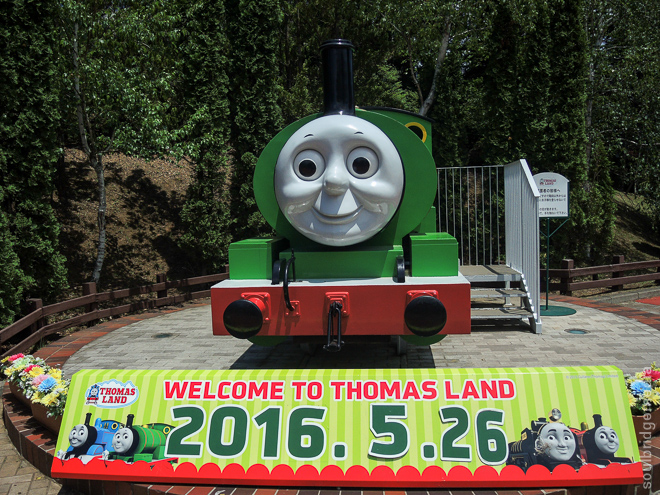
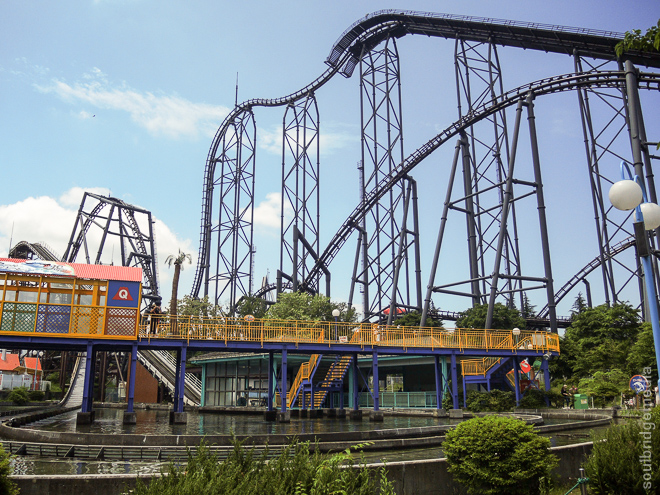
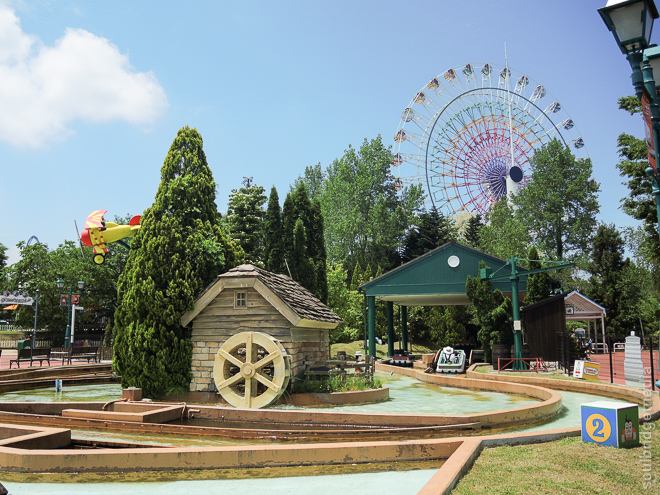
As mentioned we were mostly there to give the little one her first foray into theme parks, this did work in our favour as a lot of the rides aren’t included in the gate ticket price (Y1000-2000 extra for each ride) and while the park was quite empty first thing in the morning, there were still line ups for the main attractions. Thomas Land however was included in the price and line waits were minimal if at all, most being “hop off and straight back on”.


Like most large theme parks, food and amenities are easily accessible, the eatery near Thomasland directly catering to the youngsters with kid friendly meals, pizza, pasta, chips etc in small portions.
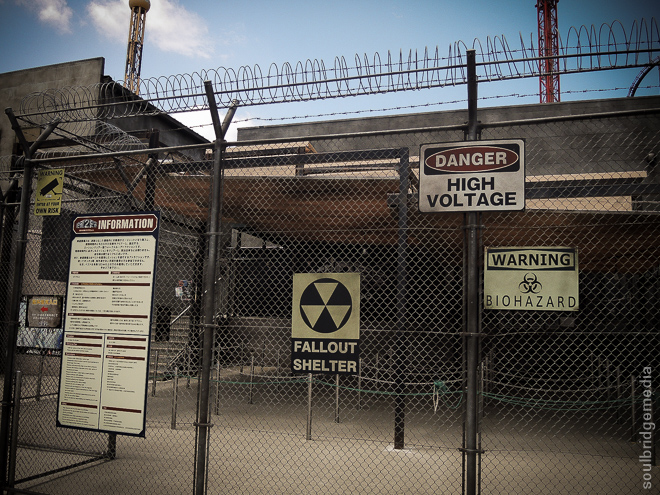
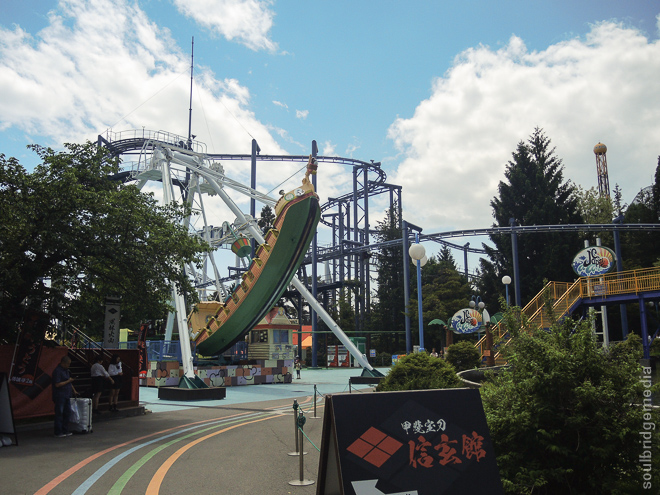
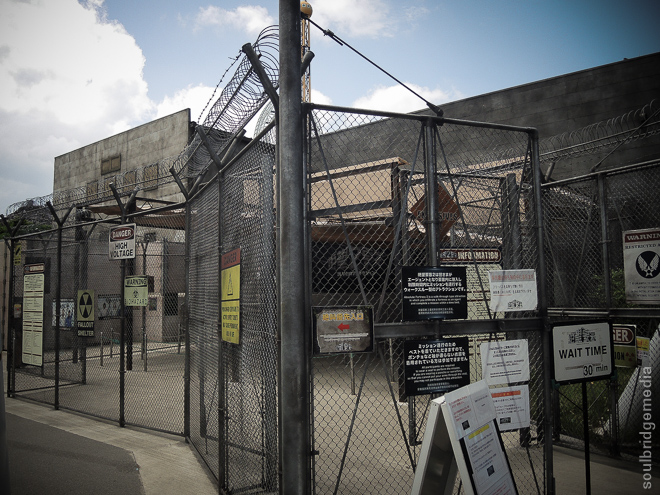
If you’re not into roller coasters, its not a complete loss, there’s apocalypse style “haunted houses”, 4D movie style experiences and a selection of tamer rides.
Update: Thomas world has since added a bunch of new rides and activities while the park itself has a few extras namely the winter wonderland activities and rides during the cold seasons.
Quick stop equals quick blog post! Next we finally get to the main event, the purpose of the whole trip, SNOW in the Japanese alps! 😀
Japan 2016 part #1 – Travelling with a plus one
Japan 2016 part #2 – Yokohama
Japan 2016 part #3 – Gotemba to Kawaguchiko
Japan 2016 part #4 – Fuji Shibazakura Festival and Chureito Pagoda
Japan 2016 part #5 – Fuji Q Highland
Japan 2016 part #6 – Matsumoto, Alpine Route, Snow Corridor
Japan 2016 part #7 – Matsumoto castle, Ashikaga Flower park
Japan 2016 part #8 – Tokyo Skytree, Ueno
Japan 2016 part #9 – Tokyo wandering, Odaiba + Disney Sea
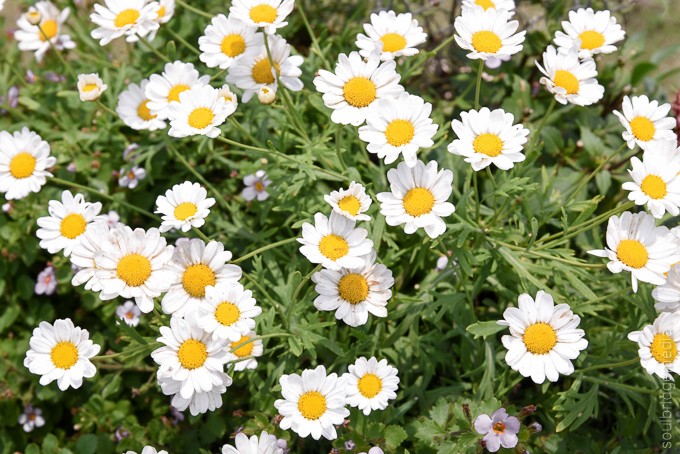
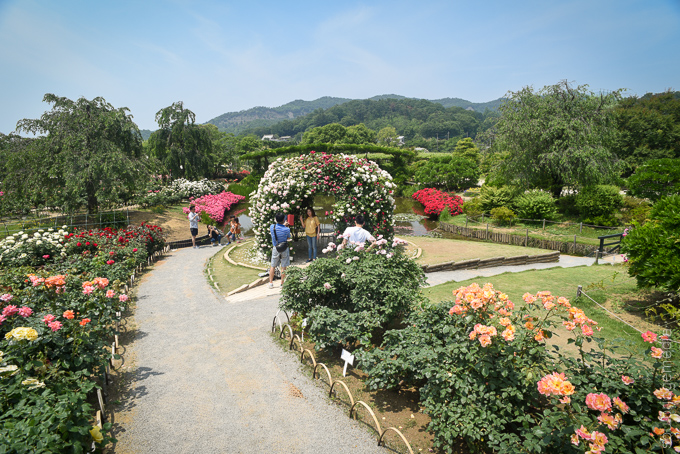
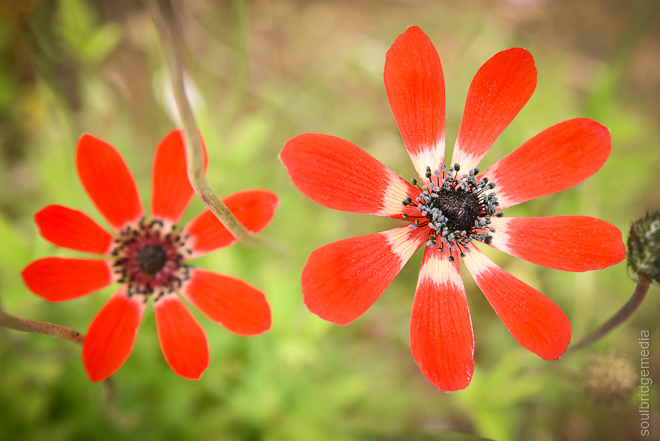
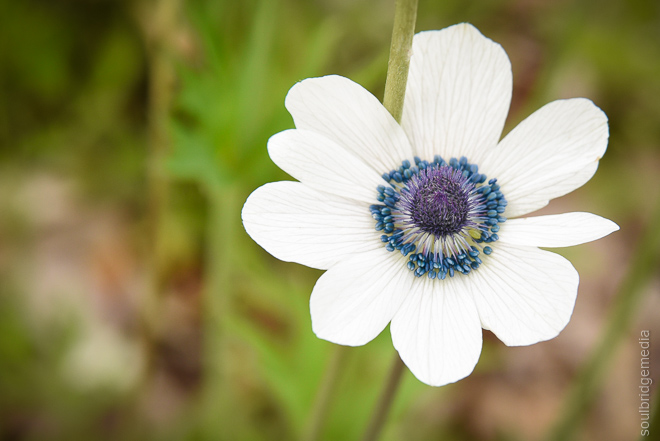
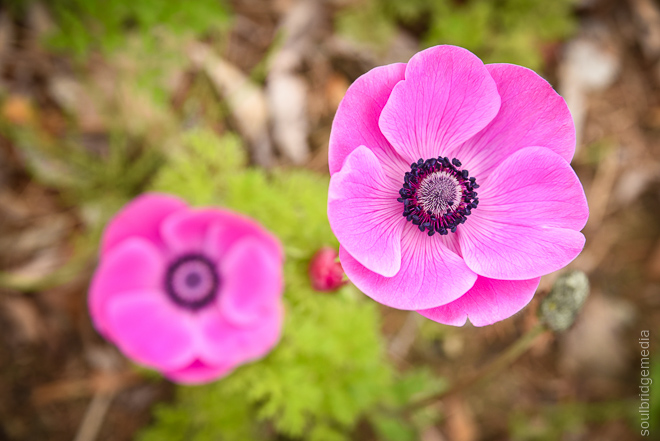
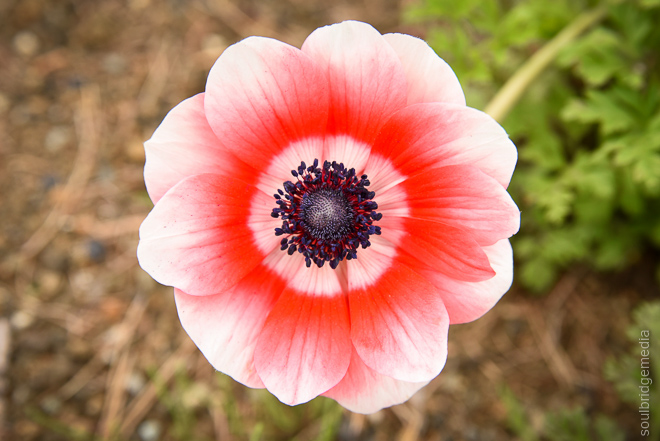
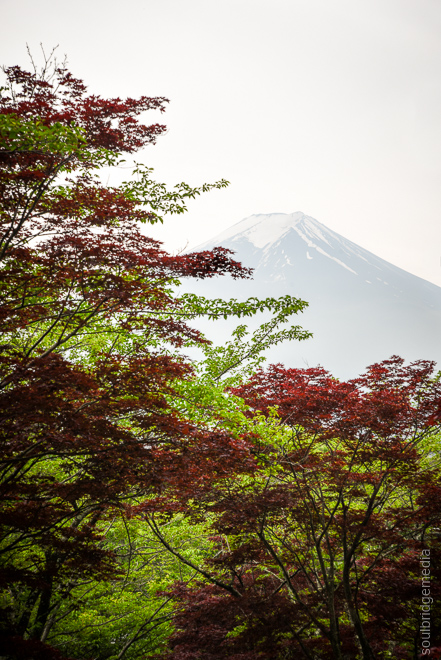
The shibazakura aka pink moss, like the cherry blossoms (sakura), only bloom for a short period each year can be seen in several locations around Japan, though possibly no where quite as prominent as the Fuji Shibazakura festival near lake Motosuko with Mt Fuji as a backdrop. Even though the shibazakura sprouts for the better part of a month, if youre on either end of that window the display can be rather lacklustre. Unfortunately this was the case for us, we caught the tail end of the season, but on the plus side crowds were minimal.
Getting there:
A ticket to the event which includes entry and a round trip bus ticket can be purchased at Kawaguchiko station for around 2000Y (at one of the small outdoor booths closer to the road, not in the station itself. Keep an eye out for signage)
One or two buses leave each hour depending on the time of day (same with returns) with the first one around 8pm. Since the trip takes about an hour, it’s a good idea to get there as early as possible, especially if you’re going during the peak weeks. We noticed an influx of people around late morning.
More info: http://www.japan-guide.com/e/e6919.html
Stay up to date with festival news from the official site: http://www.shibazakura.jp/eng/access/
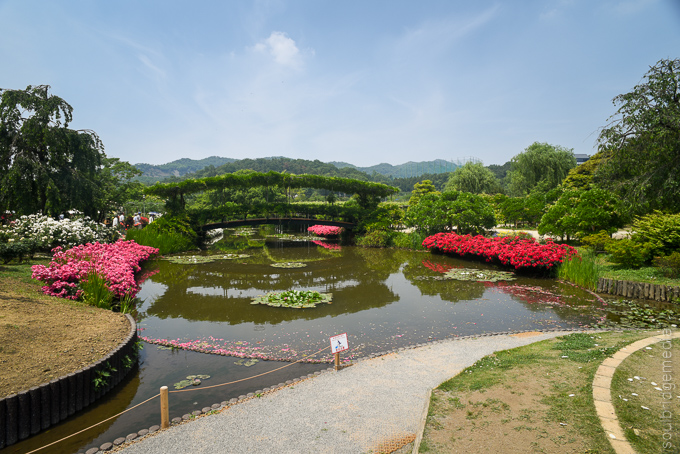
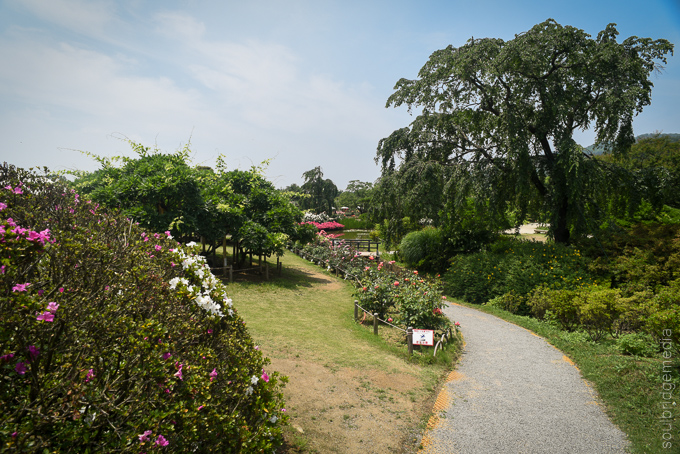
While the pink moss is the star of the show there are alot of other types of flowers in a variety of colours, shapes and sizes. The fields are vast and even with minimal coverage they are still quite beautiful.
To the rear of the area there are a couple raised viewing decks which would certainly come in handy when things get crowded.
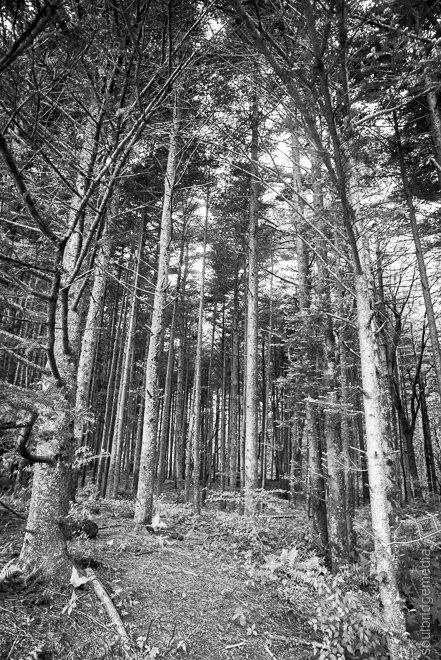
The fields are surrounded by large forest trees which are a sight themselves.
Finally, what would a Japanese flower festival be without some delicious food? There is a sizeable food court area featuring rows of tents with themed meals and snacks alongside local staples like noodles and monster sized pork buns. Back towards the entrance there is also a small area selling souvenirs.

We found a few hours here was enough time to leisurely stroll around, have a bite to eat and spend some time trying to find the right people-less angle to get a good photo. Not an easy task even with sparse traffic.

Travel tip: The area is up in the mountains and the festival itself is in a large open area with no shelter, couple that with the time of year, a hoodie, rain jacket and pants is a must even if it’s a little warm when you leave Kawaguchiko (if that’s where you’re staying). Wind and rain (very heavy mist) can come out of nowhere unexpectedly.
—
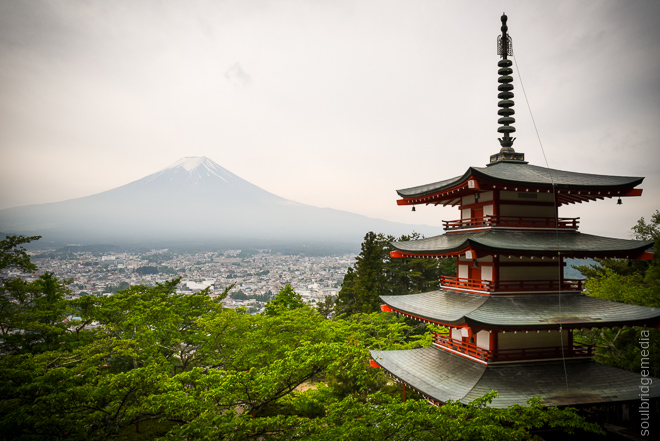
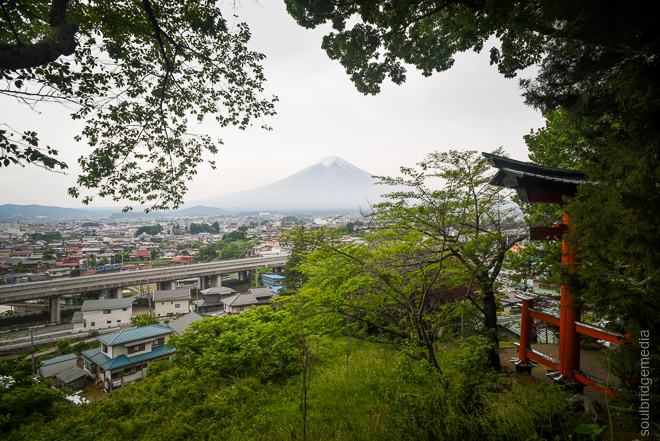
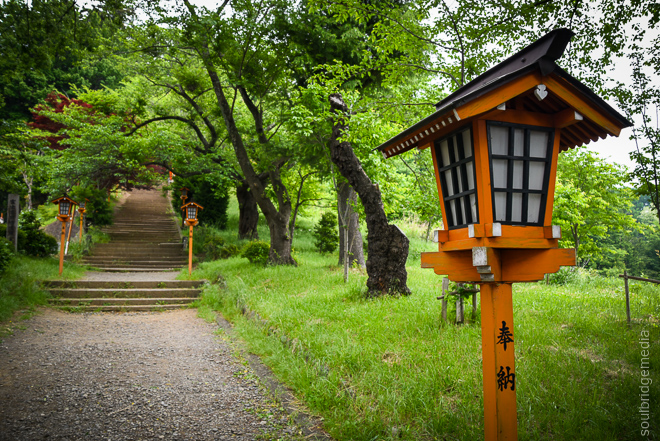
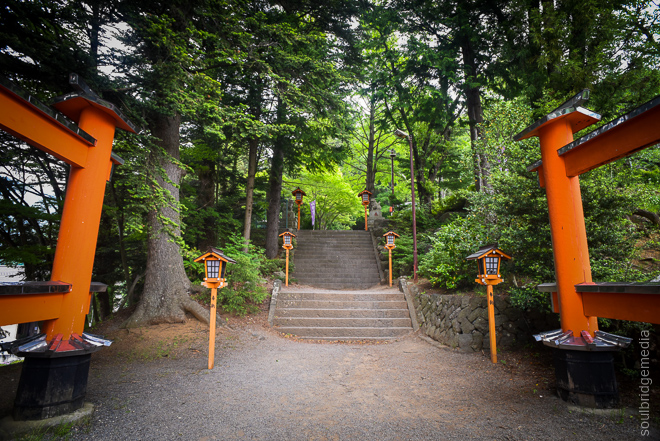
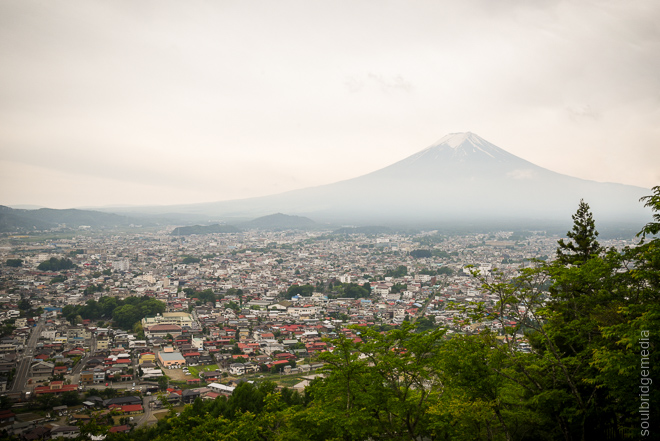
Chuerito Pagoda – Arakurayama Sengen Park
Of all the classic photos of Japan, the Chuerito pagoda in Arakurayama Sengen park would easily be in the top five. Mostly known for THAT view its hard to resist the trek up the mountain if you’re staying in Kawaguchiko.
Getting there:
Train from Kawaguchiko station > change at Fujisan station > Shimoyoshida station, then its about 1km walk to the start of the park via small lanes and backyard rice paddies, just follow the signs. Grab a quick photo of the map at the station to help with reference along the way. Oh and don’t be alarmed with the rolling thunder and screaming off in the distance, that’s just a few hundred people defying death over at Fuji Q Highland!
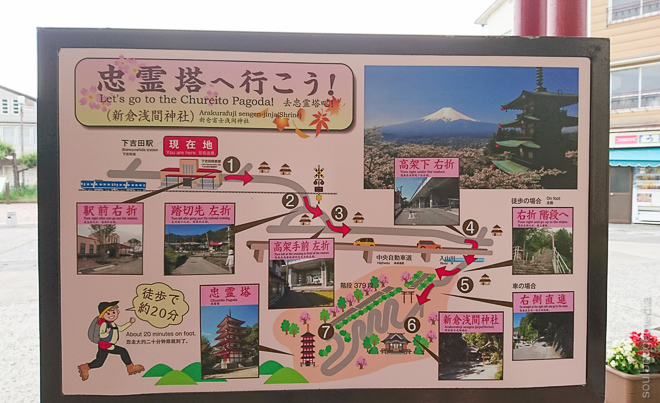

Travel tip: the walk up the mountain is via several steep flights of stairs or a winding access road (which doesn’t seem to be open to the public), there are also some bush walking tracks near the top so sturdy footwear is the way to go.
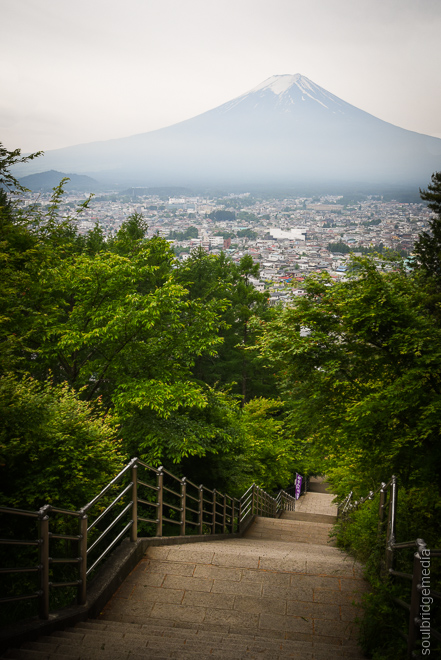
Photo tip: there are several vantage points along the route for photos – the gardens near the shrine, look out points along the way and of course the pagoda money shot. Ideally you’d want to go when the blossoms are blooming but as you can see the views can be just as nice off season.


Travel tip: there’s free wifi at the pagoda so you can hit the ‘gram even if you don’t have a local sim.
If you came up via the stairs, we recommend going down via the road for a change of pace and scenery (and a bit easier on the knees). Finally, remember to keep an eye on the time, the train services tend to thin out in the evening.

Next up, our last day in Kawaguchiko at Fuji-Q Highlands!
Got questions? We got answers! If not, we’ll make them up! Give us a yell on facebook.
Japan 2016 part #1 – Travelling with a plus one
Japan 2016 part #2 – Yokohama
Japan 2016 part #3 – Gotemba to Kawaguchiko
Japan 2016 part #4 – Fuji Shibazakura Festival and Chureito Pagoda
Japan 2016 part #5 – Fuji Q Highland
Japan 2016 part #6 – Matsumoto, Alpine Route, Snow Corridor
Japan 2016 part #7 – Matsumoto castle, Ashikaga Flower park
Japan 2016 part #8 – Tokyo Skytree, Ueno
Japan 2016 part #9 – Tokyo wandering, Odaiba + Disney Sea

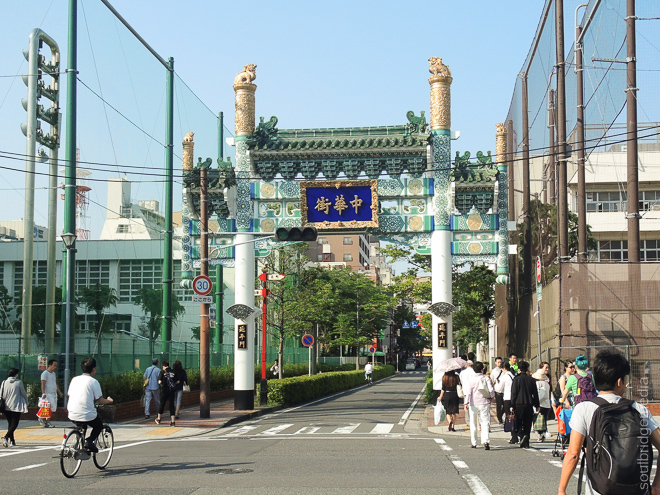
Gotemba Premium Outlets
Japanese retailers are really ahead of the curve, how do you get people to come to your stores? Make it a train station and they come right to your door, genius! The same goes for out of the way outlet malls like Gotemba, previously we spent a bit of time navigating a few different trains and a courtesy bus to get there but this time we tracked down a direct bus from the Yokohama CAT station. For around 1700Y one way (discount for return trip) we didn’t have to worry about dragging our luggage through stations and finding a seat on a train. Plus it was on the way to the 5 lakes area where we were heading, so it’s a win-win 😀
Travel tip: Bus routes, costs and departure locations for Yokohama can be found here and all other locations here
Travel tip: There are storage lockers on site (to the left of the main entrance from the bus stop, near the toilets)
Travel tip: Remember to grab a discount coupon booklet from the information booth
Travel tip: Remember to check the departure times when you arrive so you can plan your day accordingly (they run about ever hour so it could be a wait till the next one if you don’t)
Photo tip: There is plenty of lovely rolling scenery on the way there so keep your camera handy

Photo tip: On a clear day, keep an eye out for Fuji-san, its visible from the bus stop but a better spot is the walk bridge between the two mall sections
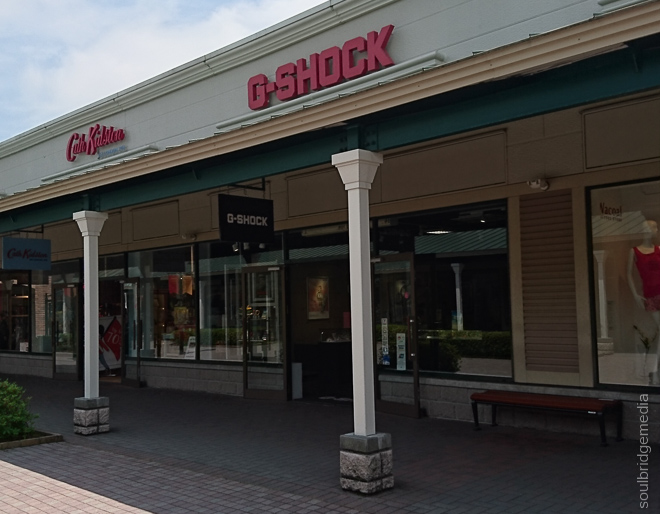
Travel tip: really goes without saying but its always worth popping into manufacture’s stores for regional exclusives and limited edition items


—-
Kawaguchiko
Coincidentally, they also have a bus that goes to where we needed to be next, Kawaguchiko, luck or crafty planning? 😉 Same deal as before, door to door station service, no faffing about.
At Kawaguchiko station there are two bus services (red, green) which run in roughly clockwise and anti clockwise routes around the southern side of the lake. These cover most of the affordable hotels and some of the local attractions. They run every 15-30min for only a couple bucks but having arrived late afternoon amongst a couple busloads of tourist groups, the services were struggling to meet demand, so after about 45min of waiting we grabbed a cab to our hotel (Kawaguchiko hotel). The hotel is only about 1km from the station, easily walkable but not so much after a long day and with luggage in tow.
Travel tip: If you did have to wait at the station, there are hot meals available from the small eatery inside.
—-
Click for full Kawaguchiko Hotel review here
Its rare that you can get the trifecta when it comes to hotels – good accommodation, good value, good location, usually one of those factors has to be sacrificed and its usually cost. Being out in the country side with a lot less options makes it even harder to score this so if you want the other two you need to pony up on the dinero. If not, manage your expectations, you saving money means corners are cut somewhere and in this case its in the general upkeep of the place.
To me, it felt a lot more like staying at your friends’ beachside place during schoolies or spring break, it was more the fact that you were there that mattered than the place where you dumped your bag and crashed out for the night. Sure, the carpet could use a steam clean (or just have new runners laid) and the window sills and the like could do with a vacuuming but the linen was clean along with the bathroom and for the double room we got, there was a welcomed amount of ample space compared with other places we have stayed at in Japan. In general, it definitely has a mum and pop store feel where they’ve just done the same thing for decades and its worked so they haven’t bothered changing anything.
All staff however were the usual Japanese kind of helpful even with minimal English but if you are after a more detailed response, track down one of the younger staff members. Rooms were quiet with minimal foot traffic, though being at the end of a hall helped. They also have bicycles for hire and there’s paddle boats on the lake (not related to the hotel).
We didn’t get to try the in house catering, the restaurant was booked out (and had to be booked in advance) but not to worry, there are plenty of eating places within walking distance. Exit the hotel and go right^, there are a couple buildings that look like they have or more so, HAD a restaurant but we couldn’t tell for sure as they weren’t open at all over the days and nights we were there (well there was one with a door open but in the same way a haunted house has a door open with no lights on, eep!). Further along there’s a small Asian takeaway but keep walking along the scenic waterfront till you get to a large intersection where the road hooks to the right*, here you’ll see a Lawson’s amongst a string of restaurants and souvenir shops. We went with the Indian place across from Lawson’s with no regret, good portions and reasonable prices.
^ – look over your right shoulder, you might be lucky enough to see Fuji off in the distance
* – following this street with a couple back street zig zags will take you back to Kawaguchiko station which is about a 15min walk. Reasonably easy but some of the streets are narrow with no footpath so navigating this with big luggage could be a little difficult, a cheap taxi ride might be the way to go for some. This route also includes a couple smaller supermarkets if you want more than what a convenient store offers.
Hotel staff actually recommended turning left out of the hotel and to go around the block for restaurants, which on a quiet night was a bit difficult to tell the difference between a hotel and a restaurant (the few along this street all looked like hotels). Eventually you’ll reach a major road, turning left here will lead to a few Japanese style fast food restaurants and a convenience store. It’s a much longer walk, about 15-20min but felt much longer with no scenery. Google maps shows a short cut route through some very small “not sure if lane or someone’s drive way” kind of “streets” but it was impossible to navigate these at night as most were poorly lit, if at all.
Overall, the location, surrounds and price more than made up for the short comings of the hotel, if we end up out that way again, it would definitely be considered.
—-


Travel tip: if you’re going to air clothing on the window sill, don’t open the opposite window! (duh!) but if you do, make sure you know how to use a tripod like giant chopsticks ;p
Next we try to catch some pink moss (yes pink moss) and a glimpse of Mt Fuji close up at the Fuji Shibazakura Festival and Chureito Pagoda.
Japan 2016 – Part #2 – Yokohama
Since we’ve covered a few of these destinations previously, I’ll try not to waffle on too much (mmm waffles)…
We arrive into Narita exhausted after a grueling 12hours in transit (hooray cheap flights -__-‘ ), so instead of messing about with multiple trains into Tokyo and back out to Yokohama, we chose the limo bus service which is a direct run to Yokohama CAT (city air terminal). It also runs about every 15min so no sweat if you miss one.

Travel tip: tickets for the bus are available at the airport via the respective counter or vending machine, the kind staff will even draw you a map of how to get to the bus stop.
Travel tip: the airport is also a good place to get your Suica card (if you don’t already have one) and to break some big notes so you can begin hoarding coins for the inevitable vending machine purchases.
The ride takes about 90min which isn’t very scenic at night but you might be lucky enough to spy some boy racers channelling Fast and Furious/Need for Speed on the freeways.
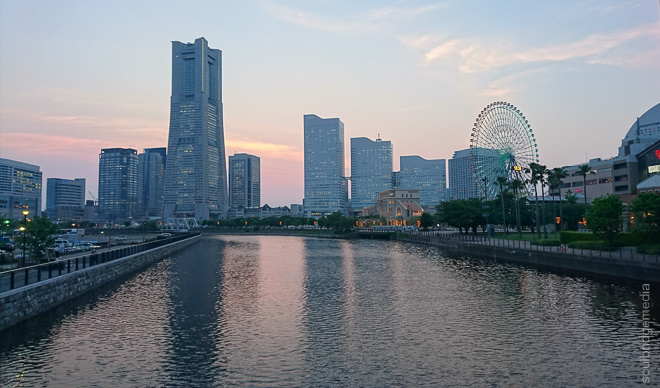
We stayed at the Richmond Hotel in Otamachi which ticked our usual holiday accommodation boxes of price and location. Bashamichi station is a couple stops from Yokohama station and then it’s a short walk to the hotel.
—
Richmond Hotel full review here
The Richmond is one of the better value hotels in the central Yokohama area, we chose it because of its walkable proximity to the bay area attractions, Chinatown and transport. From Narita we took a limo bus directly to Yokohama Station, from there its only a couple stops to Bashamichi station on the Minato Mirai line. Take the south east exit (there’s a big map of the surrounding area on the upper level of the station), this will pop you out at a large intersection with “life saving” Lawsons diagonally behind you. Head straight down this small scenic street (full of restaurants and even a Gold’s gym), stay on the right side, after about 6 (small) streets you’ll see it on your right, cant miss it. If you see a Family mart across the road, stop! You’ve literally just walked past it 😉
The walk takes about 5-10min with suitcases and a toddler (:
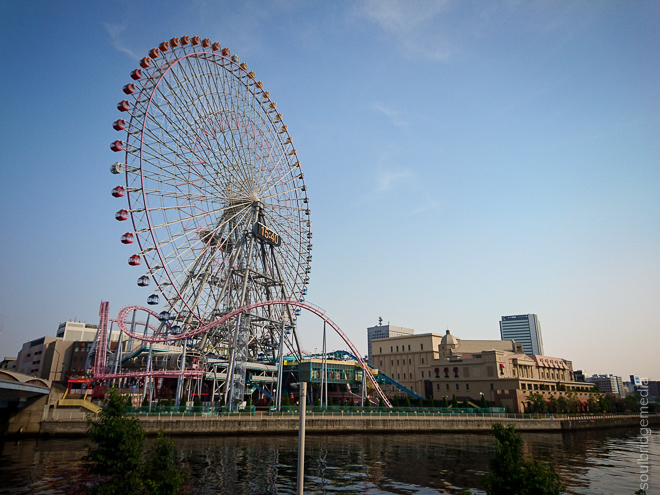
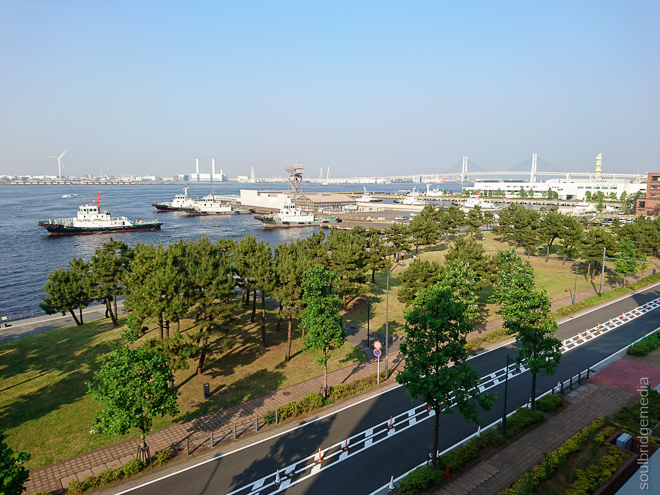
If you walk in the other direction (north east) out of the station you will get to the World Porters shopping mall (hello Teddy’s Bigger Burgers!), Cosmo World fun park, Cup Noodles museum and the harbour itself. Its only about 1km from the bay to the hotel which is nice for an evening stroll.
The area around the hotel was reasonably quiet by our standards, yes there are restaurants and a couple bars that are open later but no hordes of rowdy people milling in the streets or loud music.
The hotel itself is great, ample room by Japanese standards but if you’re one of those people that go on holidays to stay in your room (why, I don’t know), spend (much) more and look elsewhere. Regular double room was big enough for our two suitcases and a pop up sleeper for our toddler with room to get around those things.
Service was equally good, standard Japanese efficiency and friendliness. Even when we opted for no turn down service they still left a bag with bottles of water and extra towels just in case.
The breakfast buffet is at the hotel’s shared restaurant which leans more towards Asian style than Western – which is limited to chipotles, dinner rolls and scramble eggs. If you don’t mind both, like trying new things or have it included in your room cost then its worth a try otherwise you’ll find better value at the many other options nearby eg. Pork buns from Family mart 😉
—-
Travel tip: If you’re looking for mobile data while in Japan, I couldn’t fault a 14 day vistor’s sim from B-mobile for about 2200Y. Usage limits to 1Gb per 3 days so no p2p or streaming but more than enough data for map reading and social media brags 😉 Though if you’re using AirBnB most will offer a free portable wifi hotspot which you can take out and about with you. Note: these will have usage limits and from our experience were a little patchy with service at times and would also occasionally drop the hotspot connection.
UPDATE: check the bmobile site, their plans have since changed
—-
Mitsui Outlet
This has been on our to do list for the last couple trips but since it was a little bit further out in the opposite direction of our other activities we’re only just getting to it now.
Getting there:
The website provides everything you need including travel options. For us it was a short walk south from the hotel to Kannai station, change at Shin Sugita and Torihama then a short walk, past the cutest bunch of little baseballers ever, to the mall. It is located on the bay so you get a lovely seaside vibe on a sunny Sunday morning.

The layout of the complex takes advantage of this and is mostly outdoors with covered verandas and boardwalks. The stores cover the usual big name brands including Adidas, Asics, Reebok, Beams, Timberland, Levis and XLarge/Xgirl, most offering a tax free option for tourists.
There is also a water play area and simple side show alley style games for kids in the central “town square” area. A large carousel and roaming churro vendors add to the carnival vibe.
—-
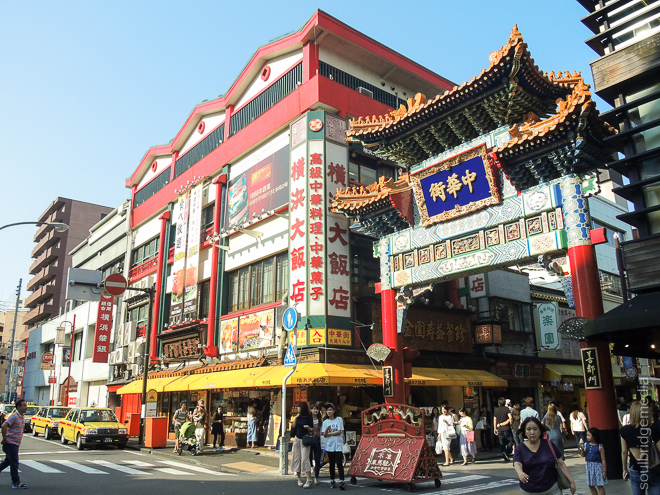
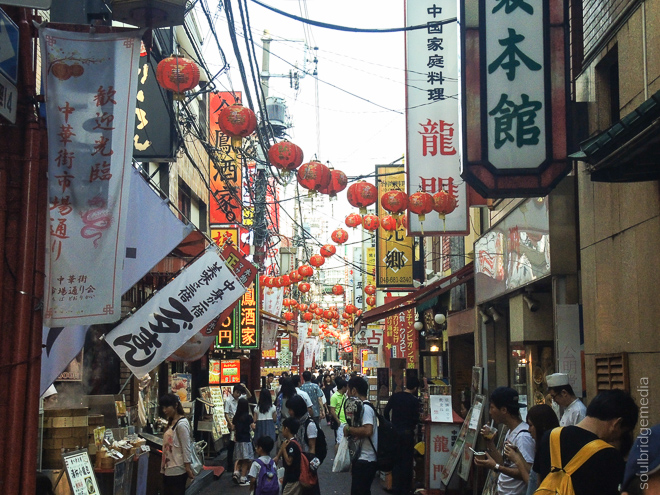
Chinatown
We stopped into Chinatown on the return journey, it was far bigger than we expected, covering more than just a couple streets and blocks. It is however what you would expect from any such place around the world, food and plenty of it with a side of bargain shopping and haggling. If you haven’t eaten that day, grab a pork bun the size of your head to tie you over till dinner 😉
Being on a tight schedule we only walked the main street but you could easily spend the better part of a day exploring all the side alleys here.

—-
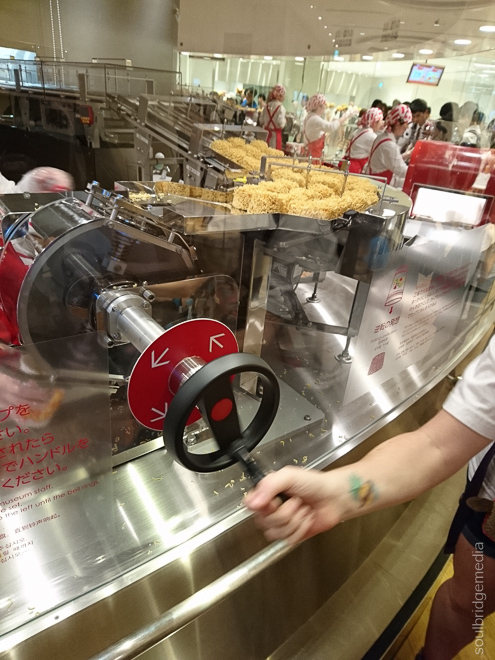
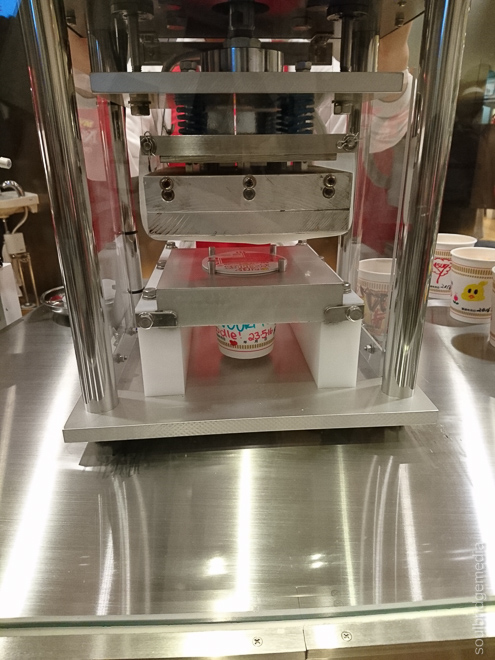
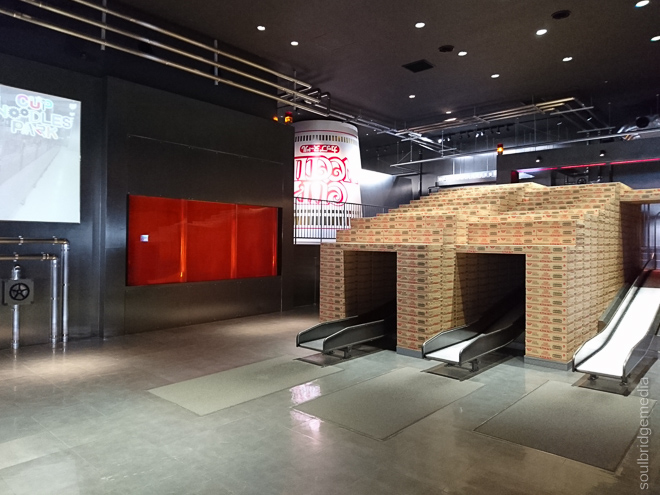
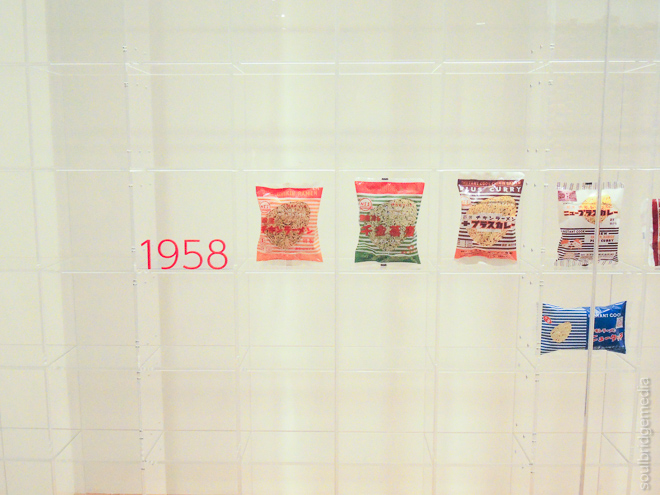
Cup Noodle Museum
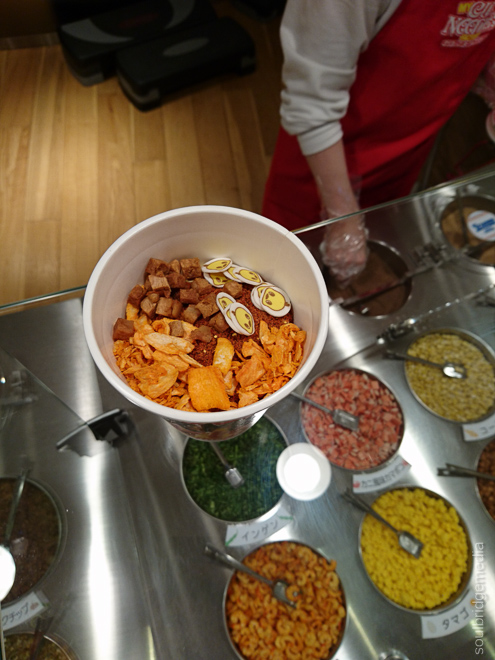
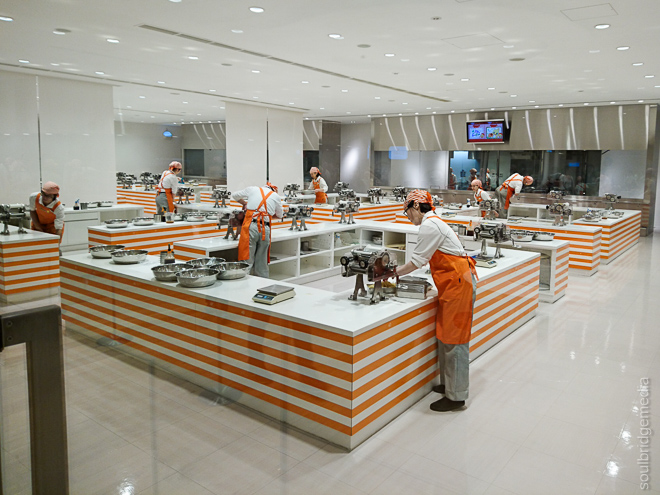
Another illusive attraction we missed previously, but not this time! Being an all ages (targeting mostly children) theme park it was the usual mix of kids everywhere and lines a plenty to queue at, that said, most lines moved quickly and kids are conveniently knee height (j/k :p ). The build your own noodle cup area was especially deafening with hoards of school excursion kids but it added to the whole feel of a busy production line, which roughly follows:
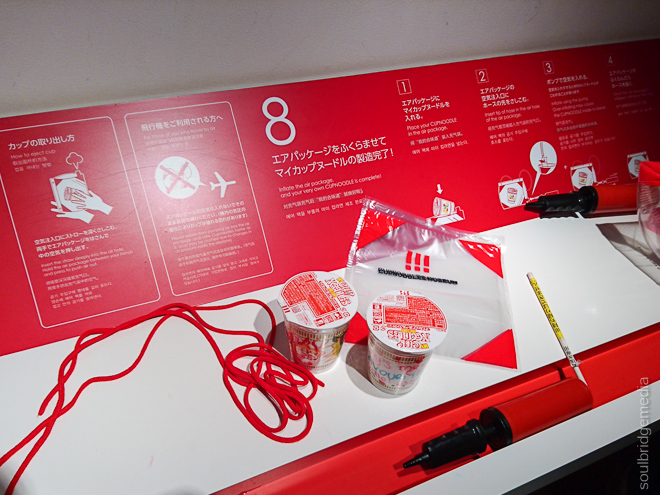
1. Sterilise your hands and take a cup
2. Cup custom area – you can go to town drawing your own designs on the cup
3. Pick and choose bar – staff fill the cup with noodles and your choice of flavourings before sealing and shrink wrapping.
4. Bagging station – you construct an ingeniously design balloon bag to safely transport your noodle cup home. (Aussie travellers – remember to declare this when coming through customs)


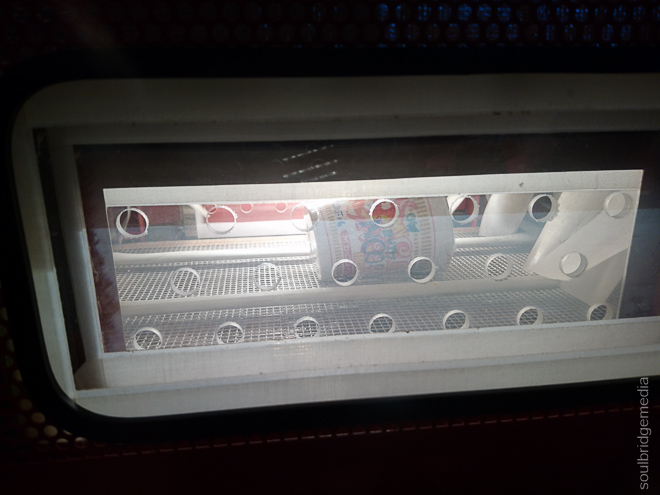


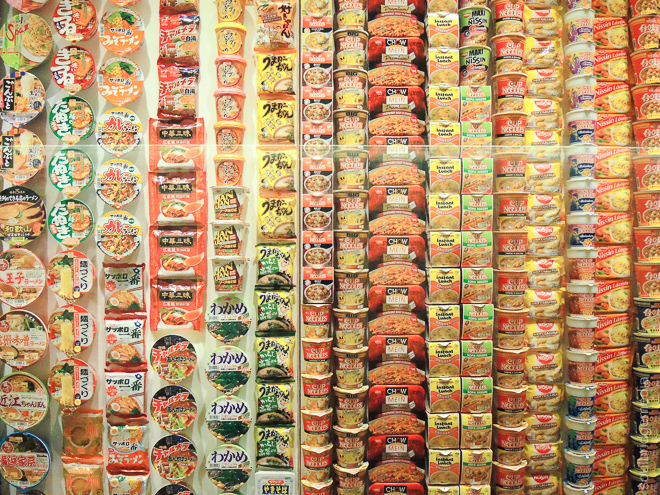
Venturing to other (much quieter) floors in the building sees a more traditional museum layout with noodle history, flavours and of course lots of cup noodles.
Travel tip:
Groups are let in at a scheduled time to avoid overcrowding, you can choose your preferred time when purchasing tickets. If you plan on making a day of it, register for a noodle making class as well!
Note: Commentary is in full Japanese and only some staff speak a little English.
We finally finished off the day with Teddy’s Bigger Burgers at World Porter’s then a nice evening stroll back to the hotel.
Travel tip: Best time to visit World Porter’s is in the late afternoon, crowds are very sparse and the food court is quite deserted.


Coming up next, we make our way to the Fuji 5 lakes area via our fave Gotemba outlet mall.
Japan 2016 part #1 – Travelling with a plus one
Japan 2016 part #2 – Yokohama
Japan 2016 part #3 – Gotemba to Kawaguchiko
Japan 2016 part #4 – Fuji Shibazakura Festival and Chureito Pagoda
Japan 2016 part #5 – Fuji Q Highland
Japan 2016 part #6 – Matsumoto, Alpine Route, Snow Corridor
Japan 2016 part #7 – Matsumoto castle, Ashikaga Flower park
Japan 2016 part #8 – Tokyo Skytree, Ueno
Japan 2016 part #9 – Tokyo wandering, Odaiba + Disney Sea
We’re going to start things off a little different this time since this holiday we had a little plus one accompanying us. In this post we’ll share some tips and our experiences travelling to Japan with a toddler.
If you’re considering doing the same then good on you! The first step is recognising a child is an addition to a family not something the family revolves around (even though sometimes it feels like it does!) in turn restricting fun things you would normally do. Secondly, they usually fly for “free” so it’s a no brainer, right?! 😀
Travel tip: Each airline is different, Jetstar’s definition of “free” is thirty-something dollars, not sure what that covers exactly though…
There are plenty of excellent blogs on flying with a toddler so we wont regurgitate it all but here’s a quick run down of what worked for us.
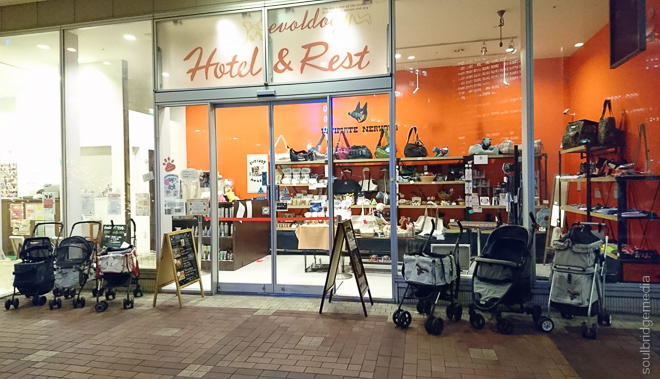
- The Gear:
It really depends where you’re going and what you plan on doing, some people say carrier all the way for hands free-dom while others prefer a leisurely pace and their own shopping trolley with a pram/stroller. Our itinerary covered a lot of ground from shopping mall outlets to flower parks to mountain hikes, cable cars and snow fields so we didn’t take any chances, we took a framed hiking backpack, a cheap umbrella stroller and the ol faithful Ergobaby carrier.
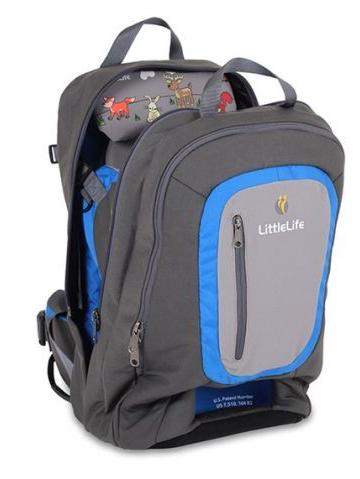
Little Life Ultralight backpack – framed with built in seat
This backpack was on loan (thanks Glenys!) – its very comfortable for the wearer and the kidlet for long periods of time and a nice high viewing position for those curious kids that want to be part of everything. A small drawback however is with the seating position, the child sits slightly further back and can lean back a little as opposed to the full koala hug position of the Ergobaby, more comfort to them but not so much for the wearer. Having the weight positioned a bit further from the center of gravity takes a bit getting used to, but leaning forward quickly becomes second nature. The pack is also small enough for carry on luggage so you can use it to and from the boarding gates.

Dymples Easy Stroller
We looked at several of the cheapies from Kmart, Big W, Target, Toys R Us and online, all were very similar in style, build quality, weight (took the travel scale to confirm 😉 ) and price but Big W’s offering won out as being one of the lightest at just over 4kg, but more so due to it being the only one (at the time of purchasing) that had a small mesh basket area underneath. Yes it was small and almost useless but it was still big enough to stow (re: jam) a couple hoodies, rain ponchos, snacks, extra water and compact tripod. Couple it with a bottle caddy from one of our other prams and it was a perfect workhorse for only $25. We also invested a few bucks and grabbed a carry case off ebay for airline and hotel transits. Not only does it make it easier to carry, it keeps the wheels from getting caught and broken on …well, just about anything and everything during transit (no thanks to the gentle caressing hands of luggage handlers :p ).
The stroller worked well through shopping districts like Harajuku and outlet malls, also spared our backs for times we didn’t want to carry the hiking pack.
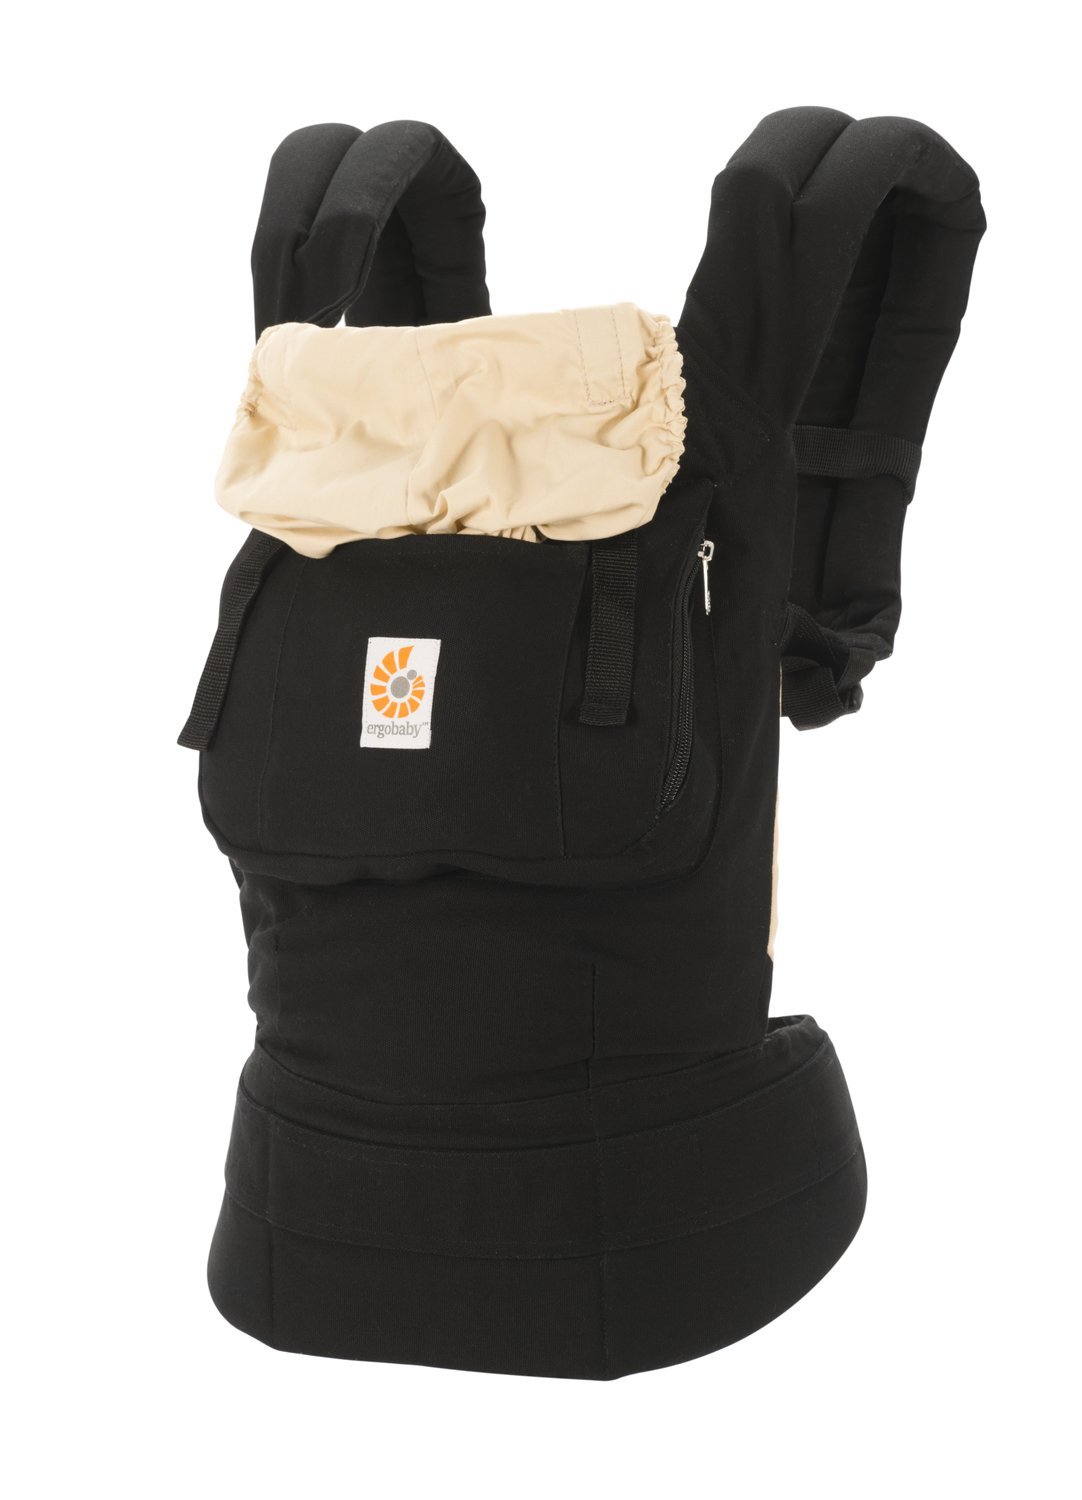
Ergo Baby Carrier
We were beginning to think if buying one of these was really worth it since our kidlet had spent very little time in it but it was perfect for strapping her in to encourage naps during flights, transit and general long days. It was also great for “travel light” days where it could be tucked into a backpack and brought out after she got tired of running around.
Note: you will have to remove baby and the carrier when passing through customs (even if your babe has only just gotten to sleep after struggling for hours! >_< ) The carrier has to go in a tray with your other belongings to be scanned.
- In The Suitcase:
Apart from the usual things, we loaded up on nappies and formula (triple zippy bagged – you don’t want that to pop open in your bag during compression on the flight!). We could have bought both over there but it was much easier to stick with what we knew both for comfort and no allergic reaction. Plus, they both diminished as the trip went on so we could replace that space with holiday loot! We also packed her fave packet meals and snacks for emergency/on the fly (literally) eats and took a separate “go bag” to carry on board essentials instead of having to sift through the carry on while everyone is trying to get to their seats or during the flight. You’re welcome fellow passengers! 😉
- Finding essentials:
Depending on your stay/luggage size you will probably eventually run out of one thing or another, now, if you’ve been doing a bit of research you’ve probably come across reports that its impossible to find baby products especially nappies and formula in Japan, well consider that myth busted. Even though we had our supplies we kept an eye open for places that would sell them and were mostly spoiled by choice in all major cities/stations. There is always a discount pharmacy some where nearby, very similar to Chemist Warehouse where everything is always on sale with bright coloured signs and shelf tickets galore. Most of these places were tax free for tourists as well. So basically only if you go off the beaten track to small towns or stations in residential areas will you have problems finding supplies, but even if you do, just track down a supermarket and itll be just like home.
One thing however, that is hard to find, is regular cow’s milk (and crunchy peanut butter!). Selected big convenience stores might have some but generally only stock some weird stuff that looks like milk but smells and tastes like a combination of soy and Yakult! Using your google text translator wont help you much either as a lot of the time it translates to “milk”. This is where the bags of formula come in handy, unless you’re after some for a tea or coffee then have your hotel or Airbnb host rustle some up for you if you get stuck.
- Sleeping arrangements:
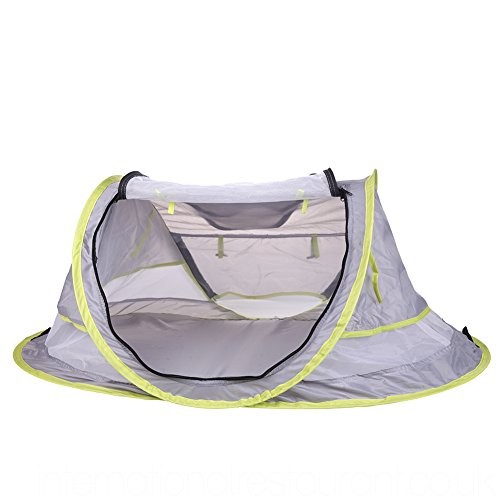
We thought we had it all sorted beforehand, grab a cheap little pop up tent style sleeping bed like this, get the bub used to it at home with day naps with her sleep buddies and away we go! Good in theory but it seems we brought Murphy’s law with us and the first night in a strange place with some chronic jetlag, thanks to 12 hours of transit, equates to one tired and stressed kid that didn’t want a bar of it. It took a couple nights of trial and error to realise all she wanted was a bed to call her own. So it turns out that it was just a matter of sorting a couple extra blankets and pillows as barricades for when she got her roll on and the rest was slumber city.
Another plus, she also worked out that her regular routine was out the window and any time was a good time for a nap for which the carrier and stroller came in very handy. We also encouraged naps on any train ride more than 15min for little refreshes through out the day. All in all, its really no different than travelling anywhere with a child, you have to be flexible, ready to roll with the punches and know when to quit while you’re behind and fight another day.
I think that’s about it, now on with the rest of the trip, first up, Yokohoma!
Japan 2016 part #1 – Travelling with a plus one
Japan 2016 part #2 – Yokohama
Japan 2016 part #3 – Gotemba to Kawaguchiko
Japan 2016 part #4 – Fuji Shibazakura Festival and Chureito Pagoda
Japan 2016 part #5 – Fuji Q Highland
Japan 2016 part #6 – Matsumoto, Alpine Route, Snow Corridor
Japan 2016 part #7 – Matsumoto castle, Ashikaga Flower park
Japan 2016 part #8 – Tokyo Skytree, Ueno
Japan 2016 part #9 – Tokyo wandering, Odaiba + Disney Sea
